Table of Contents
Advertisement
Quick Links
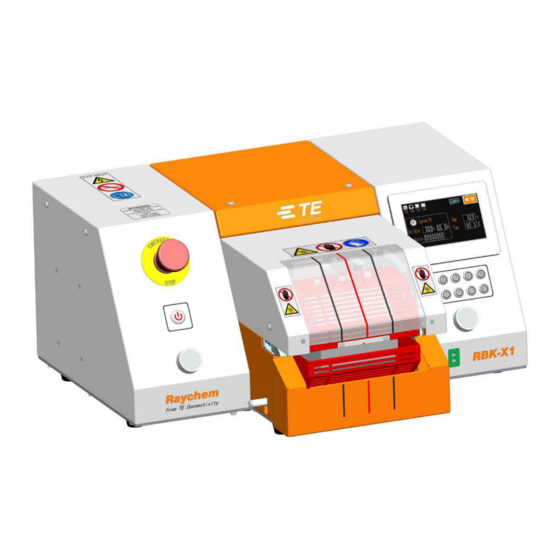
CENTERING DEVICE, RBK-X1
PART NO: 2369600-1
1
Description ................................................................................ 2
1.1
Specification .................................................................................................... 3
2
Installation ................................................................................. 4
2.1
Tool preparation .............................................................................................. 4
2.2
Components preparation ................................................................................. 4
2.2.1
Modify on machine cover ............................................................... 5
2.2.2
Remove machine front cover ......................................................... 6
2.2.3
Open machine cover...................................................................... 6
2.3
Replace Ejector blade ..................................................................................... 7
2.4
Install Centering Unit ....................................................................................... 8
2.5
Install Detection Unit ....................................................................................... 9
2.6
Install F.R.L & line pipe .................................................................................12
2.7
Connection between machine and Centering Unit .......................................13
3
Activate Centering Device ....................................................... 13
3.1
Connect air supply ........................................................................................13
3.2
Setting to machine ........................................................................................14
Table of Contents
!
.......................................................... 1
408-35126
Apr 2021
Rev. A
Advertisement
Table of Contents

Related Manuals for TE Connectivity RBK-X1


Summary of Contents for TE Connectivity RBK-X1
-
Page 1: Table Of Contents
CENTERING DEVICE, RBK-X1 408-35126 PART NO: 2369600-1 Apr 2021 Rev. A Table of Contents ! Caution - Safety – read first ............1 Description ................2 Specification ....................3 Installation ................. 4 Tool preparation ....................4 Components preparation ................. 4 2.2.1... -
Page 2: Caution - Safety - Read First
CENTERING DEVICE, RBK-X1 Rev. 1 Jan. 2021 ! Caution - Safety – read first Please comply with below caution when operate this equipment. Do be wearing protection when operating Shut machine before maintaining DON’T wear ill-suited which may cause any DON’T modify the equipment without TE permit... -
Page 3: Description
This manual shows how to upgrade RBK-X1 to RBK-X1C by installing the Centering Device. The Centering Device is an optional add-on device that can only be added to the RBK-X1 Heat Shrink Machine. It ensures the correct position of the tubing and the wire splice before the heat shrink process starts. -
Page 4: Specification
365mm Depth 650mm Fig.2 Dimension of RBK-X1C Table 1 – General Parameters Model Designation Centering Device 24V DC from RBK-X1 Power supply Air supply 4~6 bar, (Pipe OD 10mm) Machine size See Fig.2 Max. Tubing Size OD 19mm, Length 60mm Ambient operating Temperature: 5 to 40 °C... -
Page 5: Installation
CENTERING DEVICE, RBK-X1 Rev. 1 Jan. 2021 Installation Tool preparation Before installation, prepare below tools. Screwdriver Allen key Wrench Container Tools Fig.3 Components preparation Before we start upgradation, make sure you have below components. Top front cover RBK-X1 base machine... -
Page 6: Modify On Machine Cover
CENTERING DEVICE, RBK-X1 Rev. 1 Jan. 2021 2.2.1 Modify on machine cover For those old version (SN: CRX10001~CRX10030; CRX1CE0001~CRX1CE0005) RBK-X1 base machine, need to modify on machine cover before install the Centering Device components. See below capture. 57mm 114mm 1. 2X Ø5.5mm... -
Page 7: Remove Machine
CENTERING DEVICE, RBK-X1 Rev. 1 Jan. 2021 2.2.2 Remove machine front cover Remove the 2 cover from base machine. (Centering Device won’t need these 2 cover any more.) Top front cover BTM front cover Fig.5 Machine top front cover & BTM front cover 2.2.3 Open machine cover... -
Page 8: Replace Ejector Blade
CENTERING DEVICE, RBK-X1 Rev. 1 Jan. 2021 Rear cover Left cover Right cover Open cover Fig.7 Replace Ejector blade 1. Rotate Disc manually, allow the ejector blade moving forward. 2. Remove the 2X Carrier mounting screw, and lift the top carrier 3. -
Page 9: Install Centering Unit
CENTERING DEVICE, RBK-X1 Rev. 1 Jan. 2021 Install Centering Unit 1. Place the Centering Unit in front of machine, with the 4X guide pins can lean on machine base plate front. 2. Push the left and right tubing pusher to sides, then check if they have the same gap with machine wall. -
Page 10: Install Detection Unit
CENTERING DEVICE, RBK-X1 Rev. 1 Jan. 2021 Install Detection Unit 1. Remove the 4x mounting screw of the highlight bridge. (Don’t need to remove the highlight bridge.) 2. Place the Detection Unit onto the machine frame like capture below, then fix the 6x mounting screw. - Page 11 CENTERING DEVICE, RBK-X1 Rev. 1 Jan. 2021 3. Connection from Detection Unit to machine. Find the extension cable from package. Connection the terminal end (7 point) to PLC (in machine right cover), according to the schematic below. Socket of extension...
- Page 12 CENTERING DEVICE, RBK-X1 Rev. 1 Jan. 2021 iii. Connect the Socket (extension cable) with Plug (Detection Unit) like below capture, then fix the connector in suitable place by tie-wraps and fix base, and make sure the cable won’t affect the movement of machine.
-
Page 13: Install F.r.l & Line Pipe
CENTERING DEVICE, RBK-X1 Rev. 1 Jan. 2021 Install F.R.L & line pipe 1. Assemble the F.R.L onto the rear side of machine left cover, by the 2X M5 screw 2x M5 screw & M5 nut Panel connector 2. Connect the 2X output pipe with Detection Unit & Centering Unit. Fix the pipe in suitable position by tie-wraps. -
Page 14: Connection Between Machine And Centering Unit
CENTERING DEVICE, RBK-X1 Rev. 1 Jan. 2021 Connection between machine and Centering Unit Find the connection cable from Centering Device package, then connect the to the machine. Fix the cable under machine base plate, by the tie-wraps and fix base. -
Page 15: Setting To Machine
3. Turn back to Main interface. Machine is ready for operation. Refer to document 409-35021, section 4.2.8 about how to operate the RBK-X1 with auto Centering function. Page 14...
Need help?
Do you have a question about the RBK-X1 and is the answer not in the manual?
Questions and answers