Table of Contents
Advertisement
Quick Links
Advertisement
Table of Contents

Subscribe to Our Youtube Channel
Related Manuals for SubC Imaging DVRO

Summary of Contents for SubC Imaging DVRO
- Page 1 Revision 6.1 - 2018-11-27 DVRO User Manual...
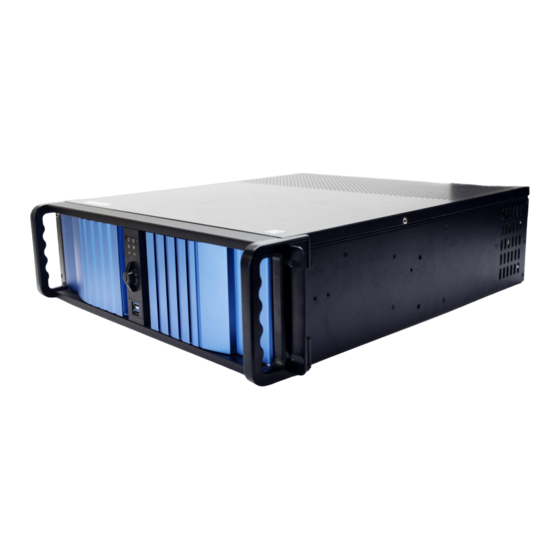
- Page 2 SUBC DVRO Record, Stream, BlackBox and Overlay 4K, 3D, HD and SD Videos SubC DVR An advanced media management solution capable of recording multiple HD/SD video and audio feeds, video streaming over Ethernet, and obtaining video frame grabs. Video streamed over a local Ethernet connection preserves its high quality while using your existing infrastructure.
-
Page 3: Table Of Contents
Connecting the DVR ● BlackBox ● Connecting the DVR (1X 4K, 4x HD) Settings ● ● Usage and duration Software ● DVRO - Software EIVA compatibility Communication-Starting ● EIVA NaviModel ● Video input Setting Enhancements HD/SD ● Rayfin Control Software: Main Screen ●... - Page 4 TABLE OF CONTENTS Please read this manual carefully before setting up and using your unit. The electronic version of this document is the controlled copy. Therefore, all printed versions of this document are uncontrolled. Updated manuals and software are available by emailing info@subcimaging.com SubC Control Ltd reserves the right to change, modify and update designs and Ethernet Specifics...
- Page 5 TECH SUPPORT & WARRANTY...
- Page 6 TECH SUPPORT Page 6 Contact Information and Remote Support Contact tech support Installing TeamViewer for remote support Telephone +1 (709) 702-0392 Ensure the LAN functionality in TeamViewer is enabled (go to Extras > Options > General > Incoming LAN connections). Using TeamViewer over LAN allows for much +1 (866) 571-1265 faster operation and better quality.
-
Page 7: Limited Warranty
LIMITED WARRANTY Page 7 SubC Control Ltd, hereafter referred to as SCL The warranty does not apply to defects that have been caused by failure to follow the recommended installation or maintenance procedures or defects SCL warrants that at the time of shipment all products shall be free from defects in material resulting from normal wear &... -
Page 8: Getting Started
GETTING STARTED... -
Page 9: Connecting The Dvr
GETTING STARTED Page 9 Connecting the DVR You can view media related to this product at: http://subcimaging.com/product/subc-dvr-and-overlay-hd-sd/ An uninterrupted power supply (UPS) is strongly recommended for all DVR installations. SubC can provide, install, and support a warranty for your UPS when purchased with our DVR. *Note: See following page for 1x 4K, 4x HD setup* Connect the supplied peripherals (keyboard, mouse, etc) to the USB inputs. -
Page 10: Connecting The Dvr (1X 4K, 4X Hd)
GETTING STARTED Page 10 Connecting the DVR (1x 4K, 4x HD) Connect the supplied peripherals (keyboard, mouse, etc) to the USB inputs. The black USB 2.0 ports in the upper part of the orange area will suffice. You may wish to save the blue USB 3.0 ports for devices that can take advantage of their increased throughput. - Page 11 SOFTWARE...
-
Page 12: Dvro - Software
DVRO - SOFTWARE Page 12... - Page 13 Page 13 Starting the DVR Start the DVRO. The upper-left corner of the main overlay window will look similar to what is shown in the The DVRO will launch image on the left. The number of concurrent video feed tabs (Video 1, Video 2, etc.) will vary depending on automatically when the DVR is your DVR’s configuration.
-
Page 14: Video Input
VIDEO INPUT Page 14 HD/SD 1. Cameras Start the live feed from the attached camera. Autodetected feeds will be disabled as long as any feed is initialized. 2. Override Displays a list of camera inputs that can be chosen to override the autodetected devices for the current video input. -
Page 15: Ethernet
VIDEO INPUT Page 15 Ethernet 1. Video Input Contains the streaming address of the IP camera once the IP camera is set up. 2. IP Cameras Enter the username and password of a device to enable cameras that are accessed through an IP Address. -
Page 16: Video Levels And Colors
VIDEO INPUT Page 16 Video Levels and Colors 1. Video Levels Controls the contrast, gain, and brightness levels of the current video feed as well as the white and black levels. There are built-in presets that can be chosen under the Presets dropdown. -
Page 17: Software Controls
SOFTWARE CONTROLS Page 17 Recording and Stills 1. Record ● Press the record button to start recording video footage in a new file. Press the record button again to stop recording video footage to that file. A outline will form around the viewing area when the footage is recording. -
Page 18: Recording
The filename/template used for video filenames. ● ● The SubC DVRO can make use of tags to input changing variables. For example, ${hh} will be the current hour that the video started to record. ● You can use the tag picker (6) to insert various tags. -
Page 19: Settings
SETTINGS Page 19 Data Log Configuration In this section of the settings panel you can set up the data logging settings. At the top are controls to choose the Logging Mode: ● Never - Records no data Recording - Records only data that ●... - Page 20 SETTINGS Page 20 Data Log Configuration Serial Sources: All detected serial connections are listed. Any that are checked Logging will record the data to the file, others will be ignored. UDP Sources: A box for inputting the port. All ports listed are recorded while all ports unchecked are removed from the list.
-
Page 21: Recording
SETTINGS Page 21 Recording 1. Encoder H.264 - Offers very good quality at a low bitrate, reducing the burden of storage and transmission. The processor in the graphics card will be used to accelerate the processing. H.264 is available only on video tab 1 as it is computationally intensive. H.263 - A low bitrate compressed format to reduce the burden of storage and transmission. - Page 22 SETTINGS Page 22 Recording 3. Bitrate (Mbps) Set the desired video quality by selecting how many millions of bits (megabits) per second to record. You can set a custom bitrate or use one of the three Bitrate Presets: - Encode video at 5Mbps (suitable for SD recording or for highly compressed HD). - Encode at 25Mbps (suitable for most HD applications).
-
Page 23: Frame Grab
The filename template used for frame grab filenames. ● ● The SubC DVRO can make use of tags to input changing variables. For example, ${hh} will be the current hour that the frame grab was taken. ● You can use the tag picker (4) to insert various tags. -
Page 24: Filename Tags
SETTINGS Page 24 Filename Tags When setting the name of the video file, there are a collection of special tag characters you can use to reflect changing variables: Tag List Current Year: ${year}, ${yyyy}, ${YYYY} 4-digit year ${yy}, ${YY} 2-digit year Current Month ${mon}, ${MM}, ${month} Current Day... -
Page 25: Blackbox
BLACKBOX Page 25 Settings BlackBox Can be used to record continuous video in a separate folder than the regular dive footage. It will continue recording, even when regular recording is paused. ● ● It can be configured to start recording before regular recording begins and after it finishes by using the Initialize option. -
Page 26: Usage And Duration
BLACKBOX Page 26 Usage and Duration 1. Convert Black Box to Lower Quality ● Select to have your files take up less space. 2. Max Usage (GB) You can limit the recording space to a particular number of gigabytes by increasing or decreasing ●... -
Page 27: Eiva Compatibility
EIVA COMPATIBILITY Page 27 EIVA NaviModel The DVRO can work in conjunction with EIVA NaviModel for 2D, 3D and 4D modelling and visualization. DVRO videos can be imported into EIVA NaviModel software as long as the formatting is: "yyyyMMddHHmmssfff@camera.mp4"... - Page 28 REVIEWING VIDEO...
- Page 29 REVIEWING MODE Page 29 Video Output The SubC DVRO has the ability to output the processed video with overlays from each video feed independently. You can output both HD and SD. 1. Video Output The output device selection allows you to output video. The inputs and outputs are linked together;...
- Page 30 2. Enter the IP address in your browser ● To view the streamed video from your browser, enter the IP address of the DVRO unit into the address bar of your internet browser (e.g. Mozilla Firefox, Google Chrome, Microsoft Edge).
- Page 31 Page 31 WWW Streaming - Configuration The SubC DVRO allows you to stream your live video feeds to the internet via a monthly subscription provided by SubC Control. You can also stream across your local area network allowing every linked computer to view the operation.
- Page 32 REVIEWING VIDEO Page 32 WWW Streaming - Display Once the steps from the previous page have been followed, the SubC DVR will be streaming to an internet server so that anyone in the world can view the operation in near real time, provided of course that the DVR itself is connected to the internet.
- Page 33 DVR OVERLAY Overlay 4K, 3D, HD, and SD videos with information and graphics.
- Page 34 OVERLAY MANAGEMENT Page 34 WWW Streaming - Display Add, save, load, hide, and show your overlays here. Videos must be initialized in order to see the effects of their overlays. 1. Add - Allows you to add a new custom overlay of your choice. Select the type from the dropdown menu (2).
- Page 35 OVERLAYS...
- Page 36 STATIC OVERLAYS Page 36 Text 1. Text Overlay Type the text you wish to display over your footage. 2. Display Format With this group of settings, you can further customize how your text overlay will look and its position on the screen.
- Page 37 STATIC OVERLAYS Page 37 Shapes Shape Overlay allows you to place a shape on the video. Several varieties of shapes are available, including rectangles and ellipses. Among other things, these can be used to supply a uniform background to a group of other overlays or used to cover up specific segments of a video when recording from an unvarying position.
- Page 38 STATIC OVERLAYS Page 38 Logo 1. Browse Select your desired logo/image file. 2. Display Format With this group of settings, you can further customize how your logo overlay looks and its position on the screen. See Appearance and Positioning Options for details. 3.
- Page 39 AUTOMATIC OVERLAYS Page 39 Date and Time 1. Date and Time Date: Check this box to show the date on your footage. Time: Check this box to show the time on your footage. If desired, modify yyyy/MM/dd HH:mm:ss to your preferred date and time format. The clock is that of the DVR and can be adjusted via the clock on the Windows taskbar.
- Page 40 AUTOMATIC OVERLAYS Page 40 Recording Time 1. Recording Timer Starts a timer that will be shown on your footage that will run for the duration of the recording and will stop when the recording ends. The timer shows hours, minutes, and seconds. 2.
- Page 41 DYNAMIC OVERLAYS Page 41 Serial Data Serial Overlay allows you to take in RS232 serial data from a GPS, depth sensor, or any other similar source. 1. COM Port Choose the COM port to listen to. Typically, this is the same as the COM port of the connected camera. 2.
- Page 42 DYNAMIC OVERLAYS Page 42 UDP Data UDP Overlay allows you to include overlay data 4. Display Format from your network encoded in UDP (User Datagram With this group of settings, you can further customize Protocol) messages. how your UDP overlay looks and its position on the screen.
- Page 43 DYNAMIC OVERLAYS Page 43 Altimeter The Altimeter Overlay adds a histogram of your altitude while displaying your current altitude. 1. COM Port Choose the COM port to listen to. Typically this is the same as the COM port of the connected camera. 2.
- Page 44 DYNAMIC OVERLAYS Page 44 Depth The Depth Overlay displays a histogram of your depth, with minimum/maximum bounds , along with your current depth reading at the top right of the overlay. 1. COM Port Choose the COM port to listen to. Typically, this is the same as the COM port of the connected camera. 2.
- Page 45 DYNAMIC OVERLAYS Page 45 Heading 6. Font Target The Heading Overlay adds a rotating compass rose with Specify the font and text color of the central your preset heading numerically displayed. heading value and the individual compass letters. Details will display below (7). 1.
- Page 46 DYNAMIC OVERLAYS Page 46 Picture-in-Picture/Splitscreen The Picture-in-Picture (PiP) and Splitscreen features 5. Splitscreen Orientation allow two videos to be combined into a single Select the type of split and where the inserted presentation. Any overlays present in the source video video will appear relative to the split.
- Page 47 Output: Fix: 123519 Lat: 34850.038N Long: 34933.000E The DVRO can also perform operations on serial data. For example, if depth data came in as feet it can be converted to meters using the following string: Input String $--DBS,123,f Format [{1}*0.3048]m...
- Page 48 OUTPUT FORMATTING Page 48 Appearance and Positioning 1. Anchor: Select the region where you would like the 7. Background: Select a color to display behind overlay to appear (top-left, center, bottom-right, etc). your text. To have text without a background select transparent.
- Page 49 OVERLAYS IN ACTION Page 49 Text Date/Time, Logo Recording Time Incoming data overlayed...
- Page 50 DIVE LOG...
- Page 51 DIVE LOG Page 51 Controls and Settings Controls: Start a new dive Video: Set the filename Stills: Set the filename Data: Set the filename and by defining a new Project and location for video files and location for stills files location for logging serial Name.
- Page 52 DIVE LOG Page 52 Events and Dive Log Information Event Log: Events that have been logged are displayed. Date/Time are automatically added. Dive Info: Allows you to enter details about the dive, such as location, vessel, and vehicle. You can also add your own fields.
- Page 53 DIVE LOG Page 53 Data Log: Serial and UDP Serial Displays live UDP data that can be logged concurrently with serial data. ● Under the Data Log tab, select Serial under the Type ● Under the Data Log tab, select under the Type dropdown.
- Page 54 DIVE LOG Page 54 Events Events system allows you to quickly mark special occurrences in your dives. For example, you can use an event to mark sightings of particular species or damaged equipment. While the footage is being recorded and an event type is registered, you can simply press the corresponding button to register each occurrence in the dive.
- Page 55 EVENTS LOGGER IN ACTION Page 55 Pre-defined events. Click to register each occurrence Detailed list of event occurrences...
- Page 56 DIVE LOG Page 56 Output to Folder Structure Under the Controls tab, set the Project Name, Folder Project Name Auto Updating timestamps can be included by adding tags such as ${yyyy} for year and ${ss} for seconds. Select: opens a new window where you can then choose a folder to save in Open: opens the selected folder in windows Explorer...
- Page 57 DIVE LOG Page 57 Output to Folder Structure Under the Options tab, choose the Video Subfolder. If left blank, it will use the same folder that was selected under the Controls tab. Select the Use Video Names checkbox. Repeat for Stills and Data, if required.
- Page 58 DIVE LOG Page 58 Output to Folder Structure Go to the Video tab on the top of the screen Under File, configure the file names as needed Tags (eg. ${ff}) can be used to include automatically updating timestamps Repeat for each video tab in use...
- Page 59 REMOTE CONTROL...
- Page 60 Page 60 Serial Configuration - Inspection Management Software The DVRO can also accept direct commands from leading Inspection Management Software. It will need to be configured in advance so that it can listen for the appropriate commands via its network ports.
- Page 61 REMOTE CONTROL Page 61 Remote Configuration - Inspection Management Software Choose how you would like to receive messages - Serial or Ethernet. Under the Remote Configuration section, select either Serial from the dropdown menu. For Serial control: Select a COM port from the next dropdown. then click Add.
- Page 62 REMOTE CONTROL Page 62 Commands Command Function update_status Return the status of the DVR start_recording Start recording. This will start recording Video 1 stop_recording Stop recording all videos take_still Take a frame grab of all initialized videos take_still c:\stilldir\still.jpg Take a frame grab with the name and directory specified for Video 1 save recording_path Sets the record path of Video 1...
- Page 63 MISCELLANEOUS...
- Page 64 STORAGE Page 64 Storage The SubC DVRO is available with a wide range of on-board storage options, featuring various high-capacity magnetic drives intended for your video files. The operating system drive is a Solid State Drive in all configurations. Rack mount DVR 3x 3.5 inch Swap Bays*, up to 24 Terabytes on-board storage...
- Page 65 RAID Page 65 Configuration RAID stands for Redundant Array of Independent Disks and refers to any technology that combines multiple physical disk drive components into a single logical unit for the purposes of data redundancy and recovery. You can set up your video recording drives to mirror each other for redundancy. This halves the overall capacity, but if one of the drives fail you can recover your recordings in full from the other drive, replace the failed drive, and resume recording.* Press the...
- Page 66 DATA VALIDATION Page 66 Drift Monitor Drift Monitor 3. Show Warning / Stop Recording on Max The DVR employs a special algorithm to detect when your Drift video file may be compromised and you have lost footage Uncheck Show Warning if you do not want to as a result.
- Page 67 Page 67 Drift Monitor What is the Drift Monitor? See previous page (Data validation) Will I lose footage during recording and not be alerted? No. The monitor runs as you record and will alert you and, by default, stop recording as soon as there is a problem. That sounds intrusive, I don’t care if I lose a few seconds here and there.
- Page 68 Page 68 Storage Device How can I speed up my drive? ➔ Reformat the drive. ➔ Don’t access the drive while recording. ➔ Don’t copy anything to or from the drive while recording. ➔ Consider purchasing a SubC Certified Drive. What is a SubC Certified Drive? These high-performance drives have been tested by SubC and are capable of simultaneous recording of up to 2x HD feeds and 2x SD feeds indefinitely.
- Page 69 CONFIGURATION Page 69 Overview Standard-Performance Configurations High-Performance Configurations 1x Ethernet HD / SD 4x Ethernet 4x HD 1 channel in (HD or SD, via Ethernet) Higher-performance hardware ● ● 1, 6 ● 1 channel out (VGA or HDMI or DVI) ●...
- Page 70 CONFIGURATION Page 70 Overview 4K Configurations 4x SD, 1x 4K Higher-Performance Hardware ● ● 4 channels in (1x 4K / HD / 3D via 6G-SDI, up to 4x SD via Composite or 10, 14, 15 Ethernet) ● 2 channels out (1x 6G-SDI, 1x HDMI) Storage: 2x 512GB solid-state drives in RAID 1 (mirrored) configuration ●...
Need help?
Do you have a question about the DVRO and is the answer not in the manual?
Questions and answers