
Related Manuals for Midea MCHC90B68


Summary of Contents for Midea MCHC90B68
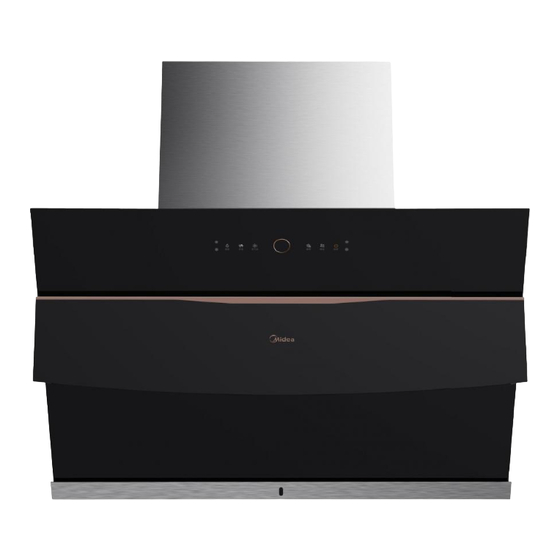
- Page 1 K K K K K K K K K K K K K K COOKER HOOD INSTRUCTION MANUAL Read this manual carefully before use Pictures in this manual are for reference only, the actual product shall prevail. MCHC90B68...
-
Page 2: Table Of Contents
Contents Contents..............Warnings..............Safety Warnings............Installation Instruction ..........First Time Usage............ Maintenance............Main Parameters............ Trouble shooting ............ Disposal.............. -
Page 3: Warnings
Warnings This appliance is not intended for use by person (including children) with reduced physical, sensory or mental capabilities lack experience knowledge unless they have been given supervision or instruction concerning the use of the appliance by a person responsible for their safety. Children shall not play with the appliance. - Page 4 Warnings cm can be reduced if: non-combustible parts of range hoods and / or parts operating at safety extra low voltage,will not touch the electrical parts if deformed. Regulations concerning the discharge of air have to be fulfilled. The appliance could apply to the use of 6 hob elements at most.
-
Page 5: Safety Warnings
Safety Warning The appliance is not intended for the usage by young children or infirmed person without supervision. Young children should be supervised to ensure that they do not play with the appliance. Plug the power cord to socket outlet with earthing continuity terminal. ... -
Page 6: Installation Instruction
Installation Instruction Determine the location Range hood should be installed horizontally parallel on the top of the stove. Installation diagram as follow: Suspended Exhaust pipe ceiling Chimney Cupboard 905~915... - Page 7 Ф200 Schematic diagram of the exhaust pipe hole size at the ceiling Note: This installation height is only applicable to electric stove. For gas stove, the installation height should be in accordance with the installation height requirements of it.
- Page 8 Installation Instruction Installation plate After hanging the hood on the installation plate, fasten two pieces of M5X50 screws to avoid the slide off of the hood accidentally. The hood should be screwed to a stable wall. It is not recommended to secure the hood to the bottom of the cabinet with screws, which may invalidate the maintenance terms.
- Page 9 Accessories Range hood body Exhaust pipe Check valve Check valve sealing gasket Installation plate Expansion bolt (8 x 60) Screws (ST2.9x2) Screws (ST4.2x16) Screws (M5x50) Screws (M5x16) Water cup Oil collector Chimney Cover Decorative Cover Hanging Plate Water Pipe Screw package...
-
Page 10: First Time Usage
First Time Usage Range hood can be used immediately after power connection. Gesture Speed On/Off light Steam wash Turbo Gesture control left Gesture control right Short press: 0.5 second Long press: 2~3 seconds Short press: Turn on the light; Light Long press: Adjust the light. -
Page 11: Maintenance
Maintenance Cleaning the surface 1. The surface of the range hood and filter should be cleaned regularly. Do not use cleaning balls, brushes, coarse cloth to clean the surface in order to avoid scratching the surface of the cookerhood. 2. As the oil level could be seen from the oil collector window, please pour out in time to avoid the oil dripping to the stove. - Page 12 Steam Wash (Cleaning the inner part of the hood) As the indicator turns red and flashes, it means that steam wash is required. a) Remove oil collector b) Pour out accumulated oil c) Install oil collector Cup filled with purified water or distilled water. water inlet Plug the tube into the water inlet.
-
Page 13: Main Parameters
Main Parameters Voltage 220-240V~/50Hz Rated Power 1600W Lighting Power 2 X 1.5W Motor Power 240W 180mm Diameter of air tube ≤70dB(A) Noise The air flow parameter is tested under the conditions of 230V ~ /50Hz when the voltage is 220-240V~ 50Hz LED Light Information Max Power... -
Page 14: Trouble Shooting
Trouble Shooting Malfunction Solution Both light and motor Unplug the power and reconnect the power supply agian. do not work Oil collector tilted, please reinstall. Oil collector fully filled with oil, please pour out the oil. Oil leakage Oil-way blockage caused by uncleaned internal oil-way. Professional is needed to wash the hood. - Page 16 The manufacturer shall decline all responsibility if the foregoing recommendations and instruction regarding installation, maintenance and usage are not abide and follow when using the cooker hood.
- Page 17 K K K K K K K K K K K K K K 抽油煙機 使用說明書 操作前請先仔細閱讀本手冊 本手冊圖片僅供參考,產品以實物為准。 MCHC90B68...
- Page 18 目錄 ................2 目錄 ................3 警告 ..............5 安全警告 ............... 6 安裝說明 ..............首 次使用 ..............11 維修及保養 ..............13 主要參數 ..............14 故障 處理 ..............14 廢棄處置...
- Page 19 警告 該器具不適用於體力、感官或心智缺乏經驗和知識的人士 使用(包括兒童),除非他們得到對其安全負責的人員監督 或指導,能確保安全使用該電器。兒童不得觸摸設備。清潔 和維修不得由兒童在缺少成人監督的情況下進行。如果電源 線損壞,必須由製造商、其經銷商或相關的合資格專業人士 進行更換,以避免危險。 當抽油煙機與燃燒氣體或其他燃料的器具同時使用時,室內 應保持足夠通風。 請勿使用腐蝕性清潔劑進行清洗。 請定期維修及保養設備,以保證其正常運行。 為確保抽油煙機主體不會受長時間累積的污垢腐蝕,抽油 煙機應每兩個月用熱水加無腐蝕性的清潔劑進行清洗。 如不按說明書指示清潔抽油煙機,將有機會帶來火災風險。 切勿在抽油煙機下方點火。 油煙不得排放至用於排放其他廢氣的煙道,例如燃氣或其他 燃料設備所產生的廢氣。 爐灶上烹飪容器的支撐面和抽油煙機最低部分之間應保持適 當的最小距離。當抽油煙機位於燃氣器具上方時,應至少間 距65釐米。如氣體爐的安裝說明規定更大的距離,則必須跟 隨指引。65釐米的距離在下列情況下可縮短:...
- Page 20 警告 抽油煙機的不可燃部件及在安全超低電壓下運行的部件 如變形,這些部件不會接觸到帶電部件。 必須遵守排氣相關的規定。 本電器最多可支持6個爐灶元件使用。 使用烹飪設備時可接觸部件溫 度將升高。 小心: 第一次接通電源或重新通電時,抽油煙機有自我檢測功 能,頂部玻璃板會開合一次,請小心夾手,切勿將手靠 近面板。 由於燃燒氣體的回流,抽油煙機和其他烹飪油煙機可能 會對燃燒氣體或其他燃料的器具(包括其他房間的電器 具)的安全運行產生不利影響。這些氣體可能導致一氧 化碳中毒。安裝抽油煙機或其他烹飪油煙機後,應由合 資格人員對開放式、煙道式燃氣器具的操作進行測試, 以確保不會發生燃燒氣體回流事故。...
-
Page 21: 安全警告
安全警告 幼兒或體弱人士必需在監管下使用本電器。 請監督幼兒,確保他們不會將本電器視作玩具玩耍。 請將電源線插到有接地的電源插座。 本抽油煙機僅供家庭使用,不適用於燒烤或其他商業用途。 應按照說明定期清洗抽油煙機及其濾芯。 切勿使用明火或使油流入抽油煙機下方。 如電器出現任何故障,請致電客戶服務中心。 請保持廚房通風。 在進行任何維修或清洗操作前,請確保電源已經切斷。 如果電源線損壞,必須由製造商、經銷商或類似的合格專業人士進 行更換,以避免危險。更換的電源線應由製造商或銷售商提供。 如插頭或電源線損壞,請致電客戶服務中心。 請按照說明使用本產品以避免任何火災危險。 請遵循當地適用於外部空氣排放的法律。 當上面板關閉時,切勿將手放置在上面板和機體之間,以免夾傷手。 蒸氣功能運作時,請小心熱蒸氣從機體溢出。 ... -
Page 22: 安裝說明
安裝說明 。 。 。 。 。 。 。 。 。 。 。 。 。 。 。 。 。 。 。 。 。 。 。 。 。 。 。 。 。 。 。 。 。 。 。 。 。 。 。 。 。 。 。 。 。 。 。 。 。 。 。 。 。 。 。 。 。 。 。 。 。 。 。 。 。 。 。 。 。 。 。 。 。 。 。 。 。 。 。 。 。 。 。 。 。 。 。 。 。 。 。 。 。 。 。 。 。 。 。 。 。 。 。 。 。 。 。 。 。 。 。 。 。 。 。 。 。 。 。 。 。 。 。 。 。 。 。 。 。 。 。 。 。 。 。 。 。 。 。 。 。 。 。 。 。 。 。 。 。 。 。 。 。 。 。 。 。 確定位置... - Page 23 Ф200 天花板排煙管孔徑示意圖 注:此安裝高度僅適用於電爐,如安裝在 氣體爐 上 方,安裝高度應符合氣體爐的安裝高度的要求。...
- Page 24 安裝說明 。 。 。 。 。 。 。 。 。 。 。 。 。 。 。 。 。 。 。 。 。 。 。 。 。 。 。 。 。 。 。 。 。 。 。 。 。 。 。 。 。 。 。 。 。 。 。 。 。 。 。 。 。 。 。 。 。 。 。 。 。 。 。 。 。 。 。 。 。 。 。 。 。 。 。 。 。 。 。 。 。 。 。 。 。 。 。 。 。 。 。 。 。 。 。 。 。 。 。 。 。 。 。 。 。 。 。 。 。 。 。 。 。 。 。 。 。 。 。 。 。 。 。 。 。 。 。 。 。 。 。 。 。 。 。 。 。 。 。 。 。 。 。 。 。 。 。 。 。 。 。 。 。 。 。 。 。 安裝板...
- Page 25 配件 抽油煙機機 身 排氣管 止回閥 止回閥密封墊圈 安裝板 膨脹螺栓(8 x 60) 螺絲 (ST2.9x2) 螺絲 (ST4.2x16) 螺絲 (M5x50) 螺絲 (M5x16) 水杯 集 油杯 煙囪蓋 裝飾罩掛板 水管 螺釘包...
-
Page 26: 首 次使用
首 次使用 抽油煙機通電後即可使用。 Switch light Gesture Steam washing Speed Turbo 左手勢感應控制 右手勢感應控制 light 燈 Gesture 手勢 感應 Steam Wash 蒸 清洗 氣 Turbo 模式 Turbo Speed 速度 開關 On/Off 。 。 。 。 。 。 。 。 。 。 。 。 。 。 。 。 。 。 。 。 。 。 。 。 。 。 。 。 。 。 。 。 。 。 。 。 。 。 。 。 。 。 。 。 。 。 。 。 。 。 。 。 。 。 。 。 。 。 。 。 。 。 。 。 。 。 。 。 。 。 。 。 。 。 。 。 。 。 。 。 。 。 。 。 。 。 。 。 。 。 。 。 。 。 。 。 。 。 。 。 。 。 。 。 。 。 。 。 。 。 。 。 。 。 。 。 。 。 。 。 。 。 。 。 。 。 。 。 。 。 。 。 。 。 。 。 。 。 。 。 。 。 。 。 。 。 。 。 。 。 。 。 。 。 。 。 。 。... -
Page 27: 維修及保養
维修及保養 。 。 。 。 。 。 。 。 。 。 。 。 。 。 。 。 。 。 。 。 。 。 。 。 。 。 。 。 。 。 。 。 機身 表面清洗 1. 抽油煙機和濾芯的表面應定期清洗,切勿使用清洗球、刷子、粗布,以免劃傷機器 表面。 可從集油杯視窗查看油滿狀況,請及時傾倒,避免油滴到煮食爐上。 油杯窗口 集... - Page 28 蒸 清洗(清洗抽油煙機內部) 氣 。 。 。 。 。 。 。 。 。 。 。 。 。 。 。 。 。 。 。 。 。 。 。 。 。 。 。 。 。 。 。 。 。 。 。 。 。 。 。 。 。 。 。 。 。 。 。 。 。 。 。 。 。 。 。 。 。 。 。 。 。 。 。 。 。 。 。 。 。 。 。 。 。 。 。 。 。 。 。 。 。 。 。 。 。 。 。 。 。 。 。 。 。 。 。 。 。 。 。 。 。 。 。 。 。 。 。 。 。 。 。 。 。 。 。 。 。 。 。 。 。 。 。 。 。 。 。 。 。 。 。 。 。 。 。 。 。 。 。 。 。 。 。 。 。 。 。 。 。 。 。 。 。 。 。 。 。 當指示燈變紅並閃爍時,表...
-
Page 29: 主要參數
主要參數 。 。 。 。 。 。 。 。 。 。 。 。 。 。 。 。 。 。 。 。 。 。 。 。 。 。 。 。 。 。 。 。 。 。 。 。 。 。 。 。 。 。 。 。 。 。 。 。 。 。 。 。 。 。 。 。 。 。 。 。 。 。 。 。 。 。 。 。 。 。 。 。 。 。 。 。 。 。 。 。 。 。 。 。 。 。 。 。 。 。 。 。 。 。 。 。 。 。 。 。 。 。 。 。 。 。 。 。 。 。 。 。 。 。 。 。 。 。 。 。 。 。 。 。 。 。 。 。 。 。 。 。 。 。 。 。 。 。 。 。 。 。 。 。 。 。 。 。 。 。 。 。 。 。 。 。 。 。... -
Page 30: 故障 處理
故障 處理 故障 解決方案 拔掉電源插頭,重新連接電源。 燈和 均無法運行 摩打 集 油杯傾斜,請重新安裝。 漏油 集 油杯油滿,請將油倒掉。 內部油槽長時間不清理造成油槽堵塞,需要專業人員清洗抽油煙機。 避免頻繁開窗或開門。 吸力不足 調整到最大轉速。 水杯缺水,請倒滿水。 蒸 清洗故障 氣 濾芯棉堵塞,請更換濾芯棉。 廢棄處置 請將廢棄的抽油煙機投放到當地的社區廢物收集/回收中心, 並確保其存放地點不會對兒童造成危險。棄置時必須使確保 插頭失效,並切斷電纜以防誤用。... - Page 32 如在使用抽油煙機時未遵守上述有關安裝、維修保養和使用的建議及說明,製造商將不 承擔任何責任。...
Need help?
Do you have a question about the MCHC90B68 and is the answer not in the manual?
Questions and answers