
Subscribe to Our Youtube Channel
Related Manuals for Midea MCHC70J72


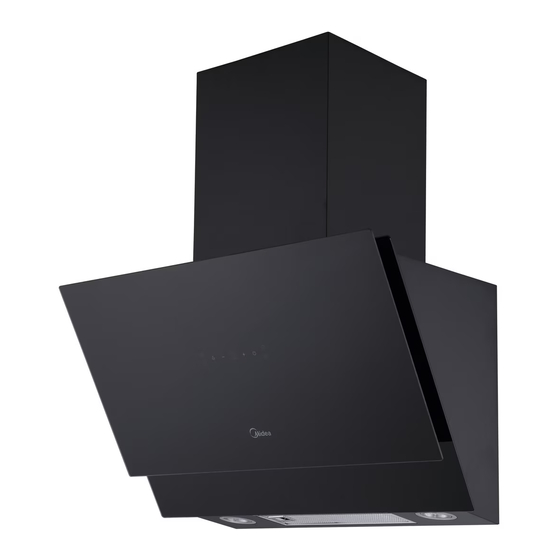
Summary of Contents for Midea MCHC70J72
- Page 1 抽油煙机 用户手册 MCHC70J72 本說明書的所有內容均已仔細檢查。如有印刷錯誤或誤解,可向本公司查詢。 註:產品若有技術改進,將會編進新版說明書中,恕不另行通知。產品外觀、顏色如有改動,以實物為準。...
- Page 2 感謝選用Midea產品!為確保客戶清楚安全使用方式及了解本產品的功能和特性,請於使用 本產品前詳細閱讀本使用說明書。 目錄 目錄 重要安全說明 產品規格 產品介紹 安裝方法 使用方法 清洁及保养 常見故障問題 商标,版权和法律声明 处置及循环再用 数据保护通知...
- Page 3 重要安全說明 預防措施 為免因不安全或不當使用本產品而造成不可預見的風險或人身傷害,請在使用本產品前細心閱讀本使 用手冊。另請在收貨時,仔細檢查包裝及產品,確保一切完好並操作無異常。若有任何損壞,請於購 買產品七天內聯絡本公司售後服務團隊或零售商/經銷商。 警告:為確保使用者人身安全,絕不允許擅自對本產品進行任何改裝,如發現用於其他用途而造成危 險,本公司有權不作維修保養。(有關保養條款細則可參閱保修卡或Midea HK官網。) 符号解释 危险 這標誌表示極易燃氣體對人的生命和健康有危險。 电压警告 這標誌表示電壓對人的生命和健康有危險。 警告 這標誌表示有中度危險,如不避免,可能會導致死亡或嚴重傷害。 警告 這標誌表示有低度潛在危險,如不避免,可能會導致人員輕微或中等傷害。 注意 這標誌表示重要信息(例如財產損失),但不表示危險。 指令 這標誌表示服務技術人員只能按照操作說明操作和維修本設備。 在使用/調試本機之前,請仔細閱讀這些操作說明,並將它們放在安裝現場或本機附近,以備以後使用!
- Page 4 警告 使用說明適用於該設備的多個版本。 因此,您可能會找到不適用於您的特定設備的個別功能的描 ● 述。 八歲或以上的小孩/ 感官與感知能力受限/ 缺乏相關知識或經驗人仕,均須在適當人員監督下安全 ● 使用。未滿八歲的小孩均不建議獨自使用本產品,本機並非設計給運動、感官與感知能力受限或 缺乏相關知識或使用經驗的人(包括孩童)使用。 應監督兒童以避免將本產品當成玩具,電器及電源亦應存放在兒童無法接觸的地方。 ● 如果電源線損壞,必須由製造商或其服務代理或具有類似資格的人員更換,以避免發生危險。 ● 本設備僅出於功能目的包含接地連接。 ● 抽油煙機與燃燒氣體或其他燃料的器具同時使用時,房間應有足夠的通風(不適用於僅將空氣排 ● 回房間的器具)。 如果不按照說明進行清潔,會有火災風險。 ● 不要在抽油煙機下燃燒。 ● 注意:與烹飪器具一起使用時,可觸及部件可能會變熱。 ● 不得將氣體排放到用於排放燃燒氣體或其他燃料的設備產生的煙霧的煙道中(不適用於僅將空氣 ● 排放回房間的設備)。 灶台上的烹飪容器的支撐面與抽油煙機的最低部分之間的最小距離為 650 毫米 ( 部分型號距離可 ● 以低於650mm,具體以尺寸圖和安裝圖為准)。 必須遵守有關空氣排放的規定。 ● 該電器最多使用 4 個爐盤元件。 ●...
- Page 5 產品規格 产品型号 MCHC70J72 额定电压/频率 220V-240V~/50Hz 额定功率 293 W 照明灯功率 2×1.5 W 摩打功率 290 W 排煙管直径 150 mm 风量 800m 產品尺寸(闊x高x深) 700×415×430 mm...
- Page 6 产品介紹 组件 参考 数量 产品组件 抽油煙机本体 下排气喉护盖 上排气喉护盖 排煙管 油杯 参考 数量 安装组件 螺丝 ( ST5 x 50 ) 牆塞 螺丝 ( ST4.2 x 9.5 ) 抽油煙机固定支架 排气喉护盖固定架 数量 使用说明书...
- Page 7 产品尺寸 单位:mm Min. Min. 530mm 530mm...
- Page 8 安裝方法 钻牆及固定支架 (OPTIONAL) Optional 首先,请遵循以下步骤绘制 在要安装抽油煙机的区域中心,从天花板或上限垂直画一条垂直線。 ● 在炉具上方1320-1700 mm位置画上水平線A。 ● 在炉具上方926 mm以上位置画上水平線B。 ● 在炉具上方730 mm (910mm 可选 )以上位置画上水平線C。 ● 标记点 在水平線A上,距离垂直参考線右方60mm位置标记一个点(1)。 ● 在另一侧重复动作,检查两个标记是否齐平。 ● 在水平線B上,距离垂直参考線右方80mm位置标记一个点(2)。 ● 在另一侧及垂直参考線重复次动作,检查三个标记是否齐平。 ● 在水平線C上,距离垂直参考線右方130(250可选)mm位置标记一个点(3)。 ● 在另一侧重复动作,检查两个标记是否处於同一水平線上。 ●...
- Page 9 固定支架 使用直径10mm钻头在标记点(1)(2)(3)钻孔。 ● 将牆塞插进孔(1)(2)(3)。 ● 用抽油煙机随机附的3颗螺丝(ST5x50)固定抽油煙机固定支架。 ● 用抽油煙机随机附的2颗螺丝(ST5x50)固定煙囱固定支架。 ● 掛上抽油煙机本体 打开面板。 ● 使用随附的手柄卸下金属油脂过滤器。 ● 将抽油煙机本体掛上支架。 ● 让抽油煙机本体保持水平。 ● 正确 错误 从抽油煙机本体内部,将螺丝(ST5x50)固定到点(3)的牆塞。 ● 将过滤器装入抽油烟机。 ● 关闭面板。 ● 连接 管道式排气系统 在安装管道时,由安装人员选择使用Φ150或Φ120 mm柔性或刚性管道连接罩到煙囱。 要安裝Φ120 mm的排風連接,請將煙管接頭插入排風口。 ● 將管道固定到位。 ● 移除活性炭過濾器(如有)。 ● ɸ150 ɸ120...
- Page 10 排气喉护盖安装 排气喉护盖只能装上抽油烟机。 下排气喉护盖 将排气喉护盖固定架以抽油煙机随附的2颗螺丝(ST4.2 x 9.50 )固定在 ● 下排气喉护盖。 将安装支架勾住抽油煙机,並用2颗螺丝(ST4.2 x 9.5 )固定,确保它们牢固就位。 ● 上排气喉护盖 稍微打开上排气喉护盖两侧,並将它们勾在牆壁及固定在下排气喉护盖的支架之间。 ● 用抽油煙机随附的2颗螺丝(ST4.2 x 9.5 )将上排气喉护盖固定在支架。 ●...
- Page 11 使用方法 选项 按钮 功能 备注 开启或关闭照明系统。 按钮开启。 减慢机器抽吸力。 开启时。 显示风扇齿轮“1、2、3”。 风扇运行时。 延迟关闭模式或待机模式。 显示 "0"。 调高机器抽吸力。 开启时。 启动机器。 关闭时。 3分钟后自动关机。 开启时。 关机。 闪动时。 启动机器及灯。 关闭时。 循环更改摩打抽吸力 开启时。 (1—2—3—1—2—3)。 进入延迟关闭模式 开启时。 (3分钟后自动关闭)。 关机及灯 闪动时。...
- Page 12 清洁及保养 油脂过滤器 清洁金属自立式油脂过滤器 过滤器必须每2个月清洁一次,特别是频繁使用时,则要更频繁清洁,並 ● 可以放入洗碗机清洗。 拉动抽吸面板以将其打开。 ● 将过滤器逐个推向油烟机本机后侧,同时向下拉出。 ● 清洗过滤器时,应避免将其弯曲。将他们重新装入抽油烟机之前,确保 ● 它们完全乾透。(过滤器表面可能会随时间而变色,但这不会影响过滤 表現)。 将过滤器装入抽油烟机时,注意将其安装在正确位置,手柄应朝外。 ● 关闭抽吸面板。 ● 活性炭过滤(内循环) 这些过滤器是不可清洗的,不能循环再用,必须大约每4个月更換一次,如果更頻繁的使用机器, ● 需要更快更換。 更換活性炭过滤器 打開機器面板。 ● 拆卸金屬過濾網。 ● 拆卸 安裝 拆卸舊的活性炭過濾器。 ● 裝上新的過濾器。 ● 裝上金屬過濾網。 ● 關閉機器面板。 ● 安裝 拆卸...
- Page 13 油杯 油杯 油杯的安装 按下鎖扣,取出過濾網。 ● 將油杯插入風扇元件下方,向內滑動油杯,並插入油杯。 ● 油杯 按下解鎖 按壓安裝 油杯清潔 (油杯需按使用次數,最少每月清潔一次) 如下圖所示,通過滑動油杯取出油杯。 ● 將油杯浸泡在溫水(40℃-50℃)和稀釋的中性洗滌劑中,清洗5-10分鐘,再用牙刷清洗以去除污 ● 垢。 擦乾油杯並將其固定在產品上。 ● 油杯 油杯 滑動取出 按壓安裝...
- Page 14 灯 抽油煙機小燈更換 1.5W LED 灯 关闭抽油煙机,拔出电源插头或关闭保险丝。 ● 拆下过滤網。 ● 从抽油烟机本体撬动灯具配件将其取下(可能需要稍微用力)。 ● 最大功率 电压 图片 灯头 ILCOS D 代码 平方/直径: DSR-1.5-S-70 1.5W DC 12 V —— 70mm 断开灯的连接器。 ● 以相同类型的新灯具替换,並确保灯及灯的电线连接正确。 ● 将灯重新安装到抽油煙机。 ●...
- Page 15 常見故障問題 故障 原因 解决方案 叶片被卡住。 检查叶片。 ● 电容器损坏。 更換电容器。 ● 灯亮起,但摩 打没有运作 摩打损坏。 更換摩打。 ● 線 摩打内部接 已切断/断开。可能 ● 更換摩打。 会产生难闻气味。 除上述项目外,请检查以下项目: 灯及摩打均没有运作 灯损坏。 更換灯。 ● 線 电源 松脱。 線 按照电气图连接电 。 ● 出风口及通风口未密封。 漏油 取下出风口並用胶水密封。 ● 叶片如果损坏,可能会 ● 装回叶片。 导致振动。...
- Page 16 商标,版权和法律声明 徽標、文字標記、商號、商業外觀及其所有版本均為美的集團和/或其附屬公司 (“美的”)的寶貴資產,美的擁有其商標、版權和其他知識產權,以及源自於使用美的商標的 任何部分的所有商譽。 未經美的事先書面同意,將美的商標用於商業目的可能構成商標違反有關 法律的侵權或不正當競爭行為。 本手冊由美的製作,美的保留其所有版權。 未經美的事先書面同意,任何單位和個人不得使用、 複製、修改、分發本手冊的全部或部分內容,也不得與其他產品捆綁銷售。 在印刷本手冊時,所有描述的功能和說明都是最新的。 但是,實際產品可能會因改進的功能和設 計而有所不同。 处置及循环再用 對於環境的重要說明 遵守 WEEE 指令和廢棄產品的處理: 本產品符合歐盟 WEEE 指令 (2012/19/EU)。 本產品帶有廢棄電子電氣設備 (WEEE) 的分類 符號。 此符號表示本產品在其使用壽命結束時不得與其他生活垃圾一起處理。 用過的設備必須返回官方回收點以回收電子電子設備。 要查找這些收 集系統,請聯繫您當地的主管部門或購買產品的零售商。 家家戶戶在 舊家電的回收和循環利用中扮演著重要的角色。 妥善處置用過的器具 有助於防止對環境和人類健康造成潛在的負面影響。...
- Page 17 符合 RoHS 指令 您購買的產品符合歐盟 RoHS 指令 (2011/65/EU)。 它不包含指令中指定的有害和禁止材料。 包裝信息 產品的包裝材料根據我們的國家環境法規由可回收材料製成。 不要將包裝材 料與生活垃圾或其他垃圾一起處理。 將它們帶到地方當局指定的包裝材料收 集點。 數據保護通知 為了提供與客戶約定的服務,我們同意不受限制地遵守適用數據保護法的所有規定,符合向客戶提供 服務的約定國家,以及適用的歐盟通用數據保護條例 (GDPR)。 通常,我們的數據處理是為了履行我們與您簽訂的合同規定的義務,並出於產品安全原因,保護您在 保修和產品註冊問題方面的權利。在某些情況下,但只有在確保適當的數據保護的情況下,個人數據 才可能被傳輸到位於歐洲經濟區以外的接收者。 可應要求提供更多信息。您可以通過 MideaDPO@midea.com 聯繫我們的數據保護官。要行使您 的權利,例如反對出於直接營銷目的處理您的個人數據的權利,請通過 MideaDPO@midea.com 聯繫我們。如需了解更多信息,請關註二維碼。...
- Page 19 All the contents of this Guide have been checked carefully. If there are any printing errors OR misunderstanding, please contact with Midea customer service team. NOTE: It will be compiled into the new version of the guide without any notice if involve the technical improvements.
-
Page 20: Table Of Contents
Please read this user manual be carefully before start use this new appliance. To ensure that you know the operate knowledge and understand more about the product features and functions in a safe way. CONTENTS CONTENTS SAFETY INSTRUCTIONS SPECIFICATIONS PRODUCT OVERVIEW PRODUCT INSTALLATION OPERATION INSTRUCTIONS CLEANING AND MAINTENANCE... -
Page 21: Safety Instructions
SAFETY INSTRUCTIONS Intended Use The following safety guidelines are intended to prevent unforeseen risks or damage from unsafe or incorrect operation of the appliance. Please check the packaging and appliance on arrival to make sure everything is intact to ensure safe operation. If you find any damage, please contact the retailer or dealer. - Page 22 WARNING The instructions apply to several versions of this appliance. Accordingly, you ● may find descriptions of individual features that do not apply to your specific appliance. This appliance is not intended for use by children over eight years of age or persons ●...
-
Page 23: Specifications
Switch off or unplug the appliance from the mains supply before carrying out any ● maintenance work. Clean the cooker hood with a damp cloth and a neutral liquid detergent. ● SPECIFICATIONS Product Model MCHC70J72 Voltage 220V-240V~/50Hz Rated Power 293 W Lighting Power 2 x 1.5 W... -
Page 24: Product Overview
PRODUCT OVERVIEW Components Ref. Qty. Product Components Cooker Hood Body Lower Decorative Chimney Upper Decorative Chimney Exhaust Pipe Oil Cup Ref. Qty. Installation Components Screws 5 x 50 Wall Plugs Screws 4.2 x 9.5 Hood fixing bracket Chimney fixing bracket Qty. - Page 25 Dimensions unit:mm Min. Min. 530mm 530mm...
-
Page 26: Product Installation
PRODUCT INSTALLATION Wall Drilling and Bracket Fixing (OPTIONAL) Optional Firstly, proceed with the following drawings: Draw a vertical line to the ceiling or up to the upper limit, at the center of the area in ● which the cooker hood is going to be fitted. Draw a horizontal line A at 1320 –... - Page 27 Fix the brackets: Drill at the marked points (1) (2) (3), using a Φ10 mm drill bit. ● Insert the wall plugs into the holes (1) (2) (3). ● Fix the cooker hood fixing bracket (component 20) with 3 screws (component 10) ●...
- Page 28 CHIMNEY ASSEMBLY The chimney can only be installed with the cooker hood. Lower Decorative Chimney Fix a chimney fixing bracket onto the Lower Decorative ● Chimney with 2 screws(4.2 x 9.5) provided. Slightly widen the two sides of the flue and hook them onto the cooker hood body, ●...
-
Page 29: Operation Instructions
OPERATION INSTRUCTIONS Menu Button Function Remarks Turns the lighting system on or off. Press to button on. Reduce the motor speed. When are on. When the fan is running. Display fan gear “1、2、3”. Delayed shutdown mode, Display "0". or standby mode. Increase the motor speed. -
Page 30: Cleaning And Maintenance
CLEANING AND MAINTENANCE Grease Filters CLEANING METAL GREASE FILTERS The filters must be cleaned every 2 months of operation, or ● more frequently for particular heavy usage. It can be washed in a dishwasher. Pull the comfort panels to open. ●... - Page 31 Oil Cup Oil Cup Oil cup installation Remove the filter by pressing the lock. ● Insert the oil cup below the fan assembly, insert the oil cup by sliding the oil cup inward. ● Oil Cup Push to unlock Push to attach Oil Cup Cleaning (The oil cup needs to be cleaned at least once a month, according to the usage frequency.)
- Page 32 Lighting LIGHT REPLACEMENT 1.5W LED light. Switch off the cooker hood and cut-off the cooker hood power by pulling out the ● mains plug or switching off the fuse. Remove the grease filter. ● Remove the light by levering its fitting from the cooker hood body(Slight pull to take ●...
-
Page 33: Troubleshooting
TROUBLESHOOTING Problem Possible reason Solution The blades are blocked. Check the blades ● The capacitor is damaged. Replace capacitor. ● Light on, but motor The motor is damaged. Replace motor. ● is not working The internal wiring of motor Replace motor. ●... -
Page 34: Trademarks, Copyrights And Legal Statement
Midea may constitute trademark infringement or unfair competition in violation of relevant laws. This manual is created by Midea and Midea reserves all copyrights thereof. No entity or individual may use, duplicate, modify, distribute in whole or in part this manual, or bundle or sell with other products without the prior written consent of Midea. -
Page 35: Data Protection Notice
European Economic Area. Further information are provided on request. You can contact our Data Protection Officer via MideaDPO@midea.com. To exercise your rights such as right to object your personal date being processed for direct marketing purposes, please contact us via... - Page 36 16173000A22429 V1.0...
Need help?
Do you have a question about the MCHC70J72 and is the answer not in the manual?
Questions and answers