Table of Contents
Advertisement
Available languages
Available languages
Quick Links
警告
安装维修手册并非提供给普通用户,产品的维修应该由具备相关资格的专业技术人
员进行,不正确的维修可能导致其他危险!
The installation service manual is not intended for ordinary user. Product
maintenance should be done by qualified professional technician. Incorrect
maintenance may cause other danger.
维修前,务必要切断电源!
Please cut off the power supply before the maintenance.
如果电源线有故障隐患,一定要更换具备相关技术参数的电源线(参数见本手册)!
If the power cord has hidden fault, please replace it with relevant technical
parameter. (Please refer to the manual for parameter)
维修产品前,请仔细阅读本手册中的安全警告!
Please read the safety warning in the manual carefully before servicing the product.
维修完成后,需按照相关规程检测方可使用!
After the maintenance, detect it according to relevant regulations before using it
本维修手册内容包含多个型号,操作中请以实物为准!
This service manual includes multiple models. Please refer to the real product
during operation.
- -
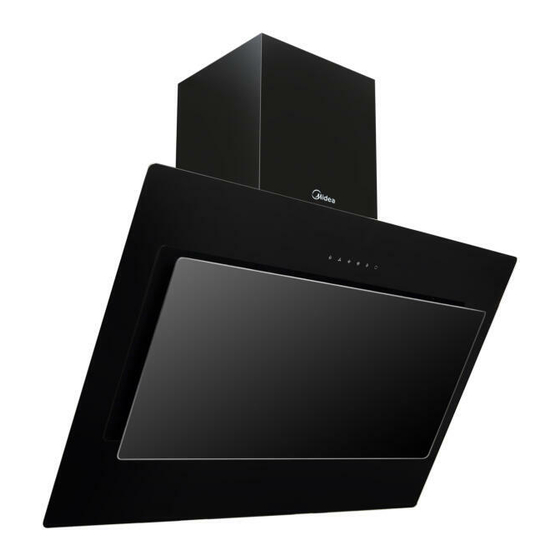
侧吸式烟机J82平台
安装与维修手册
Angled Range Hood
Installation and Service Manual
客户服务中心
二零一七年五月十日
Customer Service Center
May.10
th
, 2017
Advertisement
Table of Contents

Related Manuals for Midea J82 Series


Summary of Contents for Midea J82 Series
- Page 1 侧吸式烟机J82平台 安装与维修手册 Angled Range Hood Installation and Service Manual 警告 安装维修手册并非提供给普通用户,产品的维修应该由具备相关资格的专业技术人 员进行,不正确的维修可能导致其他危险! The installation service manual is not intended for ordinary user. Product maintenance should be done by qualified professional technician. Incorrect maintenance may cause other danger. 维修前,务必要切断电源! Please cut off the power supply before the maintenance.
-
Page 2: Table Of Contents
目录Catalogue 目录 1.预防措施 Precaution ............................1 1.1 安全预防措施 Safety Precaution ........................... 1 1.2 警告 Warning ................................. 1 2.近吸烟机尺寸 Dimension Of Near Suction Range Hood ............2 3.功能 Function ............................... 2 3.1 照明功能 Lighting Function ........................... 2 3.2 吸油烟功能 Smoke Absorption Function ....................... 3 4.电路图... -
Page 3: 预防措施 Precaution
1. 预防措施 Precaution 1.1 安全预防措施 Safety Precaution 1、为防止伤害到用户或其他人、财产损害的,必须遵循以下说明。 Please follow the below note to avoid hurting user or others or property damage. 2、由于忽略说明而错误的操作,将导致伤害或损害。 Faulty operation due to neglecting the note will caused injury or damage. 3、维护之前,请先仔细阅读以下说明! Please read the following note carefully before the maintenance. 警告... -
Page 4: 近吸烟机尺寸 Dimension Of Near Suction Range Hood
近吸烟机尺寸 Dimension of Near suction Range Hood MODEL 60J82 600mm 418.5mm 400~780mm 890~1270mm 80J82 800mm 418.5mm 400~780mm 890~1270mm 90J82 900mm 418.5mm 400~780mm 890~1270mm 60J86 600mm 425mm 400~780mm 891.5~1270mm 90J86 900mm 425mm 400~780mm 891.5~1270mm 3. 功能 Function 3.1 照明功能 Lighting Function 如图所示为触摸开关控制面板图,只要轻触红色箭头所指按键,可打开照明灯,再触摸一次该按... -
Page 5: 吸油烟功能 Smoke Absorption Function
3.2 吸油烟功能 Smoke Absorption Function 如图红色箭头所指按键是抽油烟启动键,按下启动键后启动键亮起,且风机默认档位启动。 As shown in the picture, the button indicated by red arrow is smoke exhaust start, press the “start” button, it shines and fan starts in the default setting and it is lighted. 如图按下红色箭头所指按键,可开启大风量排油 这时可以根据需要按下风挡按钮选择三档不同的风量。 烟功能;按下黄色箭头所指按键,可切换为中等风量排油烟功能;按下绿色箭头所指按键可切换为小... -
Page 6: 电路图 Circuit Diagram
射灯指示灯点亮 注意:各产品具体功能及操作请参照相应产品说明书! Note: please refer to the instruction book of relevant product in terms of the specific function and operation of each product. 4. 电路图 Circuit Diagram 注意: 电路图为基础机型电路图, 如有不同请以产品说明书上的电路图为准! Note: the above is the circuit diagram of basic models, please be subject to the circuit diagram in product instruction book if there is difference. -
Page 7: 烟机的安装 Range Hood Installation
No inflammable, explosive or non-heat-resistant article should contact or approach around the range hood. 3. 挂置烟机的墙面应具有足够强度且足够平坦,以保证本产品有足够的稳定性。 The wall where the hood hung should have sufficient strength to ensure product’s adequate stability. 5.2 烟机的安装 Range Hood Installation 近吸油烟机安装图 Installation Diagram of Near suction Range Hood B. -
Page 8: 部件拆卸 Components Mounting And Dismounting
部件拆卸 Components Mounting and Dismounting 首先,把烟机取下平放在空旷平台上。 At first,take down the range hood and keep it flat on the open platform. 6.1 冷凝板装拆 Condensate Plate Dismounting 步骤1:如上图左所示,先向箭头方向按压冷凝板,使它弹起。 Step1: As shown in the left picture, we should press the condensate plate along the red arrow for making it flick. -
Page 9: 拆除导流板 Guide Plate Dismounting
用手抠住过滤网扣手向下压住再向箭头方向拉。 Clasp the filter buckle by hand, press down and pull out 6.3 拆除导流板 Guide Plate Dismounting 工具:十字螺丝刀 Tool: Cross Screwdriver 步骤1:如下图左所示,将烟机箱体上三颗螺钉拆除。 Step 1: As shown in the left picture below, remove three screws from hood box. 步骤 2:如上图右所示,将烟机箱体上接线盒 1 颗螺钉拆除 Step 2: As shown in the right picture above, remove one screw from junction box. -
Page 10: 开关拆卸 Switch Dismounting
步骤 6:如上图所示,将导流板延箭头方向轻抬后拆除。 Step 6: As shown in the picture above, lift the guide plate upwards lightly and dismantle it. 开关拆卸 Switch Dismounting 工具:十字螺丝刀 Tool: Cross Screwdriver 步骤 1:如上 6.3 将导流板拆除后,拆除开关处两个螺钉,将开关取下。 Step 1: As above 6.3, after dismantling the guide plate, remove two screws from it while dismantle switch. -
Page 11: 射灯拆卸 Spotlight Dismounting
射灯拆卸 Spotlight Dismounting 工具:裁纸刀 Tool: Cutting Knife 步骤1:用裁纸刀将箱体内固定线束扎带割断,如下图左: Step1: Cut the inner cable tie in the box by the cutting knife, as below left picture 步骤2:如上图中,右所示,将射灯接线端子拔出,用力方向如箭头 Step2: As shown in the picture 2 and 3 above, pull the spotlight terminal out, force direction as arrow. 步骤3: 如上图左所示,拇指向箭头方向压住弹片同时压出射灯... -
Page 12: 拆卸接线盒 Junction Box Dismounting
6.6 拆卸接线盒 Junction Box Dismounting 工具:十字螺丝刀,剪刀 Tool: Cross screwdriver , Cutting knife 步骤1:拆除一个接地螺钉 Step 1: As shown in left picture below, remove a grounding screw near the junction box. 步骤2: 如上图右所示,延箭头方向抬起卡槽处电源线,同时向箭头方向拉出电源线。 Step2: As shown in right picture above, in the direction of the arrow, lift the power cord at the slot and pull out the power cord in the direction of the arrow. -
Page 13: 接线板拆装 Terminal Block Dismounting
步骤5:如上图所示,延箭头方向挤压接线盒使卡扣脱离槽,同时向上抬起接线盒。 Step5: As shown in right picture above, press the junction box fastener out of groove in the direction of arrow while pull out it. 拿出接线盒,完成接线盒的拆除。 Put the junction box out of the hood box and complete junction box dismounting . 6.7 接线板拆装... -
Page 14: 拆卸风机组件 Fan Assembly Dismounting
6.8 拆卸风机组件 Fan Assembly Dismounting 工具:裁纸刀、十字螺丝刀 步骤1:如下图所示,用裁纸刀割断两个固定线束扎带。 Step1: Cut the two ties of the fixed harness in the hood box as below picture 步骤2:如下图所示,拆下箱体上四个固定风机的螺钉。 Step2: Remove four screws fixed the fan assembly on the hood box as below picture. 步骤 3:从箱体中拿出风机,完成风机的拆卸 Step3: Remove the fan assembly from the hood box, and complete the dismounting. -
Page 15: 整理线束电容 Put The Harnesses And Capacitors In Order
6.9 整理线束电容 Put The Harnesses And Capacitors In Order 步骤1:如下图所示,整理电源线,连接线和电容 Step1: Put the connected harness , capacitor and power cable in order as picture below. -
Page 16: 故障排除 Troubleshooting
7 故障排除 Troubleshooting 7.1 电器不良现象 Electrical Appliance Faults 问题 可能原因 维修措施 Problem Possible Causes Maintenance Countermeasures 1. 更换同规格型号的射灯; Replace it with the same spec and model spotlight 1. 射灯老化损坏; 2. 检查灯线各个接线端子和线路本身是否有损坏,如 Spotlight has aging damage. 损坏则更换灯线; 2. 灯线接触不良或损坏; Check whether each lamp cord terminal and circuit itself Lamp cord has poor contact or damage. -
Page 17: 主要部件维修与检测 Main Components Maintenance And Detection
注意!Caution 1. 检查故障前请先检查电源线接地; Check the power cord grounding before checking the fault. 2. 注意高压电路部分。 Pay attention to the high voltage circuit. 7.2 主要部件维修与检测 Main Components Maintenance and Detection 7.2.1 开关组件更换 Switch Assembly Replacement 工具:十字螺丝刀 Tool: Cross Screwdriver 操作步骤:Operation Step: 1. 将烟机放在一个平整的平台上,断开电源; Put the range hood on a flat platform, switch the power off;... - Page 18 7.2.3 风机组件更换 Fan Assembly Replacement 工具:十字螺丝刀 Tool: Cross Screwdriver 操作步骤:Operation Step: 1. 按照 6.8 风机组件拆卸步骤方法将损坏的风机组件拆卸下来; Dismantle the damaged fan assembly according to fan assembly dismantling step in 6.8; 2. 准备好替换的完好的风机组件, 按照 6.8 相反的步骤顺序将风机组件安装好。 注意罩极电机和电容 电机的拆卸安装区别。 Prepare the intact fan assembly for replacement; install the fan assembly according to the contrary step sequence of 6.6.
Need help?
Do you have a question about the J82 Series and is the answer not in the manual?
Questions and answers