Chapters
Table of Contents
Troubleshooting

Related Manuals for Nidek Medical Mark5 Nuvo


Summary of Contents for Nidek Medical Mark5 Nuvo
- Page 1 Nidek Medical Products, Inc® Mark5 Nuvo® [M5C5] Oxygen Concentrator Service Manual Nidek Medical Products, Inc. 3949 Valley East Industrial Drive Birmingham, Alabama 35217 USA Telephone: (205) 856-7200 • 24-Hour Fax: (205) 856-0533...
- Page 2 Nidek Medical is a trademark of Nidek Medical Products, Inc. Mark5 Nuvo® and M5C5 are registered trademarks of Nidek Medical Products, Inc. Page 2 of 59 2010-2225 Rev - B...
-
Page 3: Table Of Contents
Table of Contents General Safety Instructions Production and Use of Oxygen Use and Maintenance of the Device Standards and Regulations Section 1.0 Introduction Home Service Provider Responsibility Important Notice and Symbol Explanations Functional Specifications Section 2.0 Operational Check and Concentration Test Description of Operation Operation Check Alarm System... - Page 4 5.2.5 Caster Replacement Compressor 5.3.1 Compressor Replacement 5.3.2 Capacitor Replacement Process Control Valve Sieve Bed Replacement 5.5.1 Sieve Bed Removal 5.5.2 Sieve Bed Installation Cabinet Fan Replacement Circuit Board Replacement 5.7.1 Circuit Board Removal 5.7.2 Circuit Board Installation Product Regulator Check and Setting 5.8.1 Product Regulator Cleaning or Rebuilding Pressure Switch Replacement 5.10...
- Page 5 Appendices Exploded A1: Base Assembly Drawings A1.1: Base Assembly A2: Main Structure Assembly – Front View A3: Main Structure Assembly – Rear View A4: Regulator Assembly A5: Compressor Assembly A5.1: Compressor Assembly A6: Control Panel Assembly; OCSI Unit - Front A7: Control Panel Assembly;...
- Page 6 Do not use an extension cord or multiple sockets which can create sparks and therefore pose a fire risk. Use of the MARK5 NUVO must be restricted solely to oxygen therapy on medical prescription in compliance with the daily rate and duration.
- Page 7 WARNING Mark5 Nuvo units must not be used for or with any life-supporting or life sustaining applications. Patients unable to communicate discomfort while using this device may require additional monitoring. Advise patients to immediately notify their Home Service Provider(s) and/or physician(s) in case of an alarm or any discomfort.
- Page 8 The Mark5 Nuvo® must not be used as a life-supporting or life sustaining device. A backup supply of oxygen must be available. ● Instruct patients how to use the Mark5 Nuvo® in conjunction with the Patient Manual. ● Instruct patients to notify their physicians and/or Home Service Providers if they experience any signs of discomfort.
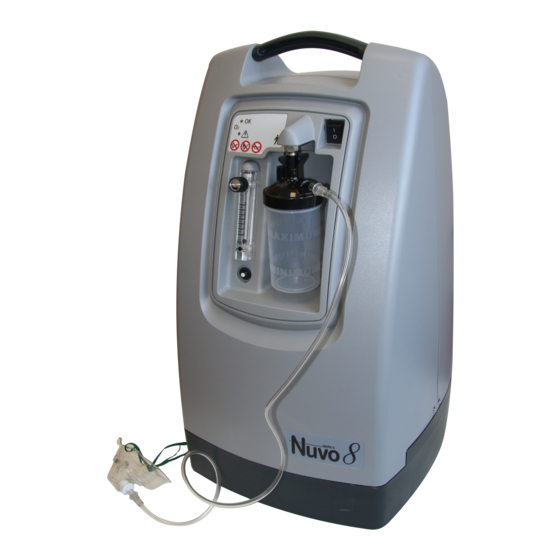
- Page 9 The flow control valve, which is part of the flow meter, controls the flow rate of oxygen delivered to the patient. The Mark5 Nuvo® unit 2010-2225 Rev - B...
- Page 10 Operational Check Nidek Medical runs each device through a burn in period and tests every Mark5 Nuvo® Oxygen Concentrator thoroughly after manufacture before releasing for shipment. As the home service provider, it is your responsibility to perform the following test to ensure that no damage occurred in shipping or handling.
- Page 11 2.3.1 Battery Test The Mark5 Nuvo® battery can be checked by observing that the continuous alarm sounds when the I/0 (ON/OFF) switch is moved to the I (ON) position when the unit is unplugged from the wall outlet. 2.3.2 Power Failure Alarm Test...
-
Page 12: Routine Maintenance By The Patient
NOTE: The patient must clean this filter weekly, as described below. The filter may require daily cleaning if the Mark5 Nuvo® unit operates in a harsh environment such as a house heated by wood, kerosene, or oil, or one with excessive cigarette smoke. -
Page 13: Checking The Alarm System Battery
15) for the recommended intervals for testing. Nidek Medical does not require preventive maintenance on the concentrator. You do not need to perform any maintenance as long as the Mark5 Nuvo® unit remains within specifications at the prescribed flow rate. -
Page 14: Inlet Air Filter Replacement
Reinstall the access panel. 4.1.4 Battery Replacement Each time the standard Mark5 Nuvo® unit is turned on, the alarm must sound loudly for approximately five seconds to indicate a good battery. An alarm that does anything other than sound loudly for five seconds indicates a weak battery and requires replacement. -
Page 15: Recording Maintenance
Once outside the body, viruses can survive for only a short period of time. 4.2.1 Preparing for New Patient Use When you remove the Mark5 Nuvo® from a patient’s home, always dispose of the used nasal cannula and humidifier bottle. Clean the exterior of the Mark5 Nuvo®... -
Page 16: Components
Allow the mixture to sit on potentially contaminated surfaces for 10 minutes. 5.0 Service Components The design of the Nidek Medical Mark5 Nuvo® Oxygen Concentrator allows for easy access and removal of most components. This allows you to perform scheduled maintenance, repair, and replacement of parts with minimal time and effort. -
Page 17: Caster Replacement
Because this drop in oxygen production occurs over a long period of time, preventive maintenance on the compressor is not required. You can continue a patient’s therapy on the Mark5 Nuvo® unit as long as the oxygen concentration level at the prescribed liter flow rate is within Nidek Medical’s specification limits. -
Page 18: Compressor Replacement
Air Flow _______ _______ Meter _______ _______ _______ 0 to 100 l/min _______ _______ _______ _______ _______ _______ _______ 1 bar _______ _______ _______ Pressure _______ _______ _______ Gauge _______ Pressure _______ _______ _______ _______ _______ _______ _______ Flow Compressor Restrictor Filter ●... -
Page 19: Capacitor Replacement
Both ports closed; this is a very short time period during which air pressure builds in the air tank. The control valve of the Mark5 Nuvo® unit requires no scheduled maintenance. If a valve does not function as required, it is best to replace the complete sieve module as it is probable that one or both of the beds has been damaged. -
Page 20: Sieve Bed Removal
Careful leak testing is important. Cabinet Fan Replacement The cabinet fan for the Mark5 Nuvo® is located under the compressor. Refer to the troubleshooting chart in Section 6.0 of this manual for instances where replacement of the fan may be required. -
Page 21: Circuit Board Replacement
power cord. Remove the front and back cabinets. Follow the procedure in 5.3.1 to remove the compressor assembly. Disconnect the fan leads. Position the new cabinet fan so that the air flow arrow points toward the bottom and the electrical connections. Be sure that the electrical wires do not interfere with the rotation of the fan. -
Page 22: Circuit Board Installation
Product Regulator Check and Setting The product regulator enables you to set the maximum flow of oxygen output by the Mark5 Nuvo® unit. To check for proper adjustment of the product regulator, take the following steps: Set the I/0 (ON/OFF) switch to the I (ON) position. -
Page 23: Pressure Switch Replacement
The high and low pressure alarms are activated by a pressure transducer located on the circuit board adjacent to the mains switch. Set the I/0 (ON/OFF) switch to the 0 (OFF) position, and unplug the power cord. Remove the back and front cabinets and the control panel. Disconnect the 7 pin connector from the circuit board. -
Page 24: I/0 (On/Off) Power Switch Installation
5.12 Buzzer Replacement The buzzer is a fixed component on the circuit board and is not individually replaceable. 5.13 Hour Meter Replacement Set the I/0 (ON/OFF) switch to the 0 (OFF) position, and unplug the power cord. Remove the cabinet back. Disconnect the hour meter leads. -
Page 25: Troubleshooting
Troubleshooting Air Pressure Test (P1) Testing the operating pressure is a useful diagnostic tool when a concentrator has low purity and requires servicing. Units functioning normally do not require operating tests. Use the following procedure to test the operating pressure of the unit. Set the I/0 (ON/OFF) switch to the 0 (OFF) position, and unplug the power cord. -
Page 26: Low Air Pressure
Lower than normal operating pressure may indicate any of the following: ► A restriction in the suction resonator or inlet air filter, which limits the amount of room air available to the compressor. Disconnect the suction tube at the compressor, and allow the unit to operate without the suction resonator to see if normal operating pressure returns. -
Page 27: Low Product Pressure
pressure returns. ► An improperly operating control valve. Confirm that the control valve does not have a leak. ► A leak in the unit, which allows system pressure to escape. Leak test the unit. ► A compressor with reduced output. Ensure that the concentration level at the desired liter flow is within specifications listed in Section 2.4. -
Page 28: Troubleshooting Chart
between a high and a low pressure. If the unit is not cycling properly, refer to troubleshooting chart. Make sure that the unit is leak free by testing all tubing connections and fittings with leak testing solution. Protect circuit board from solution and start leak test at the heat exchanger, following the air flow through the unit to the oxygen outlet. - Page 29 Low Oxygen Concentration Verify Oxygen Flow Rate Measure Air Pressure Low Pressure High Pressure Replace Air Replace Wick Inlet Filter Check for Replace Leaks Muffler Foams Check Check the Control Compressor Valve Normal Air Pressure Measure the Oxygen Pressure Low Pressure High Pressure Replace Check for...
- Page 30 Troubleshooting Chart Problem Probable Cause Solution Compressor does not run. No power to unit. Check wall outlet for power. Constant audible alarm with Unit circuit breaker tripped Reset or replace circuit I/0 (ON/OFF) power switch or faulty. breaker. in ON position. Faulty electrical Check electrical connections.
- Page 31 Problem Probable Cause Solution Compressor runs with Defective sieve beds. Replace sieve beds. intermittent high pressure alarm and low oxygen Restriction in exhaust Replace or clean muffler. concentration. muffler. Defective gearmotor / valve. Replace sieve module. Compressor relief valve Defective gearmotor. Replace sieve module.
- Page 32 Problem Probable Cause Solution Cabinet fan does not turn. Defective cabinet fan. Replace cabinet fan. Defective electrical Check electrical connections. connections. Limited or Iow flow. Restriction in humidifier or Replace humidifier or tubing. tubing. Product regulator set too Adjust regulator setting. low.
-
Page 33: Tool Kit And Pressure Test Gauge
Tool Kit and Pressure Test Gauge The tools needed for you to properly service the Mark5 Nuvo® unit are listed below: ► Requires no special tools; generally available tools including common pliers, channel lock, wire cutters, needle-nose pliers, slotted-head screwdriver, long Phillips head screwdriver, 8- inch adjustable wrench, 7/16-inch socket, 7/16-inch combination wrench, 5/8-inch combination wrench and 3/8-inch combination wrench. -
Page 34: Base Assembly
A-1 BASE ASSEMBLY NUVO 0100-0300 REV A NOTE: USE THIS DRAWING ON UNITS EARLIER THAN SERIAL # 062-11663 Page 34 of 59 2010-2225 Rev - B... - Page 35 A-1.1 BASE ASSEMBLY Nuvo 0100-0300Q Rev B NOTE: USE THIS DRAWING ON UNITS AFTER SERIAL # 062-11663 2010-2225 Rev - B Page 35 of 59...
-
Page 36: Main Structure Assembly
A-2 MAIN STRUCTURE ASSEMBLY FRONT VIEW NUVO 0140-0300 REV C Page 36 of 59 2010-2225 Rev - B... - Page 37 A-3 MAIN STRUCTURE ASSEMBLY REAR VIEW NUVO 0140-0300 REV C 2010-2225 Rev - B Page 37 of 59...
- Page 38 A-4 REGULATOR ASSEMBLY NUVO 0160-0300 REV A Page 38 of 59 2010-2225 Rev - B...
-
Page 39: Compressor Assembly
A-5 COMPRESSOR ASSEMBLY NOTE: USE THIS DRAWING ON UNITS EARLIER THAN SERIAL # 062-11663 Nuvo 0200-0300 Rev. A 2010-2225 Rev - B Page 39 of 59... - Page 40 A-5.1 COMPRESSOR ASSEMBLY NOTE: USE THIS DRAWING ON UNITS AFTER SERIAL # 062-11663 Nuvo 0200-0350 Rev. B Page 40 of 59 2010-2225 Rev - B...
-
Page 41: Control Panel Assembly A-6, A-6.1, A-7, A-7.1
A-6 CONTROL PANEL ASSEMBLY UNIT WITH OCSI FRONT VIEW NOTE: USE THIS DRAWING ON UNITS EARLIER THAN SERIAL # 062-11663 Nuvo 0300-0330 Rev. A 2010-2225 Rev - B Page 41 of 59... - Page 42 A-6.1 CONTROL PANEL ASSEMBLY UNIT WITHOUT OCSI FRONT VIEW NOTE: USE THIS DRAWING ON UNITS AFTER SERIAL # 062-11663 Nuvo 0300-0300 Rev. B Page 42 of 59 2010-2225 Rev - B...
- Page 43 A-7 CONTROL PANEL ASSEMBLY UNIT WITH OCSI REAR VIEW NOTE: USE THIS DRAWING ON UNITS EARLIER THAN SERIAL # 062-11663 Nuvo 0300-0330 Rev. A 2010-2225 Rev - B Page 43 of 59...
- Page 44 A-7.1 CONTROL PANEL ASSEMBLY UNIT WITH OCSI REAR VIEW NOTE: USE THIS DRAWING ON UNITS AFTER SERIAL # 062-11663 0300-0330 R Page 44 of 59 2010-2225 Rev - B...
- Page 45 A-8 CONTROL PANEL ASSEMBLY STANDARD UNIT WITHOUT OCSI FRONT VIEW NUVO 0300-0300 Rev A 2010-2225 Rev - B Page 45 of 59...
- Page 46 A-9 CONTROL PANEL ASSEMBLY STANDARD UNIT WITHOUT OCSI REAR VIEW NUVO 0300-0300 Rev A Page 46 of 59 2010-2225 Rev - B...
-
Page 47: Air Tank Assembly
A-10 AIR TANK ASSEMBLY NOTE: USE THIS DRAWING ON UNITS EARLIER THAN SERIAL # 062-11663 0350-0300 R 2010-2225 Rev - B Page 47 of 59... - Page 48 A-10.1 AIR TANK ASSEMBLY NOTE: USE THIS DRAWING ON UNITS AFTER SERIAL # 062-11663 0350-0300 R Page 48 of 59 2010-2225 Rev - B...
-
Page 49: Front Cabinet Assembly
A-11 FRONT CABINET ASSEMBLY Nuvo 0500-0300 Rev. A 2010-2225 Rev - B Page 49 of 59... - Page 50 A-11.1 FRONT CABINET ASSEMBLY Nuvo 0500-0300 Rev. B Page 50 of 59 2010-2225 Rev - B...
-
Page 51: Rear Cabinet Assembly
A-12 REAR CABINET ASSEMBLY NUVO 0550-0300 REV A 2010-2225 Rev - B Page 51 of 59... - Page 52 A-12.1 REAR CABINET ASSEMBLY Nuvo 0550-0300 Rev. Page 52 of 59 2010-2225 Rev - B...
-
Page 53: Sieve Module
A-13 SIEVE MODULE ASSEMBLY NUVO 0600-0300 Rev A 2010-2225 Rev - B Page 53 of 59... - Page 54 REPLACEMENT PARTS LISTING Item numbers reference call-out bubbles on the illustrations Item Part Number Description Qty UOM BASE ASSEMBLY 9250-1000 BASE, NUVO 8300-8068 CASTER 9250-1066 FOAM,BASE ASSY. MAIN STRUCTURE ASSEMBLY 9250-1003 BASE, PLATE NUVO 9250-1004 STRUCTURE,MAIN NUVO 7206-0027 BATTERY, 9 VOLT 9250-1017 HOURMETER,UNV SNAP-IN 9250-1047...
- Page 55 COMPRESSOR ASSEMBLY 9250-1018 PLATE, COMPRESSOR 9250-1023 FAN, MUFFIN 110 VOLT 9250-1024 FAN, MUFFIN 230 VOLT 7355-3638 COMPRESSOR 2660 110V 7355-3639 COMPRESSOR 2660 230V 9250-1052 FITTING,BRASS 1/4"NPX3/8" TUBE 9250-1094 TUBE,HEAT EXCH. 3/8" O.D. 6191-5003 ELBOW, NYL 1/4 NPT X 1/2 HOSE 9250-1016 SPRING,COMPRESSOR VIBRATION 9250-1105...
- Page 56 9250-1038 NUT,HEX ,NICKEL 3/8"-27 9250-1021 HUMIDIFIER BLOCK 7854-6052 HOSE 5/32 X 11/32 X 2 LG SILIC 7854-6054 HOSE 5/32 X 11/32 X 10"LG SIL 7854-6055 HOSE 5/32 X 11/32 X 7"LG SIL CONTROL PANEL ASSEMBLY (STD – NON OCSI) 9250-1005 PANEL,CONTROL 9250-1090 BOARD, STD NON-OCSI...
- Page 57 9250-1053 HOSE 1/2"ID X 3/4"OD X 10.125" 9200-1006 FITTING, QUICK DISCONNECT 9200-1612 HOSE, 1/4 OD X 18 LG POWER CORD ASSEMBLY 9250-1311 CORD,POWER CONC (US) CORD,POWER CONC (Europe) 9250-1330 CABINET FRONTASSEMBLY 9250-1002 CABINET,FRONT NUVO 9250-1050 SCREW, 10-32 X 3/8 PAN HD.PHIL CABINET BACK ASSEMBLY 9250-1001 CABINET,BACK NUVO...
- Page 58 Nidek Medical Oxygen Concentrator Service and Maintenance Log Model Number ________________ Serial Number ___________________ Initial Inspection Between-Patient Maintenance 1. Upon receipt, check the unit for shipping 1. Remove oxygen tubing, cannula, and humidifier damage. Notify shipping company if damaged. bottle and discard.
- Page 59 Please maintain a log of all maintenance Serial Number__________Model_____________ activities performed on this unit. Alarms Additional Information (Work Done, Filter Changes, Date Hours % O2 Check Comments, etc) Inspection Prior to Putting Into Service In-Service Checks Medical device regulations require users and service personnel to notify manufacturers of any incidents that, if repeated, could cause injury to any person.
Need help?
Do you have a question about the Mark5 Nuvo and is the answer not in the manual?
Questions and answers