Table of Contents
Advertisement
Quick Links
Advertisement
Table of Contents

Related Manuals for Advantech EKI-6310GN


Summary of Contents for Advantech EKI-6310GN
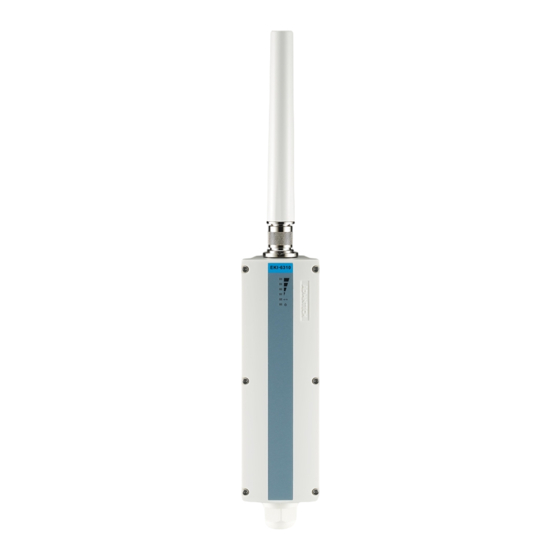
- Page 1 User Manual EKI-6310GN 2.4GHz 802.11b/g/n Outdoor AP/...
- Page 2 No part of this manual may be reproduced, copied, translated or transmitted in any form or by any means without the prior written permission of Advantech Co., Ltd. Information provided in this manual is intended to be accurate and reliable. How- ever, Advantech Co., Ltd.
- Page 3 Increase the separation between the equipment and receiver. Connect the equipment into an outlet on a circuit different from that to which the receiver is connected. Consult the dealer or an experienced radio/TV technician for help. EKI-6310GN User Manual...
- Page 4 Technical Support and Assistance Visit the Advantech web site at www.advantech.com/support where you can find the latest information about the product. Contact your distributor, sales representative, or Advantech's customer service center for technical support if you need additional assistance. Please have the following information ready before you call: –...
- Page 5 The sound pressure level at the operator's position according to IEC 704-1:1982 is no more than 70 dB (A). DISCLAIMER: This set of instructions is given according to IEC 704-1. Advantech disclaims all responsibility for the accuracy of any statements contained herein.
- Page 6 To keep you safe and install the hardware properly, please read and follow these safety precautions. If you are installing EKI-6310GN for the first time, for your safety as well as oth- ers', please seek assistance from a professional installer who has received safety training on the hazards involved.
-
Page 7: Table Of Contents
Pole Mounting ................... 7 Chapter Basic Settings ........9 Factory Default Settings................10 Table 3.1: EKI-6310GN Factory Default Settings...... 10 System Requirements................11 How to Login the Web-based Interface........... 11 Figure 3.1 Login Page ............... 11 Figure 3.2 Main Page ..............11 Basic Setting Scenario ................ - Page 8 Settings......55 Management ................... 56 Figure 7.1 Management Setting ..........56 Figure 7.2 Web Interface Setting..........56 Figure 7.3 Firmware Upgrade Setting ........57 Figure 7.4 Configuration Setting..........57 Figure 7.5 Load Factory Defaults Setting ........57 EKI-6310GN User Manual viii...
- Page 9 Intranet Coverage ................... 74 Figure A.2 Intranet coverage............74 Repeater ....................78 Figure A.3 Repeater usage ............78 Long Distance Point-to-point..............83 Figure A.4 Long distance Transition .......... 83 Fast Roaming..................88 Figure A.5 AGV - Fast Roaming ..........88 EKI-6310GN User Manual...
- Page 10 EKI-6310GN User Manual...
-
Page 11: Chapter 1 Overview
Chapter Overview... -
Page 12: Introduction
Introduction EKI-6310GN is a feature rich wireless AP/ CPE which provides a reliable wireless connectivity for industrial environments. The PoE helps to connect to PoE switch directly. As an 802.11n compliant device, EKI-6310GN provides 3 times higher data rates than legacy 802.11g devices. EKI-6310GN effectively improves the reliability of wireless connectivity, especially in applications that need high reliability and high throughput data transmission. -
Page 13: Packing List
EKI-6310GN ×1 Pole Mounting Ring ×1 PoE Adapter ×1 Start up manual ×1 User's manual CD ×1 RSMA Omni antenna ×1 EKI-6310GN User Manual... - Page 14 EKI-6310GN User Manual...
-
Page 15: Chapter 2 Installation
Chapter Installation... -
Page 16: Preparation Before Installation
To keep you safe and install the hardware properly, please read and follow these safety precautions. 2. If you are installing EKI-6310GN for the first time, for your safety as well as others’, please seek assistance from a professional installer who has received safety training on the hazards involved. -
Page 17: Hardware Installation
Hardware Installation Connect up The bottom of the EKI-6310GN is a movable cover. Grab the cover and pull it back harder to take it out as the figure shown below. Plug a standard Ethernet cable into the RJ45 port. Slide the cover back to seal the bottom of the EKI-6310GN. - Page 18 EKI-6310GN User Manual...
-
Page 19: Chapter 3 Basic Settings
Chapter Basic Settings... -
Page 20: Factory Default Settings
Factory Default Settings We’ll elaborate the EKI-6310GN factory default settings. You can re-acquire these parameters by default. If necessary, please refer to the “Restore Factory Default Set- tings”. Table 3.1: EKI-6310GN Factory Default Settings Features Factory Default Settings Username admin... -
Page 21: System Requirements
Enter the username (Default: admin) and password (Default: admin) respec- tively and click "Login" to login the main page of EKI-6310GN. As you can see, this management interface provides three main options in the gray bar above, which are Status, Advanced and Language. Most functions are configured in 'Advanced' option. -
Page 22: Basic Setting Scenario
You can configure your devices to different roles in following scenario. Configure 'operation mode' of your device. You can configure EKI-6310GN as four different modes - AP Router (router connection), AP Bridge (access point), Client Router (WISP - wireless Internet Service Provider) and Client Bridge (WiFi client). - Page 23 Figure 3.4 Network Settings Figure 3.5 WAN Settings Figure 3.6 LAN Setting EKI-6310GN User Manual...
- Page 24 Please configure your wireless access point setting in 'Basic' options if you use as access point. Please configure your wireless client setting in 'Basic' options if you use as client. Figure 3.7 Basic Wireless Access Point Settings EKI-6310GN User Manual...
- Page 25 Figure 3.8 Basic Wireless Client Settings EKI-6310GN User Manual...
- Page 26 EKI-6310GN User Manual...
-
Page 27: Chapter 4 Network Settings
Chapter Network Settings... -
Page 28: Router
6310GN as router. In router usage, the Ethernet LAN port will be your WAN interface and wireless LAN will be your LAN interface. EKI-6310GN supports IPv4 or IPv6 in WAN to access the internet. If you use IPv6 in Internet access, please follow the Chapter 4.1.3 to configure your WAN network setting. - Page 29 DHCP service to assign your Router an IP address when you connect to the Internet. Figure 4.3 Cable/Dynamic IP Settings MTU: Maximum transmission unit (MTU) is the largest protocol data unit that the layer can pass onwards. You need to configure this parameter based on your networking. EKI-6310GN User Manual...
- Page 30 IP addresses. To specify a DNS server, type the IP addresses in the text field provided. Otherwise, leave the text field blank. Secondary DNS Server: The IP address of the Secondary Domain Name Server. EKI-6310GN User Manual...
- Page 31 IP addresses. To specify a DNS server, type the IP addresses in the text field provided. Otherwise, leave the text field blank. Secondary DNS Server: The IP address of the Secondary Domain Name Server. EKI-6310GN User Manual...
- Page 32 IP addresses. To specify a DNS server, type the IP addresses in the text field provided. Otherwise, leave the text field blank. Secondary DNS Server: The IP address of the Secondary Domain Name Server. EKI-6310GN User Manual...
-
Page 33: Lan
'DHCP Relay', you will need to configure the DHCP Relay server and your device will relay the DHCP request to DHCP server. DHCP Relay: Assign the IP of DHCP server in your network, and EKI-6310GN will forward DHCP request to DHCP server that you assign. -
Page 34: Ipv6
IPv6 Address and Subnet assigned by your ISP. (A subnet with prefix /64 is supported in LAN.) IPV6 AutoConfiguration: EKI-6310GN autonomously configures its own Link- Local address. Router solicitation is sent by booting nodes to request RAs for configuring the interfaces. - Page 35 SLAAC SLAAC is IPv6 Stateless Address Auto-configuration. EKI-6310GN will use this SLAAC technology to get prefix and generate Host ID (by EUI-64 algorithm). EKI-6310GN will use those two information as IPv6 address. Network ID (Prefix): 64bits Host ID: 64bits IPv6 Address: Figure 4.10 SLAAC Settings...
- Page 36 IPv6 Address and Subnet assigned by your ISP. (A subnet with prefix /64 is supported in LAN.) IPV6 AutoConfiguration: EKI-6310GN autonomously configures its own Link- Local address. Router solicitation is sent by booting nodes to request RAs for configuring the interfaces.
- Page 37 IPv6 Address and Subnet assigned by your ISP. (A subnet with prefix /64 is supported in LAN.) IPV6 AutoConfiguration: EKI-6310GN autonomously configures its own Link- Local address. Router solicitation is sent by booting nodes to request RAs for configuring the interfaces.
- Page 38 IPv6 Address and Subnet assigned by your ISP. (A subnet with prefix /64 is supported in LAN.) IPV6 AutoConfiguration: EKI-6310GN autonomously configures its own Link- Local address. Router solicitation is sent by booting nodes to request RAs for configuring the interfaces.
- Page 39 IPv6 Address and Subnet assigned by your ISP. (A subnet with prefix /64 is supported in LAN.) IPV6 AutoConfiguration: EKI-6310GN autonomously configures its own Link- Local address. Router solicitation is sent by booting nodes to request RAs for configuring the interfaces.
-
Page 40: Advanced Routing
Figure 4.15 IPv6 Pass Through Settings 4.1.4 Advanced Routing EKI-6310GN allows you to configure advanced routing feature. Figure 4.16 Advanced Routing Destination: The IP address of packets that can be routed. Type: Defines the type of destination. (Host: Signal IP address / Net: Portion of Net- work) Netmask: Displays the sub network associated with the destination. -
Page 41: Dhcp Static Leased (Static Dhcp)
4.1.5 DHCP STATIC LEASED (STATIC DHCP) EKI-6310GN provides a solution to this mess: static DHCP, also known as DHCP res- ervation. While configuring your router for DHCP, you have the ability to enter the MAC addresses of Client and enter which IP address to assign them. EKI-6310GN will automatically take care of rest. - Page 42 DHCP Relay server and your device will relay the DHCP request to DHCP server. DHCP Relay: Assign the IP of DHCP server in your network, and EKI-6310GN will forward DHCP request to DHCP server that you assign.
-
Page 43: Wireless Access Point Settings
Chapter Wireless Access Point Settings... -
Page 44: Access Point
Access Point and WDS Repeater. Access Point In Access Point Mode, the EKI-6310GN connects your wireless devices together, and it also allows a connected wired device to connect to your other devices wire- lessly. This can be useful if you already had an existing Internet router that does not... -
Page 45: Ssid Security Settings
Hide SSID: Under AP mode, hiding network name is necessary when you are in a wireless environment that may have potential risk. By hided broadcast SSID, the STA CAN NOT scan and find EKI-6310GN, so that malicious attack by some illegal STA could be avoided. - Page 46 WPA Algorithms: Select the cipher mode either TKIP, AES or Auto-selection Key Renewal Interval: The period of time that EKI-6310GN will use the same key before a new one is generated. The recommend value is 3600 seconds (1 hour).
- Page 47 WPA Algorithms: Select the cipher mode either TKIP, AES or Auto-selection Key Renewal Interval: The period of time that EKI-6310GN will use the same key before a new one is generated. The recommend value is 3600 seconds (1 hour).
- Page 48 WPA Algorithms: Select the cipher mode either TKIP, AES or Auto-selection Key Renewal Interval: The period of time that EKI-6310GN will use the same key before a new one is generated. The recommend value is 3600 seconds (1 hour).
- Page 49 WPA-PSK-AUTO supports stations configured as WPA-PSK or WPA2-PSK. WPA Algorithms: Select the cipher mode either TKIP, AES or Auto-selection Key Renewal Interval: The period of time that EKI-6310GN will use the same key before a new one is generated. The recommend value is 3600 seconds (1 hour).
-
Page 50: Wds Access Point
Figure 5.11 WPS Setting WDS Access Point In WDS Access Point Mode, the EKI-6310GN will work as Access Point Mode, but it supports Wireless Distribution System (WDS) function in this mode. (WDS) allows you to make a completely wireless infrastructure. There're three types of application of WDS: WDS AP, WDS Repeater and WDS Client in EKI-6310GN. -
Page 51: Basic Wireless Settings
Distance: To decrease the chances of data retransmission at long distance, the EKI- 6310GN can automatically adjust proper ACK timeout value by specifying distance of the two nodes. ACK/CTS Timeout: ACK/CTS timeout will be adjusted by distance automatically BG Protection Mode: The time period for the IP address lease EKI-6310GN User Manual... -
Page 52: Ssid Security Settings
Hide SSID: Under AP mode, hiding network name is necessary when you are in a wireless environment that may have potential risk. By hided broadcast SSID, the STA CAN NOT scan and find EKI-6310GN, so that malicious attack by some illegal STA could be avoided. - Page 53 WPA Algorithms: Select the cipher mode either TKIP, AES or Auto-selection Key Renewal Interval: The period of time that EKI-6310GN will use the same key before a new one is generated. The recommend value is 3600 seconds (1 hour).
- Page 54 WPA Algorithms: Select the cipher mode either TKIP, AES or Auto-selection Key Renewal Interval: The period of time that EKI-6310GN will use the same key before a new one is generated. The recommend value is 3600 seconds (1 hour).
- Page 55 WPA Algorithms: Select the cipher mode either TKIP, AES or Auto-selection Key Renewal Interval: The period of time that EKI-6310GN will use the same key before a new one is generated. The recommend value is 3600 seconds (1 hour).
- Page 56 WPA-PSK-AUTO supports stations configured as WPA-PSK or WPA2-PSK. WPA Algorithms: Select the cipher mode either TKIP, AES or Auto-selection Key Renewal Interval: The period of time that EKI-6310GN will use the same key before a new one is generated. The recommend value is 3600 seconds (1 hour).
-
Page 57: Wds Repeater
Figure 5.22 WPS Setting WDS Repeater In WDS Repeater Mode, the EKI-6310GN will set to build communication with both wireless networks and other wireless equipment. WDS AP plays as access point function, and only WDS Repeater and WDS client can connect to WDS AP. -
Page 58: Basic Wireless Settings
WDS AP or WDS Repeater, you will only build-up the wireless backhaul connection to this specific WDS AP or WDS Repeater. If not, EKI-6310GN will search available WDS AP or WDS Repeater and build up the connection to the WDS AP or WDS Repeater with best signal automatically. -
Page 59: Ssid I / Ssid Ii Security Settings
Hide SSID: Under AP mode, hiding network name is necessary when you are in a wireless environment that may have potential risk. By hided broadcast SSID, the STA CAN NOT scan and find EKI-6310GN, so that malicious attack by some illegal STA could be avoided. - Page 60 EKI-6310GN User Manual...
-
Page 61: Wireless Client Settings
Chapter Wireless Client Settings... -
Page 62: Client / Wds Client
Client / WDS Client This mode is for Dynamic LAN-to-LAN Bridging or Device-to-LAN scenarios. The AP Client automatically establishes bridge links with other APs. EKI-6310GN forwards packets between its Ethernet interface (LAN or WAN) and wireless interface (WLAN) to connect wired hosts on the Ethernet side with wireless host(s) on the wireless side. - Page 63 Network Type: There are two types of network modes. Infrastructure - All wire- less clients will connect to an access point or wireless router. Ad-Hoc - Directly connecting to another computer, for peer-to-peer communication, using wireless network adapters on each computer, such as two or more EKI-6310GN. EKI-6310GN User Manual...
- Page 64 Figure 6.4 ACK Timeout Setting Distance: Specifies the transmission distance or maximum range between two EKI-6310GN devices. This parameter should be set properly, especially for long-distance communication. ACK/CTS Timeout: System will calculate the ACK/CTS timeout according to the distance you setup in previous item.
-
Page 65: Advanced Settings
Chapter Advanced Settings... -
Page 66: Management
Do not turn off EKI-6310GN or press the Reset button while the firmware is being upgraded, otherwise, EKI-6310GN may be dam- aged. - Page 67 EKI-6310GN. Figure 7.4 Configuration Setting Load Factory Defaults Return the configuration of current EKI-6310GN to factory default setting. You can refer to factory default parameters in Chapter 3.1. Note! When you return the configuration of EKI-6310GN to factory default parameters, the WAN and LAN information will also change to default parameters.
-
Page 68: Advanced Setting
Reboot Reboot your EKI-6310GN. Figure 7.6 Reboot Setting Scheduling Reset System will arrange the reboot according your scheduling (Duration time: 24 hour time duration). Figure 7.7 Scheduling Reset Setting Advanced Setting In this chapter, you can configure the system time and time zone, DDNS networking and remote management including of SNMP and Telnet/SSH. - Page 69 DDNS The DDNS feature allows you to host a server (Web, FTP, Game Server, etc…) behind EKI-6310GN using a domain name that you have purchased with your dynamically assigned IP address. Most broadband Internet Service Providers assign dynamic (changing) IP addresses. Using a DDNS service provider, your friends can enter in your domain name to connect to your server no matter what your IP address is.
- Page 70 SNMP can be used to manage your device in remote site and monitor traffic and statistics of EKI-6310GN. The EKI-6310GN supports SNMP v1 or v2c. Default setting is 'Disabled'.
-
Page 71: System Log
Ping Tool The Ping Test is used to send ping packets to test if your EKI-6310GN is con- nected to the Internet. Enter the IP address that you wish to ping and how many times do you want to ping. - Page 72 It is the diagnostic tool for displaying the route (path) to your destination and measuring transmit delays of packets across an IP network. It is the same com- mand as 'tracert' in windows system. URL: destination URL that you wish to trace Figure 7.15 Trace Route tool EKI-6310GN User Manual...
- Page 73 Throughput It is the sample tool to measure the throughput that you access the Internet through your ISP vender. In EKI-6311GN, it will connect to 'www.speedtest.net' website to test the throughput. Figure 7.16 Throughput tool EKI-6310GN User Manual...
- Page 74 EKI-6310GN User Manual...
-
Page 75: Chapter 8 Application Rules And Firewall
Chapter Application Rules And Firewall... -
Page 76: Mac/Port/Ip Filtering
MAC addresses, IP addresses and ports. EKI-6310GN allows you define a sequential list of permit or deny filtering rules. This device tests ingress packets against the filter rules one by one. A packet will be accepted as soon as it matches a permit rule, or dropped as soon as it matches a deny rule. -
Page 77: Virtual Server
Public Port: The protocol port number on the router's WAN interface. Protocol: Specifies the protocol to forward, either TCP, UDP, or TCP&UDP. Comment: Enter a useful comment to help identify the port forwarding service on the network. EKI-6310GN User Manual... -
Page 78: Dmz
Current Virtual Servers in System: The Current Port Forwarding Table displays the entries that are allowed to forward packets through EKI-6310GN's firewall. DMZ is to specified host PC on the local network to access the Internet without any firewall protection. Some Internet applications, such as interactive games or video conferencing, may not function properly behind the firewall. -
Page 79: Content Filter
Network Address Translation: NAT is the process of modifying IP address informa- tion in IP packet headers while in transit across a traffic routing device. Content Filter EKI-6310GN provides a variety of options for blocking Internet access based on con- tent, URL and host name. Figure 8.6 URL filter Web URL Filter Settings: By filtering inbound Uniform Resource Locators (URLs) the risk of compromising the network can be reduced. - Page 80 HOST.com. Enter the Keyword then click "Add." Current Host Filters: Displays current Host filter. Add a Host Filter: Enters the keyword for a host filtering. Delete a Host Filter: Deletes a Host filter entry from the list. EKI-6310GN User Manual...
-
Page 81: Appendix A Application Wizard
Appendix Application Wizard... -
Page 82: Hotspot
In Hotspot application, there are various customers who need to access the Internet. EKI-6310GN can effectively control the access to the Internet. Application Architecture Here is the architecture example when you want to use EKI-6310GN for WiFi hotspot application. Figure A.1 WiFi Hotspot ... - Page 83 Frequency (Channel): Channel 1 Network Mode: WiFi 11gn HT20 (It can support 802.11b / 802.11g / 802.11n end devices) Network Name: EKI-6310GN (You can define your own network name) Encryption Settings: WPA2-PSK (Suggest that you need use WPA/WPA2, not WEP for security consideration)
-
Page 84: Intranet Coverage
In this application, your clients or wireless stations don't access the Internet, and it just needs to access the Intranet server. Application Architecture Here is the architecture example when you want to use EKI-6310GN for Intranet coverage. Figure A.2 Intranet coverage ... - Page 85 Network Mode: WiFi 11gn HT20 (It can support 802.11b / 802.11g / 802.11n end devices) Network Name: EKI-6310GN (3 APs shall have same Network name SSID) Encryption Settings: WPA2-PSK (Suggest that you need use WPA/WPA2, not WEP for security consideration)
- Page 86 Device: EKI-6310GN_2 Configure EKI-6310GN as "AP Bridge" mode in "Advanced" ' "Operation Mode" page. Configure Ethernet IP Address for your LAN network in "Advanced" ' "Network Setting" ' "LAN". We assume that all devices will locate in 192.168.2.xx network. You need to assign each AP with specific IP Address '192.168.2.2'.
- Page 87 Device: EKI-6310GN_3 Configure EKI-6310GN as "AP Bridge" mode in "Advanced" ' "Operation Mode" page. Configure Ethernet IP Address for your LAN network in "Advanced" ' "Network Setting" ' "LAN". We assume that all devices will locate in 192.168.2.xx network. You need to assign each AP with specific IP Address '192.168.2.3'.
-
Page 88: Repeater
In some application scenario, you are hard to deployment wired cable between con- trol room and your APs or you want to extend the coverage the coverage of existed Wireless WiFi network. EKI-6310GN that can work as Repeater mode is the best solution. - Page 89 Configuration Guideline Device: EKI-6310GN_1 Configure EKI-6310GN as "AP Bridge" mode in "Advanced" ' "Operation Mode" page. Configure Ethernet IP Address '192.168.2.1' for your LAN network in "Advanced" ' "Network Setting" ' "LAN". Configure SSID and wireless information that another EKI-6310GN can find.
- Page 90 Network Mode: WiFi 11gn HT20 (It can support 802.11b / 802.11g / 802.11n end devices) Root AP SSID (SSID II): EKI-6310GN (Shall be same as the SSID of WDS Access Point (Device: EKI-6310GN_1)) Encryption Settings (SSID II): WPA2-PSK (Shall be same as the encryption...
- Page 91 Pre-Shared Key: 1234567890 (key that Device: EKI-6310GN_2 wants to pro- vide. It can be different of network name of Device: EKI-6310GN_1. It means that Device: EKI-6310GN_2 will connect to Device: EKI-6310GN_1 in wireless backhaul and provide different network coverage) EKI-6310GN User Manual...
- Page 92 Network Mode: WiFi 11gn HT20 (It can support 802.11b / 802.11g / 802.11n end devices) Root AP SSID (SSID II): EKI-6310GN (Shall be same as the SSID of WDS Repeater (Device: EKI-6310GN_2)) Encryption Settings (SSID II): WPA2-PSK (Shall be same as the encryption...
-
Page 93: Long Distance Point-To-Point
Long Distance Point-to-point If you want to exchange the data between two sites and the distance between two sites is 6 miles far away, EKI-6310GN can help you to reach the target. Application Architecture Here is the architecture example when you want to use EKI-6310GN for Long- Distance application. - Page 94 Configuration Guideline Device: EKI-6310GN_1 Configure EKI-6310GN as "AP Bridge" mode in "Advanced" ' "Operation Mode" page. Configure Ethernet IP Address '192.168.2.1' for your LAN network in "Advanced" ' "Network Setting" ' "LAN". Configure SSID and wireless information that another EKI-6310GN can find.
- Page 95 Device: EKI-6310GN_2 Configure EKI-6310GN as "Client Bridge" mode in "Advanced" ' "Operation Mode" page. Configure Ethernet IP Address '192.168.2.2' for your LAN network in "Advanced" ' "Network Setting" ' "LAN". EKI-6310GN User Manual...
- Page 96 Configure client profile to connect with Access Point in "Advanced" ' "Wireless settings" ' "Profile Settings". You can do the Site Survey to find the SSID of matched Access Point on the click of "Site Survey" button if you already had installed the EKI-6310GN in right location. EKI-6310GN User Manual...
- Page 97 Enter the encryption information. Profile Name: EKI-6310GN (EKI-6310GN will fill-in the profile name same as SSID when you select access point through site survey) SSID: EKI-6310GN (EKI-6310GN will fill-in the SSID when you select access point through site survey) BSSID: Fill-in the MAC address of Access Point (It will help to have stable con- nection, because client will only be able to specific AP with same BSSID.)
-
Page 98: Fast Roaming
Fast Roaming In some application, clients are in moving stage, such as AGV application. Application Architecture Here is the architecture example when you want to use EKI-6310GN for AGV application. Figure A.5 AGV - Fast Roaming Configuration Guideline Device: EKI-6310GN_1 Configure EKI-6310GN as "AP Bridge"... - Page 99 Wireless Mode: Access Point Frequency (Channel): Channel 1 Network Mode: WiFi 11gn HT20 (It can support 802.11b / 802.11g / 802.11n end devices) Network Name: EKI-6310GN (4 APs shall have same Network name SSID) Encryption Settings: Disable EKI-6310GN User Manual...
- Page 100 Device: EKI-6310GN_2 Configure EKI-6310GN as "AP Bridge" mode in "Advanced" ' "Operation Mode" page. Configure Ethernet IP Address for your LAN network in "Advanced" ' "Network Setting" ' "LAN". We assume that all devices will locate in 192.168.2.xx network. You need to assign each AP with specific IP Address '192.168.2.2'.
- Page 101 Device: EKI-6310GN_3 Configure EKI-6310GN as "AP Bridge" mode in "Advanced" ' "Operation Mode" page. Configure Ethernet IP Address for your LAN network in "Advanced" ' "Network Setting" ' "LAN". We assume that all devices will locate in 192.168.2.xx network. You need to assign each AP with specific IP Address '192.168.2.3'.
- Page 102 Device: EKI-6310GN_2 Configure EKI-6310GN as "AP Bridge" mode in "Advanced" ' "Operation Mode" page. Configure Ethernet IP Address for your LAN network in "Advanced" ' "Network Setting" ' "LAN". We assume that all devices will locate in 192.168.2.xx network. You need to assign each AP with specific IP Address '192.168.2.2'.
- Page 103 Device: EKI-6310GN_4 Configure EKI-6310GN as "AP Bridge" mode in "Advanced" ' "Operation Mode" page. Configure Ethernet IP Address for your LAN network in "Advanced" ' "Network Setting" ' "LAN". We assume that all devices will locate in 192.168.2.xx network. You need to assign each AP with specific IP Address '192.168.2.4'.
- Page 104 Device: EKI-6310GN_5 Configure EKI-6310GN as "Client Bridge" mode in "Advanced" ' "Operation Mode" page. Configure Ethernet IP Address '192.168.2.5' for your LAN network in "Advanced" ' "Network Setting" ' "LAN". Configure client profile to connect with Access Point in "Advanced" ' "Wireless settings"...
- Page 105 Enter the encryption information. Profile Name: EKI-6310GN (EKI-6310GN will fill-in the profile name same as SSID when you select access point through site survey) SSID: EKI-6310GN (EKI-6310GN will fill-in the SSID when you select access point through site survey) BSSID: Please keep this field as EMPTY. Once you enter the BSSID, it will only connect to specific Access Point.
- Page 106 No part of this publication may be reproduced in any form or by any means, electronic, photocopying, recording or otherwise, without prior written permis- sion of the publisher. All brand and product names are trademarks or registered trademarks of their respective companies. © Advantech Co., Ltd. 2014...
- Page 107 Mouser Electronics Authorized Distributor Click to View Pricing, Inventory, Delivery & Lifecycle Information: Advantech EKI-6310GN-AE...
Need help?
Do you have a question about the EKI-6310GN and is the answer not in the manual?
Questions and answers