
Related Manuals for Entrust CE875


Summary of Contents for Entrust CE875
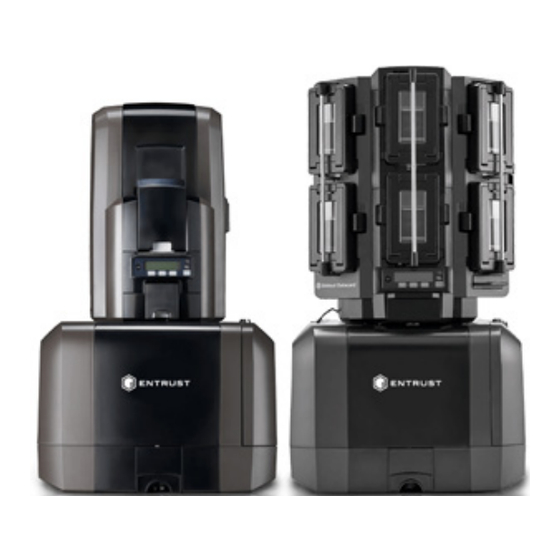
- Page 1 All manuals and user guides at all-guides.com Quick Install Guide CE875™ Retransfer Card Printer December 2020 527762-001EN, Rev H...
- Page 2 All manuals and user guides at all-guides.com Attention: CE870™ System Users If you are converting your CE870 system to a CE875 Instant Issuance System, refer to the CE870 to CE875 System Upgrade Installation Instructions located in the Upgrade Kit box.
-
Page 3: Unpack The Printer
All manuals and user guides at all-guides.com Quick Install Guide For detailed installation instructions, refer to the CR825 and CE875 Instant Issuance System Installation and Administrator’s Guide. Unpack the Printer Lift printer from the sides only 527762-001_H... -
Page 4: Unpack The Embosser
All manuals and user guides at all-guides.com CE875 Instant Issuance System Unpack the Embosser 527762-001_H... -
Page 5: Remove Shipping Items From The Embosser
All manuals and user guides at all-guides.com Quick Install Guide Remove Shipping Items From the Embosser 527762-001_H... -
Page 6: Secure The Embosser
All manuals and user guides at all-guides.com CE875 Instant Issuance System Secure the Embosser 527762-001_H... - Page 7 All manuals and user guides at all-guides.com Quick Install Guide Install the Optional Multi-Hopper 1. Unpack the multi-hopper 527762-001_H...
- Page 8 All manuals and user guides at all-guides.com CE875 Instant Issuance System Install the Optional Multi-Hopper (cont.) 2. Prepare the multi-hopper Restraining Pins Multi-Hopper Bottom Multi-Hopper Top Save the restraining pins after removing them from the multi- hopper. They are required if you need to repackage and return the multi-hopper for service.
- Page 9 All manuals and user guides at all-guides.com Quick Install Guide Install the Optional Multi-Hopper (cont.) 3. Assemble the multi-hopper printer Multi-Hopper Back Multi-Hopper Attachment Hooks Hopper Attachment Slots 1 in. 25.4 mm 527762-001_H...
-
Page 10: Assemble The System
All manuals and user guides at all-guides.com CE875 Instant Issuance System Assemble the System Interconnect Cable Lock Unlock Connect the interconnect cable. 527762-001_H... -
Page 11: Load The Indent Ribbon
All manuals and user guides at all-guides.com Quick Install Guide Load the Indent Ribbon Click Click 527762-001_H... -
Page 12: Load The Topping Foil
All manuals and user guides at all-guides.com CE875 Instant Issuance System Load the Topping Foil Click Click 527762-001_H... - Page 13 All manuals and user guides at all-guides.com Quick Install Guide Install the Embosser Cartridges 527762-001_H...
-
Page 14: Connect The Power Cords
All manuals and user guides at all-guides.com CE875 Instant Issuance System Connect the Power Cords 527762-001_H... -
Page 15: Power On The System
All manuals and user guides at all-guides.com Quick Install Guide Power On the System The printer may or may not require activation. • If Print job queue is deactivated displays on the LCD panel, continue with “Activate the System” on page •... - Page 16 All manuals and user guides at all-guides.com CE875 Instant Issuance System Activate the System Printer Serial Number Embosser Serial Number Call 1-800-328-3996 for the activation code. 527762-001_H...
- Page 17 All manuals and user guides at all-guides.com Quick Install Guide Activate the System (cont.) Press until correct digit displays Repeat 6 & 7 for each digit 527762-001_H...
-
Page 18: Clean The Printer
All manuals and user guides at all-guides.com CE875 Instant Issuance System Clean the Printer Remove the isopropanol cleaning card from the ink ribbon package. Continue with: Isopropanol “Single-Hopper Printer” Cleaning Card “Multi-Hopper Printer” on page 17 Single-Hopper Printer Remove the cleaning card from its package. - Page 19 All manuals and user guides at all-guides.com Quick Install Guide Clean the Printer (cont.) Multi-Hopper Printer Remove the cleaning card from its package. Isopropanol Cleaning Card 1. Pull out the multi-hopper exception slide and insert the cleaning card. 2. Push in the exception slide. If the cleaning card appears bowed, insert it as shown.
- Page 20 All manuals and user guides at all-guides.com CE875 Instant Issuance System Clean the Printer (cont.) Start the Cleaning Cycle 527762-001_H...
-
Page 21: Install The Ink Ribbon
All manuals and user guides at all-guides.com Quick Install Guide Install the Ink Ribbon 527762-001_H... - Page 22 All manuals and user guides at all-guides.com CE875 Instant Issuance System Install the Ink Ribbon (cont.) Click Click 527762-001_H...
-
Page 23: Install The Cleaning Sleeve
All manuals and user guides at all-guides.com Quick Install Guide Install the Cleaning Sleeve 527762-001_H... - Page 24 All manuals and user guides at all-guides.com CE875 Instant Issuance System Install the Cleaning Sleeve (cont.) 527762-001_H...
- Page 25 All manuals and user guides at all-guides.com Quick Install Guide Install the Retransfer Film Click 527762-001_H...
- Page 26 All manuals and user guides at all-guides.com CE875 Instant Issuance System Install the Retransfer Film (cont.) Click 527762-001_H...
- Page 27 All manuals and user guides at all-guides.com Quick Install Guide Store the User Reference Guide 527762-001_H...
-
Page 28: Load Cards
All manuals and user guides at all-guides.com CE875 Instant Issuance System Load Cards “Single-Hopper Printer” “Multi-Hopper Printer” on page 27 Single-Hopper Printer 527762-001_H... - Page 29 All manuals and user guides at all-guides.com Quick Install Guide Load Cards (cont.) Multi-Hopper Printer 1. Unlock the multi-hopper lock. 2. Slide the lock bar release button (B1) to the left. 3. Rotate a lock bar to the left. 527762-001_H...
- Page 30 All manuals and user guides at all-guides.com CE875 Instant Issuance System Load Cards (cont.) 4. Press the cartridge release button at the top of the cartridge and open the cartridge door. 5. Lift the card weight to the top of the cartridge and pull it forward until it locks in position.
-
Page 31: Set A Static Ip Address
All manuals and user guides at all-guides.com Quick Install Guide Connect the Network Data Cable Set a Static IP Address IP Address _____________________________________ Subnet Mask __________________________________ Gateway Address _______________________________ 527762-001_H... - Page 32 All manuals and user guides at all-guides.com CE875 Instant Issuance System Set a Static IP Address (cont.) Press until correct digit displays Repeat 10 & 11 for each section 527762-001_H...
- Page 33 All manuals and user guides at all-guides.com Quick Install Guide Set a Static IP Address (cont.) Press until correct digit displays Press until correct digit displays Repeat 18 & 19 for each section Repeat 14 & 15 for each section Press the Power button to power off the printer.
- Page 34 All manuals and user guides at all-guides.com CE875 Instant Issuance System Print a Test Card (Optional) 527762-001_H...
-
Page 35: Next Steps
All manuals and user guides at all-guides.com Quick Install Guide Next Steps Refer to the printer’s Installation and Administrator’s Guide for • complete installation instructions. • Define the printer to CardWizard Administrator. Refer to the CardWizard Issuance Software and Card Printer Setup Guide. •... - Page 36 Entrust, Sigma and the hexagon design are trademarks, registered trademarks and/or service marks, and Datacard is a registered trademark and service mark, of the Entrust Corporation in the United States and other countries. All other trademarks are the property of their respective owners.
Need help?
Do you have a question about the CE875 and is the answer not in the manual?
Questions and answers