
Subscribe to Our Youtube Channel
Related Manuals for Entrust CE840


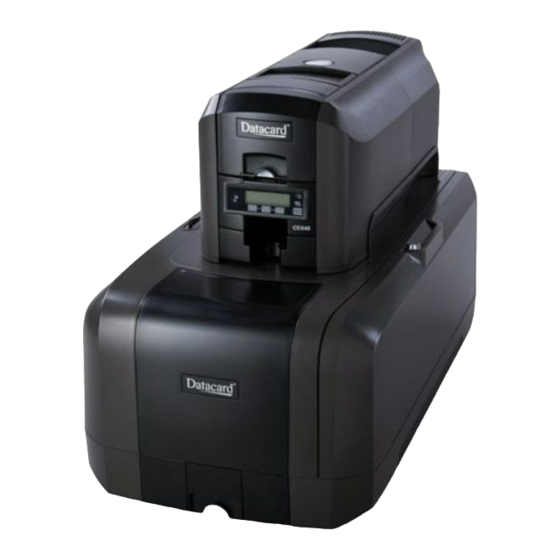
Summary of Contents for Entrust CE840
- Page 1 Quick Install Guide CE840™ Instant Issuance System December 2020 527261-002, Rev H...
-
Page 2: Select A Location For The Printer
CE840 Instant Issuance System Refer to the printer’s Installation and Administrator’s Guide found on the Owner’s Library CD for detailed installation instructions. 1. Select a Location for the Printer • Install the printer in a location that is clean and well ventilated, free of vibration or shock. - Page 3 Quick Install Guide 2. Unpack and Secure the System a. Remove the printer and the embosser from their shipping cartons. Printer Embosser 527261-002H...
- Page 4 CE840 Instant Issuance System b. Unlock the printer. c. Unlock the embosser and remove the indent ribbon and topping foil cartridges. 527261-002H...
- Page 5 Quick Install Guide d. Remove the foam “T” and block inserts used to secure the embosser topping and transport mechanisms during shipping. 527261-002H...
- Page 6 CE840 Instant Issuance System e. Secure the embosser to the work surface (if required). Refer to the printer’s Installation and Administrator’s Guide for detailed installation instructions and measurements. Bolt Washer Lock Nut Work Surface 527261-002H...
-
Page 7: Assemble The Printer And Embosser
Quick Install Guide 3. Assemble the Printer and Embosser a. Locate the interconnect cable in the cable routing area of the embosser, and make sure that it remains accessible. b. Slide the printer locking lever inside the embosser to the left to move the mounting lock to the unlocked position. -
Page 8: Connect The Power Cords
CE840 Instant Issuance System Connect the interconnect cable from the embosser to the lower data port on the printer. Data Port Interconnect Cable 4. Connect the Power Cords a. Connect the printer power cord into the printer and into the power supply. - Page 9 Quick Install Guide c. Connect the embosser power cord into the embosser and into the power supply. d. Plug the power supply cord into the power outlet. 5. Connect the Network Data Cable The cable is ordered separately. 527261-002H...
-
Page 10: Load Supplies
CE840 Instant Issuance System 6. Load Supplies Supplies are ordered separately. a. Load the indent ribbon onto the cartridge. Do not separate 527261-002H... - Page 11 Quick Install Guide b. Load the topping foil onto the cartridge. 527261-002H...
- Page 12 CE840 Instant Issuance System c. Replace the cartridges in the embosser. d. Remove the print ribbon cartridge. 527261-002H...
- Page 13 Quick Install Guide e. Load the cleaning sleeve onto the cartridge. If your printer is equipped with the optional printhead, load the print ribbon onto the cartridge. g. Install the print ribbon cartridge in the printer. 527261-002H...
-
Page 14: Power On The System
CE840 Instant Issuance System h. Load the cards in the hopper. Refer to the diagram inside the input hopper for the correct orientation. Close and lock all printer and embosser doors. 7. Power On the System a. Press the power button on the front panel to power on the system. - Page 15 Quick Install Guide 8. Retrieve the Network IPv4 Address a. Use the front panel to find the printer IP address. You need the printer IP address information if you install the Card Printer Driver and to access Printer Manager from a browser window.
- Page 16 CE840 Instant Issuance System 9. Install the Card Printer Driver (Optional) If you plan to use the CE840 system with the XPS Card Printer Driver, refer to the XPS Card Printer Driver User’s Guide for installation and setup instructions. Make sure that the printer IP address is available.
- Page 17 Quick Install Guide c. Select TroubleShooting >Test Card. d. Select the Emboss test card option and the test card to run. Each test card tests the position and quality of embossed and indented characters. Refer to the printer’s Installation and Administrator’s Guide for a description of the test cards.
-
Page 18: Next Steps
CE840 Instant Issuance System 11. Next Steps • Define the printer to the card application you are using, if necessary. If you are using the Card Printer Driver, refer to the Driver User’s Guide for setup instructions. • Contact your system administrator to set up the rest of the system. - Page 19 Quick Install Guide Notes 527261-002H...
- Page 20 Entrust, Sigma and the hexagon design are trademarks, registered trademarks and/or service marks, and Datacard is a registered trademark and service mark, of the Entrust Corporation in the United States and other countries. All other trademarks are the property of their respective owners.
Need help?
Do you have a question about the CE840 and is the answer not in the manual?
Questions and answers