Table of Contents
Advertisement
Advertisement
Table of Contents

Related Manuals for Mahlkonig X54


Summary of Contents for Mahlkonig X54
- Page 1 Home Grinder X54 Original instructiOns www.mahlkoenig.de...
-
Page 3: Table Of Contents
Home Grinder X54 Figures ..................5 Part designations ............... 9 General Information ..............11 reading and retaining the operating manual ........11 Explanation of symbols used ..............12 Safety ..................14 Intended use of the grinder ..............14 safety information..................14 A brief explanation of the basics of the grinder and its function ................ - Page 4 Home Grinder X54 Operation .................. 32 Operating steps at a glance ..............32 switching on the grinder ................. 33 selecting recipe / Manual grinding ............34 starting grinding ..................34 grinding with the portafilter module ........34 grinding with the container module ........34 stopping or interrupting grinding manually ........
-
Page 5: Figures
Home Grinder X54... - Page 6 Home Grinder X54...
- Page 7 Home Grinder X54...
- Page 8 Home Grinder X54...
-
Page 9: Part Designations
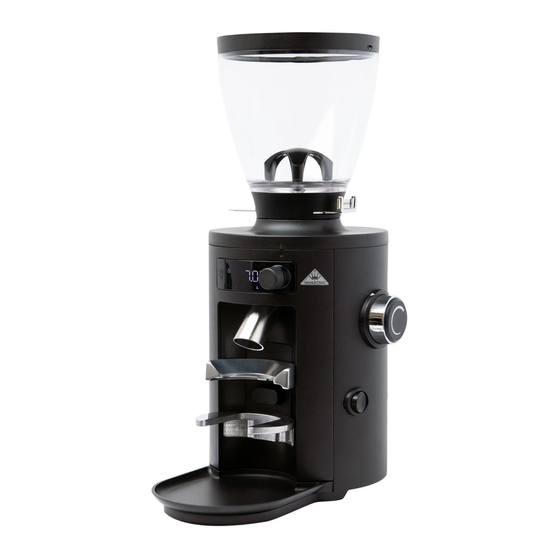
Home Grinder X54 Part designations Designation 1 Bean hopper 2 3 Sliding valve 4 Bean hopper intake 5 Adjusting wheel (adjustment of the grinding degree) 6 Grinding degree scale 7 Pushbutton (module lock) 8 Grinder body 9 Feet Drip tray Module area... - Page 10 Home Grinder X54 Designation Portafilter module Portafilter intake Portafilter support Container module Switch cover Screw (height adjustment of portafilter support) Portafilter* Container Controller (Jogdial) Display START/STOP button not supplied...
-
Page 11: General Information
This operating manual is based on the standards and regu- lations in force in the European Union. Please also note the guidelines and laws of your specific country if abroad. The following abbreviations are used below to ensure better readability: Home Grinder X54 = Grinder; Original instructions = Operating manual. -
Page 12: Explanation Of Symbols Used
Home Grinder X54 Explanation of symbols used You will find various symbols and signal words in this oper- ating manual, on the grinder and on the packaging. Please refer to the following overview for their meaning. WArninG! The warning triangle in combination with the signal word WARNING indicates a hazard with a medium degree of risk, which can lead to death or serious injury. - Page 13 Home Grinder X54 This symbol indicates important information concerning the operation or handling of the grinder. Declaration of Conformity: Products marked with this symbol fulfil all applicable community provisions of the European Economic Area. ETL Listed seal of approval: Products marked...
-
Page 14: Safety
Home Grinder X54 Safety intended use of the grinder The intended use of the grinder is for grinding whole roasted espresso or coffee beans, and it may only be used for this purpose. Do not use the grinder for grinding other products or objects and do not make any (technical) changes to the grinder. - Page 15 Home Grinder X54 WArninG! Danger of electric shock! Improper use, incorrect electrical installation or an excessively high voltage can all lead to electric shock. → Connect the grinder only if the mains voltage of the socket complies with the information indicated on the type plate.
- Page 16 Home Grinder X54 → Never touch the power plug with wet hands. → Never unplug the power plug from the wall socket by pulling on the power cable; always grip the plug itself. → Never use the power cable as a handle to carry the grinder.
- Page 17 Home Grinder X54 WArninG! Danger for children and persons with reduced physical, sensory or mental capacities (e.g. some disabled persons, older persons with limited physical and mental abilities) or a lack of experience and knowledge (e.g. older children). → The grinder is not intended for use by...
- Page 18 Home Grinder X54 → Do not let children play with the small parts. The small parts can be life-threatening if swallowed. CAUTion! Risk of injury! Incorrect handling of the grinder can result in injury. → Place the grinder on a level and stable surface to prevent it from falling off.
- Page 19 Home Grinder X54 noTe! Risk of damage! The grinder could be damaged by improper handling. → Do not lift the grinder by the bean hopper; lift only by the casing and always with both hands. → Ensure that children do not insert any objects into the grinder.
-
Page 20: A Brief Explanation Of The Basics Of The Grinder And Its Function
Home Grinder X54 A brief explanation of the basics of the grinder and its function You can use the grinder to grind both espresso beans and coffee beans with different grinding degrees (fine – coarse) . Use the adjusting [see „Adjusting the grinding degree“] wheel on the side (5) to set the grinding degree. -
Page 21: Basic Settings
Home Grinder X54 The grinder has a portafilter switch (12): When you insert a portafilter, the grinding process starts automatically. If you remove the portafilter, you can stop the grinding at any time. If you use a container as a collecting receptacle instead of... -
Page 22: Initial Operation
Home Grinder X54 Initial operation Check the grinder and scope of delivery Hold the grinder body (8) with both hands when lifting the grinder out of the packaging. 1. Remove the grinder and all accessories from the packaging. 2. Check that the delivery is complete (see Fig. A and B). -
Page 23: Selecting The Installation Location
Home Grinder X54 Selecting the installation location Select a place for the grinder that meets the following criteria: • level, stable and vibration-free surface; • supporting surface non-slip and dry; Socket for the power connection within easy reach; • • Grinder and power cable are out of the reach of small children. -
Page 24: Basic Handling
Home Grinder X54 2. Place the drip tray (10) in the housing recess under the spout (13) on the front of the grinder. The drip tray is held magnetically in the correct posi- tion in the housing recess. Basic handling Using the bean hopper... -
Page 25: Inserting The Bean Hopper
Home Grinder X54 Inserting the bean hopper 1. Pull sliding valve guide bean hopper (see Fig. C). The bean hopper can only be inserted when the sliding valve is in position 1 (= pulled out to the maximum). 2. Place the bean hopper on the bean hopper intake (4) (see Fig. -
Page 26: Removing The Bean Hopper
Home Grinder X54 4. When the bean hopper is correctly locked, push the sliding valve all the way in (see Fig. E). The sliding valve opens up the bean hopper to the grinding mechanism (position 3). 5. Finally, place the lid (2) on the bean hopper. -
Page 27: Selecting The Collecting Receptacle (Portafilter Vs. Container)
Home Grinder X54 Selecting the collecting receptacle (portafilter vs. container) The scope of delivery includes two different modules for the respective collecting receptacles*: • You use a portafilter (24) with the portafilter module (18) (see Fig. H) [see „Using the portafilter module“] • You use a container (25) with the container module (21) (see Fig. -
Page 28: Removing The Portafilter Module
Home Grinder X54 The two pins on the back of the module slide into the holes in the module area. The portafilter switch in the module area slides smoothly through the opening in the module. 3. Release the pushbutton. The pins on the back of the module engage in the module area and lock the module in the correct position. -
Page 29: Removing The Container Module
Home Grinder X54 The two pins on the back of the module slide into the holes in the module area. The portafilter switch in the module area slides smoothly into the portafilter switch cover of the module. 3. Release the pushbutton. -
Page 30: Filling With Espresso/Coffee Beans
Home Grinder X54 The portafilter support (20) is lowered as far as it will go. 2. insert the portafilter (24) in the portafilter intake (19) of the module. 3. Push the portafilter support upwards until the portafilter fits exactly between the portafilter support (bottom) and the portafilter intake (top). -
Page 31: Changing The Type Of Espresso/Coffee Bean
Home Grinder X54 Changing the type of espresso/coffee bean 1. Remove the bean hopper (1) with the old type of espresso/coffee beans from the grinder [see „Removing the bean hopper“] 2. Remove the remaining espresso beans from the bean hopper. 3. Remove any excess beans from the bean hopper intake (4). -
Page 32: Operation
Home Grinder X54 Operation Operating steps at a glance The basic operating steps for using the grinder are shown in brief in this Chapter. Detailed descriptions individual points can be found in the corresponding sub-chapters. 1. Switch on the grinder [see „Switching on the grinder“] 2. -
Page 33: Switching On The Grinder
Home Grinder X54 6. Only for Manual grinding mode: Press the START/ STOP button (28) to stop grinding* [see „Stopping or interrupting grinding manually“] When grinding according to a recipe, grinding stops automatically after the set grinding time has elapsed. 7. Remove the collecting receptacle with the ground material. -
Page 34: Selecting Recipe / Manual Grinding
Home Grinder X54 Selecting Recipe / Manual Grinding Simply turn the controller (Jogdial) (26) clockwise or » counterclockwise until the display (27) shows the number of the desired recipe or the symbol Manual Grinding. The time display shows the grinding time for the selected recipe.*... -
Page 35: Stopping Or Interrupting Grinding Manually
Home Grinder X54 The container opening must be located centrally under the spout (13). 2. Briefly press the START/STOP button (28) once. Grinding starts. Stopping or interrupting grinding manually You can manually stop the grinding in progress at any time, regardless of whether you are in Manual Grinding mode or Recipe mode*. -
Page 36: Stopping Grinding Manually With The Container Module
Home Grinder X54 Stopping grinding manually with the container module Briefly press the START/STOP button (28) once to » stop grinding. After use Switching off the grinder Switch off the grinder after use or when you are no » longer supervising the grinder and disconnect the power plug. -
Page 37: Setting The Grinder To Sleep Mode Manually
Home Grinder X54 3. Press any control element* to wake up the grinder from Sleep mode. The display changes to the last selected recipe/ mode**. Setting the grinder to Sleep mode manually You can also set the grinder to Sleep mode manually without using the sleep timer. -
Page 38: Changing Settings
Home Grinder X54 Changing settings Adjusting the grinding degree You can use the adjusting wheel on the side (5) for stepless adjustment of the desired grinding degree: The finest setting on the grinding degree scale (6) is "01", the maximum (coarsest) setting is "35". -
Page 39: Defining Recipes
Home Grinder X54 Defining recipes Proceed as follows if you would like to change the grinding time of a new recipe or if you want to change that of an existing recipe: 1. Select the number of the desired recipe in the display (27) by turning the controller (Jogdial) (26) -
Page 40: Setting The Time For The Sleep Timer
Home Grinder X54 The display changes to the last selected recipe/mode*. If you do not make any settings for more than 5 seconds (by turning/pressing the controller (Jogdial)), the process will be cancelled. Setting the time for the sleep timer 1. Use the controller (Jogdial) (26) to set the Manual Grinding mode. -
Page 41: Maintenance And Service
Useful information about the handling of the grinder can also be found in the videos about the X54 on the YouTube channel of Mahlkönig. Scan the following QR code to go directly to the »... -
Page 42: Activating/Deactivating The Wifi Signal
You can also retrieve usage statistics, error messages and other data about your grinder online. Detailed information can also be found in the videos about the X54 on Mahlkönig’s YouTube channel [see „Maintenance and service“] When the WiFi signal is activated, the symbol lights up in the display (27). -
Page 43: Optional Accessories
Home Grinder X54 Optional accessories Mahlkönig is constantly working to further develop its existing products and to open up new avenues for coffee lovers worldwide through technical innovations. In terms of user satisfaction and sustainability, it is particularly impor- tant to us that our existing products can be retrofitted (as far as possible) with new technologies and new accessories. -
Page 44: Cleaning
Home Grinder X54 Cleaning WArninG! Danger of electric shock! There is a risk of electric shock if electrical components are handled improperly. → Switch off the grinder and disconnect the power plug from the socket before starting to clean the grinder. -
Page 45: Cleaning The Grinder Installation Surface
Home Grinder X54 → Do not use any harsh cleaning products or sharp or metallic cleaning objects such as knives, metal scouring pads or similar. These can scratch the surface. → Do not wash the drip tray or the lid of the bean hopper in the dishwasher. -
Page 46: Cleaning The Casing
Home Grinder X54 Cleaning the casing Clean the casing at regular* intervals. The manufacturer recommends using a brush with nylon bristles for cleaning. 1. Switch off the grinder (on/off switch (15) in the 0 position) and remove the power plug from the socket. -
Page 47: Cleaning The Bean Hopper
Home Grinder X54 Cleaning the bean hopper The bean hopper must be cleaned regularly* to remove any coffee oil residues, as this can have a detrimental effect on the taste. 1. Remove the bean hopper (1) with any espresso/ coffee beans which it may still contain [see „Removing... -
Page 48: Cleaning The Grinder Mechanism
Home Grinder X54 Cleaning the grinder mechanism The manufacturer recommends cleaning with GRINDZ™ grinder cleaner. You will find more information on GRINDZ™ at www.mahlkoenig.de. Clean the grinder regularly* to prevent fluctua- tions in the dosage and premature wear. 1. Set the grinding degree to a medium setting [see „Adjusting the grinding degree“]... - Page 49 Home Grinder X54 7. Place a bowl in the module area under the spout (13) to collect the grinder cleaner. 8. If required, switch to the Manual Grinding mode and then press the START/STOP button (28) to start grinding. 9. Allow the maximum grinding time* to elapse and repeat the process several times if necessary until the grinder cleaner has been ground completely.
-
Page 50: Troubleshooting
Home Grinder X54 Troubleshooting Fault Cause / Remedy The grinder The power plug is not plugged into a socket. is not Insert the power plug into a properly » grinding, installed socket. the display is not lit up. The overcurrent protection switch was triggered. - Page 51 Home Grinder X54 Fault Cause / Remedy The grinder The grinding mechanism is clogged. / is making The grinding degree is too fine. noise but 1. Set the grinding degree to the not grinding. maximum setting [see „Adjusting the grinding degree“] 2.
- Page 52 Home Grinder X54 Fault Cause / Remedy The grinder The grinding discs are worn out or require is not readjustment. grinding fine Please contact the customer service » enough. for Mahlkönig products [see „Maintenance and service“] The grinder The portafilter switch is defective.
- Page 53 Home Grinder X54 Fault Cause / Remedy The spout is clogged. Too much ground grinder’s material has been deposited in solid form dispensing inside the grinder. accuracy is 1. Clean the spout [see „Cleaning the casing“] decreasing. 2. Set the grinding degree to the maximum setting [see „Adjusting the...
- Page 54 Home Grinder X54 Fault Cause / Remedy Use the controller (Jogdial) to select » The symbol. symbol appears in Briefly press the controller (Jogdial) » the display once to confirm the selection and (in red). enter the error menu. The current error message is displayed in the error menu.
- Page 55 Home Grinder X54 Fault Cause / Remedy Error The grinder automatically switches to manual message grinding degree mode. This mode cannot E003 is be exited by any means as long as this error shown in code is active. the error Please contact the customer service »...
-
Page 56: Technical Data
Home Grinder X54 Fault Cause / Remedy Error The grinding discs are worn and the quality message of the ground material is deteriorating. E010 is The grinding discs must be replaced. shown in Please contact the customer service » the error for Mahlkönig products... -
Page 57: Eu Declaration Of Conformity
Information on GPL/LGPL licenses can be found at www.mahlkoenig.de. EU Declaration of Conformity Hemro International AG hereby declares that the X54 (home) coffee grinder complies with the essential health and safety requirements of all relevant European directives. The complete text of the EU Declaration of Conformity... -
Page 58: Disposal
Home Grinder X54 Disposal Disposing of the packaging Dispose of the packaging by correctly sorting the recyclable materials. Dispose of card and cardboard as waste paper and film as recy- clable material. Disposing of the grinder Old appliances may not be thrown into... - Page 60 Hemro International AG Länggenstrasse 34 | 8184 Bachenbülach, Switzerland Tel.: +41 44 864 18 00 | Fax: +41 44 864 18 01 info@hemrogroup.com | www.hemrogroup.com...
Need help?
Do you have a question about the X54 and is the answer not in the manual?
Questions and answers