Table of Contents
Advertisement
Advertisement
Table of Contents

Related Manuals for Mahlkonig X54


Summary of Contents for Mahlkonig X54
- Page 1 Home Grinder X54 Original instructiOns www.mahlkoenig.de...
-
Page 2: Table Of Contents
Home Grinder X54 Figures ..................5 Part designations ............... 9 General information ..............11 reading and storing the instruction manual ........11 Explanation of symbols used ..............12 Safety ..................14 intended use of the grinder ..............14 safety information..................15 important safeguards .............. 15 additional safety information .......... - Page 3 Home Grinder X54 operation .................. 32 Operating steps at a glance ..............32 switching on the grinder ................. 33 selecting the recipe / manual grinding ..........34 starting the grinding process ..............34 grinding with the portafilter module ..........34 grinding with the container module ..........35 stopping or interrupting the grinding process manually ....
-
Page 4: Figures
Home Grinder X54... - Page 5 Home Grinder X54...
- Page 6 Home Grinder X54...
- Page 7 Home Grinder X54...
-
Page 8: Part Designations
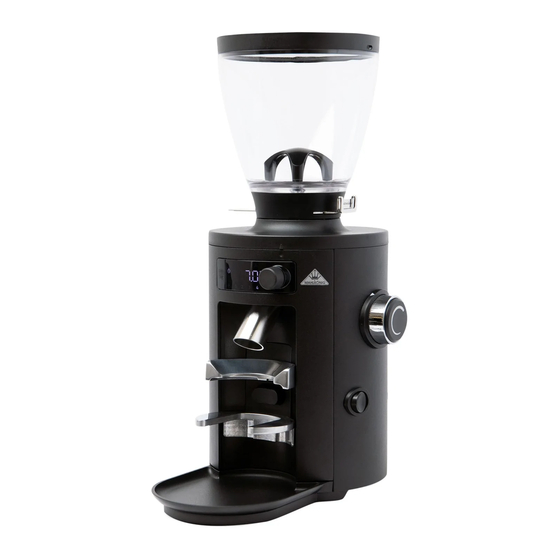
Home Grinder X54 Part designations name 1 Hopper 2 3 Slider 4 Hopper intake 5 Hand wheel (grind adjustment) 6 Grinding degree scale 7 Pushbutton (module lock) 8 Grinder body 9 Feet Collecting tray Module area Portafilter switch Spout Control panel on/off switch... - Page 9 Home Grinder X54 name Portafilter module Portafilter intake Portafilter support Container module Switch sheating Screw (portafilter support height adjustment) Portafilter* Container Jogdial display STArT/SToP button not included in the scope of delivery...
-
Page 10: General Information
This instruction manual is based on the standards and regu- lations in force in the european Union. Please also observe the guidelines and laws that apply in your country. For better readability, the following short forms are used in the following: Home Grinder X54 = grinder; Original instructions = instruction manual. -
Page 11: Explanation Of Symbols Used
Home Grinder X54 explanation of symbols used in this instruction manual, on the grinder and on the pack- aging, you will find various symbols and signal words, the meaning of which is provided in the following overview. WArninG! The warning triangle in conjunction with the signal word WArninG indicates a hazard with a medium degree of risk that can result in death or serious injury. - Page 12 Home Grinder X54 declaration of Conformity: Products marked with this symbol fulfill all applicable community provisions of the european economic Area. eTL Listed test seal: Products marked with this symbol meet the requirements for electrical product safety in the United States of America.
-
Page 13: Safety
Home Grinder X54 Safety intended use of the grinder The grinder is designed for grinding whole roasted espresso or coffee beans and may only be used for this purpose. do not use the grinder for grinding other products or objects and do not make any (technical) changes to the grinder. -
Page 14: Safety Information
Home Grinder X54 Safety information The following important safeguards and additional safety information must always be observed for the safe use of the grinder: in this way, you can avoid dangerous situations and/or reduce the resulting risks. imPorTAnT SAFeGUArdS a) read all instructions. - Page 15 Home Grinder X54 e) Avoid contacting moving parts. f) do not operate any appliance with a damaged cord or plug or after the appliance malfunctions, or is dropped or damaged in any manner. Contact the dealer from whom you purchased the grinder or the customer service of mahlkönig products...
-
Page 16: Additional Safety Information
Home Grinder X54 Additional safety information WArninG! Risk of electric shock! improper use, incorrect electrical installation, or a voltage that is too high can all lead to electric shock. → Connect the grinder only if the supply voltage of the socket complies with the information indicated on the type plate. - Page 17 Home Grinder X54 → never touch the power plug with wet hands. → never unplug the power plug from the wall socket by pulling on the power cable; always grip the power plug. → never carry the grinder by its power cable.
- Page 18 Home Grinder X54 WArninG! Danger for children and persons with reduced physical, sensory, or mental capacities (e.g. partially disabled persons, elderly persons with limited physical and mental capacities) or a lack of experience and knowledge (e.g. older children). → The grinder is not intended for use by children...
- Page 19 Home Grinder X54 → do not let children play with small parts. Small parts can be life-threatening if swallowed. CAUTion! Risk of injury! incorrect handling of the grinder can result in injury. → Place the grinder on a level and stable surface to prevent it from falling off.
- Page 20 Home Grinder X54 → make sure that children do not insert any objects into the grinder. → do not open the grinder casing, leave repairs to the experts. if repairs are required, contact a specialist workshop. if unauthorized repairs are carried out, the...
-
Page 21: Briefly Explained: Basics About The Grinder And How It Works
Home Grinder X54 Briefly explained: Basics about the grinder and how it works With the grinder, you can grind both espresso and coffee beans in different grinding degrees (fine - coarse) [see . Use the side hand wheel (5) to set „Setting the grinding degree“] the grinding degree. -
Page 22: Basic Settings
Home Grinder X54 if you do not use a portafilter, but rather a container as a collecting tray, the portafilter switch is locked: You can start the grinding process manually by pressing the START/STOP button. if you press the STArT/SToP button again before the set grinding time has expired, you can stop the grinding process prematurely. -
Page 23: Commissioning
Home Grinder X54 Commissioning Checking the grinder and scope of delivery Grip the grinder body (8) with both hands when lifting the grinder out of its packaging. 1. remove the grinder and all accessories from the packaging. 2. make sure the delivery is complete (see Fig. A and B). -
Page 24: Setting Up The Grinder
Home Grinder X54 Some cleaning agents contain ingredients that attack the rubberized feet (9) of the grinder. As a result, the grinder loses stability. Therefore, only use water and mild » detergents to clean the setup surface. Setting up the grinder When lifting or moving the grinder, always grab it by the grinder body (8). -
Page 25: Basic Handling
Home Grinder X54 Basic handling Using the hopper Slider positions The slider (3) has three positions within its guide in the hopper (1), between which it is moved. Position 1: Slider pulled out to maximum (see Fig. C) The hopper is not locked in the hopper intake when the slider is in this position. -
Page 26: Removing The Hopper
Home Grinder X54 3. Press the hopper down into the hopper intake and push the slider in up to the marking (see Fig. d). The slider noticeably engages in position 2 and locks the hopper in the correct position in the hopper intake. if the hopper cannot be inserted or the slider... -
Page 27: Selecting The Collecting Tray (Portafilter Vs. Container)
Home Grinder X54 4. remove the hopper from the grinder by lifting it out of the hopper intake (4). Selecting the collecting tray (portafilter vs. container) The scope of delivery includes two different modules for the respective collecting trays*: • A portafilter (24) is used with the portafilter module (18) (see Fig. H) -
Page 28: Removing The Portafilter Module
Home Grinder X54 2. Keep the side pushbutton (7) pressed and simultane- ously push the module into the module area. The two pins on the back of the module slide into the holes in the module area. The portafilter switch in the module area slides smoothly through the opening in the module. -
Page 29: Removing The Container Module
Home Grinder X54 2. Keep the side pushbutton (7) pressed and simultane- ously push the module into the module area. The two pins on the back of the module slide into the holes in the module area. The portafilter switch in the module area slides smoothly into the switch sheating of the module. -
Page 30: Filling Espresso/Coffee Beans
Home Grinder X54 The portafilter support (20) lowers until it reaches the limit stop. 2. insert the portafilter (24) into the portafilter intake (19) of the module. 3. Push the portafilter support upwards until the portafilter fits exactly between the portafilter support (bottom) and the portafilter intake (top). -
Page 31: Changing The Espresso/Coffee Bean Type
Home Grinder X54 Changing the espresso/coffee bean type 1. remove the hopper (1) with the espresso/coffee beans of the old type from the grinder [see „Removing the hopper“] 2. remove the leftover espresso beans from the hopper. 3. remove any excess beans from the hopper intake (4). -
Page 32: Switching On The Grinder
Home Grinder X54 Important: if you use the portafilter module and still want to change settings, do not insert the portafilter yet. With the insertion of the portafilter, you start the grinding process. 3. Select the desired recipe or manual Grinding mode [see „Selecting the recipe / manual grinding“]... -
Page 33: Selecting The Recipe / Manual Grinding
Home Grinder X54 3. Switch on the grinder by setting the on/off switch to position I (=on). The grinder is ready for operation as soon as the last selected recipe or the start screen appears on the display (27). Selecting the recipe / manual grinding Simply turn the jogdial (26) clockwise or counterclock-... -
Page 34: Grinding With The Container Module
Home Grinder X54 Grinding with the container module 1. Place the container (25) in the module area (11) (see Fig. i). The container opening must be centered under the spout (13). 2. Press the STArT/SToP button (28) once briefly. The grinding process starts. Stopping or interrupting the... -
Page 35: Stopping The Grinding With The Portafilter Module Manually
Home Grinder X54 Stopping the grinding with the portafilter module manually Simply remove the portafilter (24) from the portafilter » module (18) to stop the grinding process. Grinding stops automatically when the portafilter is removed, thus releasing the portafilter switch (12). Stopping the grinding with the container module manually Briefly press the STArT/SToP button ... -
Page 36: Putting The Grinder Into Sleep Mode Manually
Home Grinder X54 3. Press any control element* to wake up the grinder from sleep mode. The display then automatically switches to the start display. Putting the grinder into sleep mode manually You can also put the grinder into sleep mode manually, without using the sleep timer. -
Page 37: Changing Settings
Home Grinder X54 Changing settings Setting the grinding degree With the side hand wheel (5), you can infinitely adjust the desired grinding degree: The finest setting on the grinding degree scale (6) is "01", while the maximum (coarsest) setting is "35". Approximate guide values for the grind adjust- ment are as follows: •... -
Page 38: Defining Recipes
Home Grinder X54 defining recipes Proceed as follows if you want to set up the grinding time for a new recipe or change the grinding time of an existing recipe: 1. Select the number of the desired recipe in the display (27) by turning the jogdial (26) [see „Selecting the... -
Page 39: Setting The Time Of The Sleep Timer
Home Grinder X54 Setting the time of the sleep timer The grinder has an integrated sleep timer. When the sleep timer is activated, the grinder automatically switches to sleep mode after a previously set period of time after the last use* [see „Using the sleep timer“] When the sleep timer is activated, the symbol S lights up on the display (27). -
Page 40: Maintenance And Service
Home Grinder X54 maintenance and service if servicing is required, contact the customer service » for mahlkönig products. Please visit the mahlkönig Service Platform at: www.mahlkoenig.de The Customer Service department can answer any questions you may have regarding repair and maintenance of your product or spare parts. -
Page 41: Activating/Deactivating The Wi-Fi Signal
Home Grinder X54 Activating/deactivating the Wi-Fi signal enabled Wi-Fi facilitates convenient software updates and access to usage statistics, error messages and other grinder data. For detailed information please refer to www.mahlkoenig.de/X54. When the Wi-Fi signal is activated, the symbol on the display (27) lights up. -
Page 42: Optional Accessories
Home Grinder X54 optional accessories mahlkönig is constantly working on further developing its existing products and opening up new avenues for coffee lovers worldwide through technical innovations. in terms of user satisfaction and sustainability, it is particularly important to us that our existing products can be retrofitted (as far as possible) with new technologies and new accessories. -
Page 43: Cleaning
Home Grinder X54 Cleaning WArninG! Risk of electric shock! There is a risk of electric shock if electrical components are handled improperly. → Turn off the grinder and unplug the power cord from the socket before starting to clean the grinder. noTe! -
Page 44: Cleaning The Surface Underneath The Grinder
Home Grinder X54 → do not use any harsh cleaning agents or sharp or metallic cleaning tools such as knives, metal scouring pads, or similar. These can scratch the surface. → do not use a dishwasher to clean the collecting tray or the lid of the hopper. -
Page 45: Cleaning The Casing
Home Grinder X54 Cleaning the casing Clean the casing at regular* intervals. The manufacturer recommends using a brush with nylon bristles for cleaning. 1. Switch off the grinder (on/off switch (15) to position 0) and pull the power plug out of the socket. -
Page 46: Cleaning The Hopper
Home Grinder X54 Cleaning the hopper The hopper must be cleaned regularly* to remove any coffee oil residue, which can have a negative effect on the taste. 1. remove the hopper (1) with any remaining espresso/ coffee beans [see „Removing the hopper“] 2. Temporarily transfer the espresso/coffee beans into another container if necessary. -
Page 47: Cleaning The Grinding Mechanism
Home Grinder X54 Cleaning the grinding mechanism The manufacturer recommends cleaning with the grinder cleaner GrindZ™. For more information about GrindZ™, visit www.mahlkoenig.de. Clean the grinding mechanism regularly* to prevent dosing fluctuations and premature wear. 1. Set the grinding degree to a medium setting [see „Setting the grinding degree“]... - Page 48 Home Grinder X54 8. Press the STArT/SToP button (28) to start grinding and keep the button pressed until the grinder cleaner is completely ground. 9. now push the slider further in to the limit stop. The slider opens the hopper towards the grinding mechanism (position 3).
-
Page 49: Troubleshooting
Home Grinder X54 Troubleshooting Problem Cause / Solution The grinder The power plug is not plugged into a socket. is not insert the power plug into a properly » grinding, the installed socket. display does The thermal overcurrent circuit- not light up. - Page 50 Home Grinder X54 Problem Cause / Solution The grinder The hopper is not inserted. does not insert the hopper » [see „Inserting the grind, hopper“] the error message E001 shown in the display. Error no WiFi connection to an external station message possible.
- Page 51 Home Grinder X54 Problem Cause / Solution Error The grinder automatically switches to message manual grinding degree mode. E003 This mode cannot be exited by any means shown in as long as this error code is active. the display. 1. Switch the grinder off and on again [see „Switching off the grinder“] / [see „Switching on...
- Page 52 Home Grinder X54 Problem Cause / Solution Error Product identification in the log files is not message possible E008 1. Switch the grinder off and on again [see shown in „Switching off the grinder“] / [see „Switching on the display. the grinder“] 2.
- Page 53 Home Grinder X54 Problem Cause / Solution The grinder The grinding mechanism is blocked. is humming The grounds are too fine. but not 1. Set the grinding degree to the grinding. maximum setting [see „Setting the grinding degree“] 2. Start the grinding process [see „Starting...
- Page 54 Home Grinder X54 Problem Cause / Solution The grinder The grinding discs are worn out or need to is not be readjusted. grinding Contact Customer Service » finely mahlkönig products [see „Maintenance enough. and service“] The grinder The portafilter switch is defective.
- Page 55 Home Grinder X54 Problem Cause / Solution The grinder’s The spout is clogged. Too much ground dosing coffee has built up a solid residue inside the accuracy is grinder. decreasing. 1. Clean the spout [see „Cleaning the casing“] 2. Set the grinding degree to the maximum setting [see „Setting the grinding...
-
Page 56: Technical Data
Home Grinder X54 Technical data model: Voltage / frequency: 220–240 V; 110–127 V; 100 V; 50/60 Hz 60 Hz 50/60 Hz idle speed: 1 000 rpm 1 050 rpm 1 050 rpm Protection type: iPX1 Protection class: noise emission (during grinding): 65 dB(A) Grinding capacity (fine–coarse): 1–2.8 g/s* Max. -
Page 57: Eu Declaration Of Conformity
Hemro international hereby declares that Home G rinder X54 complies with the essential health and safety requirements of all relevant european directives. The full text of the eU declaration of Conformity is available at the following UrL: www.mahlkoenig.de. disposal disposing of the packaging dispose of the packaging by correctly sorting the recyclable materials. - Page 58 Hemro International AG Länggenstrasse 34 | 8184 Bachenbülach, Switzerland Tel.: +41 44 864 18 00 | Fax: +41 44 864 18 01 info@hemrogroup.com | www.hemrogroup.com...
Need help?
Do you have a question about the X54 and is the answer not in the manual?
Questions and answers