Garland Master Series Installation, Operation And Maintenance Manual
Full-size electric convection ovens
Hide thumbs
Also See for Master Series:
- Installation, operation and maintenance manual (36 pages) ,
- Installation, operating & service manual (32 pages) ,
- Installation and operation manual (12 pages)
Table of Contents
Advertisement
Available languages
Available languages
https://appliancetechmanuals.com
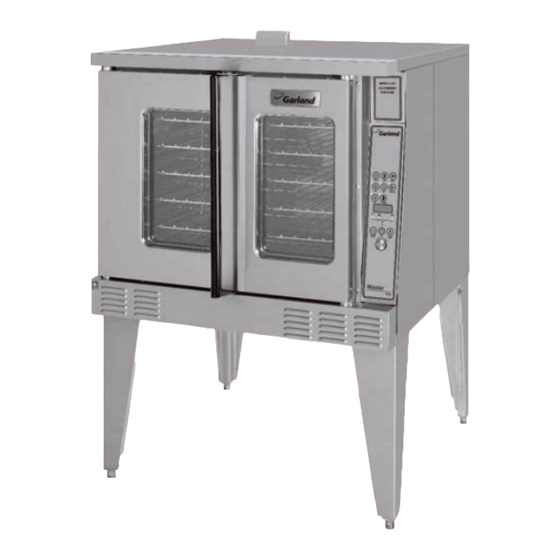
Master Series
Full-Size Electric Convection Ovens
Installation, Operation and Maintenance Manual
This manual is updated as new information and models are released. Visit our website for the latest manual.
models
MCO-ES-10
MCO-ES-10S
MCO-ED-10S
MCO-ES-20S
MCO-ED-20S
MCO-ES-10
MCO-ED-10
MCO-ES-20
MCO-ED-20
Part Number 1955203 rev 4 4/15
Advertisement
Table of Contents

Related Manuals for Garland Master Series


Summary of Contents for Garland Master Series
- Page 1 Master Series Full-Size Electric Convection Ovens Installation, Operation and Maintenance Manual This manual is updated as new information and models are released. Visit our website for the latest manual. models MCO-ES-10 MCO-ES-10S MCO-ED-10S MCO-ES-20S MCO-ED-20S MCO-ES-10 MCO-ED-10 MCO-ES-20 MCO-ED-20...
-
Page 2: Safety Notices
Users are cautioned that maintenance and repairs must be performed by a Garland authorized service agent using genuine Garland replacement parts. Garland will have no obligation with respect to any product that has been improperly installed, adjusted, operated or not maintained in accordance with national and local codes or installation instructions provided with the product, or any product that has its serial number defaced, obliterated or removed, or which has been modified or repaired using unauthorized parts or by unauthorized service agents. -
Page 3: Table Of Contents
https://appliancetechmanuals.com TABLE OF CONTENTS Core Probe Operation ....13 SAFETY NOTICES..... . . 2 Setting Setback Feature . - Page 4 https://appliancetechmanuals.com THIS PAGE INTENTIONALLY LEFT BLANK...
-
Page 5: General Information
MCO-ES-20 • Removable stainless steel drip pan MCO-ED-20 Warranty Visit www.Garland-Group.com to view or download a copy of your warranty. Serial Plate Location When corresponding with the factory or your local authorized factory service center regarding service problems or replacement... -
Page 6: Dimensions And Specifications, Mco
https://appliancetechmanuals.com DIMENSIONS AND SPECIFICATIONS, MCO ED/ES 10/20 Nominal Amperes Per Line (includes 3/4 HP fan motor) Total Model** 208V/3Ph 240V/3Ph 460V/3Ph 380V/3Ph** 415V/3Ph 208V/ 240V/ Load 10.4 MCO-ES-10 10.4 MCO-ED-10 **Total kW rating for 380/3 phase models is 9.0 Interior Dimensions (per oven) Exterior Dimensions Ship Info. -
Page 7: Ed/Es 10/20 S
https://appliancetechmanuals.com DIMENSIONS AND SPECIFICATIONS, MCO ED/ES 10/20 S Interior Dimensions (per oven) Exterior Dimensions Ship Info. Model W:In(mm) H:In(mm) D:In(mm) W:In(mm) H:In(mm) D:In(mm) Lbs./Kg Cu Ft 29(436) 24(610) 24(610) 38(965) 57-1/2(1416) 515/230 MCO-ES-10S 41-1/4 (1048) 29(436) 24(610) 24(610) 38(965) 70-1/2(1791)* 1030/465 MCO-ES-20S 41-1/4 (1048) -
Page 8: Installation
https://appliancetechmanuals.com INSTALLATION Entry Clearance Installation of Ovens Equipped with Casters • Crated: 47” (1194mm) A. For an appliance equipped with casters, the installation • Uncrated: 32-1/2” (826mm) shall be made with a connector that complies with the Standard for Connectors for Movable Appliances, ANSI Installation Clearance Z21.69. -
Page 9: Electrical Connections
https://appliancetechmanuals.com INSTALLATION Continued Electrical Connections Before attempting the electrical connection, the rating plate should be checked to ensure that the unit’s electrical characteristics and the supply electrical characteristics agree. Installation of the wiring must be made in accordance with U.L. 197 Commercial Electric Cooking Appliance Standards, Local and/or National Electrical Code, ANSI/NFPA 70-1990, or the Canadian Electrical Code, CSA C22.2 as applicable. -
Page 10: Operating Instructions
https://appliancetechmanuals.com OPERATING INSTRUCTIONS Master 200 Solid State Control with Electromechanical Timer Modes In Off Mode When the oven is off , there are no lights or indicators. Start Up Press the COOK/OFF/COOL DOWN rocker switch to the “COOK” position. The green lamp will light indicating the oven is powered in cook mode. -
Page 11: Timer
https://appliancetechmanuals.com OPERATING INSTRUCTIONS Continued Timer The timer is set by rotating the dial clockwise aligning the indicator to the desired time cycle. The timer will count down from 2 minutes to 60 minutes. At the end of the timing cycle the buzzer will sound. -
Page 12: Fahrenheit/Celsius
https://appliancetechmanuals.com OPERATING INSTRUCTIONS Continued Pressing the FAN HIGH key will activate the higher fan speed and light its LED. Pressing the FAN LOW key will activate the lower fan speed and light its LED. Pressing the FAN PULSE key will activate the lower fan speed and light its LED. -
Page 13: Operating The Controls
https://appliancetechmanuals.com OPERATING INSTRUCTIONS Continued Operating the Controls Core Probe Operation Setting the cook temperature and time are done in the same The Core Probe option (455 Controller Only) is only active manner. Pressing the SET key will light the TEMP LED. The when the core probe is plugged into its connector. -
Page 14: Master 475 Electronic Programmable Control
https://appliancetechmanuals.com OPERATING INSTRUCTIONS Continued Master 475 Electronic Programmable Control Manual Cooking 1. Press SET key – TEMP LED will light. 2. Set temperature using the dial (factory preset at 350°F). 3. Press SET key – FAN LED will light. 4. Select fan mode using one of the three (3) fan keys (HIGH, LOW, PULSE) –... -
Page 15: Cooking Using The Product
https://appliancetechmanuals.com OPERATING INSTRUCTIONS Continued 1. Press and hold PROG key for three (3) seconds – all the NOTE: the controller will only accept cooking temperatures product key LEDS light. for the number of profi les for which a cooking time has been set. -
Page 16: Verifying Hold Time (Master 475)
https://appliancetechmanuals.com OPERATING INSTRUCTIONS Continued EXAMPLE: Two product profi les contain the same cooking Verifying Hold Time (Master 475) temperature, fan speed and are both programmed for fl ex While a product is being held, press and hold the product time – keys 1 and 6. key. -
Page 17: Performance Recommendations And General Safety Precautions
https://appliancetechmanuals.com PERFORMANCE RECOMMENDATIONS AND GENERAL SAFETY PRECAUTIONS 1. Preheat oven thoroughly (approx. 20 minutes) before use. 14. When re-thermalizing frozen casseroles, preheat the oven 100° over the suggested temperature. Return to cooking 2. As a general rule, temperature should be reduced 25° temperature when the oven is loaded. -
Page 18: Problem/Solutions
https://appliancetechmanuals.com PROBLEM/SOLUTIONS Problem Solution Cakes are dark on the sides and not done in the center Lower oven temperature Cakes edges are too brown Reduce number of pans or lower oven temperature Cakes have light outer color Raise temperature Cake settles slightly in the center Bake longer or raise oven temperature slightly. -
Page 19: Cooking Guide
https://appliancetechmanuals.com COOKING GUIDE The following suggested times and temperatures are provided as a starting guide. Elevation, atmospheric conditions, recipe, cooking pans and oven loading may aff ect your actual results. PRODUCT TEMPERATURE (ºF) TIME Cakes White Sheet Cakes – 5 lbs 300º... -
Page 20: Cook And Hold
https://appliancetechmanuals.com COOK AND HOLD Please refer to the operating instructions to program the 450 and 455 control units for Cook and Hold feature. The times and temperatures listed below are to be used as a starting guide. Your actual results may vary greatly depending on your elevation, atmospheric conditions and other items being cooked at the same time. -
Page 21: Cleaning And Maintenance
This simple practice, if performed on a regular basis will keep metal. your Garland oven operating at peak performance. 4. The control panel surface is easily cleaned with hot water, Motor Care soap and a soft cloth. - Page 22 https://appliancetechmanuals.com CLEANING AND MAINTENANCE Continued At the end of the day, press the ON/OFF key, for the 400 series controllers to activate the Auto Cool Down feature. The fan will run on high until the oven cavity drops below 150°F (66°C).
- Page 23 https://appliancetechmanuals.com...
- Page 24 1177 KAMATO ROAD, MISSISSAUGA, ONTARIO, CANADA. L4W 1X4 888 442 7526 WWW.GARLAND GROUP.COM Every new piece of Manitowoc Foodservice equipment comes with KitchenCare™ and you choose the level of service that meets your operational needs from one restaurant to multiple locations.
- Page 25 1177 KAMATO ROAD, MISSISSAUGA, ONTARIO, CANADA, L4W 1X4 888 442 7526 WWW.GARLAND GROUP.COM Every new piece of Manitowoc Foodservice equipment comes with KitchenCare™ and you choose the level of service that meets your operational needs from one restaurant to multiple locations.
- Page 26 https://appliancetechmanuals.com ENTRETIEN ET NETTOYAGE (suite) Entretien du Moteur Nous recommandons, à la fi n de la période de cuisson ou de rôtissage, quand le four est au ralenti pour n’importe Le moteur de ce four à convection est sans entretien étant quelle période de temps ou avant de l’arrêter complètement, donné...
- Page 27 L’humidité pourrait endommager les composants Cette pratique simple si elle est réalisée régulièrement, électriques ou présenter un risque de choc électrique maintiendra votre four Garland dans un état de pour l’opérateur. fonctionnement impeccable. Nettoyage Intérieur Établir un calendrier de nettoyage régulier ou essuyer le jour...
- Page 28 https://appliancetechmanuals.com CUISSON ET MAINTIEN AU CHAUD Consulter les instructions d’utilisation pour la programmation des unités de commande de séries 450 et 455 pour la caractéristique de cuisson et maintien au chaud. Les temps et les températures ci-dessous sont a utiliser comme guide de départ.
- Page 29 https://appliancetechmanuals.com GUIDE DE CAISSON Les temps et les températures suggérés suivants sont fournis comme guide de départ. L’altitude, les conditions atmosphériques, l’alimentation en gaz, la recette, les plats de cuisson et le chargement du four peuvent aff ecter les résulats défi nitifs obtenus.
- Page 30 https://appliancetechmanuals.com PROBLÈMES/SOLUTIONS Problèmes Solutions Si le gâteau est doré sur les côtés Abaisser la température du four et n’est pas cuit au centre Si les bords du gâteau sont brûlés Réduire le nombre de plats ou la température du four Si la couleur du gâteau est pâle Augmenter la température Si le gâteau s’aff aisse légèrement au centre...
- Page 31 https://appliancetechmanuals.com RECOMMANDATIONS D’UTILISATION ET PRÉCAUTIONS GÉNÉRALES DE SÉCURITÉ 1. Bien préchauff er le four (environ 20 minutes) avant son 14. Pour le réchauff age des plats en cocotte congelés, utilisation. préchauff er le four à 100° de plus que la température suggérée.
- Page 32 https://appliancetechmanuals.com INSTRUCTIONS D’UTILISATION (suite) 3. Appuyez sur la touche START/CANCEL pour commencer 3. Appuyez sur la touche START/CANCEL pour démarrer la le processus de cuisson/minuterie. cuisson du niveau 2. 4. Lorsque le processus de cuisson/minuterie est terminé 4. Chargez les aliments dans le four sur le niveau 4. pour chaque niveau, un signal sonore de fi n de cuisson se 5.
- Page 33 https://appliancetechmanuals.com INSTRUCTIONS D’UTILISATION (suite) REMARQUE: Le contrôleur acceptera uniquement les 5. Pour annuler l’alarme ou l’opération de maintien au températures de cuisson pour les profi ls pour lesquels un chaud, appuyez sur la touche START/CANCEL et ensuite temps de cuisson a été réglé. Si l’on appuie sur la touche sur la touche produit.
- Page 34 https://appliancetechmanuals.com INSTRUCTIONS D’UTILISATION (suite) Cuisson Manuelle à l’aide 3. Appuyez sur la touche de produit (1 - 9) où vous souhaitez sauvegarder un programme de cuisson. Le mot de la Fonction Cook-N-Hold SHLF s’affi che. Le contrôle demande si vous souhaitez (Cuisson et Maintien au Chaud) programmer la touche en tant que minuteur de niveau ou en tant que profi l de cuisson.
- Page 35 https://appliancetechmanuals.com INSTRUCTIONS D’UTILISATION (suite) Lorsque la température intérieure de l’aliment est atteinte, le signal sonore retentit et le message « DONE » clignote sur l’affi chage pendant 3 secondes. L’affi chage passe automatiquement à « HOLD » . Pour terminer ce cycle, la sonde thermique doit être retirée du connecteur.
- Page 36 https://appliancetechmanuals.com INSTRUCTIONS D’UTILISATION (suite) Si on appuie sur la touche ON/OFF pour arrêter le four et Le réglage de la température de cuisson, de la température si la température du four est supérieure à 200°F (93°C), d’attente et du temps de cuisson se fait de la même façon. le four entre en mode Auto Cool Down (refroidissement Quand on appuie sur la touche SET, la DEL TEMP s’allume.
- Page 37 https://appliancetechmanuals.com INSTRUCTIONS D’UTILISATION (suite) Si la porte est ouverte pendant le mode de cuisson, le ventilateur et le chauff age s’arrêtent et l’affi chage indique « DOOR » jusqu’à ce que la porte soit fermée. Ceci est une fonction de sécurité . Quand on appuie sur la touche ACTUAL TEMP, la température réelle du four est indiquée sur l’affi chage par incréments de 5 degrés.
- Page 38 https://appliancetechmanuals.com INSTRUCTIONS D’UTILISATION (suite) Mettre le bouton en position « OFF » pour annuler le refroidissement et éteindre le four. Température La plage de températures va de 150°F à 500°F (66°C à 250°C) et est commandée en tournant le cadran de température et en alignant l’indicateur sur la température souhaitée.
- Page 39 https://appliancetechmanuals.com INSTRUCTIONS D’UTILISATION Commande Transistorisée Master 200 avec Minuterie Électromécanique Modes En mode d’arrêt Quand le four est éteint, il n’y a aucun voyant ni indicateur. Démarrage Mettre le commutateur à bascule COOK/OFF/COOL DOWN en position « COOK ». Le témoin vert s’allume, indiquant que le four est sous tension et en mode de cuisson.
- Page 40 https://appliancetechmanuals.com INSTALLATION (suite) Connexions Électriques Avant de commencer le branchement électrique, consulter la plaque signalétique afi n de s’assurer que les caractéristiques électriques de l’appareil correspondent aux caractéristiques de l’alimentation électrique. L’installation du câblage doit être faite conformément aux normes U.L. 197 Commercial Electric Cooking Appliance Standards, au Code électrique national ou local, ANSI/NFPA 70-1990, ou le Code Électrique Canadien, CSA C22.2 comme applicables.
- Page 41 https://appliancetechmanuals.com INSTALLATION Installation des Rôtissoires Dégagement d’entrée • Emballé : 47 po (1194 mm) Équipées de Roulettes • Déballé : 32 ½ po (826 mm) A. Pour un appareil équipé de roulettes, l’installation sera eff ectuée avec un connecteur conforme à la norme Conditions d’espace requises Connectors for Movable Appliances, ANSI Z21.69.
- Page 42 https://appliancetechmanuals.com DIMENSIONS ET SPÉCIFICATIONS, MCO ED/ES 10/20 S Dimensions Intérieures (par four) Dimensions Extérieures Informations d’expédition Modèle L:Po(mm) H:Po(mm) P:Po(mm) L:Po(mm) H:Po(mm) * P:Po(mm) Lb/Kg Volume MCO-ES-10-S 29(436) 24(610) 24(610) 38(965) 57-1/2(1416) 515/230 41-1/4 (1048) MCO-ES-20-S 29(436) 24(610) 24(610) 38(965) 70-1/2(1791)* 1030/465 41-1/4 (1048)
- Page 43 https://appliancetechmanuals.com DIMENSIONS ET SPÉCIFICATIONS, MCO ED/ES 10/20 Ampérage Nominal par Ligne (Comprend le Moteur du Ventilateur de 3/4 Hp) Puissance Modèle* 208V/3Ph 240V/3Ph 460V/3Ph 380V/3Ph** 415V/3Ph 208V/ 240V/ Totale kW MCO-ES-10 10.4 MCO-ED-10 10.4 La-puissance totale pour les modèles 380 V triphasés est de 9 kW. Dimensions Intérieures (par Four) Dimensions Extérieures Informations d’expédition...
- Page 44 MCO-ES-20 • lèchefrite, amovible MCO-ED-20 Garantie Visitez www.Garland-Group.com pour voir ou télécharger une copie de votre garantie. Plaque signalétique Lors des communications avec le fabricant ou votre centre de services local autorisé par le fabricant concernant des problèmes relatifs au service ou pour les pièces de remplacements, assurez-vous d’avoir les...
- Page 45 https://appliancetechmanuals.com CETTE PAGE EST LAISSÉE BLANCHE INTENTIONNELLEMENT...
- Page 46 https://appliancetechmanuals.com TABLE DES MATIÈRE INFORMATIONS IMPORTANTES ... . 2 Modes ........11 Touches du Contrôleur .
- Page 47 L’attention des utilisateurs est attirée sur le fait que l’entretien et les réparations doivent être eff ectués par un agent d’entretien autorisé par Garland utilisant des pièces de rechange d’origine Garland. Garland n’aura aucune obligation en ce qui concerne n’importe quel produit mal installé, réglé, utilisé ou qui n’aurait pas été entretenu conformément aux codes nationaux et locaux ou aux instructions d’installation fournies avec le produit ou n’importe quel produit dont le...
- Page 48 https://appliancetechmanuals.com Du Four Électrique À Convection « The Master » Manuel d'Installation et d'utilisation Ce manuel est mis à jour au fur et à mesure que de nouvelles informations sont disponibles et que de nouveaux modèles sont commercialisés. Pour obtenir la dernière mise à jour du manuel, visitez notre site Web. modèles MCO-ES-10 MCO-ES-10S...
Need help?
Do you have a question about the Master Series and is the answer not in the manual?
Questions and answers