Table of Contents
Troubleshooting

Related Manuals for Garland RTCS GME36-I14C


Summary of Contents for Garland RTCS GME36-I14C
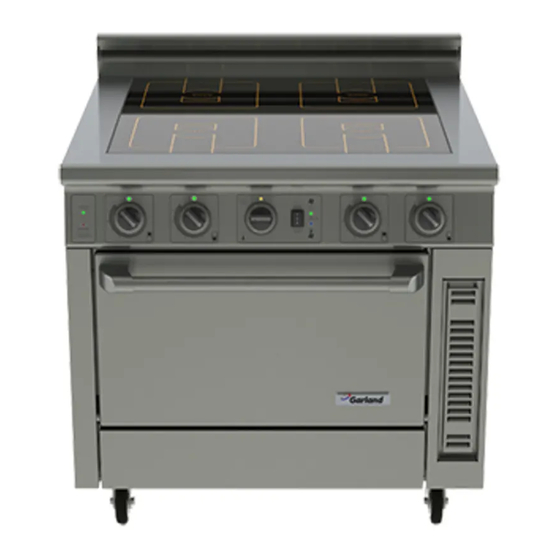
- Page 1 Master Series Electric Induction Range Induction Quad Cook-Top with Convection Oven Base Installation, Operation and Maintenance Manual models GME36-I14C GME36-I20C Original Instructions Part Number 4533030 Rev 1 07/20177...
- Page 2 WARRANTY INSPECT THE SHIPMENT In order for the appliance to function safely and Please visit our website at www.garland-group.com to Thoroughly inspect the equipment upon delivery. normally, you must read and understand all specific review or download a copy of the Warranty Statement.
-
Page 3: Definitions
Safety Notices Safety Notices DISCLAIMERS DANGER DEFINITIONS Disregarding any safety instructions may cause harm DANGER to people, the surroundings, and the equipment. The Indicates a hazardous situation that, if not avoided, will manufacturer and/or authorized representative are not result in death or serious injury. This applies to the most responsible for any damages or personal injury caused extreme situations. -
Page 4: Correct Disposal Of This Product
Safety Notices NOTE: Proper installation, care and maintenance are Warning essential for maximum performance and trouble-free Do not store or use gasoline or other flammable vapors operation of your equipment. Visit our website or liquids in the vicinity of this or any other appliance. for manual updates, translations, or contact information Never use flammable oil soaked cloths or combustible for service agents in your area. -
Page 5: Table Of Contents
Correct Disposal of This Product .......................4 Section 1 General Information Description of Product ....................... 7 Garland Induction ..........................7 Garland Convection Oven ........................7 Product Compliance ..........................7 Accessories ...............................7 Serial Plate Location ......................8 Model Number ........................8 Serial Number ........................8 Main Features and Components .................. - Page 6 Table of Contents (continued) Proper Induction Cookware ....................22 Condition ............................... 22 Material ..............................22 BOIL TEST ..............................22 Size of Pan .............................. 23 Placing Pan On A Cook Zone ...................23 Automatic Pan Detection, No Pan No Heat ..............24 When Appliance Is Idle.....................24 Working with Convection Oven ..................25 Oven Motor ............................
-
Page 7: General Information
Section 1 General Information Description of Product PRODUCT COMPLIANCE ALL IN ONE, the Garland Master Series Induction Range is engineered to incorporate Garland Induction with Garland’s Full certification pending, CSA. Convection Oven. Garland’s Induction cook tops with Boil The GME36 series Induction Range complies with the Dry Protection and Automatic Pan Detection cook faster standards CSA 22.2 No. -
Page 8: Serial Plate Location
" 1Ø 1Ø REAR/ARRIÈRE REAR/ARRIÈRE SUITABLE FOR COMBUSTIBLE FLOORS GARLAND COMMERCIAL RANGES LTD., MISSISSAUGA, ONT., CANADA MADE IN CANADA POUR LES PLANCHERS COMBUSTIBLES 4527849 Rev. 2 Model Number The model number is located on the serial plate. This manual covers the following models:... -
Page 9: Installation
Section 2 Installation INSTALLATION SAFETY—DISCLAIMER INSTALLATION SAFETY—ELECTRICAL DANGER DANGER Installation must be carried out by registered installation All electrical connections must be carried out by a contractors only. certified electrical contractor, who is responsible for the correct rating and installation of the appliance. The The contractors are responsible for interpreting all contractor has to comply with all legal safety regulations instructions correctly and performing the installation... -
Page 10: Personal Protection
Installation Section 2 PERSONAL PROTECTION DANGER All utilities (gas, electric, water and steam) must be OFF to all equipment and locked out of operation according to national/regional, as well as company approved practices during installation, maintenance and servicing. Always allow appliance to cool. DANGER Use appropriate safety equipment during installation, maintenance and servicing. -
Page 11: Specifications
Section 2 Installation Specifications DIMENSIONS Measurements in inches and [mm]. 4.5in 114mm REAR ELECTRICAL INLET 47.9in [1216.88mm] 28.3in 720mm 4.1in 105mm 28.3in 720mm 35.4in 35.4in 4.0in 900mm 900mm 102mm 33.4in 850mm 29.4in 2.5in 748mm 64mm REAR ELECTRICAL CONNECTION OPTIONAL [152mm] BOTTOM ELECTRICAL INLET ADJUSTABLE LEG... -
Page 12: Installation Clearance
Installation Section 2 INSTALLATION CLEARANCE NOTE: DANGER • Adequate clearance must be provided for servicing, Risk of Fire or Shock or Equipment Failure ventilation and proper operation. All minimum clearances must be maintained. Air intake • The range must be kept clear of combustible material. vents and exhaust vents must not be blocked or be restricted by the installation. -
Page 13: Electrical Specifications
Section 2 Installation ELECTRICAL SPECIFICATIONS Model Voltage Total kW Loading per Phase (kW) Amperage (A) 1 Phase GME36-I14C 120V / 208V Total 21.1kW 10.4 66.4 66.4 44.3 (Induction Range Top 4x available 3.5kW, Oven 5.1kW) GME36-I20C 120V / 208V Total 26.8kW 12.3 82.2 82.2... -
Page 14: Location
Installation Section 2 LOCATION ELECTRICAL CONNECTION Warning Read and understand all installation safety instructions regarding Clearance and Ventilation Prior to installation, check the electrical supply to at the beginning of this chapter. ensure input voltage and phase match the equipment •... -
Page 15: Commissioning
Section 2 Installation 3. Feed cable through the bottom inlet. 4. Make connections at terminal block (3 phases, neutral and ground). ⑤ ④ ④ ③ ③ To route cable from the bottom: 1. To access the terminal block, open the kick-plate (not shown) below the oven section and then remove the electrical panel. -
Page 16: Function Test
Installation Section 2 Function Test 5. Remove the pan away from the cook-zone. NOTE: When power transmission to the pan bottom stops, the indicator lamp blinks. • Before Function Tests, read and understand all installation safety instructions regarding 6. Place the pan back on the cook-zone. The heating Personal Protection. -
Page 17: Operation
Section 3 Operation OPERATION SAFETY—DISCLAIMER OPERATION SAFETY—PERSONAL PROTECTION Notice DANGER Induction appliances are more powerful, heat up The on-site supervisor is responsible for ensuring that pans quicker, and cook food faster than conventional operators are made aware of the inherent dangers of cooking equipment. - Page 18 Operation Section 3 Cooking with Induction Glass-Tops Models Caution Warning Short Cook Time Induction appliances cook food faster than conventional Never Leave An Empty Pan On Cooktop cooking equipment. To avoid overheating and burning, Induction appliances heat up empty pans very quickly. check the cooking process frequently.
-
Page 19: Controls
Section 3 Operation Controls Important AIR MANAGEMENT SYSTEM Shutdown using circuit breaker Incorporated in the Range are internal For emergency shutdown, switch off the circuit breakers cooling fans to manage airflow efficiently. that are located behind the kickplate. Do not open any These cooling fans are turned on other panels. - Page 20 Operation Section 3 This power level and output relationship gives you a fine Cooling down the Oven simmer-rate control in the low power range, and an instant NOTE: Perform cool down procedure before shutting down response in the high power range. or to lower the oven temperature during idle periods.
-
Page 21: Working With Induction Equipment
Section 3 Operation Working with Induction Equipment IMPORTANT RULES—OPERATION AND MAINTENANCE Follow these simple rules to ensure reliable and repeatable performance of your induction equipment: Use only pans that fits the glass. Do not use Never pre-heat the pan. Place the pan on the cook oversized pans. -
Page 22: Proper Induction Cookware
Operation Section 3 Proper Induction Cookware CONDITION MATERIAL USE cookware made of conductive and magnetic • Pans with layer separation (outward and inward • bubbles), arching or partially detached bottoms must be materials. If the pan bottom attracts a magnet, the pan replaced. -
Page 23: Size Of Pan
Section 3 Operation Placing Pan On A Cook Zone SIZE OF PAN MINIMUM SIZE: The bottom of pan must have a • Each cook zone of our appliances is equipped with the minimum diameter of 12cm [5”] (below, dotted lines). latest RTCS®... -
Page 24: Automatic Pan Detection, No Pan No Heat
Operation Section 3 Automatic Pan Detection, No Pan No Heat When a temperature or a power level is selected, the appliance supplies energy only when a pan is placed in the cook zone. When you remove the pan from the cook zone, the appliance stops power supply immediately. -
Page 25: Working With Convection Oven
Section 3 Operation Working with Convection Oven OVEN MOTOR • When rethermalizing frozen products, preheat oven to 50°F (25°C) higher than the cooking temperature The motor on your range convection oven is maintenance to compensate for heat loss before and after loading. free since it is constructed with self-lubricating sealed ball Return thermostat to the cooking temperature after bearings. -
Page 26: Maintenance
Section 4 Maintenance MAINTENANCE SAFETY—DISCLAIMER Warning DANGER Allow heated equipment / glass surface to cool down before attempting to clean, service or move. It is the responsibility of the equipment owner to perform a Personal Protective Equipment Hazard Warning Assessment to ensure adequate protection during maintenance procedures. -
Page 27: Personal Protection
Section 4 Maintenance PERSONAL PROTECTION DANGER All utilities (gas, electric, water and steam) must be OFF to all equipment and locked out of operation according to national/regional, as well as company approved practices during installation, maintenance and servicing. Always allow appliance to cool. DANGER Use appropriate safety equipment during installation, maintenance and servicing. -
Page 28: Daily Cleaning And Maintenance
Maintenance Section 4 Daily Cleaning and Maintenance GLASS CLEANING STAINLESS STEEL 1. Clean the stainless steel surface using a soft cloth with a mild detergent and/or a food-safe liquid cleaner designed to clean stainless steel. 2. Wipe dry with a soft clean cloth. NOTE: •... -
Page 29: Weekly Cleaning And Maintenance
Section 4 Maintenance Weekly Cleaning and Maintenance Yearly Maintenance Best Practice: Have the equipment examined once a year OVEN by an authorized technician. Deep clean the oven interior with an appropriate oven General Maintenance Tips: cleaner. Always follow manufacturer’s instructions on the cleaning products. -
Page 30: Troubleshooting
Section 5 Troubleshooting When problem occurs DANGEROUS ELECTRICAL VOLTAGE DANGER • Use the table below to record the details of the LEDs and the situation. This information is valuable to If any part of the appliance is cracked or broken, Stop technician for solving the problem. -
Page 31: Air System Troubleshooting
Section 5 Troubleshooting Air System Troubleshooting PROBLEM POSSIBLE CAUSE ACTION TO TAKE • Fresh air intake opening is blocked. IMMEDIATELY, TURN OFF THE OVEN if RED indicator lamp ON • The cooling fan(s) has failed. it is on. • Internal heat sensor has failed. Check air filter. -
Page 32: Induction Cook-Top Troubleshooting
Troubleshooting Section 5 Induction Cook-Top Troubleshooting COMMON PROBLEMS BOIL TEST FOR INDUCTION COOKWARE One or more of the following conditions may affect the To test the efficiency of a pan for induction cooking, function or cause the induction equipment to fail: perform a boil test. -
Page 33: Troubleshooting Without Error Code / Flash Code
Section 5 Troubleshooting TROUBLESHOOTING WITHOUT ERROR CODE / FLASH CODE Symptom Possible Cause Action Pan does not heat up on glass-top. No power supply. Check incoming power supply (Example, power No heat to griddle or braising pan. cable plugged into the wall socket). Check kitchen Indicator lamp is OFF (dark). -
Page 34: Troubleshooting - Error Code / Flash Code
Troubleshooting Section 5 TROUBLESHOOTING — ERROR CODE / FLASH CODE • Appliance equipped with an indicator lamp: The indicator lamp flashes to signal a specific problem. To find the possible cause, count the number of short flashes after each long flash. Example: “—... -
Page 35: Incident Record
Section 5 Troubleshooting Incident Record Incident Record Record the details of the LEDs and the situation at the time Record the details of the LEDs and the situation at the time when problem occurs. This will help technician to diagnose when problem occurs. - Page 36 GARLAND 1177 KAMATO ROAD, MISSISSAUGA, ONTARIO, CANADA. L4W1X4 888-442-7526 WWW.GARLAND-GROUP.COM WWW.WELBILT.COM Welbilt provides the world’s top chefs, and premier chain operators or growing independents with industry leading equipment and solutions. Our cutting-edge designs and lean manufacturing tactics are powered by deep knowledge, operator insights, and culinary expertise.
Need help?
Do you have a question about the RTCS GME36-I14C and is the answer not in the manual?
Questions and answers