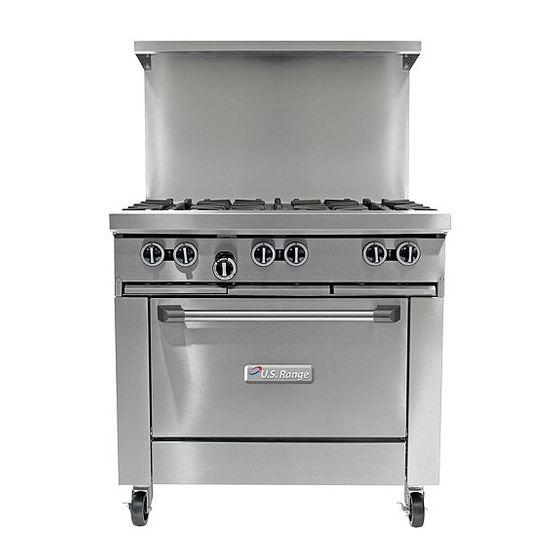
All equipment is supplied with 6” (152mm) legs unless specified • In the Commonwealth of Massachusetts this product must be installed by a licensed plumber or gas fitter. Garland G Series Restaurant Ranges (2007 – Sit Control) Clearances Clearances Applicable For All Models...
Page 7
Base Model Designations & Total Input Rates Input BTU/Hr Model # Description Natural Propane G24-4S 24” (610mm) nominal size unit, 4 open burners, storage base 132,000 104,000 G24-4L 24” (610mm) nominal size unit, 4 open burners, space saver oven 164,000 132,000 G36-6S 36”...
US Range U Series Restaurant Ranges (2007 – Sit Control) Clearances Clearances Applicable For All Models Surface Sides Rear Combustible Wall Minimum 12” (305mm) 6” (152mm) Non-Combustible Wall Minimum 0” 0” Gas Pressures Minimum Supply Manifold Operating Pressure Pressure Natural 7”...
Page 9
Base Model Designations & Total Input Rates Input BTU/Hr Model # Description Natural Propane U24-4S 24” (610mm) nominal size unit, 4 open burners, storage base 128,000 104,000 U24-4L 24” (610mm) nominal size unit, 4 open burners, space saver oven 160,000 132,000 U36-6S 36”...
Sunfire X Series Restaurant Ranges (2007 – Sit Control) Clearances Clearances Applicable For All Models Surface Sides Rear Combustible Wall Minimum 12” (305mm) 6” (152mm) Non-Combustible Wall Minimum 0” 0” Gas Pressures Minimum Supply Manifold Operating Pressure Pressure Natural 7” WC (17.5 mbar) 4.5”...
Page 11
Individual Burner Input Rates Input BTU/HR Burner Natural Propane Open Top 30,000 26,000 Hot Top Burner (In lieu of 2 open top burners) 20,000 19,000 Griddle Burner (In lieu of 2 open top burners) 20,000 19,000 Raised Griddle Broiler (Consists of 3 burners) 33,000 33,000 Oven Burner Standard...
Garland Restaurant Series Top Section Base Models (1) Space Saver Oven G28, H28, P28 2 x 12” Sections (1) Storage Base G28S, H28S, P28S 24” Wide (1) Standard Oven 286, 386, G286, GV286, H286, P286 3 x 12” (1) Range Base...
Garland Heavy Duty Master Series Model Numbers Prefix Definitions Suffix Definitions Master Electric Spark Pilot Ignition Master Sentry c/w open top pilot shut off Broiler Master Sentry Cc/s total flame failure Modular Top Section Storage cabinet under top section Range with convection oven...
Section 2 Serial Number Identification Part # GCTRM Rev 3 (12/10/09) Page 17...
Page 18
In January 1993, a revised serial number for Garland products was implemented. Our sister company Frymaster used this system and Garland adapted it for its own use. The following is a break down of this format with the product codes.
Page 19
95 = Year Built Currant Serial Number As of 2007 all Garland/US Range serial numbers no longer contain a product code, this includes the 2007 Restaurant Ranges (Sit Control). The number is now all numbers consisting of Year, Month and sequence number.
Page 22
Certification Markings There are many marks used on equipment manufactured Electric Cooking Equipment and distributed by Garland. Below is a summary of what the marks are and where they are used. Sanitation Mark All equipment sold in the USA requires a mark to show that is complies with ANSI/NSF Standards 2 &...
Page 23
ANSI Z83.11/CGA 1.8 standard. Note: when you look at all the marks used in the Garland group, you will notice that GCR uses only CSA and GCI uses predominantly UL. The reason for this comes down to two reasons.
Properties And Characteristics Of Fuel Gases Expansion Factors The petroleum gases most commonly used in the gas industry are natural gas and it two processed derivatives, When the temperature of a liquid increases, it causes the propane and butane. The two most commonly used fuels in liquid to expand, causing the volume of the liquid to increase commercial cooking equipment are natural gas and propane.
Operation Of Controls Thermostatic Controlled Griddles CAUTION: Gas will flow to top burners even with the top pilots out. Gas will not be interrupted. It is the responsibility 1. Raise the griddle at the front and block. of the operator to check the ignition of the burners. SHOULD IGNITION FAIL AFTER 10 SECONDS, TURN THE BURNER VALVE 2.
Standard Oven 3. Repeat lighting instructions in section “A” above. Lighting G, U, X Restaurant Ranges (Sit Control) Lighting 1 Remove oven buttons. 2. Depress and hold the reset button (Red) located at the 1. Push in the SIT control knob. lower front of the oven (beneath the oven door) while lighting the oven pilot.
Page 30
5. To shut the pilot completely off, extinguish the pilot 2. Using the access hole located below the louver in the flame. The internal pilot valve will automatically close panel, push the RED IGNITOR BUTTON continuously within 60 seconds. Each time this is done, the pilot will until the oven pilot ignites.
Section 6 Gas Valves And Adjustments Part # GCTRM Rev 3 (12/10/09) Page 31...
Page 32
Gas Valves And Adjustments Pilot Adjustment Valves SINGLE PILOT VALVE • Also known as gum valves. BURNER PILOT OPENING IN ADJUSTMENT VALVE PANEL SCREW • Available in single or double. • Double contains adjustment for an open top burner and oven.
Page 33
Non-adjustable Valve • Used together with oven thermostat on the Master Series and ST280 Series. • Also available on some Garland counter top models. • Uses a magnetic coil energized by a thermocouple to hold gas valve open. • Cuts off gas supply when not sensing a pilot flame.
Page 34
Open (Star) burner The valve itself allows you to bypass the plunger by pushing it in. This allows gas flow to the pilot, which then must be 1/2” stable, sharp inner blue cones. ignited. The valve must be held depressed for approximately 30 seconds in order to sufficiently heat the thermocouple Star Burner and generate millivoltage.
Page 35
Oven burners, Knuckle burners If the burner fl ames are soft and unstable or show yellow 4” to 6” stable, blue fl ame, with slight yellow tips. tipping increase the amount of air by opening the air shutter. 4" to 6" Blue Flame Oven H Burner - Side View Knuckle Burner Side View...
630 Euro Sit Control The 630 EUROSIT is a multifunction single knob valve with combined modulating/snap thermostat control. Pilot gas flow adjustment SIT Control Thermoelectric Flame Failure Device Snap and Dual Main Gas Inlet Modulating and Outlet Two gas valve Mount Options Thermoelectic Pilot Safety Valve...
7. Remove the two screws holding the pilot assembly and shield. This control, although very similar to the mechanical controls SHIELDS found on Garland’s current range and griddle models, has 4528285 (LH) several major economical effi ciencies that off er reliability 4525300 (RH) advantages to the customer.
Page 40
Bulb Tip Holder 11 Install the new thermocouple using the above procedure, but in reverse. Thermostat Replacement: 1. Unmount the oven thermostat capillary from its holder. 2. Carefully snake the capillary through the guide holes and out of the guard holder. Control capillary guard mounting Page 40 Part # GCTRM Rev 3 (12/10/09)
Page 41
3. Remove the gas lines from the valve. You will also need to remove the fittings from the valve. 4. Remove the two nuts and bolts that hold the thermostat in place. (Do not lose) C. Observe capillary and T couple routing 5.
NOTE: For complete Sit Control installation instructions refer to Garland Service for an installation DVD. BJWA Gas Thermostat • Ambient temperature 32°F (0°C) to 350°F (177°C) •...
Page 43
The control should be re-calibrated if your reading NOTE: A replacement thermostat will come with the by-pass in the closed position. is not within ± 20° F of the dial setting (350°F) . If re-calibration is required, the additional steps that BY-PASS need to be taken are as follows: ADJUSTMENT SCREW CALIBRATION 5. Hold the dial firmly, insert a screwdriver through the SCREW center of the dial and push the calibration stem. Do Not turn this stem.
It is a modulating snap by-pass. shut off completely. If this occurs, turn the dial counter- Garland uses the FD Control for range ovens and Pizza decks. clockwise slowly until the bypass gas snaps on. Then check the bypass adjustment as stated.
4. Allow the oven, or appliance, to heat and the thermostat 8. Replace the dial. to cycle three times. After sufficient time, check the 9. Note: If the above adjustment is prevented by the two temperature, if the temperature does not read with in loosened calibration lock screws being in contact with ±20°...
1. Turn all griddle temperature control dials to 350°F 4. Remove the dial making sure the setting is not disturbed. (177°C). In order to allow the temperature to stabilize, 5. Each division mark on the calibration plate equals 15°F. the controls must be allowed to cycle three times before With a screw driver, turn the calibration screw clock-wise taking a test reading.
Page 47
4. Carefully remove the thermostat dial, not disturbing the 3. Check the griddle temperature when the thermostat just dial setting. cycles “OFF” by placing the thermocouple firmly on the griddle surface directly above the sensing bulb of the 5. Hold the thermostat shaft steady and with a small flat thermostat.
Section 8 Gas Pressure Regulators Part # GCTRM Rev 3 (12/10/09) Page 49...
Page 50
Gas Pressure Regulators Purpose Of A Gas Pressure Regulator Hydrostatic Relief Device Gas pressure regulators have two main purposes, to A hydrostatic relief device is used in propane systems. They reduce supply main pressure to safe operating pressures of are to be installed between two valves in a propane system. connected appliances and to maintain constant downstream If liquid propane is trapped between two closed valves in pressure, regardless of changes in the gas flow or upstream...
Page 51
The Restricting Element moves in response to the Low Capacity Appliance Regulators carry both main burner measuring element when the downstream pressure changes. and pilot gas loads. They are usually marked with the symbol Usually, it is a disk or plug that controls the amount of flow “P”.
Section 9 Thermocouples And How They Work Part # GCTRM Rev 3 (12/10/09) Page 53...
Page 54
Thermocouples And How They Work Thermocouples are used to generate voltage to hold a The magnitude of the voltage across the cold junction magnet on a pilot safety valve. It plays an important part of depends on the: the flame safety system in a gas oven. •...
Garland’s new Restaurant ranges contain a gas control burning. (This is used on GARLAND ovens and ranges to have system enclosed in one component; the Sit Control.
Page 57
Figure B 3/8" TO 1/2" Pilot Thermocouple If, while following the proper lighting procedures, the magnet cannot be made to “HOLD”, inspect the pilot fl ame for proper size and adjustment (see pilot burner adjustment). If the magnet will still not hold, make the following checks. Closed Circuit Test 1.
Page 58
Open Circuit Test 1. Disconnect the thermocouple from the safety valve. 2. Attach the thermocouple to the millivolt test instrument. 3. Heat the sensor end of the thermocouple at the pilot flame or similar flame characteristics, monitoring the millivolt meter. 4 If the millivolt reading is below 14 millivolts, replace the thermocouple.
Section 11 Gas Equipment Field Service Trouble Shooting Guide Part # GCTRM Rev 3 (12/10/09) Page 59...
Page 60
Gas Equipment Field Service Troubleshooting Guide A professional as listed in your maintenance and repair center guide should perform service. PROBLEM POSSIBLE CAUSE SOLUTION Burner flame soft-lazy tip yellow. Not enough air mixing with gas. Open air shutter. Flame lifts off burner ports. Flashes To much air mixing with gas.
Garland and US Range Operating, Maintenance and Care Instructions For Ranges and Oven Surfaces Exterior Cleaning Black Baked Enamel Griddle plates should be wiped daily while still warm. Remove carbonized grease or food with a spatula. When Allow equipment to cool after use and wash all grease necessary, clean the griddle’s surface thoroughly using a...
Page 63
• Soiled and burnt deposits can be removed with a wire Care should be taken to avoid excessive soil drippings. If soils brush. Difficult to remove burnt on deposits can usually are deposited on the coating at a rate faster than the coating be removed using an oven cleaner.
• To brand meat, place it on an unused heated area of the • Soiled and burnt deposits can be removed with a wire rack. brush. Difficult to remove burnt on deposits can usually be removed using an oven cleaner. Wash, dry thoroughly, •...
Section 13 Gas Technician’s Glossary Part # GCTRM Rev 3 (12/10/09) Page 65...
Page 66
Gas Technician’s Glossary Air-Gas Ratio: The ratio of combustion air supply flow rate to Draft Hood (draft diverter): A device built into an appliance, the fuel gas supply flow rate. or made part of a vent connector from an appliance. It is designed to: 1) assure the ready escape of the products Air Shutter: An Adjustable shutter on the primary air of combustion in the event of no draft, backdraft, or opening of a burner, which is used to control the amount...
Page 67
Flame Velocity: The speed at which a flame travels through a Inches of Water Column: A unit used in measuring pressures. fuel-air-mixture. Burning speeds vary with types of gases, One inch of water column equals a pressure of 0.578 and the amount of air mixed with the gas. This air to gas ounces per square inch.
Page 68
Limits of Flammability: Upper and lower ranges of gas in Port: Any opening in a burner head through which gas or an the air-gas mixture that will support combustion. Low air-gas mixture is discharged for ignition. amount of fuel makes mixture lean. High amount of fuel Port Loading: The input rate of a gas burner per unit of port renders mixture rich.
Page 69
Updraft: Excessively low air pressure existing at the outlet of Viscosity: The property of a fluid to resist flow. a chimney or stack which tends to increase the velocity Yellow Tipping of Flames: Too severe a reduction in primary and volume of gases passing up the stack. air also causes its problems.
Section 14 Range Wiring Diagrams Part # GCTRM Rev 3 (12/10/09) Page 71...
Page 72
Garland and US Range Gas Ranges Wiring Diagrams Number Description Page Garland Restaurant Duty left RC Oven Garland Restaurant DUTY RC2 Oven 3056100 US Range C836C Cuisine Series 229064 US Range 836C Cuisine Series 2706601 US Range Px/S Series Left Single RC Oven...
Page 73
Garland Restaurant Duty left RC Oven Part # GCTRM Rev 3 (12/10/09) Page 73...
Section 15 Service Bulletins Part # GCTRM Rev 3 (12/10/09) Page 97...
Page 98
: Sit Valve Introduction Please find the enclosed introduction to the Sit Valve Modulating/Snap Thermostat used in the Garland G, U, and X Series Restaurant Range Models. These instructions will be added to our existing manuals, and they are designed to inform technicians of some common details and the general overview of the Sit Thermostat.
Page 99
Sit Valve Field Guide G, U, and X Series When installing the knob, align the When installed correctly, the knob set screw (a) with the hole on the tab extends the hub stop so the hub (b). knob cannot be overturned into The tab must be intact on the knob To calibrate the Thermostat, use the for the knob to properly stop as shown...
Page 100
To adjust the pilot size, turn the No adjustment should be made pilot adjustment screw (A). The to the screw circled above. pilot ame should be approximately Please see notes* ¾ of an inch long. To shut down all gas to pilots and With the knob removed, turn the hub burners, loosen the knob set screw until the metal tab (B) lines up with...
Page 101
* Notes: The Sit Thermostat used in the Garland G, U and X series is a Modulating/Snap thermostat with a multifunctional single knob. The part number for theOven Thermostat is 4523006 (Long Capillary) and the Griddle Thermostat is 4523007(Short Capillary).
Page 102
If you believe it has been tampered with, turn the screw all the way clockwise until tight for the proper setting. (Do not over tighten) A:US C:Canada B:Canada/US I:International S: Service P: Parts W: Warranty G: General 1-800-427-6668 www.garland-group.com Fax: 1-800-361-7745 Page 102...
Page 103
Page 2 of 2 Garland uses a fixed drilled orifice to regulate the first stage in the SIT Control as shown below. (Internal component shown, do not disassemble control) Orifice When a call for heat is initiated, the thermostat will cycle as follows:...
Page 104
6. Check milli voltage from the thermocouples to ensure the correct amount of milli voltage is present. Refer to your unit’s technical service manual to determine the correct amount of voltage. A:US C:Canada B:Canada/US I:International S: Service P: Parts W: Warranty G: General 1-800-427-6668 www.garland-group.com Fax: 1-800-361-7745 Page 104 Part # GCTRM Rev 3 (12/10/09)
Page 105
If these checks are performed accordingly and you are still having intermittent pilot problems, please contact our Technical Support at 800-427-6668 for further instruction and review. Part # GCTRM Rev 3 (12/10/09) Page 105 A:US C:Canada B:Canada/US I:International S: Service P: Parts W: Warranty G: General 1-800-427-6668 www.garland-group.com Fax: 1-800-361-7745...
Page 106
G U X Pilot Assembly Guide G, U, and X SeriesOven Pilots When assembling the Pilot, the pilot When installed incorrectly, the lip ori ce (a) interlocks with the grooved prevents the ferrule from seating ferr ule (b). completely with the ori ce. This will have a negative e ect on the pilot ame and needs to be corrected.
Page 107
I ncorrect C orrect When the pilot is assembled incorrectly, With a pilot assembled correctly approximately 4 threads will be shown. approximately 2 threads will be visible. Part # GCTRM Rev 3 (12/10/09) Page 107...