GRANULDISK Granule Flexi User Manual
Hide thumbs
Also See for Granule Flexi:
- User manual (43 pages) ,
- User manual (19 pages) ,
- User manual (36 pages)

Subscribe to Our Youtube Channel
Related Manuals for GRANULDISK Granule Flexi


Summary of Contents for GRANULDISK Granule Flexi
- Page 1 Granule Flexi® User Manual Art. no EN16265 Granuldisk AB retains the right to make technical changes to the products. No responsibility is taken for any printing errors. www.granuldisk.com Tel. +46 40 671 50 60...
-
Page 3: Table Of Contents
Contents EC DECLARATION OF CONFORMITY FOR MACHINERY 1 General Description and Safety 1.1 To the user 1.2 Safety regulations 1.3 Technical data 1.4 PowerGranules and PowerGranules BIO ® ® 1.5 SIMpel™— easy access to information 2 Operating 2.1 Start up procedure 2.2 Loading wash ware 2.3 Control panel 2.4 Start and operation... -
Page 5: Ec Declaration Of Conformity For Machinery
Jägershillsgatan 13, 213 75 Malmö Hereby declares that Type of machinery: Granule pot washing machine for commercial kitchens No. of machinery: Granule Flexi ® Complies with the requirements of Machinery Directive 2006/42/EC. Complies with the applicable requirements of the following EC directives: 2014/30/EU, EMC... -
Page 7: General Description And Safety
Granule pot washing machine for commercial kitchens ® that is designed for washing pots and pans. This manual is your guide for the correct use of the Granule Flexi ® washing machine. Granuldisk recommends that you study the manual thoroughly to be sure that the machine is installed and used correctly and safely. -
Page 8: Safety Regulations
NOTE Read the safety notes and operating instructions in this manual carefully. Keep the operating instructions for future reference. Granuldisk does not assume liability or warranty in case of non-adherence to these safety and operating instructions. Do not make changes, additions or reconstructions in the pot washer without the approval of the manufacturer. - Page 9 1.2 Safety regulations 1 General Description and Safety WARNING Formaldehyde, which is dangerous if inhaled, may be formed if the original granules made of POM plastics, catch fire. Does not apply for the PowerGranules BIO. NOTE Regarding the handling and use of detergent and rinse aid with the product, please see the chemical manufacturer’s instructions.
-
Page 10: Technical Data
1 General Description and Safety 1.3 Technical data Technical data GENERAL Design Front loaded with two level washing External dimensions 1,775 mm (±25) x 870 mm x 1017 mm H x W x D (closed) Weight 372 kg (filled machine) 278 kg (empty machine) Tank volume 84 liter... - Page 11 1.3 Technical data 1 General Description and Safety Wash programs without granules ECO: 2 min, 30 sec (+70 sec w EcoExchanger) Short: 3 min, 40 sec (+60 sec w Steam reduction or +80 sec w EcoExchanger) Normal: 5 min, 40 sec (+60 sec w Steam reduction, or +80 sec w EcoExchanger) Max.
- Page 12 1 General Description and Safety 1.3 Technical data Enclosure rating IPX5 WATER CONNECTION Total hardness: 3-7 °dH, 5-12 °TH, Hardness/Connection 53-125 PPM ¾” BSP male (DN20) NB! Reverse osmosis water and to- tally softened water must not be used. Connection A 12.0 kW unit: 1-6 bar, 15 l/min, 55-65 °...
- Page 13 This may influence or disturb the operation of other apparatuses, e. g. flickering lamps, especially those connected to the same supply mains. NOTE Granule Flexi is supplied with a 2 metres long electric cable ® to be connected to an approved supply disconnecting de- vice on the wall.
-
Page 14: And Powergranules Bio
® • PowerGranules and PowerGranules BIO are specially designed to work with Granule pot and pan washing machines from Granuldisk. • They ensure the best wash result as well as the longest working life both for themselves and the machine. -
Page 15: Simpel™- Easy Access To Information
1.5 SIMpel™— easy access to 1 General Description and Safety information SIMpel™— easy access to information To make it easier for the operator to find information about the machine and how to use it, there is a QR-code on the machine. The sticker is placed under or at the side of the display. - Page 16 User manuals and videos of accessories/ DOCUMENTATION daily cleaning 3. TECHNICIAN AREA Only for technicians/service partners 4. CODES AND List of error codes INFORMATION 5. ABOUT GRANULDISK Link to our website 6. CONTACT INFORMATION Contact information to service partner Rev. 2021-12...
-
Page 17: Operating
Operating Start up procedure Fill the machine with the right amount of PowerGranules from the Gran- ule Collector. 2 2 Close the drain valve on the front of the machine See Fig. 3 Drain valve Fig. 3 Drain valve 3 3 Switch on the main electrical switch. Filling with water Close the doors Rev. - Page 18 2 Operating 2.1 Start up procedure 2 2 Press the Confirm (1) button in order to fill the wash tank. Fill wash tank? 3 3 The program selection diodes flash out of sequence with the diodes for washing with or without granules during filling. XX °C XX°C Filling the wash...
- Page 19 2.1 Start up procedure 2 Operating Preparing utensils Empty and scrape off all food remains before loading the utensils See Fig. 4 Scrape off food • No soaking or scrubbing is needed. • No usage of hand-soap or similar (to avoid foaming which could lead to ex- tended problems).
-
Page 20: Loading Wash Ware
2 Operating 2.2 Loading wash ware 2.2 Loading wash ware All utensils must be loaded upside down — the dirty side facing the spray nozzles. Removing the insert Draw the insert out as far as it will go. See Fig. 5 Draw the insert out Fig. - Page 21 2.2 Loading wash ware 2 Operating Fixed insert for GN containers (13465) To fit GN 1/1–1/9 up to 200 mm depth. Capacity 2 GN 1/1 up to depth equivalent small containers. See Fig. 7 Fixed insert for GN containers GN 1/1 and GN 1/2 loaded.
- Page 22 2 Operating 2.2 Loading wash ware NOTE Items of the same depth should be placed on the same side to en- sure that they are all properly held in place. Fig. 10 Flexible insert closed Insert for lids and trays of GN size (6001147) To fit slightly soiled GN sized flat trays or lids.
- Page 23 2.2 Loading wash ware 2 Operating Insert loaded with GN 2/1. See Fig. 13 Adjustable insert Fig. 13 Adjustable insert Insert loaded with GN 1/4 and a pot. See Fig. 14 Adjustable insert Fig. 14 Adjustable insert Insert loaded with a large pot. Large pots as deep as 700 mm can be washed with the short spray pipe (26828) inserted.
- Page 24 2 Operating 2.2 Loading wash ware Short spray pipe (26828) See Fig. 16 Short spray pipe Fig. 16 Short spray pipe Net basket with lid (21477) For ladles, whisks and other small utensils up to 500 mm length. See Fig. 17 Net basket with lid Fig.
-
Page 25: Control Panel
2.3 Control panel 2 Operating 2.3 Control panel Confirm button is used to an- swer “yes” to a question shown in the display window 2 2 The Stop button is used to reset potential alarms. It is also used to enter sleep mode. After 30 seconds the display light goes out and the machine goes into sleep mode. -
Page 26: Start And Operation
2 Operating 2.4 Start and operation 2.4 Start and operation Press the Confirm button (1) • If temperature is lower than 65 °C in wash tank at the time of the first start, once the wash tank has been filled, the machine will continue heating. - Page 27 2.4 Start and operation 2 Operating 4 4 When the wash program is complete, the word ”END” flashes and the green indica- tion lamp goes on. 65°C 85°C See Fig. 18 When the program is finished the green light goes on. Fig.
- Page 28 2 Operating 2.4 Start and operation Resetting of overheat protection Reset overheat protection if error codes 104 and 105 occur. Empty the wash tank. 2 2 Clean the level sensor. 3 3 Unscrew the black cap. 4 4 Reset the overheat protection using a small screwdriver to stick into the protector and push the reset button.
-
Page 29: Language Selection
2.5 Language selection 2 Operating 2.5 Language selection To change the language settings: Press the STOP button, release it and wait for 3 seconds. 2 2 Press the (4) “Short program” button, five times. 3 3 The display shows the following: Language <... -
Page 30: Set Date And Time
2 Operating 2.6 Set date and time 2.6 Set date and time To change the date and time: Press STOP (2), then press Short program button (4) 5 times and 1 time on ECO pro- gram button (3). Change date and time ddmmyy hh:mm 210101 13:00... -
Page 31: Daily Cleaning
Daily cleaning Collecting and cleaning of PowerGranules Use the Granule Collector. Fig. 21 Granule collector in machine 2 2 Place the Granule Collector in the insert. See Fig. 21 Granule collector in machine 3 3 Close the doors and press STOP. 4 4 Wait for 3 seconds. - Page 32 3 Daily cleaning 3.1 Collecting and cleaning of PowerGranules • From 2500 to 501 programs: Check Granule level (after every 10th collection) • From 500 to 251 programs: No message (goes back to STOP mode) • From 250 to 1 program: Order granules (after every collection) •...
-
Page 33: Cleaning Inside The Machine
3.2 Cleaning inside the machine 3 Daily cleaning 3.2 Cleaning inside the machine Press STOP button (2) and open drain valve to empty wash tank. 2 2 Switch off at the main electrical switch. 3 3 Remove and check both spray pipes. - Page 34 3 Daily cleaning 3.2 Cleaning inside the machine 5 5 Lift out overflow sieve (A) and Granule valve cover (B). Clean and flush the parts with water. See Fig. 26 Items to clean • Overflow sieve; remove the cover. • Granule valve; remove the cover by pulling handle straight up.
- Page 35 3.2 Cleaning inside the machine 3 Daily cleaning 1 1 3 3 For video instructions use the QR code and watch the daily cleaning on Youtube See Fig. 28 QR code Fig. 28 QR code NOTE The outside of the machine should not be washed with high-pressure water.
- Page 36 3 Daily cleaning 3.2 Cleaning inside the machine 3 3 Make sure the spray pipes are secured properly. Press the spray pipe in and turn it clockwise. Ensure and secure by gently pulling it outwards. If difficult, take out the spray pipe, remove any granules or if the seal may be dry, damp- en it with a little water and try...
-
Page 37: Over Night And At Longer Stoppages
3.3 Over night and at longer 3 Daily cleaning stoppages 3.3 Over night and at longer stoppages • Ensure that wash tank is empty after cleaning. • Leave doors slightly open so that air can circulate in the machine. • PowergGranules should be stored in Granule collector standing in the machine. -
Page 38: Gd Memo
3 Daily cleaning 3.4 GD Memo™ 3.4 GD Memo™ GD Memo is an integrated function which informs the user of the ma- chine’s most important maintenance requirements. With GD Memo, it is possible to ensure optimum wash results, avoid breakdowns during peak hours and maintain the lowest possible operating costs. - Page 39 1”, “Time for service 2” or "Time for service 3" depending on which service is required. Sequence for service calls are: 1, 2, 1, 3, 1, 2, 1, 3... Phone number for Service company or Granuldisk is shown below the service message. The reminder can be reset by an authorised service technician, once the service is performed.
-
Page 41: Haccp Hygiene And Operation Documentation
HACCP Hygiene and Operation Documentation General Granuldisk Documentation Tool, GDTdirect™, is an integrated function for the documentation of the pot washing machine’s operating parameters and critical hygiene control points, HACCP. The following can be viewed: • Operating data for the last 200 wash program run is viewed directly in the control panel window. -
Page 42: Reading The Data Through The Control Panel
4 HACCP Hygiene and Operation 4.2 Reading the data through the Documentation control panel 4.2 Reading the data through the control panel Press STOP button (2), release it and wait 3 seconds. 2 2 Press “Short program” (4), five times. 3 3 Use button “ECO program”... -
Page 43: Accumulated Values For Electricity And Water Consumption
4.3 Accumulated values for electric- 4 HACCP Hygiene and Operation Documentation ity and water consumption 4.3 Accumulated values for electricity and water consumption Repeat steps 1-3 on previous page to enter user menu, but choose "Ac- cumulated power and water" in step 3. 2 2 Accumulated values that are calculated from the operating data are shown. -
Page 44: Download Of Operation Data From Usb Port
4 HACCP Hygiene and Operation 4.4 Download of operation data Documentation from USB Port 4.4 Download of operation data from USB Port Press STOP. 2 2 Insert a USB stick. The USB port is found on the right side of the machine. See Fig. -
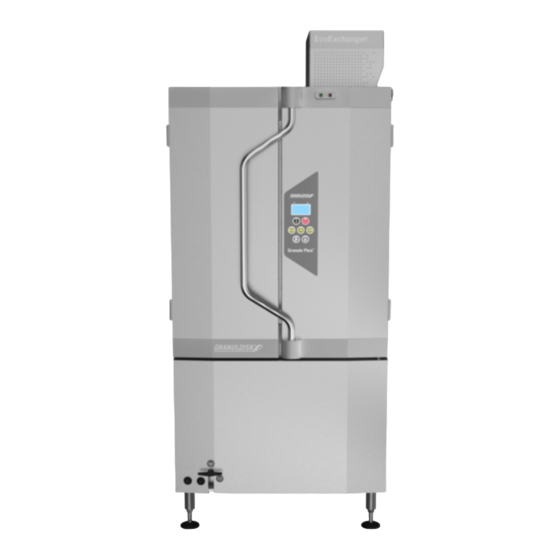
Page 45: Optional Ecoexchanger
4.5 Optional EcoExchanger® 4 HACCP Hygiene and Operation Documentation 4.5 Optional EcoExchanger® The EcoExchanger is a heat recovery and steam reduction unit all in one. The unit is condensing the steam and at the same time increasing the temperature on the incoming water (cold) to the rinse tank. Press STOP button (2), release it and wait 3 seconds. -
Page 47: Trouble Shooting And Alerts
Trouble shooting and alerts User related notices • User related notices are codes 100, 109, 116, 118, and 132. They appear with a message in the display. Below table gives more details about the user related notices. • When an alert is displayed, the program is always interrupted. •... - Page 48 5 Trouble shooting and alerts 5.1 User related notices Error Cause Meaning Remedy code Drain valve The drain valve has Close the drain not closed opened during an ac- valve and reset the tive process in the alarm by pressing machine.
-
Page 49: Error Codes
5.2 Error codes 5 Trouble shooting and alerts 5.2 Error codes The meaning of the error codes can be read out form the table below. Error Cause Remedy Meaning code Program interrupted by This error code is operator. displayed only when operating da- ta is read. - Page 50 5 Trouble shooting and alerts 5.2 Error codes Error Cause Meaning Remedy code Water level Contact a service The level in the rinse too low in tank has fallen engineer! rinse tank. incorrectly. Water level The level in the wash Contact a service too low in tank has fallen...
- Page 51 5.2 Error codes 5 Trouble shooting and alerts Error Cause Meaning Remedy code Short rinse Rinse water was Contact a service time. pumped out too fast, engineer! causing insufficient rinsing and heating of the wash ware. Level detec- False level signal from Turn the machine tion function OFF! Continued op-...
-
Page 53: Notes
Notes Rev. 2021-12...
Need help?
Do you have a question about the Granule Flexi and is the answer not in the manual?
Questions and answers