
Related Manuals for GRANULDISK GRANULE SMART+


Summary of Contents for GRANULDISK GRANULE SMART+
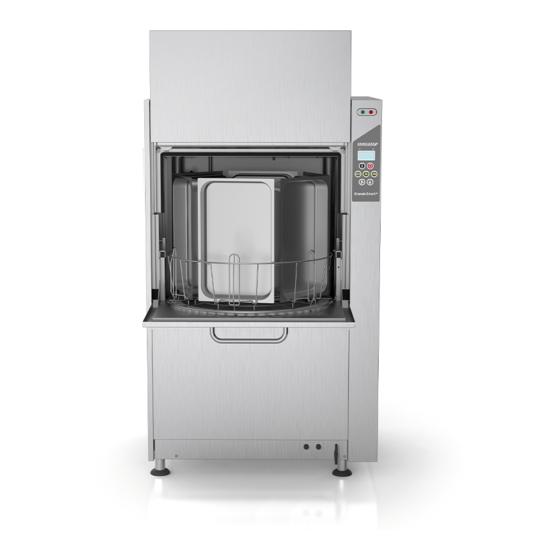
- Page 1 ® USER MANUAL. Art.no EN16400202010 GRANULDISK AB retains the right to make technical changes to the products. No responsibility is taken for any printing errors. www.granuldisk.com Tel. +46 40 671 50 60...
-
Page 3: Table Of Contents
Contents CE Declaration of Conformity General Description and Safety User manual in original To the user Safety regulations Technical data ® ® PowerGranules and Power Granules BIO Operating Daily cleaning Collecting and cleaning of PowerGranules Cleaning inside the tank Replacement of cleaned items Over night and at longer stoppages EcoExchanger as an option –... - Page 4 Notes...
-
Page 5: Ce Declaration Of Conformity
Jägershillgatan 13 SE-213 75 MALMÖ, Sweden declares that the following machinery: ® The GRANULDISK system Granule Smart+ ® The Granule Smart+ is a Granule pot washing machine for commercial kitchens that is designed for washing such wares as pots and pans. - Page 6 CE Declaration of Conformity Malmö, Sweden 01.10.2020 Signed on behalf of GRANULDISK AB GRANULDISK AB Jägershillgatan 13 213 75 MALMÖ Phone: +46 40 671 50 60 Mikael SAMUELSSON CEO and President Rev. 2020-10...
-
Page 7: General Description And Safety
This manual is your guide for the correct use of the Granule Smart+ pot washing machine. GRANULDISK recommends that you study the manual thoroughly to be sure that the machine is installed and used correctly and safely. Ensure that the manual is always available during the whole lifetime of the machine. - Page 8 1.3 Safety regulations 1 General Description and Safety For your safety, test the local fault current circuit breaker (FI) regularly by pressing the test button. Close the on-site water shut-off valve after the work is complete. Switch off the local mains disconnector after the work is complete.
-
Page 9: Technical Data
1 General Description and Safety 1.4 Technical data Technical data GENERAL Design ....... .. Round rotating stainless steel basket External dimensions ....2079 (± 25) x 1025 x 1317 mm (H x W x D) open Weight ... - Page 10 1.4 Technical data 1 General Description and Safety Fuse (at output 17.2 kW) .... 32 A (400/415 V, 380 V) Max output (hot or cold fill) ..17.2 kW Wash pump motor ....2.2 kW Wash pump motor PLUS mode ..0.7 kW Rinse pump motor ..
-
Page 11: Powergranules ® And Power Granules Bio
Power Granules BIO • PowerGranules are specially designed to work with Granule pot and pan washing machines from GRANULDISK. • They ensure the best wash result as well as the longest working life both for themselves and the machine. - Page 12 ® ® 1.5 PowerGranules and Power Granules BIO 1 General Description and Safety...
-
Page 13: Operating
Operating Start up Place the tank grid in position. Make sure the folded edge is upwards and that the bigger holes in the grid are on top of the wash nozzles. Figure 1 Tank grid Figure 1: Tank grid Put the basket wheel in place. Swing in around until it drops down on the pegs in the middle of the wheel. - Page 14 2 Operating Empty the Granule Collector with PowerGranules into the left part of the wash tank. Figure 3 Granule filling Figure 3: Granule filling Close the drain valve on the front of the machine Figure 4 Drain valve Switch on the main electrical switch. Figure 4: Drain valve Rev.
- Page 15 2 Operating Filling with water Close the door. Press the Confirm (1) button in order to fill the wash tank. Fill wash tank? The machine will now fill with water and heat up to the correct temperature. On the panel, the diodes for program selection (3-5) flash out of sequence with the diodes for washing with or without Granules (6-7) during filling.
- Page 16 2 Operating Ready to use when the correct temperature has been attained in the wash tank. A pre-selected program is now displayed; 65°C 70°C Eco program with Granules wash time: 2:20 NOTE Indication lamps RED LAMP; indicates that the machine is working. Figure 6: Indication lamps Do not open the door! GREEN LAMP;...
- Page 17 2 Operating Loading the basket Take the basket half way out of the machine (the basket standing partly on the door.) When the basket is loaded with pots and pans, slide the wash basket into the machine. The basket is designed so that you clearly feel when the basket is placed correctly on the basket wheel.
- Page 18 2 Operating Possible to load 6 x GN 1/3. Possible to load 12 x small GN containers. Choose among GN 1/4, GN 1/6, GN 1/9. Figure 11 Standard wash basket Figure 11: Standard wash basket Insert for trays (19992) To be placed inside standard wash basket (26426).
- Page 19 2 Operating Holder for bowls & pots with integrated ladle holder (13756) To be placed inside standard wash basket (26426). Capacity: up to 5-6 bowls or pots. Containers from approx 60 mm to 170 mm deep can be washed. Possible to load ladles, whisks, spatulas and similar in the net basket in the middle of the holder.
- Page 20 2 Operating Multiflex holder for saucepans, small bowls, sieves (20554) To be placed inside standard wash basket (26426). Capacity: up to 3-4 saucepans or up to 4-5 small bowls, sieves etc. Figure 16 Multiflex holder Figure 16: Multiflex holder Wash basket with bottom grid (26140) Same capacity as the standard wash basket (26426).
- Page 21 2 Operating When placing one large pot in the Pot basket, use one or two Flexible pot holders to fixate the pot. Hook the rubber band and wrap it around the pot and hook on to the bar on the other side. Figure 19 Pot basket Figure 19: Pot basket Net basket with lid (21477)
- Page 22 2 Operating Loading of utensils for PLUS mode (soft wash) Place the items to be washed in a 500 x 500 mm wash basket. Rinse off any remaining bits of food Push the wash basket into position in the machine. The basket wheel is designed so that you feel when the basket is positioned correctly.
- Page 23 2 Operating Control Panel Confirm button is used to answer “yes” to a question shown in the display window The Stop button is used to reset potential alarms. It is also used to enter sleep mode. After 30 seconds the display light goes out and the machine goes into sleep mode.
- Page 24 2 Operating Start and Operation pot washing Press the Confirm button (1) • If temperature is lower than 65 °C in wash tank at the time of the first start, once the wash tank has been filled, the machine will continue heating. •...
- Page 25 2 Operating When a program is chosen, a 10 seconds detection phase will follow while the machine determines which type of wash basket has been placed in the machine. This is done automatically and does not require the operator to decide whether to run a program in pot wash or in PLUS mode.
- Page 26 2 Operating Keep the door closed if you are not running another wash programme straight away. It saves energy and reduces evaporation from the wash tank. Figure 24: When the program is finished the green light goes on. Start and operation of PLUS mode For PLUS mode (soft wash), select desired length of program by pressing ECO (3), Short (4) or Normal (5) buttons.
- Page 27 2 Operating Stopping the machine while in operation • Switch to washing with water for about 30 seconds in order to rinse off all Granules. Then press STOP (2) • In an emergency: Just press STOP (2) NOTE Utensils may have remains of detergent and should be washed again before they are taken out of the machine.
- Page 28 2 Operating Language selection To change the language settings: Press the STOP button, release it and wait for 3 seconds. Press the (4) “Short program” button, five times. The display shows the following: Language < English > Select Back Press the Confirm button for “select”. Scroll using the buttons for ECO(3) or Normal (5) program, to step through the list of languages.
- Page 29 2 Operating Press Function button (1) to choose and to be able to change date and time. Change date and time ddmmyy hh:mm 160118 12.34 Cancel Adjust date and time by using Normal program button (5) to step to the right. ^^ marks which number can be changed.
- Page 30 2 Operating...
-
Page 31: Daily Cleaning
Daily cleaning Collecting and cleaning of PowerGranules Use the Granule Collector Place the Granule collector on the basket wheel. It should be placed as tightly as possible to the door, which means that the Granule collector will be tilting slightly towards the back of the machine. -
Page 32: Cleaning Inside The Tank
3.2 Cleaning inside the tank 3 Daily cleaning • From 0 program: Change Granules now (after every collection until message is reset) Top-up with Granules when needed. Wash result will suffer if the Granule level is too low. Take the filled Granule collector out from the machine and rinse the Granules thoroughly. - Page 33 3 Daily cleaning 3.2 Cleaning inside the tank Take the basket wheel out. Figure 30 Basket wheel Figure 30: Basket wheel Lift the tank grid out. Figure 31 Tank grid Clean and flush the parts with water. Flush the inside of the tank with pure water. Figure 31: Tank grid Clean and flush Granule damper (A) with water...
- Page 34 3.2 Cleaning inside the tank 3 Daily cleaning 10. Clean and flush bottom sieve (C) with water. To make cleaning easier, bottom sieve can be unscrewed (Figure 33 Bottom sieve, level sensor and rollers). 11. The sieve for the dishwashing-pump at the bottom of the wash tank must be cleaned once a month.
- Page 35 3 Daily cleaning 3.2 Cleaning inside the tank Figure 36: EcoExchanger as seen inside the machine cabin. 16. Check that the white plug on the overflow drain moves up and down. Clean if required. Figure 37 Overflow tap Figure 37: Overflow tap 17.
- Page 36 3.2 Cleaning inside the tank 3 Daily cleaning 18. Wipe inside of the lower door and the seal with a damp cloth. Figure 39 Lower door Figure 39: Lower door 19. Wipe the door frame with damp cloth. Figure 40 Door frame to clean NOTE The outside of the machine should not be washed with...
-
Page 37: Replacement Of Cleaned Items
3 Daily cleaning 3.5 EcoExchanger as an option – Periodical service with cleaning Replacement of cleaned items Replace all items, instructions see section 2 Operating • Put back bottom sieve if it has been unscrewed. • Put back tank grid. •... -
Page 38: Gd Memo
3.6 GD Memo™ 3 Daily cleaning GD Memo™ GD Memo is an integrated function which informs the user of the machine’s most important maintenance requirements. With GD Memo, it is possible to ensure optimum wash results, avoid breakdowns during peak hours and maintain the lowest possible operating costs. This function is integrated in the control panel and keeps the user informed as follows: 1. - Page 39 3" depending on which service is required. Sequence for service calls are: 1, 2, 1, 3, 1, 2, 1, 3... Phone number for Service company or GRANULDISK is shown below the service message. The reminder can be reset by an authorised service technician, once the service is performed.
- Page 40 3.6 GD Memo™ 3 Daily cleaning...
-
Page 41: Haccp Hygiene And Operation Documentation
HACCP Hygiene and Operation Documentation GRANULDISK Documentation Tool, GDTdirect™, is an integrated function for the documentation of the pot washing machine’s operating parameters and critical hygiene control points, HACCP. The following can be viewed: • Operating data for the last 200 wash program run is viewed directly in the control panel window. -
Page 42: Accumulated Values For Electricity And Water Consumption
4.2 Accumulated values for electricity and water 4 HACCP Hygiene and Operation consumption Documentation • OK; indicates that the rinse water volume is correct in accordance with factory values; if the set values have been changed, NA (not applicable) is displayed. NOTE If the wash program has been cancelled due to an operating error or technical error, the temperature indication is not included and “error”... -
Page 43: Download Of Operation Data From Usb Port
4 HACCP Hygiene and Operation Documentation 4.3 Download of operation data from USB Port Download of operation data from USB Port Press STOP. Insert a USB stick. Hold ECO and Normal program buttons in for 2 seconds. After 10 seconds, function button lights up in green. - Page 44 4.3 Download of operation data from USB Port 4 HACCP Hygiene and Operation Documentation...
-
Page 45: Troubleshooting And Alerts
Troubleshooting and alerts User related notices and error codes User related notices • User related notices are codes 109, 116, 118,120, 132 and they appear with a message in the display. Below table gives more details about the user notices. •... - Page 46 5.1 User related notices and error codes 5 Troubleshooting and alerts Error codes The meaning of the error codes can be read out from the table below. Error Meaning Cause Remedy code Program interrupted by This error code is displayed operator.
- Page 47 5 Troubleshooting and alerts 5.1 User related notices and error codes Error Meaning Cause Remedy code Long wash tank Wash tank filling has exceeded Check the water supply to filling time its time limit. the machine, as well as the rinse pump.
- Page 48 5.1 User related notices and error codes 5 Troubleshooting and alerts Error Meaning Cause Remedy code instruction regarding glass breakage before performing this operation. ID error Electrical error, identity outside Contact a service engineer! range. Wrong incoming Wrong incoming voltage to IO Continued operation can voltage to IO circuit circuit board.
-
Page 49: Course Of Action When Finding Shattered Glass In A Granule Smart
5 Troubleshooting and alerts 5.2 Course of action when finding shattered glass in a Granule Smart+ Course of action when finding shattered glass in a Granule Smart+ Equipment: • Thick protective gloves Vacuum cleaner for water • Please follow these steps in this particular order: •... - Page 50 5.2 Course of action when finding shattered glass in a 5 Troubleshooting and alerts Granule Smart+...
- Page 51 Notes Rev. 2020-10...
Need help?
Do you have a question about the GRANULE SMART+ and is the answer not in the manual?
Questions and answers