GRANULDISK Granule Maxi Service Manual
Hide thumbs
Also See for Granule Maxi:
- User manual (53 pages) ,
- User manual (19 pages) ,
- User manual (34 pages)
Table of Contents
Troubleshooting

Related Manuals for GRANULDISK Granule Maxi


Summary of Contents for GRANULDISK Granule Maxi
-
Page 1: Service Manual
Granule Maxi Service manual Granule Maxi serial # 920010– Art.no EN22559–201205 GRANULDISK AB retains the right to make technical changes to the products. No responsibility is taken for any printing errors. www.granuldisk.com Tel. +46 40 671 50 60... -
Page 3: Table Of Contents
1.2 Safety regulations 1.3 Disconnecting power 1.4 Technical data Installation 2.1 Installation instructions 2.2 Detergent and rinse aid 2.3 How to lay the Granule Maxi down on its side Troubleshooting and Alarms 3.1 Error codes Programming 4.1 Preselected values in Service menu 4.2 Flashloader 4.2... -
Page 4: Table Of Contents
® Steam heating Granule Maxi 8.1 Power/Effective Steam Pressure 8.2 Heating time 8.3 Steam Consumption 8.4 Safety 8.5 Connection 8.6 Recommended equipment not included 8.7 Diagrams Appendix... -
Page 5: Ce Declaration Of Conformity
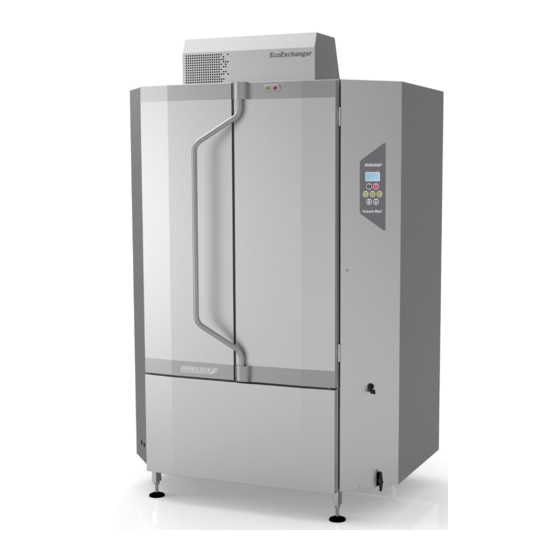
The GRANULDISK system Granule Maxi. The Granule Maxi is a Granule pot washing machine – a pot washing machine for commercial kitchens that is designed for washing such wares as pots and pans. Basic conception a. - Page 6 CE Declaration of Conformity...
-
Page 7: General Description And Safety
Granule Maxi is a Granule pot washing machine – a pot washing machine for commercial kitchens that is designed for washing pots and pans. This manual is your guide for the correct installation and use of the Granule Maxi pot washing machine. - Page 8 1.3 Disconnecting power 1 General Description and Safety Ensure the machine is dead by undoing the front cover, the lid to the electrical cabinet and measuring the incoming voltage on Q1. There must not be any voltage between any of the phases or between any of the phases and protective earth.
-
Page 9: Technical Data
1 General Description and Safety 1.4 Technical data Technical data Weight ......666 kg (filled machine), 485 kg (empty machine) External dimensions . - Page 10 ** For specific data regarding delivered machines, please see machine rating plate NOTE The Granule Maxi is supplied with a 2 metres long electric cable to be connected to an approved supply disconnecting device on the wall. The supply disconnecting device is not included in the delivery.
-
Page 11: Installation
The arrows should be in line. 3. Check too that all external screws as well the screws on the door’s hinges are tightened. 4. For the Granule Maxi, Flow System and Freeflow System: Also make this test using an empty cassette. - Page 12 2.1 Installation instructions 2 Installation Make sure that the cassette moves freely into the machine, adjust the feet if necessary. The machine can be laid down on its side when being moved in. 5. Connect the hot and cold water (A and B Figure 2 ,on page 13).
- Page 13 2 Installation 2.1 Installation instructions Figure 2: Rev. 2012-05...
-
Page 14: Detergent And Rinse Aid
All dosing equipment must be fitted with a main switch. Do not use detergent containing chlor. To obtain the best performance of this GRANULDISK pot washer we strongly recommend installing sensor controlled detergent dosing equipment and appropriate rinse aid equipment. - Page 15 2 Installation 2.2 Detergent and rinse aid Figure 4: Detergent and rinse aid junction box 1. Constant 230 VAC J 1-2 2. Neutral 230 VAC J 1-6 3. Detergent connection 230 VAC J 1-7/D 4. Rinse connection 230 VAC 5. Earth PE 6.
- Page 16 2.2 Detergent and rinse aid 2 Installation Figure 5: The detergent inlet is a tube. Rev. 2012-05...
- Page 17 2 Installation 2.2 Detergent and rinse aid Figure 6: Detergent inlet tube The machine is equipped with a rinse aid connection (see section on page 16). The tube is connected to the rinse tank. Figure 7: Detergent and rinse aid connections. The pre-drilled sensor hole is found on the right hand side.
-
Page 18: How To Lay The Granule Maxi Down On Its Side
All dosing equipment must be fitted with a main switch. How to lay the Granule Maxi down on its side To pass low doorways when moving the Granule Maxi it is possible to lay it down on the right side. Material needed:... - Page 19 2 Installation 2.3 How to lay the Granule Maxi down on its side Figure 10: Machine prepared for to be tilted to right side. 2. Open doors and take out all removable parts like the multi-cassette, other accessories, tank grids and overflow filter.
- Page 20 2.3 How to lay the Granule Maxi down on its side 2 Installation Figure 12: Plank under left pair of legs. Correct distance, 550 mm Right leg-profiles have to be placed in the centre of wooden beams. CAUTION Please mind the correct position, otherwise machine could fall of the beams.
- Page 21 2 Installation 2.3 How to lay the Granule Maxi down on its side Figure 14: The machine is now ready to be moved. 9. To rise the machine up, perform in reversed order. Rev. 2012-05...
- Page 22 2.3 How to lay the Granule Maxi down on its side 2 Installation...
-
Page 23: Troubleshooting And Alarms
Troubleshooting and Alarms NOTE Controls in this chapter may only be carried out by qualified staff. FAULT CHECK Machine will not fill 1. Water valves for incoming water are open. with water. 2. Rinse pump is rotating in the correct direction, phase order correct. - Page 24 3 Troubleshooting and Alarms FAULT CHECK Wash result not 1. That the nozzles are not blocked. satisfactory. 2. That the wash water temperature is approx. 65 °C. 3. That detergent dosing is correct. 4. That the right amount of granules are in the machine. 5.
-
Page 25: Error Codes
3 Troubleshooting and Alarms 3.1 Error codes Error codes The meaning of the error codes can be read out from the table below. • Error codes 100, 109, 116, 118, 132 are also displayed with an Error message text shown in the Meaning column. •... - Page 26 3.1 Error codes 3 Troubleshooting and Alarms Error Meaning Cause Remedy code Overheating The wash tank heater has Check the function of the protector for wash overheated. level sensors, and check that tank tripped the machine is filling with water. Reset the overheating protector located to the right of the electrical cabinet.
- Page 27 3 Troubleshooting and Alarms 3.1 Error codes Error Meaning Cause Remedy code Water level too low The level in the rinse tank Check the water connections in rinse tank has fallen incorrectly. from the rinse tank. Check the condition (value) of the upper and lower level sensor in the rinse tank.
- Page 28 3.1 Error codes 3 Troubleshooting and Alarms Error Meaning Cause Remedy code Clean level sensor The level sensor in the wash Empty the wash tank and tank may be dirty, or water in clean the level sensor in the the wash tank has not been wash tank.
-
Page 29: Programming
Programming Preselected values in Service menu Factory settings in service mode, Program version 4.x: Text Flexi Maxi Maxi S Gastro Combi Unit Eco wash time Short wash time Normal wash time Eco fine wash time Short fine wash time Normal fine wash time Separation time Time control the rinse pump Pot wash Eco... -
Page 30: Flashloader 4.2
4.2 Flashloader 4.2 4 Programming Text Flexi Maxi Maxi S Gastro Combi Unit Type of rinse aid dosage cycle cycle cycle cycle cycle Sensitivity of level detectors Inter- Prescavenging at program start Impulse time on the pump during prescavenging Alarm Low water level Alarm Wash temperature not reached min. - Page 31 4 Programming 4.2 Flashloader 4.2 1. The system requirements for external computers connected are Windows 2000,Windows XP or Windows 7. 2. Create a folder for the program on the hard drive. Use “Windows Explorer”. 3. Insert the CD and click the program file Flashloader 4.2.zip. Save the files in the folder that was just created on the hard drive.
- Page 32 4.2 Flashloader 4.2 4 Programming Figure 16: Making the connection with the machine. 5. Press “Run from Flash”. Figure 17: Computer connected and ready to take control. Rev. 2012-05...
- Page 33 4 Programming 4.2 Flashloader 4.2 Figure 18: Running the machine with Flash Loader. 6. Update date and time in the PC settings by pressing “Set Time”. (Figure 18 Running the machine with Flash Loader., on page 4.2.4 Flashloader for troubleshooting 1.
- Page 34 4.2 Flashloader 4.2 4 Programming Example: Basket drive ticked, basket drive out port forced, basket drive motor running. 3. The inputs are displayed in the “InPorts” field on the computer screen. time temperature settings and tank levels (No level<500, Level>500.) are displayed at the top of the screen.
- Page 35 4 Programming 4.2 Flashloader 4.2 3. Enter the Upload software menu by pressing “Program” when this button is highlighted. Figure 19: Press Program to enter the menu. 4. Select software version e.g. for Smart: “WashProg Smart 4.0.bin”, for Maxi, Gastro/Combi, Flexi: “WashProg 4.3.bin”.
-
Page 36: Gdtdirect™ 3.X
Figure 21: Upload ready GDTdirect™ 3.x* The GRANULDISK® Documentation Tool, GDTdirect™ 3.x, is an integrated function for documentation of the pot washing machine’s operating parameters and critical hygiene control points, HACCP. The function can be utilized in two different ways: •... - Page 37 4 Programming 4.3 GDTdirect™ 3.x* 4. Operating data for the most recent program is displayed in the window, for example: 120121 15:19 65/85 OK The information is read as follows: Date – 120121 (21/01/12) Time – 15:19 Program type E = Eco program S = Short program N = Normal program G = Washing with Granules selected...
- Page 38 4.3 GDTdirect™ 3.x* 4 Programming To obtain information about previous programs, scroll forwards and backwards in the list with button 3, “Select eco program”, and button 5, “Select normal program”. 8. To finish scrolling and exit the list, press the STOP button 2. 4.3.2 Storing data on an external computer To store complete operating data for the machine, it needs to be connected to an external...
-
Page 39: Starting The Program
4 Programming 4.3 GDTdirect™ 3.x* 4.3.5 Starting the program 1. The program started by double-clicking the program file gdt-direct 3.x.exe in the folder created on the hard drive or by clicking the icon on the desktop. 2. When the program has started, select the port to which the pot washing machine is connected. - Page 40 4.4 GD Memo™ 4 Programming GD Memo™ GD Memo is an integrated function which informs the user of the machine’s most important maintenance requirements. With GD Memo, it is possible to ensure optimum wash results, avoid stoppages during peak hours and maintain the lowest possible operating costs. This function is integrated in the control panel and keeps the user informed as follows: 1.
- Page 41 2” depending on which service is required. Phone number for Service company or GRANULDISK is shown below the service message. The reminder can be reset by an authorised service technician, once the service is performed. OK is shown in the display during 2 seconds after the reset.
- Page 42 4.4 GD Memo™ 4 Programming The following menus can be can be scrolled by using eco button (3) or the Normal program button (5). 1. Language: Set the languge by pressing Confirm button (1) and set the language by scrolling with eco (3) and Normal program (5).
-
Page 43: Routines For Long Time Storage
Routines for long time storage Routine for storing Granule Maxi not in daily use. 1. Collect the Granules in the machine with the Granule collector. 2. Rinse the Granules with plenty of water so all the dirt is removed. 3. Fill a sink with dish washing detergent solution (2 ml detergent / litre water) Place the Granule collector with the Granules in that solution overnight. - Page 44 5 Routines for long time storage...
-
Page 45: Warranty
After Sales representative and clearly labelled with machine number and copy of packing slip for replacement part. The warranty is valid only if GRANULDISK AB Granules and spare parts are being used and if a completed and signed Site Survey/Installation Protocol is returned to GRANULDISK AB. - Page 46 6 Warranty...
-
Page 47: Maintenance And Service
Maintenance and Service Service instructions 1 year service Granule Maxi 1 year service (8000 Cycles). Spare parts: Servicet kit 1 article # 20032. 1. Perform checks according to “Service record 1 year service”. see section 9 Appendix 2. Replacing the wash nozzles. - Page 48 7.1 Service instructions 1 year service 7 Maintenance and Service Nuts holding the damper. Take the damper grid with seal out of the machine. Undo the frame holding the seal (14 Nuts). Replace the seal and mount the frame again. Exploded view of Granule damper mechanism.
- Page 49 7 Maintenance and Service 7.1 Service instructions 1 year service Figure 24: Bolt NOTE Never tap the shaft to the left when it is placed in the left hand bearing. This will crack the bearing. Gently slide the arm off the shaft. Figure 25: Arm Push the shaft to the right and take it out of the machine.
- Page 50 7.1 Service instructions 1 year service 7 Maintenance and Service Clean supports and seat edges for tight sealing. Fit new seal make sure that the joint is to the bottom right or left. Shorten for good joint. Remount the seal holders. 5.
-
Page 51: Service Instructions 2 Year Service
7 Maintenance and Service 7.2 Service instructions 2 year service Service instructions 2 year service Granule Maxi 2 year service (16000 Cycles). Spare parts: Service kit 1 article # 20036. Make sure that the machine is empty from granules and water. - Page 52 7.2 Service instructions 2 year service 7 Maintenance and Service Figure 27: Make sure the hole is not clogged and no granules. Check arms and locking device for damages,cracks. Mount o-ring on wash nozzles and mount the wash nozzles. m Mount new bearings. Check that the pins on the shafts that interlock with the wash arms are firmly fastened.
- Page 53 7 Maintenance and Service 7.2 Service instructions 2 year service Check tubes from dirt. By undoing the lower nozzle on each side. If dirt is present: run the rinse system with bottom nozzles dismounted by using a computer and the Flash loader software. If no computer is available, fill the machine for one minute and drain it.
- Page 54 7.2 Service instructions 2 year service 7 Maintenance and Service...
-
Page 55: Steam Heating Granule Maxi
Power/Effective Steam Pressure The element is designed to be connected to an effective steam pressure of 0.3-2.0 bars saturated steam for a water feed temperature of 55° C. Always contact Granuldisk if the temperature of the water supply is lower. -
Page 56: Steam Consumption
® 8.5 Connection 8 Steam heating Granule Maxi Steam Consumption Steam consumption can be described in two ways: a. The daily consumption as a function of the number of wash cycles in an eight-hour day is shown in diagram 3 (on page 60). - Page 57 ® 8 Steam heating Granule Maxi 8.5 Connection Steam connections Rev. 2012-05...
-
Page 58: Recommended Equipment Not Included
® 8.6 Recommended equipment not included 8 Steam heating Granule Maxi Flow chart Recommended equipment not included Other essential or recommended equipment not included in the steam version of the Granule Maxi 1. Separate closing valve 1/2”. 2. Condensation carrier, e.g. thermally encapsulated condensation carrier 1/2”... -
Page 59: Diagrams
® 8 Steam heating Granule Maxi 8.7 Diagrams Diagrams Diagram 1 Diagram 2 Rev. 2012-05... - Page 60 ® 8.7 Diagrams 8 Steam heating Granule Maxi Diagram 3 Diagram 4 Rev. 2012-05...
-
Page 61: Appendix
Appendix Service record 1 year service Service record 2 year service Wiring diagrams Rev. 2012-05... - Page 62 9 Appendix This page intentionally left blank. Rev. 2012-05...
- Page 63 Service record 1 year service Customer: Machine type Granule Maxi Serial no. Service performed by: Name Company: Check point Passed Failed Notes 1. Solenoid Check operation. Leaks in the □ □ valve, incoming pipes, connections, solenoid water valve and water filter.
- Page 64 Check point Passed Failed Notes 10. Drip collector Check function of drains if □ □ necessary clean the tubes. 11. Door sensors Check operation 1: Ensure □ □ and locking that there is no water in the mechanism. wash tank. Close one door and leave the other open.
- Page 65 Check point Passed Failed Notes temperature blocks. Check rinse time normal time =40 s. (non Eco mode). 20. Detergent Doses correctly/does food fat □ □ and rinse aid dissolve/is there foam in the dosing wash water? 21. Outflow Check the drain time. Do □...
- Page 66 Service record 2 year service Customer: Machine type Granule Maxi Serial no. Service performed by: Name Company: Check point Passed Failed Notes 1. Solenoid valve, Check operation. Leaks in the □ □ incoming water pipes, connections, solenoid valve and water filter.
- Page 67 Check point Passed Failed Notes and locking there is no water in the wash mechanism. tank. Close one door and leave the other open. Check that the machine does not fill with water when a wash programme is selected. Repeat with the other □...
- Page 68 Check point Passed Failed Notes 21. Detergent Doses correctly/does food fat □ □ and rinse aid dissolve/is there foam in the dosing wash water? 22. Outflow Check the drain time. Do □ □ granules emerge with the water when the machine is emptied? Check the overflow pipe.
- Page 69 200/230 V + 400/415 V CW...
- Page 70 200/230 V + 400/415 V CW...
- Page 71 200/230 V + 400/415 V CW...
- Page 72 200/230 V + 400/415 V CW...
- Page 73 200/230 V + 400/415 V CW...
- Page 74 200/230 V + 400/415 V CW...
- Page 75 208/575 V CSA...
- Page 76 208/575 V CSA...
- Page 77 208/575 V CSA...
- Page 78 208/575 V CSA...
- Page 79 208/575 V CSA...
- Page 80 208/575 V CSA...
- Page 81 230/400/415 V Steam heated...
- Page 82 230/400/415 V Steam heated...
- Page 83 230/400/415 V Steam heated...
- Page 84 230/400/415 V Steam heated...
- Page 85 230/400/415 V Steam heated...
- Page 86 380/400/415/440/480 V...
- Page 87 380/400/415/440/480 V...
- Page 88 380/400/415/440/480 V...
- Page 89 380/400/415/440/480 V...
- Page 90 380/400/415/440/480 V...
- Page 91 380/400/415/440/480 V...
- Page 92 575 V CSA Steam heated...
- Page 93 575 V CSA Steam heated...
- Page 94 575 V CSA Steam heated...
- Page 95 575 V CSA Steam heated...
- Page 96 575 V CSA Steam heated...
- Page 97 575 V CSA Steam heated...
Need help?
Do you have a question about the Granule Maxi and is the answer not in the manual?
Questions and answers