Advertisement
Quick Links
Advertisement

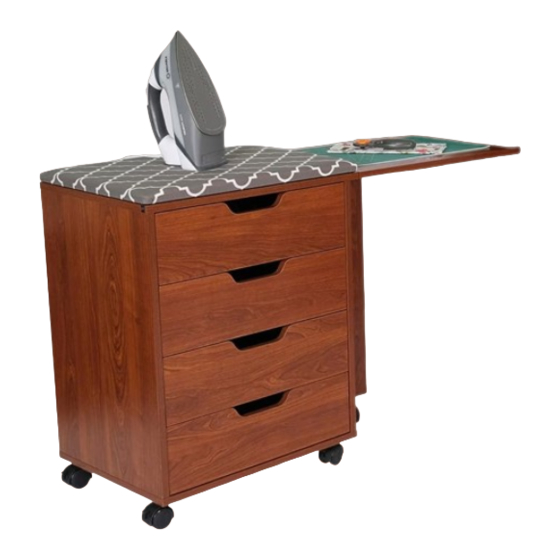
Summary of Contents for Arrow Shirley 441
- Page 1 ASSEMBLY INSTRUCTIONS Shirley ITEM NO.: 441 White Teak...
-
Page 2: General A Ssembly Guidelines
Insert bolt through pre-drilled Screw cam bolts flush as Turn clockwise to lock cam with bolt. illustrated. surface. The arrow direction must hole in edge of panel. be in the direction of the hole. Tip: place a small bit of WD-40 or similar lubricant into the pre-installed cam bolt holes to help the cam bolts screw in better. - Page 3 Par ts List: Panels ITEM DESCRIPTION QTY. PACK. ITEM DESCRIPTION QTY. PACK. Top Panel 1 of 2 Back Support Panel 2 of 2 A1/A2 Bottom panel 1 of 2 Gate Leg Panel 2 of 2 Drawer Front 2 of 2 Back panel 1 of 2 Drawer Back...
-
Page 4: Parts List: Hardware
Parts List: Hardware TIP: Keep all the parts in their individually labeled bags. This will make finding parts easier as you assemble your cabinet. NOTE: P Brackets shown below are an optional part, used to add extra stability to the back panel of your cabinet. If you choose not to use them, the function of your cabinet will not be affected. - Page 5 Part One: Cabinet Shell Congratulations and welcome to Arrow Sewing Furniture! We can’t wait to get your brand new Shirley Storage Cabinet up and running. Please contact our Customer Service Team at 1-800-533-7347 ext. 1 during normal business hours with any assembly related questions.
- Page 6 Part One: Cabinet Shell 8x30 Dowel Pin x12 6x35 Cam Bolt Install 4 Dowel Pins in Panel Z Install 4 Cam Bolts in Panel Z Install 4 Dowel Pins in Panel X Install 4 Cam Bolts in Panel X Insert 2 Dowel Pins in each of the two Panel O pieces. Shirley Assembly Instructions...
- Page 7 Part One: Cabinet Shell ⁄ “ Cam Cover NOTE: The image below shows UPSIDE DOWN construction. This will make installing the base of the cabinet easier in the next step. Attach Panels Z and X to O Panels. Tighten Cams and apply Cam Covers. Shirley Assembly Instructions...
- Page 8 Part One: Cabinet Shell ⁄ “ Cam Cover Attach Panel G. Tighten Cams and apply Cam Covers. Make sure Plate Casters are locked and turn the cabinet over onto its wheels. You may need a friend to help you, but it is not required.
- Page 9 Part One: Cabinet Shell ⁄ “ Cam Cover 6x35 Cam Bolt Insert Panel D (back) into the grooves on Panels X, Z and G. A1/A2 Attach c1 Cam Bolts to Panel A1/A2. A1/A2 Attach Panels A1/A2 to Panels X, Z and O as shown.
- Page 10 Part One: Cabinet Shell P-Brackets are optional. They work to help stabilize the back panel of your cabinet. If you choose not to use them, your cabinet will still function as it should. Measure approximately 8 inches from the top and bottom of the cabinet. Slide P-Brackets into the seams between Panel X and Panel D, and between Panel Z and Panel D.
- Page 11 Part Two: Drawers 6x35 Cam Bolt ⁄ “ Cam Cover Prep drawer front Panel K as shown above by installing 4 c1 Cam Bolts. Repeat x3 (4 drawer fronts total) Attach side Panels K1 and K2 to drawer front Panel Slide drawer bottom Panel K4 into the grooves on Pan- K.
- Page 12 Part Two: Drawers 3.5x35 Screw To reach the pre-drilled screw holes on the sides of Panels K1 and K2, you will need to tilt the drawer runners. Remove the front and back screws on the drawer runners, leaving the middle screw installed. Pivot the drawer runners to access screw holes as shown above.
- Page 13 Part Two: Drawers Fully extend the cabinet rails, align drawer rails, and slide drawers into caddy. Be sure that the silver ball bearing pieces are positioned all the way to the front of the rails. TIP: Gently open and close the drawers a few times to engage the Soft Close mechanism. For detailed video instructions on how to install/adjust your soft close drawers, go to www.arrowsewing.com/assembly.
- Page 14 Part Three: Gate Leg Assemble Panel Y as shown, attaching h2 Hinges with s2 Screws, and attaching t2 Caster with b Bolt and Nut. Attach Panel Y to Panel Z with s2 Screws as shown. Shirley Assembly Instructions...
- Page 15 Part Four: Thread Spool Holders 6x30 Dowel Pin x106 Insert 6x30 Dowel Pins into Thread Spool Board Panel O1. Repeat with second Panel O1. You may choose to use glue to secure your dowels, but it is not required. Place Panel O1 (2) Thread Spool Holders into the cabinet.
-
Page 16: Limited Warranty
(detailed receipt), and photos of the product. Arrow will replace any defective part (at its sole option), excluding labor. Replacement parts will be warranted for only the remaining period of the original Warranty. - Page 17 COMPLETE YOUR SEWING STUDIO! Elevate your sewing experience with Arrow’s Best-Selling Accessories! Custom Sewing Inserts Sewing Chairs Enhance your sewing experience with a custom acrylic Arrow’s #1 Rated Height Adjustable Sewing Chair is sewing insert! Custom acrylic sewing inserts are...


Need help?
Do you have a question about the Shirley 441 and is the answer not in the manual?
Questions and answers