Advertisement
Quick Links
Industrieweg 24, NL-8071 CT Nunspeet, Holland
Phone 31-(0)341-272222 Fax 31-(0)341-272200
One Holland, Irvine, CA 92618 U.S.A.
Phone 949-951-5003 Fax 949-951-7519
685 The Queensway Peterborough, Ontario K9J 7J6
Phone 705-745-3232 Fax 705-745-1949
6/30 Endeavor Road, Caringbah, NSW Australia. 2229
Phone 61-(0)2-9526-7799 Fax 61-(0)2-9526-7622
20 Benoi Sector, Jurong Town, Singapore 629852
Phone 65-6-2654777 Fax 65-6-6632504
3-77 Oimatsu-cho Sakai Osaka Japan
Phone 81-(0)72-223-3243 Fax 81-(0)722-23-3493
www.shimano.com
This publication is printed on recycled paper.
Specifications are subject to change for improvement without notice.
MA8CMEC © Dec. 2002 Shimano Inc., 1202 Printed in Japan XBC IZM
• Shimano recommends that helmets be worn at all times when
riding bicycles.
When participating in the sports depicted in this brochure, Shimano recommends
that you use the proper safety protection for that sport. The riders seen in these
pictures are experienced experts or professionals, and Shimano requests that you
do not attempt to duplicate any of the actions shown in this brochure that are
beyond the capabilities of your equipment or your own abilities.
UCI official neutral
technical support
Advertisement

Related Manuals for Shimano BR-M965


Summary of Contents for Shimano BR-M965
- Page 1 UCI official neutral do not attempt to duplicate any of the actions shown in this brochure that are technical support MA8CMEC © Dec. 2002 Shimano Inc., 1202 Printed in Japan XBC IZM beyond the capabilities of your equipment or your own abilities.
- Page 2 SHIMANO Disc Brake For best performance Systems Service manual vol.
- Page 3 CAUTION correctly. I Handling the mineral oil • Use only genuine Shimano mineral oil. If other types of oil are used, it may cause problems • Use safety glasses when handling, and avoid with brake operation, and cause the system to contact with eyes.
- Page 4 We strongly recommend that only genuine adjust the brakes. Shimano replacement parts be used. • Always make sure that the front and rear • Read these Technical Service Instructions brakes are working correctly before you ride carefully, and keep them in a safe place for the bicycle.
- Page 5 • • • • Contents conditions • • • • • • • • • • • • • • • • • • • I Shimano Disc Brake Features • Applicable forks and frames • • • • • Shimano Linear Response •...
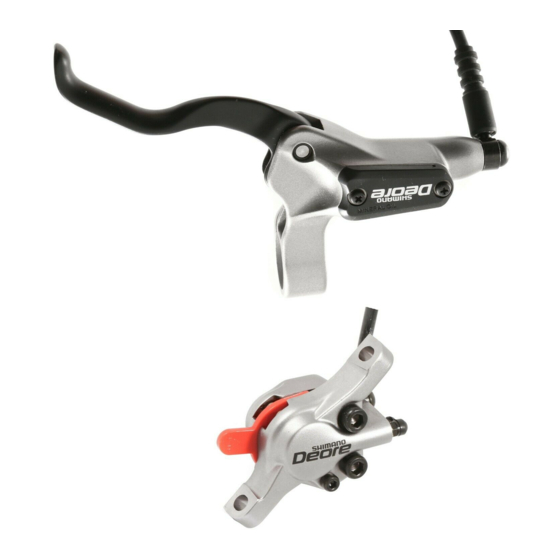
- Page 6 • • • • • • • • • • • • • • • • • • • Brake Lever Hose Caliper Rotor HB-M965 Technical Service BR-M965 P. 25 Instructions • • M965 Part lists P. 42 – 43 M965 • •...
- Page 7 Shimano Linear Response Disc Brake System Recently we conducted testing with world Brian with Shimano R & D engineer champion caliber pros Nicolas Vouilloz, Brian Lopes and Mike King to confirm our disc brake design priorities. As our testing confirmed, the highest priority is not “Power”.
- Page 8 Disc Brake Line-up XC Competition MTB All-around BR-M965 BR-M755 BR-M555 ST-M965 BL-M756 BL-M556 SM-RT96 SM-RT75 SM-RT61 SM-BH96 SM-BH62 SM-BH62 M755-DH MTB All-around For Downhill 203mm Roter and adapter MTB Sport / Recreational BR-M525 BL-M525 SM-RT61 SM-BH59 BR-M515-LA SM-RT61 BR-M475 SM-RT61...
- Page 9 User friendly features Bleed kit Bleeding spacer (BR-M965/966) Adjustable reach lever New shape shim for easy adjust 0.5mm 0.2mm Becomes wider Becomes narrower Center-lock mounting system Disc brake with power modulator lockring 4-finger Brake Lever hub spline rotor SM-PM50 Power Modulator...
- Page 10 I Installation of shims I Installation of the brake hose Shim (0.5mm, 0.2mm) BL-M755/M555 O-rings 0.2 mm 0.5 mm BL-M756/M556 0.2mm Y-8CL 14000 0.5mm Y-8CL 13000 Shim (0.5mm, 0.2mm) I Preventing loosening of the caliper fixing bolts M965 Wire M755-DH I Installation of the rotor Bolt Fixing bolt plate...
- Page 11 Hydraulic Disc Brake Brake Hose Part names Caliper Brake Lever Rotor Brake Cable Cable type Disc Brake Caliper Brake Lever Rotor Hydraulic Cable type Disc Brake Disc Brake Differences With normal brake systems and cable-type disc brake systems, operating between the lever causes a cable to be pulled, which in turn operates the brake hydraulic disc body.
- Page 12 Vapor lock prevention and remedying Use only Shimano genuine mineral oil or a Be sure to use only oil from a freshly- proper equivalent. If any other type of oil opened container. This is because the oil is used, it may not only cause vapor lock, may absorb moisture from the air after the but may also damage the brake system.
- Page 13 The shimano disc brake system is compatible with flange or and frames International standard bosses. For some installations, it will be necessary to mount a Shimano adapter for post type frame and fork bosses. If an adaptor needs to be installed, consult the place of purchase for further details.
- Page 14 I The hose should be long enough so that it will not be damaged or become disconnected if the bicycle falls over. Hydraulic Disc Brake I When connecting the hose, apply Shimano genuine mineral oil to the O-ring to help preserve the O-ring from deterioration.
- Page 15 Hydraulic Cable type Disc Brake Disc Brake I Secure the hose with plastic ties or similar so that the hose does not stick out from the bicycle frame. If the hose is not secured correctly and sticks out, it may get caught on parts such as bushes during riding, which may result in damage to the hose or it might cause the bicycle to fall over.
- Page 16 Technical Notes Disc brake mount dimensions Disc brake Shimano disc brakes are designed to fit the frame and fork as shown below. (The dimensions shown below are as same as the International Standard disc brake mount.) dimensions The following mount dimensions (A~H) for each model are recommended.
- Page 17 Disc brake mount dimensions Shimano disc brakes are designed to fit the frame and fork as shown below. (The dimensions shown below are as same as the International Standard disc brake mount.) The following mount dimensions (A~H) for each model are recommended.
- Page 18 Technical Notes • Shimano rotors (except RT96) are able to mount to hubs with the following dimensions. Hub dimensions Required dimensions are the same as Hayes disc brake standard. for Shimano ø 44 ± disc brake Dimension Dimension M755 M756/M525/M475/C501 10.5 ±...
- Page 19 Shimano Hydraulic Disc Brake combination chart Combination In order to realize the best performance, we recommend that the following Chart combination be used. (Hydraulic Disc ) Series Brake Lever Hose Caliper Roter Mount type (option) International ST-M965 SM-BH96 M07 Resin...
- Page 20 Technical Notes At brake lever end At caliper end Brake lever Brake Hose Banjo Caliper Hose SM-BH96 (Cutable) Banjo ST-M965 Hose BR-M965 / M966 O-ring Banjo bolt O-ring Banjo bolt Connector O-ring insert Olive Banjo A Banjo nut Banjo Banjo bolt...
- Page 21 Shimano Mechanical (Cable type) Disc Brake combination chart Combination In order to realize the best performance , we recommend that the following Chart combination be used. (Mechanical Disc) Series Caliper Mount type Brake Lever Roter International V-brake BL BR-M515-LA standard (1.5-2.5finger )
- Page 22 Interchangeability < Brake Pad lineup > Sintered Sintered Sintered Sintered Model NO. type Resin Resin Resin Resin Resin Metal Metal Metal Metal BR-M965 Hydraulic option Standard BR-M755 Hydraulic Standard option BR-M555 Hydraulic Standard option BR-M525 Hydraulic Standard BR-M515 Mechanical* Standard...
- Page 23 Performance of Brake Pad Combinations < metal / resin > Modulation Modulation Stopping Resists Brake #Pad Fade Noise Weight Weight Stopping power abrasion power BR-M755 M03 Metal metal / resin M04 Resin Resists abrasion Recommended use : XC Free ride / Touring Noise Fade <...
- Page 24 Technical Notes < metal / resin > Modulation Modulation Stopping Resists Brake #Pad Fade Noise Weight Weight Stopping power abrasion power BR-M555 M01 Metal metal / resin M02 Resin Resists abrasion Recommended use : XC Free ride / Touring Noise Fade <...
- Page 25 Technical Notes Check that the spokes have been laced as shown in the illustration. Wheel spoke A radial assembly cannot be used. Lace the spokes as shown in Figure 1 below for the left side of the front wheel (the side lacing where the rotor is installed), and the left and right sides of the rear wheel, and as shown in Figure 2 below for the right side of the front wheel.
- Page 26 • Do not remove the pistons when disassembling the calipers. • Parts are not guaranteed against natural wear or deterioration resulting from normal use. • For maximum performance we highly recommend Shimano lubricants and maintenance products. I When cleaning with a compressor CAUTION •...
- Page 27 < BL-M525 > Installation of the brake lever After checking that the olive is Olive positioned as shown in the Secure the brake lever as shown in the illustration. illustration, apply grease to the (Check that the brake lever does not interfere with threads of the connecting bolts the shifting lever during operation.
- Page 28 Socket wrench Lever operation (8mm) BL-M755 Loose • Socket wrench Model Number Size BR-M965 / M966 7 mm BR-M755 8 mm Slightly stiff BR-M555 / C901 6 mm Loosen the bleed nipple by 1/8th of a turn to open it, and then pour oil into the reservoir tank. Gently...
- Page 29 If using post-type caliper mounting bosses, use a released into the reservoir tank. Shimano adapter (F: Y8B298040; R: Y8B298070). Be It can be useful to shake the hose sure to use the 170 mm rotor when using the front gently or shift the position of the adapter.
- Page 30 Start with two 0.5 mm thick shims, and use the 0.2 While wearing protective gloves, apply a force to the mm shims for fine tuning. tighten the calipers, and calipers to turn it in a counterclockwise direction. check that the calipers and the rotor do not interfere While doing this, tighten the fixing bolts.
- Page 31 Install the accessory caps as shown in the illustration fixing bolts to prevent the bolts from loosening. 24.5 mm < BR-M755 > Caps Installation of the SHIMANO adapter and caliper. < For front > Front fork Adapter I For post type Install as shown in the illustration.
- Page 32 ➀ < BR-M965 / M966 / M755-DH > If bolt tries to loosen (turn in the counterclockwise direction), Secure the two bolts with a length of wire as shown ➀ force is applied via the wire to turn Bolt in the illustration in order to prevent the bolts from ➁...
- Page 33 After draining the fluid, pour in fresh brake fluid while referring to "Adding the brake fluid and bleeding air". Use only genuine Shimano mineral oil as the brake fluid. Dispose of the waste oil according to proper country...
- Page 34 Cut end system. Olive • For maximum performance we highly Banjo nut recommend Shimano lubricants and Hose maintenance products. Installation Use a utility knife or similar tool to cut the hose. * Make sure that you handle the utility knife safely and correctly in accordance with the instructions which are provided with the utility knife.
- Page 35 < SM-BH96 > After checking that the olive is positioned as shown in the illustration, apply grease to the thread of the 1. At brake lever end banjo nut and then tighten the banjo nut. Pass the hose through the banjo nut and the olive as shown in the illustration.
- Page 36 < SM-BH62 > After checking that the olive is positioned as shown in the illustration, apply grease to the 1. At brake lever end threads of the connecting bolts and then attach Pass the hose through the connecting bolt and the the hose to the brake lever as shown in the olive as shown in the illustration.
- Page 37 < SM-BH61 > Slide the olive into banjo A until banjo nut can thread on to banjo A. Pass the hose through the banjo nut and the olive as shown in the illustration. Direction of insertion Banjo A Olive Cut end Olive While pushing the brake hose, Banjo nut...
- Page 38 < SM-BH59 > After checking that the olive is positioned as shown in the illustration, apply grease to the Pass the hose through the connecting bolt and the threads of the connecting bolts and then attach olive as shown in the illustration. the hoses to the brake lever and calipers as shown in the illustration.
- Page 39 • Parts are not guaranteed against natural wear or deterioration resulting from to use normal use. • For maximum performance we highly recommend Shimano lubricants and maintenance products. Installation Installation of the rotor Installation of the brake lever Install the rotor and the rotor tightening plate to the Use a 5 mm Allen key to install.
- Page 40 6. Securing the cable While wearing protective gloves, apply pressure to the adapter in the counterclockwise direction while Pass the inner cable through the cable adjusting tightening the caliper clamp bolt. bolt, and then tighten the cable fixing bolt. Tightening torque: 6 - 8 N·m {53 - 69 in.
- Page 41 Remove the bicycle wheel from the frame, and I For post type then remove the brake pads as shown in the illustration. • BR-M475/C501 • BR-M515/C601 BR-M475/C501 Split pin Brake pad Adjusting when the pads are worn Snap ring Use the cable adjusting bolts at the brake lever and the caliper body and also the pad adjusting screws to BR-M515/C601 adjust the clearance for pads which are worn.
Need help?
Do you have a question about the BR-M965 and is the answer not in the manual?
Questions and answers