
Related Manuals for Shimano E6000 Series


Summary of Contents for Shimano E6000 Series
- Page 1 UM-70H0A-004-00 Shimano Total Electric Power System User's manual E6000 Series Original instructions...
-
Page 3: Table Of Contents
CONTENTS IMPORTANT NOTICE ..................2 Important safety information .................2 To ensure safety ...................2 Features of SHIMANO STEPS ................5 Features ............................5 Riding the bicycle ........................5 Assist mode ..........................6 Names of parts .....................7 Specifications....................8 Method of use .....................8 INTRODUCTION ...........................8 Charging the battery ........................8 About battery and charger displays ..................11... -
Page 4: Important Notice
Furthermore, it is Be sure to observe the following in order to avoid burns or recommended that you use only genuine Shimano parts at other injury from fluid leakages, overheating, fire or these times. If bolts and nuts are left loosened or the explosions. - Page 5 Handling the battery Handling the battery • If any liquid leaking from the battery gets into your eyes, • Do not leave the battery in a place exposed to direct immediately wash the affected area thoroughly with sunlight, inside a vehicle on a hot day, or other hot clean water such as tap water without rubbing your eyes, places.
- Page 6 • Contact the place of purchase for updates of the product software. The most up-to-date information is available on the Shimano website. For details, refer to the "Connection and communication with the PC" section. • Do not use thinner or other solvents to clean any of the products.
-
Page 7: Features Of Shimano Steps
Features of SHIMANO STEPS „ Features • Lightweight, compact design • Silent, smooth ride • High shifting performance system (In the case of electronic gear shifting) This system uses accurate sensors to enable shifting gears by providing the most appropriate level of power assistance carefully adjusted by computer controls. -
Page 8: Assist Mode
„ Assist mode You can select a SHIMANO STEPS assist mode for each particular application. HIGH NORMAL Use when powerful assistance is Use when an intermediate level of Use when you want to enjoy long required, such as when riding up steep assistance is needed, such as when you distance riding on level ground. -
Page 9: Names Of Parts
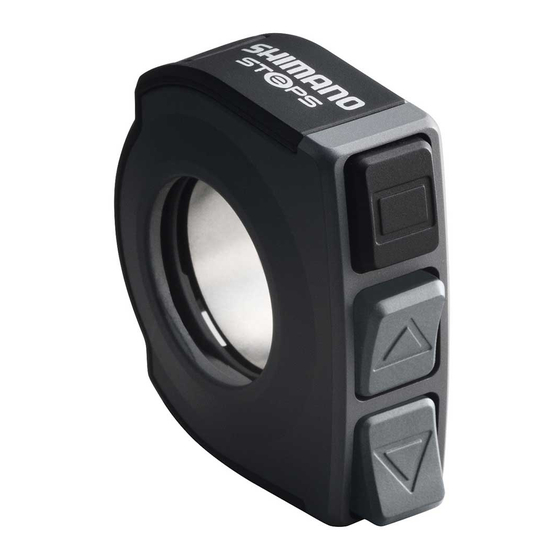
Names of parts <BT-E6000> < In the case of electronic gear shifting > Shifting SW-E6000 switch Motor MU-S705 unit SG-C6060 Internal geared SG-S705 SG-S505 <BT-E6010> Motor unit Internal geared Internal geared • SC-E6000 • BT-E6000 Cycle computer Battery • SC-E6010 •... -
Page 10: Specifications
Specifications Operating temperature -10 – 50˚C Battery type Lithium ion battery range: During discharge Operating temperature 0 – 40˚C Nominal capacity 11.6 Ah range: During charging Storage temperature -20 – 70˚C Rated voltage 36 V DC Storage temperature -20 – 60˚C Drive unit type Midship (Battery) - Page 11 When charging the battery alone < EC-E6000 > Attach the adapter to the charging plug. Charging plug Plug the charger’s power plug into the outlet. Plug the adapter into the battery’s charger connector. Adapter * When inserting the adapter into the charger connector, hold the charging plug so it is facing down toward the adapter.
- Page 12 < SM-BCE60 > Attach the charger plug to the charger connector of the < BT-E6000 > Battery battery. Insert it with the groove side of the connector facing Charger connector * You cannot insert it with the groove side facing Groove down.
-
Page 13: About Battery And Charger Displays
Charging the battery while installed onto the bicycle < EC-E6000 > Insert the battery charger power plug into the outlet. Insert the charging plug into the battery mount charger connector. * Place the battery charger main body on a steady surface such as the floor before charging. <BT-E6000>... -
Page 14: Handling And Charging The Battery
Charging-in-progress indication Battery level indicator*1 Battery level 0% - 20% 21% - 40% 41% - 60% 61% - 80% 81% - 99% 100% : No light : Lights up : Flashing Battery level indication The current remaining battery level can be checked by pressing the power button on the battery. The current battery level will not be displayed if the battery is installed onto the bicycle. -
Page 15: Installing / Removing The Battery
„ Installing / removing the battery How to use the key The following description may not be applicable as different types of keys are available. Insert the key into the key cylinder in the battery <BT-E6000> holder. Key cylinder • The position of the key does not affect the insertion of the battery. - Page 16 Removing the battery <BT-E6000> Turn off the power, then turn the key to the unlocking position, and pull out the battery. You can remove the battery only when the key is in the unlocking position. <BT-E6010> Turn off the battery then turn the key to the unlocking position.
-
Page 17: Switching Between Cycle Computer Operations And Modes
<BT-E6010> Align the indentation in the bottom of the battery with the protrusion on the holder and insert the battery. Slide the battery to the right starting from the point where it is inserted. Push in the battery until you hear it click. -
Page 18: Installing And Removing The Cycle Computer
„ Installing and removing the cycle computer Slide the cycle computer onto the bracket as shown in the illustration to install it. Insert the cycle computer securely until it clicks into place. Bracket To remove the cycle computer, push the lever of the bracket firmly while sliding out the cycle computer. -
Page 19: Turning The Power On / Off
If the bicycle has not moved for over 10 minutes, the power Press once will automatically turn off. „ SHIMANO STEPS logo screen This screen is displayed during system start up and shutdown. This screen is an example of the... -
Page 20: Basic Screen Display
„ Basic screen display Displays the status of the power assisted bicycle, traveling data. The number of gears and the shifting mode are only displayed when using electronic gear shifting. < SC-E6000 > Current speed Displays the current speed. Battery charge Displays the current battery level in six levels. - Page 21 Battery level indicator You can check the battery level on the cycle computer while riding. <SC-E6000> <SC-E6010> Display Battery level Display Battery level 81 - 100% 100% 61 - 80% 41 - 60% 21 - 40% 1 - 20%...
- Page 22 < SC-E6000 > < SC-E6010 > Changing the assist mode display Assist Shift Display the current assist mode. Press Assist-Y or Assist-Z on the assist switch to switch assist modes. Display Details HIGH Assist high NORM Assist normal HIGH Assist eco Assist off NORM WALK...
- Page 23 <Switch to walk assist mode> Assist Shift 1. Press assist-Z to switch the mode to "OFF". 2. Press assist-Z once again 2 seconds until "WALK" is displayed. 3. Press and hold assist-Z to start walk assist. 2 seconds < SC-E6000 > <...
- Page 24 < SC-E6000 > < SC-E6010 > Gear position and traveling data display Displays the current gear ratio or traveling data. The type of traveling data displayed changes each time you tap Assist-X. Display (SC-E6000) Display (SC-E6010) Details Gear position*7 (displayed only when the motor unit is connected) Gear position*6 (when setting start mode)
- Page 25 Assist Shift < SC-E6000 > < SC-E6010 > *3 When "RANGE" is displayed, the battery level and the walk assist indicator do not appear on the screen. *4 Optional item: You can configure the display settings in E-tube Project. For details, refer to the "Connection and communication with the PC"...
- Page 26 Turning the battery-powered light ON or OFF <SC-E6000> Assist Shift When the battery-powered light is connected, pressing the Assist-X for 2 seconds displays this 2 Sec. information instead of the clock and assist mode. The light turns on and off each time it is displayed. It is displayed for about 2 seconds.
- Page 27 Switching gear shifting mode From the basic screen, press Shift-X to switch between Assist Shift automatic and manual gear shifting modes. < SC-E6000 > Automatic Manual < SC-E6010 > Automatic Manual...
- Page 28 Clearing the traveling distance You can clear the traveling distance in the main screen. If the battery-powered light is connected and configured, clear the traveling distance (DST) according to "Clear (Clear settings)" in "About the settings menu". * When using the SC-E6000 this function can only be used when the light is not connected. Change the traveling data display to DST and press Assist Shift...
-
Page 29: About The Settings Menu
„ About the settings menu Launching With the bicycle stopped, pressing both the Assist-Y Assist Shift and Assist-Z at the same time for 2 seconds displays the setting screen. 2 Sec. < SC-E6000 > < SC-E6010 > Press the Assist-Y or Assist-Z to move the cursor to the item you want to configure. - Page 30 Clear (Clear settings) Clear the traveling distance, or reset the display setting to default. Press the Assist-Y or Assist-Z to move the cursor to the Assist Shift Assist Shift item you want to configure. Configurable items Details Return to the setting menu Exit screen <...
- Page 31 Clock (Clock setting) Configure the clock setting. Press the Assist-Y or Assist-Z to set the hour. Assist Shift Press Assist-Y to increase the numbers. Press Assist-Z to decrease the numbers. < SC-E6000 > < SC-E6010 > Pressing the Assist-X enables the set value and moves Assist Shift you to the minutes setting.
- Page 32 Start mode (Start mode setting) Sets the start gear when using start mode function. Assist Shift Press the Assist-Y or Assist-Z to move the cursor to the item you want to configure. Configurable items Details No setting < SC-E6000 > <...
- Page 33 Brightness (Backlight brightness settings) < SC-E6010 > Press Assist-Y or Assist-Z to adjust the brightness. Assist Shift • Brightness can be adjusted to one of 5 levels. Pressing the Assist-X button enables the set value at Assist Shift the cursor position and takes you back to the "Setting menu"...
- Page 34 Unit (Switching between km and miles) Configure the distance unit setting. Press the Assist-Y or Assist-Z to move the cursor to the Assist Shift item you want to configure. Configurable Details items Displayed in km < SC-E6010 > < SC-E6000 > mile Displayed in miles Pressing the Assist-X button enables the setting item...
- Page 35 Font color (Font color settings) < SC-E6010 > Press the Assist-Y or Assist-Z to move the cursor to the Assist Shift item you want to configure. Configurable items White Black Black White Pressing the Assist-X button enables the setting item Assist Shift indicated by the cursor and takes you back to the...
- Page 36 Auto (Shift timing adjustment) Shift timing can be adjusted when in automatic shift mode. Press Assist-Y or Assist-Z to adjust the Assist Shift values. • Pressing Assist-Y and adjusting the value upward adjusts shift timing to make pedaling easier. • Pressing Assist-Z and adjusting the value downward adjusts shift timing to make pedaling harder.
-
Page 37: Drive Unit Setting Data Backup Function
CAUTION Connection and communication with a PC is not possible while charging. • You need SM-PCE1 and SM-JC40 / JC41 to connect SHIMANO STEPS to a PC. • Firmware is subject to change without notice. If necessary, contact the place of purchase. -
Page 38: Troubleshooting
Troubleshooting „ Battery level and error indication Error indication Lighting Indication condition Recovery type pattern *1 Make sure that the cable is not loose or improperly Communication error connected. System error with the bicycle If the situation does not improve, contact the place of system purchase. -
Page 39: Error Messages On The Cycle Computer
„ Error messages on the cycle computer WARNING This disappears if the error is fixed. < SC-E6000 > < SC-E6010 > Condition for removing Situation where the the operational restriction Code Remedy when a warning is being error occurred displayed The chain tension may The assist function is not have been adjusted... - Page 40 Condition for removing Situation where the the operational restriction Code Remedy when a warning is being error occurred displayed The crank may be Install the crank in the correct direction, then turn on W012 installed in the the power again. wrong direction.
-
Page 41: Troubleshooting
Situation where Operational restriction when Code Remedy the error occurred an error is being displayed The speed sensor may have been Power assistance is not E014 Contact the place of purchase or bicycle dealer. installed in the provided during riding. wrong position. - Page 42 Symptom Cause / Possibility Remedy The bicycle is not a motorbike, so you need Are you pedaling? to operate the pedals. Set the assist mode to "HIGH". If you still Is the assist mode set to "OFF"? do not feel that assistance is being given, contact the place of purchase.
- Page 43 Battery Symptom Cause / Possibility Remedy The battery level indicators do not show All the five battery level battery levels when the battery is It is not a sign of a malfunction. indicators stay on. connected to the bicycle. Battery levels are shown during charging.
- Page 44 Symptom Cause / Possibility Remedy The battery cannot be Contact the place of purchase. removed. The battery cannot be Contact the place of purchase. inserted. Fluid is coming out from the Contact the place of purchase. battery. An abnormal odor can be Stop using the battery immediately and detected.
- Page 45 Symptom Cause / Possibility Remedy Check if the electric wire connector is The gear position is not The gear position is only displayed when disconnected. If you are not sure, contact displayed. the power gear shifting unit is installed. the place of purchase. Change the setting.
- Page 47 The number that is attached to the key is needed in case you need to purchase spare keys. Make a note of the in the number following box and keep it in a safe place. Key number Please note: specifications are subject to change for improvement without notice. (English) © Jun. 2015 by Shimano Inc. HTR...
Need help?
Do you have a question about the E6000 Series and is the answer not in the manual?
Questions and answers
does the SC-e6010 have bluetooth capability to connect with etube? It is on a Felt Sport E50