Table of Contents
Advertisement
Quick Links
Advertisement
Table of Contents
Troubleshooting

Subscribe to Our Youtube Channel
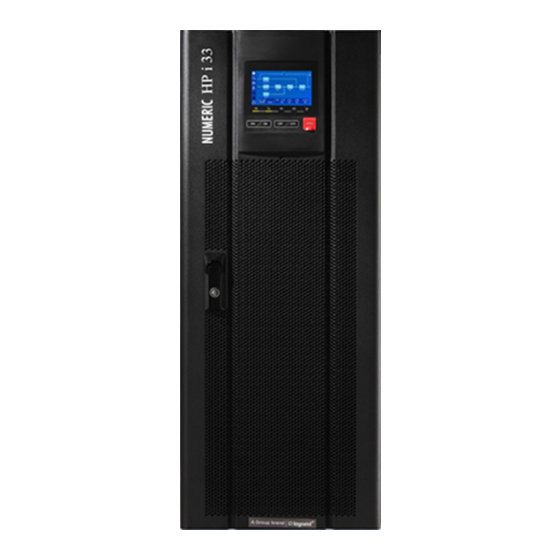
Related Manuals for LEGRAND NUMERIC HP i 33 40 kVA Series


Summary of Contents for LEGRAND NUMERIC HP i 33 40 kVA Series
- Page 1 USER MANUAL HP i 33 40 kVA Series UPS NEW ENERGY TO POWER www.numericups.com...
-
Page 2: Table Of Contents
CONTENTS Preface Product overview 2.1 Product introduction 2.1.1 Model meaning 2.1.2 Product features 2.2 Working principle 2.2.1 Working principle diagram 2.2.2 Working mode 2.3 Appearance and structure 2.3.1 Appearance 2.3.2 Structure layout (open door) 2.3.3 Alarm function Safety instructions 3.1 Safety announcements 3.1.1 Safety instructions 3.1.2 Usage announcements for battery 3.1.3 Anti-static protection... - Page 3 CONTENTS 3.1.5 Safety warning label setting 3.1.6 Measure with electricity 3.2 Operation and maintenance requirements 3.3 Environment requirements Installation Installation procedure Installation preparation 4.2.1 Installation tools 4.2.2 Installation environment 4.2.3 Installation space 4.2.4 Selection for input and output wires 4.2.5 Surge protection device 4.2.6 Reverse feedback protection (optional) 4.3 Transportation and unpacking 4.3.1 Transportation...
- Page 4 CONTENTS 4.4.1 UPS installation 4.4.2 Wiring 4.4.3 Install battery cabinet 4.4.4 Battery cabinet installation procedure 4.5 System check and test 4.5.1 Check electrical connection 4.5.2 UPS test 4.5.3 Connect load Touch screen operation and setting Menu hierarchy Main page System work status display Monitor function 5.4.1 Bypass input information 5.4.2 Mains information...
- Page 5 CONTENTS 5.5.1 Event log 5.5.2 User log 5.5.3 Device information 5.6 Setting management 5.6.1 System management 5.6.2 Battery management 5.6.3 Battery test 5.6.4 Function configuration 5.6.5 HMI setting 5.6.6 Password setting 5.7 Buzzer control 5.8 On/off 6. Uses and operations Usage announcements Operating procedure UPS start and shut down...
- Page 6 CONTENTS 6.3.2 Start up 6.3.3 UPS shut down 6.3.4 Switch to bypass mode manually 6.3.5 Switch to maintenance bypass mode from inverter output 6.3.6 Switch to inverter output from maintenance bypass 6.3.7 Emergency Power Off (EPO) 6.3.8 Emergency Power Off recovery 6.4 Parallel system start up and shut down 6.4.1 Start parallel system 6.4.2 Shut down parallel system...
- Page 7 CONTENTS 7.4 Trouble shooting 7.4.1 Common abnormal phenomena diagnosis 7.4.2 Emergency dispose for system fault Package, transportation and storage Package Transportation Storage Acronyms and abbreviations...
-
Page 8: Preface
1 PREFACE Congratulations! We are delighted to welcome you to our family of customers. Thank you for choosing Numeric as your reliable power solution partner, you now have access to our widest network of 250+ service centers in the country. Since 1984, Numeric has been enabling its clients to optimize their business with top-notch power solutions that promise seamless and clean power with controlled... - Page 9 Note: The figures in this manual are for reference. Please see the actual product for details. Symbol conventions The manual gives the meaning of the safety symbols for the users to comply with precautionary measures during installation, operation and maintenance. Symbol Description High-risk hazard that could result in serious injury or death.
-
Page 10: Product Overview
2 PRODUCT OVERVIEW This section introduces the scope, product feature, work principle, modes, appearance, layout, alarm list and more of the UPS. 2.1 Product introduction HP i 33 40 kVA UPS is a high-frequency double conversion UPS. This high performance sine-wave UPS is specially designed for the network computer room, precision instruments, etc. - Page 11 Energy conservation and high efficiency Adopts advanced PFC control technology. The input power factor is greater than 0.99, which greatly improves the use ratio of electric energy and reduces the load of power grid, thus saving the cost of power distribution. The size of the UPS is small, and the weight is light, calorific value is small, which enhances the use ratio of environment and decreases the investment cost.
-
Page 12: Working Principle
Working principle 2.2.1 Working principle diagram Maintenance bypass Bypass Input Bypass unit Bypass unit Mains Input Output Battery Input Power unit Power unit Figure 2-1. Working principle diagram 2.2.2 Working mode There are 4 working modes of the UPS: normal mains mode, battery mode, bypass mode and maintenance bypass mode. - Page 13 • When mains is normal, the rectifier, inside the power unit, rectifies the mains into anode and cathode DC voltage and stores energy in DC electrolysis for the inverter to use. The inverter absorbs energy from DC electrolysis and inverts to a stable output at 220 Vac voltage. When the system control card detects the inverter is normal, it will supply the inverting voltage to load.
-
Page 14: Appearance And Structure
Maintenance bypass mode When the UPS needs to be maintained and the power supply for load cannot be interrupted, user can shut down the inverter and make the UPS work in bypass status. Switch on the maintenance bypassbreaker and switch off the mains pint breaker and bypass power supply breaker. while transforming the manual maintenance bypass, AC power is supplied for load by maintenance bypass breaker. - Page 15 Table 2-1. Illustration for the operating panel Name Illustration Shows the running parameters (such as voltage, current, Touch screen load, etc.) and status On (green): Rectifier works normally. Touch screen On (red): Rectifier abnormal. On (green): Inverter works normally. Touch screen On (red): Inverter abnormal.
-
Page 16: Structure Layout (Open Door)
2.3.2 Structure layout (Open door) The structure layout of this series UPS is as shown in Figure 2-4. 1. Top cover plate 2. Control unit 3. Power breaker 4. Bypass breaker 5. Output breaker 6. Wiring cover plate 7. Wiring holes of communication wires 8. - Page 17 • Expansion dry contact board (optional) The expansion dry contact communication port includes 4 input dry contact communication signal and 3 output dry contact signal, detailed definition is as shown in Table 2-2 and Table 2-3. Table 2-2. Output dry contact function illustration Silk-screen Signal Function illustration...
- Page 18 Note: The definition for MODBUS port is as follows: pin3 is A, pin6 is B. The definition for RS485 port is as follows: pin1 is A, pin8 is B. The monitor card contains 6 standard dry contact ports (3 ports are input dry contact, the others are output dry contact), detailed definition is as shown in Table 2-4 and Table 2-5.
-
Page 19: Alarm Function
2.3.3 Alarm function When the UPS is abnormal, it will send sound and light alarm. Some alarm or protection functions of the UPS are shown in Table 2-6. Table 2-6. Abnormal status and alarm / protection function Alarm action Protection action Fault name EPO enable. - Page 20 Table 2-6. Abnormal status and alarm/protection function Fault name Alarm action Protection action Bypass over-frequency. Bypass under-frequency. Bypass phase sequence is wrong. Bypass lack-phase. Output circuit abnormal. Output current DC component is too large. System card without redundancy. Environment temperature is too high Buzzer beeps None Generator fails to start.
- Page 21 Table 2-6. Abnormal status and alarm/protection function Protection action Fault name Alarm action The communication of cabinet inner busbar 3 abnormal. None BSC synchronization wire abnormal. Battery low-temperature alarm. PFC software version is in conformity. The static startup INV software version is in conformity. is not allowed.
-
Page 22: Safety Instructions
3. SAFETY INSTRUCTIONS This section introduces the safety announcements. Prior to performing any work on the UPS, please read the user manual carefully to avoid human injury and damage to the device due to irregular operations. 3.1 Safety announcements This section introduces the safety announcements that must be complied with and given special attention while installing, using, maintenance and other related operations. - Page 23 DANGER It is prohibited to touch any terminal or conductor that is connected with the grid circuit, as it may endanger human safety. DANGER Damaged or faulty devices may cause electric shock or fire hazard. • Before operating, please inspect the device for damages and potential causes of hazards •...
-
Page 24: Usage Announcements For Battery
WARNING In case of fire, please use dry powder fire extinguisher, liquid fire extinguisher may cause electric shock. CAUTION Keep away liquid or any other objects from the cabinet. CAUTION The product is class C3 device. If the product is used for residential purposes, it may cause wireless interference. -
Page 25: Anti-Static Protection
WARNING Battery operation must be done according to instructions, especially battery wiring. Irregular operation will cause battery damage, and may even result in human injury. • It is prohibited to short circuit the anode and cathode of the battery. The battery wiring must be intact. -
Page 26: Safety Warning Label Setting
3.1.5 Safety warning label setting To avoid unauthorized operations or coming in proximity of the UPS, during installation or daily maintenance, please comply with the related standards. • Set warning labels at input and output ends to avoid accidental switching off and accidents. •... -
Page 27: Operation And Maintenance Requirements
3.2 Operation and maintenance requirements There exists high temperature and high voltage inside the UPS. Please comply with the relevant safety regulations and operating procedures during installation, operation and maintenance to avoid human injury or damage to the device. The safety precautions mentioned in the user manual is only a supplement to the local safety regulations. - Page 28 • Even with external power disconnected, residual electric charge might exist in the capacitance inside the UPS. The output terminal bars may have high voltage which will result in safety hazard. It is necessary to set the UPS aside for enough time (≥10 min) to release all charge before opening the UPS chassis.
-
Page 29: Environment Requirements
Environment requirements The surrounding environment may influence the service life and reliability of the device. So, please avoid using the device in the following environment conditions: • Temperature beyond specified (normal work temperature: - 5 C ~ 40 C, relative humidity: 0%-95%). •... -
Page 30: Installation
4 INSTALLATION This section mainly introduces the installation of the UPS, including unpacking and checking, installation procedure, installation preparation, mechanical installation, system checking and test, etc. CAUTION The UPS should be installed by authorized person trained in high-voltage and AC power. -
Page 31: Installation Preparation
4.2 Installation preparation 4.2.1 Installation tools Tools Clamp meter Multi-meter Label paper Phillips screwdriver Socket wrench Adjustable wrench Torque wrench Flat-headscrewdriver COAX crimping tool Diagonal pliers Wire stripper Claw hammer Hammer drill Insulation tape Cotton cloth Brush Heat shrink tubing Heat gun Electrician’s knife Protective gloves... -
Page 32: Installation Environment
4.2.2 Installation environment • Do not install the UPS in the place which exceeds the provision of technology index (temperature: 0 0C~40 0C, relative humidity: 0%~95%). • It is strictly prohibited to install the UPS in the environment with metal conductive dust. •... -
Page 33: Installation Space
4.2.3 Installation space Maintain a clearance of at least 800 mm. from the front panel, side panel or rear panel of the UPS to the wall or adjacent device, and maintain a clearance of at least 800 mm. from the top of the UPS to ceiling to ensure good ventilation, as shown in Figure 4-2. - Page 34 Table 4-1. Recommended wire and terminal specification 1 Model 40 kVA (/B) Item Mains input current (A) 4×25 Recommended wire sectional area (mm R/Y/B/N DT16 Wire terminal model Bypass input current (A) Recommended wire sectional area (mm R/Y/B/N 4×16 Wire terminal model DT16 Output current (A) R/Y/B/N...
-
Page 35: Surge Protection Device
Table 4-1. Recommended wire and terminal specification 1 Model 40 kVA (/B) Item Battery nominal discharge current (the current value of 384 V voltage when standard equipped with 32 pieces 12 V storage battery) (A) Battery max. discharge current (the current value when standard equipped with 32 pieces 12 V storage battery stop discharge <each piece voltage is 10.5 V>) (A) Recommended wire sectional area (mm... -
Page 36: Transportation And Unpacking
Transportation and unpacking 4.3.1 Transportation CAUTION The UPS should be transported by trained professionals. During transportion, please take necessary precautions to avoid impact or UPS falling off. If the UPS needs to be stored for a long time after unpacking, it is suggested to package the UPS with original plastic bag. -
Page 37: Unpacking
4.3.2 Unpacking Step 1 Check if the package is in good condition and if there is any damage due to transportation. If damaged, please inform the carrier immediately. Step 2 Transport the UPS to assigned site. Step 3 Unpack the external package, remove the foam pad and plastic bag, and take out the accessories. Step 4 Check the UPS: •... - Page 38 Step 6 Loosen the brake of all the wheels or heighten the 4 supporting feet (as shown in Figure 4-6.) Note: The wheels of 40 kVA (/B) is equipped with brakes. Figure 4-6. Adjust supporting feet Note: • Adjust the support feet in clockwise to increase the height and adjust in anti-clockwise to lower. •...
- Page 39 Step 7 Put the tilting plate to the front of the UPS and keep the higher end of the sliding plate close to the wooden bracket and move the UPS to the ground slowly, as shown in Figure 4-7. Figure 4-7. Place the sliding plate Note: The operations for the sliding plate of the UPS are the same.
-
Page 40: Mechanical Installation
Mechanical installation 4.4.1 UPS installation Step 1 Determine and plan the installation position according to the UPS size (as shown in Figure 4-8.) and installation clearance requirement (see 4.2.3 Installation space). Figure 4-8. Size of 40 kVA (/B) UPS Step 2 Push the UPS to the installation site. CAUTION When moving the UPS to the ground, please move the device smoothly and avoid tilting the device. - Page 41 Step 3 Lock the brake on all the wheels or adjust each supporting feet, as shown in Figure 4-9. • For 40 kVA (/B) UPS, lock the brake on all the wheels to ensure the UPS cannot move at will. Figure 4-9.
- Page 42 Step 5 Install 4 expansion bolts M12 into the installation holes. The structure and installation of the expansion bolt is as shown in Figure 4-11. Bolt 1. Drill holes on the installation ground by hammer drill. Spring gasket 2. Tighten the expansion bolt mildly, and put it to the hole vertically, Flat gasket and then knock the expansion bolt by rubber hammer till all the Expansion tube...
-
Page 43: Wiring
Step 6 Move the UPS from the wooden bracket to the ground and align the bottom installation hole with the expansion bolt and screw the bolts. Step 7 Reinstall the bottom cover plates. 4.4.2 Wiring Step 1 Open the front door of the UPS, remove the bottom wiring cover plate, as shown in Figure 4-12. CAUTION The battery +, - and neutral wire terminal of 40 kVA (/B) UPS, are all at the back of the UPS, before wiring, dismantle the rear bottom wiring cover plate. - Page 44 Step 2 Lead the input cables, output cables and battery cables through the bottom wiring hole (the diagrams of bottom wire hole are as shown in Figure 4-13, and connect the cables according to Figure 4-14. respectively, then fasten the bolts. Figure 4-13.
-
Page 45: Install Battery Cabinet
CAUTION When wiring, ensure that the connection between input, output wire and input, output terminal is reliable to avoid bad or wrong connection. It is suggested to select DC breaker for battery DC input, the detailed wiring is as shown in Figure 4-15. Coonect to neutral wire N Coonect to... -
Page 46: Battery Cabinet Installation Procedure
To avoid electric shock and short circuit while replacing battery, pay attention to the following precautions: • Do not wear watch, ring or other metal decorations. • Use a tool with insulation handle. • Do not put any tool or metal object on the battery. •... -
Page 47: System Check And Test
System check and test 4.5.1 Check electrical connection After completing the electrical connection, check the following items: Table 4-2. Check list Check item Result Check if the colour of AC cables is in accordance with the specification. Check if the wiring of cabinet is firm. Check if the safety identification of AC power distribution unit is complete. -
Page 48: Touch Screen Operation And Setting
5 TOUCH SCREEN OPERATION AND SETTING This section mainly introduces the work parameters and work status and system setting of the UPS. 5.1 Menu hierarchy Voltage/ current/ frequency Mains Voltage/ current/ active power/ apparent power/ frequency Bypass Monitor page Voltage/ charge current/ discharge current/ temperature/ backup time/ capacity/ status Battery Voltage/ current/ active power/ apparent power/ load rate/ frequency Output... -
Page 49: Main Page
5.2 Main page After powering on, it will enter system monitor main page, as shown in Figure 5-2. BYPASS MAINS REC. INV. OUTPUT BATT. Initializing Output: P-U(V) P-V(V) P-W(V) Freq.(Hz) 0.00 2017.12.12 20:06:12 Figure 5-2. Main page After entering the mains page, user can monitor the system conveniently. The meaning of icon in main page is as follows: : System bypass input. -
Page 50: System Work Status Display
System work status display The system work status includes: initializing, shut down, exit parallel system, maintenance bypass output, bypass output, battery inverter output, mains inverter output, grid-connected aging, ECO bypass output, frequency conversion inverter output, aging bypass output, fault protection. Each page is as shown from Figure 5-3 to Figure 5-14. - Page 51 BYPASS MAINS REC. INV. OUTPUT BATT. Output: P-U(V) P-V(V) P-W(V) Freq.(Hz) Exit Parallel Sys. 0.00 2017.12.12 20:06:12 Figure 5-5. Exit parallel system BYPASS MAINS REC. INV. OUTPUT BATT. Output: P-U(V) P-V(V) P-W(V) Freq.(Hz) Maintain Byp. Output 0.00 2017.12.12 20:06:12 Figure 5-6. Maintain bypass output BYPASS MAINS REC.
- Page 52 BYPASS MAINS REC. INV. OUTPUT BATT. INV. Output Output: P-U(V) P-V(V) P-W(V) Freq.(Hz) 0.00 2017.12.12 20:06:12 Figure 5-8. Battery INV output BYPASS MAINS REC. INV. OUTPUT BATT. INV. Output Output: P-U(V) P-V(V) P-W(V) Freq.(Hz) 0.00 2017.12.12 20:06:12 Figure 5-9. Mains INV output BYPASS MAINS REC.
- Page 53 BYPASS MAINS REC. INV. OUTPUT BATT. ECO Byp. Output Output: P-U(V) P-V(V) P-W(V) Freq.(Hz) 0.00 2017.12.12 20:06:12 Figure 5-11. ECO bypass output BYPASS MAINS REC. INV. OUTPUT BATT. Output: P-U(V) P-V(V) P-W(V) Freq.(Hz) Freq.Conv.INV.Output 0.00 2017.12.12 20:06:12 Figure 5-12. Frequency conversion INV output BYPASS MAINS REC.
- Page 54 BYPASS MAINS REC. INV. OUTPUT BATT. Output: P-U(V) P-V(V) P-W(V) Freq.(Hz) Fault Protection 0.00 2017.12.12 20:06:12 Figure 5-14. Fault protection, without output When unit or system is abnormal, the left warning indicator is switched on. Click the warning indicator, it will show the current fault, as shown in Figure 5-15.
-
Page 55: Monitor Function
5.4 Monitor function 5.4.1 Bypass input information In main page, click icon, it will enter system bypass information page, as shown in Figure 5-16. In the page, it shows the bypass three-phase voltage, current, active power, apparent power and frequency. Bypass Volt.(V) 100.0 200.0... -
Page 56: Battery Information
5.4.3 Battery information In main page, click icon, it will enter battery information page. In the page, it shows the battery voltage of positive and negative battery group, battery charge/discharge current, battery remaining capacity, battery remaining time, battery temperature, battery status, as shown in Figure 5-18, Figure 5-19 and Figure 5-20. P-Batt. -
Page 57: System Output Information Page
P-Batt. N-Batt. Battery Voltage(V) 100.0 2000 3000 Battery Discharging Current(A) 400.0 500.0 Battery Charging Current(A) Battery Temperature( Battery Remaining Capacity(%) 700.0 Battery Remaining Time(min) 8000 Battery Working Status Equalizing Charge Next Back Figure 5-20. Mains inversion status, battery charge 5.4.4 System output information page In main page, click icon, it will enter system output information page, as shown in Figure 5-21. -
Page 58: Information Query
5.5 Information query In main page, click icon, it will enter information query page, as shown in Figure 5-22. Event Log User Log Device Info. Figure 5-22. Information query CAUTION It can record a maximum of 9000 pieces of information. When the record exceeds 9000 pieces, the earliest information will be replaced a by new one. -
Page 59: User Log
5.5.2 User log In information query page, click user log icon , it will enter user log page, as shown in Figure 5-24. This page shows the user parameter setting record. 1000 2015/11/10 21:20:20 System Frame Model Seri 2015/11/10 21:20:20 Password Function For 2015/11/10 21:20:20... - Page 60 S/N: Back Next Save Figure 5-26. Product information 2 Hardware Ver. Software Ver. Produce Date HMI: V1.00 V1.00 Moni. Card V1.00 V1.00 202020 Sys. Card1 V1.00 V1.00 202020 Sys. Card2 V1.00 V1.00 202020 Snmp Card V1.00 V1.00 202020 Node Card V1.00 V1.00 202020...
-
Page 61: Setting Management
5.6 Setting management Click the icon in the main page and enter right password (as shown in Figure 5-29.), it will enter the main page, as shown in Figure 5-30. After login, click icon, it will enter system setting management page, as shown in Figure 5-31. -
Page 62: System Management
TEST Sys.Manag. Batt.Mang. Batt.Test Func.Cfg. HMI Set Password Figure 5-31. Setting management page 5.6.1 System management In setting management page, click system management icon , it will enter system management page. The page includes system setting, bypass setting, ECO setting. System setting System Set Bypass Set... - Page 63 System Set Bypass Set ECO Set Output Freq. Tracing Rate(Hz/s) -5.0 Output Voltage Adjustment(V) Back Next Save Figure 5-33. System setting page 2 If the setting is successful, mark will show at the right of the parameter, as shown in Figure 5-34. If setting failure, it will show mark, as shown in Figure 5-35.
- Page 64 System Set Bypass Set ECO Set Output Freq. Tracing Rate(Hz/s) -5.0 Output Voltage Adjustment(V) Back Next Save Figure 5-35. Setting failure Bypass setting Click Bypass Setting, it will turn to bypass setting page, as shown in Figure 5-36. Click enter box to change the parameter.
- Page 65 System Set Bypass Set ECO Set INV. Bypass Out Of Syn.Alarm Bypass Max-Time Turn INV.T0 Byp. Syn. (ms) The Max-Time Turn INV.T0 Byp.Syn.(ms) Back Next Save Figure 5-37. Bypass setting 2 Note: At the top of the enter box, it shows the max. and min. setting value of the setting item, and once the setting value exceeds the range, the setting will be invalid.
-
Page 66: Battery Management
5.6.2 Battery management In setting management page, click battery management icon , it will enter the battery management page. The page includes battery setting and charging setting, and can be changed by the top button. Click enter box to change the parameter. Click Save button to save the setting. The marks of setting success and setting failure is the same as that of system setting. - Page 67 Battery Set Changing Set Share Parallel Batt. Batt. Low-temperature Alarm Point( Batt. High-temperature Alarm Point( Batt. Discharging Time Batt. Discharging Protection Time(h) Previous Next Save Back Figure 5-41. Battery setting page 3 Battery Set Changing Set Battery Circuit Abnormal Alarm Back Previous Next...
- Page 68 Battery Set Changing Set Time Equal-Charge Timing Equal-Charge Interval Time(day) Equal-Charge Prot. Interval Time(day) Force Equalized Charge Force Equalized Charge Previous Next Save Back Figure 5-44. Charge setting 2 Battery Set Changing Set Temper. Compensation Charge comp. Coefficient(mV/ C.Cell) Previous Save Back Figure 5-45.
-
Page 69: Battery Test
5.6.3 Battery test In setting management page, click battery test icon , it will enter battery test page, as shown in Figur e 5-46. Standard Test Depth Test Cancel Test Test Status: Constant Curr. Timely Mismatch the test condition: Battery Voltage Is Lower Than Test Allowable Voltage Back Figure 5-46. -
Page 70: Hmi Setting
Dedusting setting When the module works for too long and the inner temperature is too high, you can perform the force dedusting operation. Click dedusting setting, enable the regular self-dedusting setting to start force dedusting. Once the output exceeds 60% of rated output, it will not perform the dedusting operation. Generator Dedusting Regular Self-dedusting... -
Page 71: Password Setting
CAUTION When setting the system time, ensure that the setting value is same as that of the real clock time. This is to keep the veracity of the system event log and for ease of maintenance. 5.6.6 Password setting In setting management page, click password setting icon , it will enter password setting page, as shown in Figure 5-50. - Page 72 Confirm to Power On? Cancel Figure 5-51. Confirm to power on While powering off, click button, it will enter the ON/OFF page, as shown in Figur e 5-52, click OK button to perform the Shut down operation. Confirm to Power Off? Cancel Figure 5-52.
-
Page 73: Uses And Operations
6 USES AND OPERATIONS This section mainly introduces the operation procedures and methods, including using announcements, operation procedures, UPS start and parallel system start, etc. 6.1 Usage announcements • Before starting the UPS, check whether the load is proper. The load must not exceed the rated output power of the UPS, to avoid overload protection. -
Page 74: Start Up
Step 2 Check load. • Ensure that the load is not conductive load. The output of the UPS cannot be conductive load, such as motor, fan, air-condition, etc. Generally, these loads are power supplied by power-grid. • Ensure that the load is closed. At the same time, the load capacity should not exceed the UPS rated capacity, else it will cause overload protection. - Page 75 • Start the UPS by panel combination button. 1. Close the mains breaker (POWER). 2. 30 sec. later, long press the panel ON combination button for 3sec., the system inverters to output. Check the system running status in the touch screen, and ensure that the system turns to inverter from bypass to supply power.
-
Page 76: Ups Shut Down
6.3.3 UPS shut down CAUTION When the system bypass is normal, after the UPS shut down, system will turn to bypass power supply mode; when system bypass is abnormal, after the UPS shut down, system will be with no output. Before shutting down, please ensure that the load is closed. •... -
Page 77: Switch To Maintenance Bypass Mode From Inverter Output
Note: When the bypass input voltage or frequency exceeds the setting value, shutting down the inverter will cause system without output, and the power supply for load will be interrupted. 6.3.5 Switch to maintenance bypass mode from inverter output CAUTION Only qualified professionals can perform the following operation. -
Page 78: Emergency Power Off (Epo)
Step 1 Close the mains input breaker (POWER), bypass breaker (BYPASS), battery breaker of battery cabinet, output breaker (OUTPUT) successively. Step 2 After the power supply of UPS becomes normal and the energy flow on touch screen shows bypass output, place the manual maintenance breaker at the back of the cabinet to OFF, at this time, the bypass will supply power for load. -
Page 79: Emergency Power Off Recovery
6.3.8 Emergency power off recovery Step 1 Ensure that the dry contact of monitor card, which is connected to the external EPO switch, is not in emergency power off status. Step 2 Disconnect the system input, output and battery breaker, until all system indicators are off, system power is down completely. - Page 80 Step 4 Start each UPS. Ensure that all UPS stay in bypass power supply mode, and with no abnormal, switch on the external distribution switch, switch off the UPS output switch, and start the inverter of each UPS manually, all UPS turns to inverter power supply. Step 5 Measure the output voltage and frequency of each UPS.
-
Page 81: Shut Down Parallel System
with the output breaker back-end phase-A of UPS 2, measure the voltage difference between front-end and back-end of UPS 2 output breaker. Measure the voltage difference of phase-B and phase-C in the same way. If the phase sequence is right, the voltage difference of each should be less than 5 V;... -
Page 82: Emergency Power Off (Epo)
Step 1 Close the load of parallel system, keep the UPS run without load for 5 mins. to eliminate inner heat. Step 2 Perform 6.3.3 UPS Shut down to close all UPS, system turns to bypass power supply. Step 3 Disconnect the load total breaker, each UPS output breaker (OUTPUT), battery breaker (BYPASS), mains input breaker (POWER) successively. -
Page 83: Maintenance And Troubleshooting
7 MAINTENANCE AND TROUBLESHOOTING This section mainly introduces the UPS maintenance guide, battery daily maintenance, battery replacement announcement, troubleshooting, etc. 7.1 Maintenance guide Proper maintenance is the key for a longer service life. 7.1.1 Safety precautions To ensure safety and equipment security, observe the following precautions: •... -
Page 84: Announcements For Battery Replacement
− Generally, the battery needs to be charged and discharged every 4 to 6 months. First, discharge till battery low-voltage alarm and then charge the battery. The charge duration of each time cannot be less than 24 hours. − In high temperature area, the battery needs to be charged and discharged every 2 months and the charge duration of each time cannot less than 24 hours. -
Page 85: Trouble Shooting
• Recycle the battery according to the relative illustration on the battery. • Do not put the battery into fire, to avoid explosion. • Do not open or disassemble the battery, as the inner electrolyte is harmful for the skin and eyes. 7.4 Trouble shooting 7.4.1 Common abnormal phenomena diagnosis If the UPS works abnormally after start, please refer to Table 7-1 to find possible reason. - Page 86 Table 7-1. Trouble shooting Abnormal phenomena Possibl e reason The UPS output is normal after 1. The UPS is in serious overload or the output circuit is start, but once the load is turned short circuit. It is necessary to reduce load to proper on, the UPS stops output capacity or find the reason for short circuit.
- Page 87 Table 7-1. Trouble shooting Abnormal phenomena Possible reason Warning: if the battery stays in under-voltage status for long time, it will influence the battery service life. After battery under-voltage protection, if mains cannot recover after a long time, please disconnect the battery breaker to protect battery and restart the UPS and fully charge the battery once mains recovers.
- Page 88 Table 7-1. Trouble shooting Abnormal phenomena Possibl e reason At mains status, the UPS works The grounding is improper and the float voltage between normally, once power outage, the neutral wire and grounding wire is too large. UPS works normally but load system halts.
-
Page 89: Emergency Dispose For System Fault
7.4.2 Emergency dispose for system fault • How to deal with the system fault in emergency When system faults, shut down the power supply of UPS using the touch screen, if necessary, close the user load and disconnect the input and output breaker of the UPS to avoid further damage to the UPS. Inform the engineering technician for maintenance. -
Page 90: Package, Transportation And Storage
8 PACKAGE, TRANSPORTATION AND STORAGE This session mainly introduces the package, transportation and storage of the UPS. 8.1 Package During packing, please pay attention to the place direction requirements. At the side of the package, there are handling instructions like keep in dry place, handle with care, upward, stack layer limit, etc. Also, the device model is printed on the package. -
Page 91: Acronyms And Abbreviations
9 ACRONYMS AND ABBREVIATIONS Alternating Current SNMP Simple Network Management Protocol Direct Current Total Harmonic Distortion Digital Signal Processor THDv of output voltage Energy Control Operation Uninterruptible Power Emergency Power Off System Light-emitting Diode Protective Earthing RS485 Recommended Standard 485... - Page 92 NUMERIC Floor, Prestige Center Court, Office Block, Vijaya Forum Mall, 183 NSK Salai, Vadapalani, Chennai - 600 026. Phone: +91 44 4656 5555 Toll Free 1800 425 3266 www.numericups.com NUMERIC reserves at any time the right to modify the contents of this booklet and to communicate in any form and modality, the changes brought to the same.
Need help?
Do you have a question about the NUMERIC HP i 33 40 kVA Series and is the answer not in the manual?
Questions and answers