
Subscribe to Our Youtube Channel
Related Manuals for BEA LZR-FLATSCAN 3D SW


Summary of Contents for BEA LZR-FLATSCAN 3D SW
- Page 1 -FLATSCAN 3D SW ® SAFETY SENSOR FOR AUTOMATIC SWING DOORS User’s Guide for software version SW 0100 and higher (refer to tracking label on product)
-
Page 2: Installation Tips
INSTALLATION TIPS Avoid vibrations. Avoid moving objects Do not cover and light sources in the laser window. the detection field. Avoid exposure to Keep the sensor permanently Avoid the presence Avoid condensation. sudden and extreme powered in environments of smoke and fog in temperature changes. -
Page 3: Led Signals
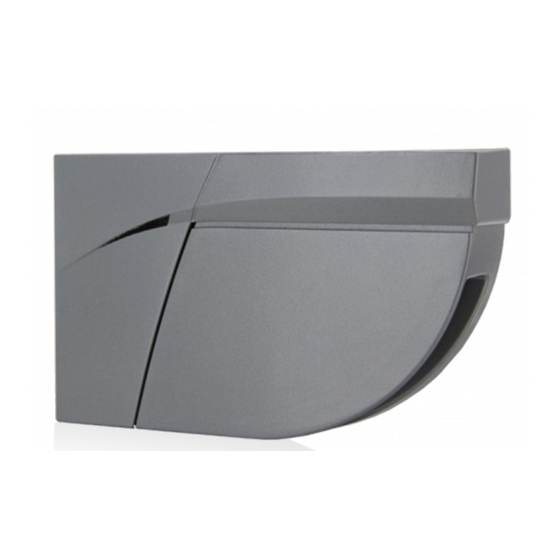
DESCRIPTION -FLATSCAN 3D SW -FLATSCAN SW ® ® are safety sensors for automatic swing doors based on laser technology. They secure the moving door wing as well as the hinge area. To do so, a module must be installed in the upper corner of the door wing on both sides of the door. FLATSCAN 3D SW FLATSCAN SW cover... - Page 4 FOREWORD The FLATSCAN 3D SW can be paired with another FLATSCAN 3D SW or a FLATSCAN SW. The installation steps are identical for both product versions. Used in combination with a FLATSCAN SW, the FLATSCAN 3D SW must be connected to the door controller to access all features (e.g opening functions).
- Page 5 Using a wire cutter, remove the positioning aids from Fasten the 3 screws using a Pozidrive screwdriver. the base. The base needs to be fixed firmly! Ø 10 mm Take the MAIN-SECONDARY cable and pass it through Drill through the 2 bases and the door using a 10 mm the hole.
- Page 6 WIRING TO DOOR CONTROLLER We recommend connecting a FLATSCAN 3D SW to the door controller. Take the flexible tube and determine how long it Cut the surplus to avoid undesired detections caused should be in order to reach the door controller. by the flexible tube.
-
Page 7: Wiring : Cables
WIRING : CABLES Green 12-24 Brown Yellow White Pink Grey Blue Yellow / black OPEN (only operational when the FLATSCAN 3D SW is connected White / black to the door controller). * See output configuration. Cut the power cable to the right length, strip the 10 wires and connect all wires as indicated. The polarity of the power supply is important. -
Page 8: Testing And Adjusting
TEACH-IN Before launching a teach-in, make sure that: - glass surfaces near the door are covered - the door controller is set up first - the door is closed (use the service mode if needed) - the door controller is connected to all relay outputs and is fully reacting to them - the MAIN-SECONDARY cable is connected between the modules - the detection field is free of snow buildups, heavy rain, snowfall, fog or other objects or people - the laser window protection is removed (for FLATSCAN SW). - Page 9 VIRTUAL OPENING BUTTONS (FLATSCAN 3D SW only) If needed, you can add virtual opening buttons (max. 2) in the second curtain. They can be used as activation zones to open the door manually, and can also be placed outside of the safety zones. To operate, the FLATSCAN 3D SW must be connected to the door controller with the cable provided (10 strands).
- Page 10 FLATSCAN 3D DIP-SWITCH SETTINGS (OPTIONAL) In order to adapt these parameters by remote control, set the corresponding DIP switch to ON. 1 2 3 4 Switch to CRITICAL when external disturbances DIP 2 ENVIRONMENT standard critical are likely to cause unwanted detections (min.
-
Page 11: Output Configuration
REOPEN side: During the opening cycle, the sensor always extends the safety depth up to 4 curtains to cover the whole door pathway. OPENING FIELD * * only available with the new BEA remote control. 1 curtain 2 curtains 3 curtains... - Page 12 FLATSCAN DIP-SWITCH SETTINGS (OPTIONAL) In order to adapt these parameters by remote control, set the corresponding DIP switch to ON. 1 2 3 4 Switch to CRITICAL when external disturbances DIP 2 ENVIRONMENT standard critical* are likely to cause unwanted detections (min.
- Page 13 FLATSCAN OUTPUT CONFIGURATION NO POWER NO DETECTION DETECTION NO = normally open NC = normally closed. IMMUNITY FILTER In order to change these settings by remote control, adjust DIP-switch 2 to ON. > > > > high > > > Increase to filter out external disturbances.
-
Page 14: How To Use The Remote Control
HOW TO USE THE REMOTE CONTROL After unlocking, the red If the red LED flashes quickly after unlocking, you To end an adjustment session, LED flashes and the sensor need to enter an access code from 1 to 4 digits. always lock the sensor. - Page 15 DETECTION FIELDS FLATSCAN 3D SW FLATSCAN SW UNCOVERED ZONE HINGE ZONE SAFETY DOOR WING SAFETY Adjustable by remote control factory value: 10 cm. Check the detection fields using our online sizer tool: https://eu.beasensors.com/sizer/flatscan/...
-
Page 16: Service Mode
SERVICE MODE The service mode deactivates the door safety during 15 minutes and can be useful during an installation, a mechanical teach-in of the door or maintenance work. To enter the service mode, push on the button for > 3 seconds. When the sensor is in service mode, the LED is off. - Page 17 (step 3 of teach-in). Permanent faulty Launch a new teach-in (closed door). measurements of door If orange LED flashes again, contact BEA. position. The ORANGE LED flashes Sporadic faulty Clear field and wait until the door closes.
- Page 18 NOTES...
- Page 19 NOTES...
-
Page 20: Technical Specifications
All values measured in specific conditions and with a specific temperature of 25°C. BEA SA | LIEGE Science Park | ALLÉE DES NOISETIERS 5 - 4031 ANGLEUR [BELGIUM] | T +32 4 361 65 65 | F +32 4 361 28 58 | INFO-EU@BEASENSORS.COM...
Need help?
Do you have a question about the LZR-FLATSCAN 3D SW and is the answer not in the manual?
Questions and answers