Canon PIXMA iP 3300 User Manual
Hide thumbs
Also See for PIXMA iP 3300:
- Quick start setup (388 pages) ,
- Quick start manual (92 pages) ,
- Easy setup instructions (2 pages)
Table of Contents
Advertisement
Quick Links
User's Guide
MP-0911-V2.00
FAQs
How to Use This Manual
Safety Precautions
Before Printing
Main Components
Loading Printing Paper
Basic Printing
Printing with Windows
Printing with Macintosh
Printing Media
Compatible Media Types
High Resolution Paper HR-101N
Glossy Photo Paper GP-401 / Glossy Photo Paper "Everyday Use" GP-501
Matte Photo Paper MP-101
Photo Paper Plus Double Sided PP-101D
Photo Paper Plus Glossy PP-101
Photo Paper Plus Semi-gloss SG-101, SG-201
Photo Paper Pro PR-101
Photo Stickers PS-101
T-Shirt Transfers TR-301
Envelopes
Routine Maintenance
1
Advertisement
Table of Contents

Related Manuals for Canon PIXMA iP 3300


Summary of Contents for Canon PIXMA iP 3300
- Page 1 User's Guide MP-0911-V2.00 FAQs How to Use This Manual Safety Precautions Before Printing Main Components Loading Printing Paper Basic Printing Printing with Windows Printing with Macintosh Printing Media Compatible Media Types High Resolution Paper HR-101N Glossy Photo Paper GP-401 / Glossy Photo Paper "Everyday Use" GP-501 Matte Photo Paper MP-101 Photo Paper Plus Double Sided PP-101D Photo Paper Plus Glossy PP-101...
- Page 2 Print Head Cleaning Print Head Deep Cleaning Aligning the Print Head Cleaning Your Printer Using the Canon Setup Utility Features of the Canon Setup Utility Starting the Canon Setup Utility Canon Setup Utility Menu (Windows) Canon Setup Utility Menu (Macintosh) Troubleshooting...
- Page 3 Opening the Canon IJ Printer Utility (Macintosh)
-
Page 4: How To Use This Manual
How to Use This Manual The screen of this on-screen manual consists of two parts: the Menu frame (on the left) and the Content frame (on the right). Note The example screenshots in this section are in English. Menu frame Content frame... - Page 5 Note Operations explained in this manual are specific to computers running Windows® XP with Service Pack 2 (hereafter referred to as "Windows XP SP2") or Mac® OS X v.10.4.x operating systems. Operation may vary depending on your operating system. The example above is the screen in Windows. The appearance of the screen in Macintosh®...
- Page 6 : Click to jump to the previous page. : Click to jump to the next page. : Click to jump to the beginning of this page. Printing This Manual To print a topic, click on a blank area of the Content frame to make sure it is active, then click the Print button.
-
Page 7: Symbols Used In This Manual
Note This searches all the on-screen manuals installed on your computer. Enter keywords in the (search field), then press the Return key. Double-click the topic to read from the list of search results to display the page. Note You can click to specify the search scope. - Page 8 Note Indicates notes for operation or additional explanations. Indicates operations in Windows. Indicates operations in Macintosh. Trademarks "Windows" and "Internet Explorer" are trademarks of Microsoft Corporation, registered in the United States and other countries. "Macintosh" and "Mac" are trademarks of Apple Computer, Inc., registered in the U.S.
-
Page 9: Safety Precautions
Safety Precautions Please read the safety warnings and cautions provided in this manual to ensure that you use the printer safely. Do not attempt to use the printer in any way not described in this manual. Warning You may cause an electric shock, fire, or damage the printer if you ignore any of these safety precautions. - Page 10 If you detect smoke, unusual smells or strange noises around the printer, immediately unplug the printer at the power supply and call for service. Periodically, unplug the printer and use a dry cloth to wipe off any dust or dirt collected on the plug and the power outlet.
- Page 11 Working around Do not use highly flammable sprays the printer near the printer. This could cause a fire or electric shock if the spray comes into contact with electrical components inside the printer. Caution You may cause injury or damage the printer if you ignore any of these safety precautions.
- Page 12 Do not use an extension lead/ cord. Never use a power supply source other than the one rated for the printer in the country of where you purchased the printer. AC 100-240 V, 50/60 Hz Working around Never put your hands or fingers in the the printer printer while it is printing.
- Page 13 Never touch the electrical contacts on a Print Head after printing. The metal parts may be very hot and could cause burns. Do not throw ink tanks into fire.
-
Page 14: Before Printing
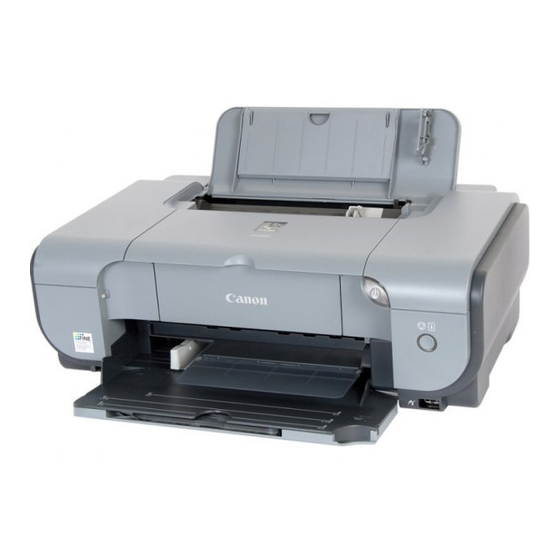
Before Printing Main Components Front View Top Cover Open when replacing the ink tanks, or when removing jammed paper. Paper Guide (Auto Sheet Feeder) After loading paper, pinch the knob and slide it so that it just touches the left edge of the paper. Sheet Feeder Cover Open to load paper in the Auto Sheet Feeder. - Page 15 Cover Guide Align the right side of the paper to this guide. POWER Button / Power Lamp Turns the printer on and off. Lights or flashes green to indicate the power status. Alarm Lamp Lights or flashes orange when an error has occurred, or when paper or ink has run out.
-
Page 16: Rear View
ALARM Lamp Flashes Orange. POWER lamp flashes green once and ALARM lamp flashes orange once alternately: An error that requires contacting your Canon Service representative may have occurred. For details, see POWER Lamp Flashes Green and ALARM Lamp Flashes Orange Alternately. - Page 17 (19) Print Head Lock Lever Locks the Print Head into place. Important Do not pull up this lever after installing the Print Head. (20) Ink Lamp Lights or flashes red to indicate the status of the ink tank. (21) Print Head Holder Holds the Print Head.
- Page 18 Fast flashing (at around 1-second intervals): Ink tank is empty, or the printer is not ready due to an error. For details, see ALARM Lamp Flashes Orange. Off: Make sure that the ink tanks are inserted properly. If the lamps are still off after reinserting the ink tanks, there has been an error and the printer cannot print.
-
Page 19: Loading Printing Paper
Loading Printing Paper This section describes how to load printing paper in the Auto Sheet Feeder and the Front Feeder. Paper Handling Recommended Paper and Requirements Paper Support Load Printer Limit Paper Driver Media Thickness Setting for Model Auto Type Front Lever Media... - Page 20 Glossy GP-501 10 sheets Left Glossy Photo Photo (A4, loadable Paper Letter), Paper "Everyday 20 sheets Use" (4" x 6" / 101.6 x 152.4 Matte MP-101 10 sheets Left Matte Photo Photo (A4, loadable Paper Letter), Paper 20 sheets (4" x 6" / 101.6 x 152.4 Photo...
- Page 21 Transfers loadable Paper with a Model Number is Canon specialty media. You may not be able to purchase some Canon genuine papers depending on your country. Paper is not sold in the US by Model Number. Purchase paper by name.
-
Page 22: Media Types You Cannot Use
Folded, curled, or wrinkled paper Damp paper Paper that is too thin (weighing less than 64 gsm / 17 lb) Paper that is too thick (non-Canon genuine paper weighing more than 105 gsm / 28 lb) Picture postcards Postcards affixed with photos or stickers... - Page 23 Images may become smudged if you place printouts in an album before the ink is completely dry. We recommend to allow the ink to dry for 24 hours before placing your printouts in an album. Do not attempt to dry the ink with a hair dryer or by exposing printouts to direct sunlight.
- Page 24 Front Feeder When Printing for the First Time At purchase, the printer is set to feed from the Auto Sheet Feeder. If you are printing without changing paper source settings, load paper in the Auto Sheet Feeder. Note For details on loading paper, see Loading Paper in the Auto Sheet Feeder.
- Page 25 Switch paper source here. Paper Source Selection Scenarios Deciding on the usage of the two paper sources to print with minimum reloading of paper depends mainly on the variety of the type of paper you use regularly, and also on space limitations of the location you are setting the printer.
-
Page 26: Loading Paper
Auto Sheet Feeder: Load paper of various types and sizes, including photo paper Front Feeder: Load A4, Letter, or B5-sized plain paper Choosing the paper source to match the location of the printer You can choose to use only either the Auto Sheet Feeder or Front Feeder according to the location of the printer. - Page 27 Always load paper in portrait orientation (A). Loading paper in landscape orientation can cause the paper to be jammed. Note For details on the specialty media Canon provides for use with its various printers, see Printing Media. For detailed instructions on how to load specialty media...
- Page 28 Load paper only in the Auto Sheet Feeder. You can load up to 20 sheets of 4" x 6" or 2.13" x 3.39" (credit card-sized) paper and 10 sheets of 5" x 7" paper. We recommend using genuine Canon photo media when printing photographs. Printing Media.
-
Page 29: Load The Paper
Prepare to load paper. Open the Sheet Feeder Cover and pull out the Paper Support. Open the Front Feeder. Extend the Paper Output Support. Adjust the position of the Paper Thickness Lever. Set it to the right when printing on envelopes or T-shirt transfers, and left when printing on any other type of paper. - Page 30 Do not load higher than the Load Limit Mark (A). Load the paper in the Auto Sheet Feeder with the print side facing UP. Align the paper stack against the Cover Guide on the right side of the Paper Support. Note Make sure that the Cover Guide is set upright when you load paper in the Auto Sheet Feeder.
- Page 31 You can load A4, Letter, or B5-sized plain paper (such as Canon Super White Paper SW-201) in the Front Feeder. You cannot load any other paper in the Front Feeder. Flatten the four corners of the paper before loading it.
- Page 32 Do not load higher than the Load Limit Mark (A). Load the paper in the Front Feeder with the print side facing DOWN and the leading edge to the far side. Align the right edge of the paper stack against the inner face of the Front Feeder, and the near and left edges with the Paper Size Mark.
-
Page 33: Loading Envelopes
In the printer driver, select Front Feeder for Paper Source. Printing with Windows Printing with Macintosh. Note Select the page size of the loaded paper in Page Size in the printer driver. Loading Envelopes Envelopes must be fed from the Auto Sheet Feeder. Use either European DL or US Comm. - Page 34 Important Envelopes may not be fed properly if the Paper Support is extended. Load the envelope against the Cover Guide (the right side of the Paper Support). Load with the front face UP and the rear flaps DOWN on the left. A maximum of 10 envelopes can be loaded at once.
- Page 35 then select DL Env. or Comm. Env. #10 in Page Size. For details on printer driver settings, see Printing with Windows Printing with Macintosh.
-
Page 36: Basic Printing
Basic Printing This section describes the procedure for basic printing. When printing photographs, you can also use Easy-PhotoPrint to easily specify print settings. Easy-PhotoPrint is provided on the Setup CD-ROM. For details on using Easy-PhotoPrint, refer to the Photo Application Guide on-screen manual. Printing with Windows Note Menu and command names may differ between software applications,... - Page 37 Make sure that Canon iP3300 is selected. Note If a different printer is selected, click Canon iP3300. Click Preferences (or Properties). The Main sheet of the Printing Preferences dialog box appears. Specify the required settings. Click Media Type to select the type of media loaded in the printer.
-
Page 38: Print The Document
Note If you select Front for Plain Paper, the printer will automatically switch to the Front Feeder when Plain Paper is specified for Media Type. You cannot load paper other than A4, Letter, or B5-sized plain paper in the Front Feeder. -
Page 39: Printing With Macintosh
To cancel a print job in progress, press the RESUME/ CANCEL button on the printer or click Cancel Printing on the Canon IJ Status Monitor. To display the Canon IJ Status Monitor, click Canon iP3300 on the taskbar. Printing with Macintosh... -
Page 40: Select Paper Size
appropriate application software. Select Paper Size. Select Page Setup on the application software's File menu. The Page Setup dialog box opens. Confirm that iP3300 is selected in Format for. Select the desired paper size in Paper Size. Click OK. Specify the required settings. Select Print on the application software's File menu. - Page 41 Note If you select Front for Plain Paper, the printer will automatically switch to the Front Feeder when Plain Paper is specified for Media Type. You cannot load paper other than A4, Letter, or B5-sized plain paper in the Front Feeder.
- Page 42 Note Click the printer icon in the Dock to display the list of print jobs in progress. If you are using Mac OS X v.10.2.8, click the printer icon in the Dock to start up the Print Center and double-click the name of your printer in the Printer List. To cancel a print job in progress, select the desired document in the Name list and click Delete.
-
Page 43: Printing Media
Printing Media Compatible Media Types You can use the following sizes and types of paper and other media. Size The following table shows paper sizes that can be used and where they can be loaded. O:Available -:Unavailable Auto Width x Front Paper Size Sheet... - Page 44 5" x 7" 5 x 7 inches / 127.0 x 177.8 8" x 10" 8 x 10 inches / 203.2 x 254.0 3.50 x 5 inches / 89.0 x 127.0 mm 5 x 7.01 inches / 127.0 x 178.0 mm Hagaki 3.94 x 5.83 inches / 100.0...
- Page 45 Folded, curled, or wrinkled paper Damp paper Paper that is too thin (weighing less than 64 gsm / 17 lb) Paper that is too thick (non-Canon genuine paper weighing more than 105 gsm / 28 lb) Picture postcards Postcards affixed with photos or stickers...
- Page 46 10" / 203.2 x 254.0 mm, and Wide) Weight 64 to 105 gsm (17 to 28 lb) (plain paper except for genuine Canon media) Do not use paper heavier or lighter than this (except for genuine Canon media), as it could jam in the printer.
- Page 47 Glossy Photo Paper GP-401 / Glossy Photo Paper "Everyday Use" GP- 501. Matte Photo Paper MP-101. Photo Paper Plus Double Sided PP-101D. Photo Paper Plus Glossy PP-101. Photo Paper Plus Semi-gloss SG-101, SG-201. Photo Paper Pro PR-101. Photo Stickers PS-101. T-Shirt Transfers TR-301.
-
Page 48: High Resolution Paper Hr-101N
High Resolution Paper HR-101N This type of paper provides better color reproduction than plain paper. It is suitable for printing business documents that feature graphics, and for printing photographs. Size This media is available in A4 and Letter sizes. Loading Load the paper in the Auto Sheet Feeder. - Page 49 Glossy Photo Paper GP-401 / Glossy Photo Paper "Everyday Use" GP-501 This paper is thicker than High Resolution Paper and has a glossy printing surface to produce printouts close to photograph quality. It is suitable for borderless printing. Size Glossy Photo Paper is available in A4, Letter, 4" x 6" / 101.6 x 152.4 mm, and Credit card sizes.
- Page 50 Note To prepare the data to be printed with Borderless Printing, create a document with the same size as the size of paper you are printing on, and then paste the image so that it fills the document area without leaving any margins. If you are using an application that allows you to set margins, set the left, right, top and bottom margins to 0 inches / mm.
- Page 51 Matte Photo Paper MP-101 This is a thick matte water-resistant paper and provides superior color reproduction. It is suitable for a variety of printing purposes such as paper crafts, calendars, and photos with matte finish. It is suitable for borderless printing. Size This media is available in A4, Letter, and 4"...
- Page 52 * This will help protect printouts from color fading. * Do not mount printouts in an adhesive-type album, as you may not be able to remove them. When storing printouts in albums with pockets, firmly insert them fully into the pocket. The edges of the printouts may turn yellow depending on the type of plastic folder or pocket album.
- Page 53 Photo Paper Plus Double Sided PP-101D This paper is provided with glossy coating on both sides, ensuring superior color reproduction. You can print high quality photographs onto both sides of this paper and bind the prints into a booklet to create a photo album. It is suitable for borderless printing.
- Page 54 Printer Driver Settings Media Type: Photo Paper Plus Double Sided Page Size: Make sure that the setting matches the size set in the application. Handling of Printed Output Remove each sheet as soon as it is printed. Use the drying stand included in the Photo Paper Plus Double Sided PP- 101D package to dry the printouts for more than 30 minutes.
- Page 56 Photo Paper Plus Glossy PP-101 This is a thick paper with a glossy water-resistant coating and provides superior color reproduction. It is ideal for printing high quality photographs. It is suitable for borderless printing. Size This media is available in A4, Letter, 4" x 6" / 101.6 x 152.4 mm, and 5" x 7" / 127.0 x 177.8 mm sizes.
- Page 57 Storing Printed Output Store printouts in photo albums, plastic folders, or photo frames to protect them from direct exposure to air. * This will help protect printouts from color fading. * Avoid storing printouts in an adhesive-type album, as you may not be able to remove them.
-
Page 58: Photo Paper Plus Semi-Gloss
Photo Paper Plus Semi-gloss SG-101, SG-201 This paper provides the same excellent water-resistant coating and superior color reproduction as the Photo Paper Plus Glossy PP-101, while offering a less reflective surface, closer to a traditional matte finish. This paper is suitable for borderless printing. Size Photo Paper Plus Semi-gloss SG-101 is available in A4, Letter, and 4"... - Page 59 Do not attempt to dry the ink with a hair dryer or by exposing printed sheets to direct sunlight. Do not touch the printed surface nor stack the printed sheets until the ink is fixed. Storing Printed Output Store printouts in photo albums, plastic folders, or photo frames to protect them from direct exposure to air.
- Page 60 Photo Paper Pro PR-101 This is a thick paper with a treated surface that enhances gloss and provides superior color reproduction. It is ideal for printing high quality photographs. It is suitable for borderless printing. Size This media is available in A4, Letter, 4" x 6" / 101.6 x 152.4 mm, 8" x 10" / 203.2 x 254.0 mm, and Wide sizes.
- Page 61 Do not attempt to dry the ink with a hair dryer or by exposing printed sheets to direct sunlight. Do not touch the printed surface nor stack the printed sheets until the ink is fixed. Storing Printed Output Store printouts in photo albums, plastic folders, or photo frames to protect them from direct exposure to air.
- Page 62 Photo Stickers PS-101 This is a peel-and-stick sheet that allows you to make your original stickers from your favorite photo. It is a glossy sheet and is highly resistant to water. On each sheet, you can print 16 photo stickers with excellent printing quality. Note You can use Easy-PhotoPrint or PhotoRecord (Windows only) to easily specify print settings.
- Page 64 T-Shirt Transfers TR-301 This paper is used to create iron-on transfers. The image is printed inverted. Note Create an image for printing onto A4-sized paper. The image is printed with the left and right inverted to the transfer. When it is ironed onto the T-shirt, you will get the correct, uninverted image.
- Page 65 Envelopes Use either European DL or US Comm. Env. #10 size envelopes. Important Select either DL Env. or Comm. Env. #10 in the printer driver according to the envelope size you are using. If you do not, the address will be printed in the wrong direction.
- Page 66 * The above illustrations show a side view of the leading edge of the envelope. The envelopes may jam in the printer if they are not completely flat or the edges are not aligned. Make sure that no curl or puff exceeds 0.2 inches / 5 mm. Size Use either European DL or US Comm.
- Page 67 Printer Driver Settings Media Type: Envelope Page Size: Select either DL Env. or Comm. Env. #10 according to the envelope size you are using. Handling of Printed Output Remove each envelope as soon as it is printed. Do not touch the printed surface nor stack the printed sheets until the ink is fixed.
-
Page 68: Routine Maintenance
Routine Maintenance Replacing an Ink Tank When ink runs out, replace the ink tank. The printer will not print if the wrong type of ink tank is used, or if it is installed in the incorrect position. The printer uses the following ink tanks. Black: PGI-5BK Magenta: CLI-8M Cyan: CLI-8C... - Page 69 For details, see ALARM Lamp Flashes Orange. Ink Level Indication on the Computer Open the Canon IJ Status Monitor to check the ink level information. Open the printer properties dialog box. Opening the Printer Properties Dialog Box (Windows). Click View Printer Status on the Maintenance sheet.
- Page 70 * To confirm the ink tank information, click the Ink Details menu. * You can also display the Canon IJ Status Monitor by clicking the Canon IJ Status Monitor button which appears on the taskbar during printing.
-
Page 71: Knowing When To Replace Ink Tank
Top Cover to resume printing. Note When ink is low, the "!" symbol appears above an ink tank with low ink in the Canon IJ Status Monitor. Obtain a replacement tank as soon as possible. Ink tank with low ink If the ALARM lamp flashes orange four times Ink may have run out. - Page 72 * With this operation, releasing the function for detecting the remaining ink level is memorized, and the Canon IJ Status Monitor will no longer display the remaining ink level. Please be advised that Canon shall not be liable for any malfunction or trouble which may be caused by continuation of printing...
- Page 73 Ink tank with no ink If the ALARM lamp flashes orange four times Ink may have run out. Replacing the ink tank is recommended. Click Delete Job to cancel the current printing job. Click Stop Job to stop the current printing job. Click Stop All Jobs to stop all printing jobs. Replace the ink tank with a new one.
-
Page 74: Replacing Ink Tanks
* With this operation, releasing the function for detecting the remaining ink level is memorized, and the Canon IJ Printer Utility will no longer display the remaining ink level. Please be advised that Canon shall not be liable for any malfunction or trouble which may be caused by continuation of printing under the ink out condition. - Page 75 maintain optimal printing quality, use an ink tank within six months of first use. Color ink may be consumed even when printing a black-and-white document or when black-and-white printing is specified. Color ink is also consumed in Print Head Cleaning and Print Head Deep Cleaning, which may be necessary to maintain the printer's performance.
- Page 76 Do NOT touch the Print Head Lock Lever; remove only the ink tank. Important Handle ink tanks carefully to avoid staining clothing or the surrounding area. Discard empty ink tanks according to the local laws and regulations regarding disposal of consumables. Note Do not remove more than one ink tank at a time.
- Page 77 Do not touch the electrical contacts on the ink tank. Doing so can cause the printer to malfunction or become unable to print. Carefully hold the protective cap when removing it to prevent the ink from staining your fingers. Important Be sure to remove the clear film from the ink tank in the exact order shown in step 4-(1), as failure to follow this step may cause the ink to leak and stain your clothes and...
-
Page 78: Close The Top Cover
Insert the front end of the ink tank into the Print Head. Make sure the position of the tank matches the label. Press on the mark on the ink tank until the ink tank snaps firmly into place. Make sure that the ink lamp lights up red. Important The printer cannot be used unless all the ink tanks are installed. - Page 79 Follow the procedure below to turn off the printer. Press the POWER button to turn off the printer. Confirm that the POWER lamp has gone out. This takes a few seconds or as long as around 20 seconds. Unplug the power cord from the wall outlet. If you are using a power outlet strip, you can switch it off instead.
-
Page 80: When Printing Becomes Faint Or Colors Are Incorrect
When Printing Becomes Faint or Colors Are Incorrect When printing becomes faint or colors are incorrect even if ink remains in the ink tanks, the print head nozzles are probably clogged. Print the nozzle check pattern to confirm the condition of the nozzles and then perform Print Head Cleaning. - Page 81 Note If Print Head Deep Cleaning does not resolve the problem, the Print Head may be damaged. Contact your Canon Service representative. If the Ruled Lines Are Shifted Step 1 Aligning the Print Head.
-
Page 82: Printing The Nozzle Check Pattern
Printing the Nozzle Check Pattern Print the nozzle check pattern to determine whether the ink ejects properly from the print head nozzles. Note You cannot feed paper from the Front Feeder to print the Nozzle Check Pattern. Always load paper in the Auto Sheet Feeder. Printing the Nozzle Check Pattern Without a Computer Nozzle check pattern printing can be performed also from the printer itself using the RESUME/CANCEL button. - Page 83 Letter-sized plain paper in the Auto Sheet Feeder. Set the Paper Thickness Lever to the left. Open the Front Feeder and extend the Paper Output Support. Open the Canon IJ Printer Utility dialog box. Opening the Canon IJ Printer Utility (Macintosh). Print the Nozzle Check Pattern.
- Page 84 The nozzle check pattern is printed. Do not open the Top Cover while printing. Note Clicking Initial Check Items displays the items to be checked before printing the pattern. Examine the pattern and take the appropriate action. Examining the Nozzle Check Pattern.
-
Page 85: Examining The Nozzle Check Pattern
Examining the Nozzle Check Pattern Examine the nozzle check pattern output by the printer, and clean the Print Head if necessary. Note The nozzle check pattern will not be printed correctly if there is not enough ink. Replace the ink tank if the remaining amount of ink is insufficient. - Page 86 To proceed to cleaning of the Print Head, go to step 4-(3) of the Windows or Macintosh Print Head Cleaning procedure, depending on your platform. See Print Head Cleaning. If no lines of the group (1) pattern are missing and the group (2) patterns have no white streaks, click Exit or Quit to exit nozzle check pattern examination.
-
Page 87: Print Head Cleaning
Print Head Cleaning Clean the Print Head if lines are missing or if white streaks appear in the printed nozzle check pattern. Cleaning unclogs the nozzles and restores the print head condition. Note that cleaning the Print Head causes used ink to be absorbed in the ink absorber. - Page 88 Select the ink group to be cleaned. Note Clicking Initial Check Items displays the items to be checked before cleaning. Click Execute. Print Head Cleaning starts when the POWER lamp starts flashing green. Do not perform any other operations until Print Head Cleaning finishes. This takes about 50 seconds.
- Page 89 4-(3) in the following procedure will appear. Make sure that the printer is on. Open the Front Feeder and extend the Paper Output Support. Open the Canon IJ Printer Utility dialog box. Opening the Canon IJ Printer Utility (Macintosh). Start Print Head Cleaning.
- Page 90 Note Clicking Initial Check Items displays the items to be checked before cleaning. Click OK. Print Head Cleaning starts when the POWER lamp starts flashing green. Do not perform any other operations until Print Head Cleaning finishes. This takes about 50 seconds. Load a sheet of A4 or Letter-sized plain paper in the Auto Sheet Feeder and set the Paper Thickness Lever to the left.
-
Page 91: Print Head Deep Cleaning
Print Head Deep Cleaning If print quality does not improve by standard Print Head Cleaning, try Print Head Deep Cleaning, which is a more powerful process. Note that cleaning the Print Head causes used ink to be absorbed in the ink absorber. Print Head Deep Cleaning consumes more ink than standard Print Head Cleaning, so perform this procedure only when necessary. - Page 92 A4 or Letter-sized plain paper in the Auto Sheet Feeder. Set the Paper Thickness Lever to the left. Open the Front Feeder and extend the Paper Output Support. Open the Canon IJ Printer Utility dialog box. Opening the Canon IJ Printer Utility (Macintosh). Start Print Head Deep Cleaning.
- Page 93 Make sure that Cleaning is selected in the pop-up menu. Click Deep Cleaning. Select the ink group to be deeply cleaned. Note Clicking Initial Check Items displays the items to be checked before deep cleaning. Click OK. Print Head Deep Cleaning starts when the POWER lamp starts flashing green.
- Page 94 If this does not solve the problem, the Print Head may be damaged. Contact your Canon Service representative.
-
Page 95: Aligning The Print Head
Aligning the Print Head If ruled lines are printed misaligned or print results are otherwise unsatisfactory, adjust the print head position. Note You cannot feed paper from the Front Feeder when performing Print Head Alignment. Always load paper in the Auto Sheet Feeder. Make sure that the printer is on, and then load two sheets of A4 or Letter-sized plain paper in the Auto Sheet Feeder. - Page 96 Note Clicking Check Setting prints the current settings and finishes Print Head Alignment. After the pattern is printed, click Yes. Look at the printout. From the patterns, select the most even, least irregular patterns for each column and enter their numbers.
- Page 97 Note If it is difficult to pick the best pattern, pick the setting that produces the least noticeable vertical white streaks.
- Page 98 Less noticeable white streaks More noticeable white streaks Confirm the message, and then click OK. Important Do not open the Top Cover while printing. In the same way, select the best patterns for each column, enter their numbers, then click OK.
- Page 99 When the confirmation message is displayed, click OK. Note When you turn off the printer, be sure to press the POWER button on the printer. Otherwise, the settings made here will not be saved. Make sure that the printer is on, and then load two sheets of A4 or Letter-sized plain paper in the Auto Sheet Feeder.
-
Page 100: Head Alignment
Open the Canon IJ Printer Utility dialog box. Opening the Canon IJ Printer Utility (Macintosh). Select Test Print in the pop-up menu. Click Print Head Alignment. When the confirmation message is displayed, click Print Head Alignment. Important Do not open the Top Cover while printing. - Page 101 Note If it is difficult to pick the best pattern, pick the setting that produces the least noticeable vertical white streaks.
- Page 102 Less noticeable white streaks More noticeable white streaks Confirm the message, and then click OK. Important Do not open the Top Cover while printing. In the same way, select the best patterns for each column, enter their numbers, then click Send.
- Page 103 Note When you turn off the printer, be sure to press the POWER button on the printer. Otherwise, the settings made here will not be saved.
-
Page 104: Cleaning Your Printer
Cleaning Your Printer Cleaning the Inside of the Printer If the printed paper is smudged, the inside of the printer may be dirty. To always get best quality printing result, periodical cleaning of the inside of the printer is recommended. You can clean this part in three ways: Cleaning the Paper Feed Rollers. - Page 105 If the problem still persists, contact a Canon service representative. Cleaning the Paper Feed Roller of the Front Feeder Turn off the printer.
- Page 106 Manually rotate the paper feed roller toward you and apply a cotton swab or the like to wipe off dust or stain. Note If the dirt is hard to remove, slightly moisten the tip of the cotton swab with water. Paper loaded in the Front Feeder will gradually feed and eject as you manually rotate the roller.
- Page 107 Hold the Rear Cover so that the Rear Cover Lever comes to the left. Align the protrusions at the right edge of the cover with the slots at the rear of the printer and press on the lever to reattach the Rear Cover. Important Press firmly on the Rear Cover until it is fit squarely in the rear of the printer.
- Page 108 3. Fold a sheet of A4 or Letter-sized plain paper in half widthwise, and then unfold it. 4. Load this and only this sheet of paper in the Auto Sheet Feeder with the open side to the front. 5. Set the Paper Thickness Lever to the left. 6.
- Page 109 Load the paper after unfolding it. Open the printer properties dialog box. Opening the Printer Properties Dialog Box (Windows). Click the Maintenance tab, and then Bottom Plate Cleaning. When the confirmation message is displayed, click Execute. The paper cleans the inside of the printer as it feeds through the printer. If the ejected paper is smudged, clean the inside of the printer again.
- Page 110 Feeder with the open side to the front. Set the Paper Thickness Lever to the left. Load the paper after unfolding it. Open the Canon IJ Printer Utility dialog box. Opening the Canon IJ Printer Utility (Macintosh). Make sure that Cleaning is selected in the pop-up menu.
- Page 111 Execute. The paper cleans the inside of the printer as it feeds through the printer. If the ejected paper is smudged, clean the inside of the printer again. If the problem is not resolved after performing cleaning twice, the protrusions inside the printer may be stained.
- Page 112 Using the Canon Setup Utility Features of the Canon Setup Utility With the Canon Setup Utility, you can pre-specify the type and size of media to be printed on from a PictBridge-compatible device without operating your computer (printer driver). Use the Setup CD-ROM to install the Canon Setup Utility. Clicking Easy Install on the initial menu installs the printer driver, which installs the Canon Setup Utility automatically in your computer.
- Page 113 USB cable and the POWER lamp on the printer is lit in green. Click Start > All Programs (Programs in non-XP Windows) > Canon Utilities > Canon Setup Utility 2.3 > Canon Setup Utility 2.3. The Canon Setup Utility dialog box will be displayed.
- Page 114 Printers list. If the computer is connected to two or more printers that support the Canon Setup Utility, a dialog box for selecting the printer to be configured with Canon Setup Utility may be displayed. If this appears, select the name of the printer in the Available Printers list.
- Page 115 Printers list. If the computer is connected to two or more printers that support the Canon Setup Utility, a dialog box for selecting the printer to be configured with Canon Setup Utility may be displayed. If this appears, select the name of the printer...
- Page 116 Click to display the Select Printer dialog box. If there are multiple printers supported by Canon Setup Utility connected to the computer, select the name of the printer to configure with Canon Setup Utility in the Available Printers list. PictBridge Print Settings Displays the default settings for PictBridge printing, such as the type and size of media, borderless printing, and automatic image optimization.
- Page 117 PictBridge Dialog Box Printing Type Select the type (layout) for printing with PictBridge. You can select from 4 x 6 (Standard), 4 x 6 Bordered, Credit Card Borderless, Letter Borderless, A4 Borderless, and Custom. Select Custom to specify the media type, paper size, and printing options such as borderless printing and automatic image optimization.
- Page 118 Automatic Image Optimize Select this check box to automatically optimize the color tones and brightness of the photos to be printed. Send Sends the settings to the printer.
- Page 119 Click to display the Select Printer dialog box. If there are multiple printers supported by Canon Setup Utility connected to the computer, select the name of the printer to configure with Canon Setup Utility in the Available Printers list. PictBridge Print Settings Displays the default settings for PictBridge printing, such as the type and size of media, borderless printing, and automatic image optimization.
- Page 120 Printing Type Select the type (layout) for printing with PictBridge. You can select from 4 x 6 (Standard), 4 x 6 Bordered, Credit Card Borderless, Letter Borderless, A4 Borderless, and Custom. Select Custom to specify the media type, paper size, and printing options such as borderless printing and automatic image optimization.
- Page 121 Send Sends the settings to the printer.
-
Page 122: Troubleshooting
Troubleshooting This section describes troubleshooting tips for problems you may encounter when using the printer. Note If you cannot find appropriate tips for your problem, refer to the on-screen manuals. Cannot Install the Printer Driver Cannot Connect to Computer Properly Printing Speed Is Slow / USB 2.0 Hi-Speed Connection Does Not Work "Hi-Speed USB Device Plugged into non-Hi-Speed USB Hub"... - Page 123 Error No.: 1700/1710 Is Displayed Error No.: 2001 Is Displayed Other Error Messages Windows-specific Problems Canon IJ Status Monitor Is Not Displayed Cannot Print in Background (Windows Me/Windows 98 Only) Cannot Print Properly from a Digital Camera If You Cannot Resolve the Problem...
-
Page 124: Cannot Install The Printer Driver
Cannot Install the Printer Driver Cause Action If you were unable to proceed beyond the Printer Connection screen, follow Unable to proceed the procedure below to reinstall the beyond the Printer printer driver. Connection screen. Click Cancel on the Printer Connection screen. - Page 125 Double-click the CD-ROM icon on your desktop to start installation. If the CD-ROM icon is not displayed on the desktop, there may be a problem with the CD-ROM. Contact a Canon service representative. Installation Follow the procedure described in the...
-
Page 126: Cannot Connect To Computer Properly
If other disks are displayed, there is a problem with the Setup CD- ROM. Contact a Canon service representative. Cannot Connect to Computer Properly Printing Speed Is Slow / USB 2.0 Hi-Speed Connection... - Page 127 The USB cable, and the USB hub if you are using one, support USB 2.0 Hi-Speed connection. Be sure to use a certified USB 2.0 Hi- Speed cable. We recommend the cable to be no longer than around 10 feet (3 meters). The operating system of your computer supports USB 2.0 Hi-Speed connection.
-
Page 128: Print Results Not Satisfactory
Print Results Not Satisfactory Cannot Print to End of Job Cause Action In Windows XP and Windows 2000, click Print Options on the Page Setup Size of the print sheet. Then, select the Reduce spool data is extremely data size check box in the displayed large (Windows dialog. - Page 129 Cause Action Media Type Make sure that the Media Type setting setting does not in the printer driver matches the type of match the actual the paper loaded in the printer. If you type of paper. are printing a photograph or an illustration, incorrect Media Type setting may reduce the quality of printout color.
- Page 130 Ink tank is Open the Top Cover and check the ink lamps. empty. If an ink lamp is flashing red slowly at about 3- second intervals, ink is running low. If an ink lamp is either flashing red fast at about 1-second intervals or is not lit, the tank is empty.
- Page 131 If the problem is still not resolved after performing Print Head Deep Cleaning twice The Print Head may be damaged. Contact your Canon Service representative. For details on how to print the nozzle check pattern, how to clean the Print Head, and how to...
- Page 132 Print quality Set the Print Quality setting to High in Windows is not set or Fine in Macintosh. appropriately. Open the printer properties dialog box. Opening the Printer Properties Dialog Box from Your Application Program. On the Main sheet, click High for the Print Quality setting.
-
Page 133: White Streaks
If the problem is still not resolved after performing Print Head Deep Cleaning twice The Print Head may be damaged. Contact your Canon Service representative. For details on how to print the nozzle check pattern, how to clean the Print... -
Page 134: Printed Paper Curls Or Has Ink Blots
Media Type Make sure that the Media Type set in setting in the the Main sheet of the printer driver printer driver does (Windows) or the Quality & Media in not match the the pop-up menu of the Print dialog box actual type of (Macintosh) matches the type of the paper. -
Page 135: Printed Surface Is Scratched/Paper Is Smudged
Paper is too thin. When printing data with high color saturation such as photographs or images in deep color, we recommend using Photo Paper Pro or other Canon specialty paper. See Media Types You Cannot Use. Media Type Make sure that the Media Type set in... - Page 136 If repeating this procedure three times or more does not solve the problem, clean the surface of the roller with applying a slightly moisten cotton swab with water to wipe off dust or stain. If the problem still persists, contact a Canon service representative.
- Page 137 Paper Feed Follow the procedure below to clean the paper Roller is dirty. feed roller of the Front Feeder. (Front Turn off the printer. Feeder) Load five or more sheets of A4 or Letter- sized plain paper in the Front Feeder. Note Paper is loaded to aid the cleaning process and will not be printed on.
- Page 138 rear of the printer and press on the lever to reattach the Rear Cover. Important Press firmly on the Rear Cover until it is fit squarely in the rear of the printer. If the Rear Cover is not reattached properly, paper may not be fed properly and cause paper jams.
- Page 139 Hold down the RESUME/CANCEL button and release it when the POWER lamp flashes green five times. The paper cleans the inside of the printer as it feeds through the printer. If the ejected paper is smudged, clean the inside of the printer again. If the problem is not resolved after performing cleaning twice, the protrusions inside the printer may be stained.
- Page 140 Send. Confirm the message and click OK. Make sure that the printer is turned on. Open the Canon IJ Printer Utility. Opening the Canon IJ Printer Utility (Macintosh). Select Custom Settings in the pop-up menu.
- Page 141 Paper is If you are using paper with either any of the curled. corners or the whole printing surface curled, the paper may become dirty, not feed properly, or both. Use such paper after correcting paper curl as follows. With the printing side facing up, cover the paper with a fresh sheet of plain paper to avoid staining or scratching the surface.
-
Page 142: Colors Are Uneven Or Streaked
Media Type Make sure that the Media Type setting in the setting in the Main sheet (windows) or the Quality & Media in printer driver the pop-up menu of the Print dialog box does not (Macintosh) matches that of the paper loaded in match the the printer. - Page 143 Print quality is not Set the Print Quality setting to High in set appropriately. Windows or Fine in Macintosh. Especially when printing a document that requires a lot of ink, increasing the Print Quality setting in the printer driver settings is effective in reducing uneven colors.
- Page 144 If the problem is still not resolved after performing Print Head Deep Cleaning twice The Print Head may be damaged. Contact your Canon Service representative. For details on how to print the nozzle check pattern, how to clean the Print...
-
Page 145: Printer Does Not Start Or Stops During Print Jobs
Printer Does Not Start or Stops During Print Jobs Printing Does Not Start Cause Action The printer is Make sure that the power cord is securely not powered plugged into the Power Connector of the printer. on. / The Plug the power cord all the way in, since it may be power cord difficult to plug. - Page 146 Ink tank is Open the Top Cover and check the ink lamps. not installed If the ink lamp is not lit, press the mark on the securely. / ink tank until it clicks into place. The ink lamp Part of the lights up red when the ink tank is fully inserted.
- Page 147 Click the printer icon in the Dock to display the list of print jobs in progress. In Mac OS X v.10.2.8, click the printer icon in the Dock to start up the Print Center and double- click the name of your printer in the Printer List. Select the print job to delete and click The print jobs are deleted.
-
Page 148: Printing Stops Before It Is Completed
The printer will not print properly if you are using a is not driver for a different printer. selected in In Windows, make sure that Canon iP3300 is the printer selected in the Print dialog box. driver. On a Macintosh, make sure that iP3300 is selected in Printer in the Print dialog box. -
Page 149: Printer Moves But Ink Is Not Ejected
time, the printer may stop printing to protect the Print Head. In this case, printing will not resume automatically. Turn the printer off for at least 15 minutes. Caution The Print Head and the surrounding area can become extremely hot inside the printer. - Page 150 If the problem is still not resolved after performing Print Head Deep Cleaning twice The Print Head may be damaged. Contact your Canon Service representative. For details on how to print the nozzle check pattern, how to clean the Print...
- Page 151 For details on different flashing speeds, Getting the Ink Level Information. Printing Speed Not as Fast as Expected Note Printing speed may not improve noticeably by following the instructions below, depending on your system environment. Cause Action Printing in Quiet Print speed is reduced if you specified to print in Quiet Mode in the printer Mode.
- Page 152 Note Opening the Top Cover while printing moves the Print Head Holder to the right. Close the Top Cover, and reopen it after printing finishes. Cause Action Check if the POWER lamp is lit green. The printer is not ready. The Print Head Holder will not move unless the power is on.
-
Page 154: Paper Does Not Feed Properly
Paper Does Not Feed Properly Cause Action Printing on Check to see if the paper you are inappropriate type printing on is not too thick or curled. of paper. Media Types You Cannot Use. Paper Feed Roller You may need to clean the Paper Feed is dirty. - Page 155 If the problem still persists, contact a Canon service representative. Paper Feed Roller Follow the procedure below to clean the is dirty.
- Page 156 If the dirt is hard to remove, slightly moisten the cotton swab with water. Paper loaded in the Front Feeder will gradually feed and eject as you manually rotate the roller. Remove ejected paper. If you run out of paper while cleaning, reload the paper in the Front Feeder.
- Page 157 edge of the stack. When loading paper in the Front Feeder, load the paper with the print side facing DOWN. Align the right edge of the paper stack against the right edge of the Front Feeder and slide the Paper Guide against the left edge of the stack.
- Page 158 Foreign object in Make sure that there are no foreign the Auto Sheet objects in the Auto Sheet Feeder or Feeder or Front Front Feeder. Feeder. Envelopes not See Envelopes, and prepare the prepared or envelopes before printing. loaded properly. Once you have prepared the envelopes, load them in the Auto Sheet Feeder in portrait orientation.
-
Page 159: Paper Jams
Paper Jams Cause Action Paper Remove the paper following the procedure below. jammed in Slowly pull the paper out, either from a the Paper paper source or from the Paper Output Slot, Output whichever is easier. Slot, the Auto Sheet Feeder, or the Front Feeder. - Page 160 If you cannot remove the paper or the paper tears inside the printer, or if the paper jam error continues after removing the paper, contact your Canon Service representative. Landscape Do not load credit card-sized paper in the credit card- landscape orientation.
- Page 161 If you cannot remove the paper or the paper tears inside the printer, or if the paper jam error continues after removing the paper, contact your Canon Service representative.
- Page 162 The last When printing on Legal-sized paper, do not set the extension last extension segment of the Output Paper Support segment upright. of the Output Paper Support is standing upright.
-
Page 163: Alarm Lamp Flashes Orange
ALARM Lamp Flashes Orange ALARM Lamp Flashes Orange When a printer error occurs, the ALARM lamp flashes orange as shown below. The number of flashes indicates the type of error that has occurred. Count the flashes and take the appropriate action to correct the error. Cause Action Two flashes:... - Page 164 Press the RESUME/CANCEL button to cancel the error so you can continue printing. Before the ink absorber becomes completely full, contact a Canon service representative. (You will need to replace a particular part of the printer.) Important Canon recommends that you call for service as soon as this error occurs.
- Page 165 * With this operation, releasing the function for detecting the remaining ink level is memorized. Please be advised that Canon shall not be liable for any printer malfunction or damage caused by refilled ink tanks. Replacing an Ink...
-
Page 166: Error Message Appears On The Screen
Plug the printer back in and turn the printer back on after leaving it for a while. If the problem is not resolved, contact your Canon Service representative. Error Message Appears on the Screen... -
Page 167: Writing Error/Output Error/Communication Error
Printers and Faxes. connecting the In non-XP Windows, click Start > printer. Settings > Printers. Click the Canon iP3300 icon. Open the File menu and select Properties. Click the Ports tab to confirm the port settings. Make sure that a port named USBnnn... - Page 168 (where n is a number) is selected for Print to the following port(s). In Windows Me or Windows 98, click the Details tab and make sure that MPUSBPRNnn (Canon iP3300 Printer) is selected for Print to the following port. If the port setting is not correct, change...
- Page 169 Printing Support. In Windows Me or Windows 98, in the Device Manager sheet, double-click Universal Serial Bus controllers and then double-click iP3300. Click the General tab and make sure that there is no indication of a problem with the device. Spooling is Disable spooling to send the print job enabled (Windows...
- Page 170 the error, see ALARM Lamp Flashes Orange. Printer is not Make sure that the USB cable is connected plugged in securely to the computer and properly. the printer. If you are using a relay device such as a USB hub, disconnect it, connect the printer directly to the computer, and try printing again.
-
Page 171: Error No.: 2001 Is Displayed
Press the RESUME/CANCEL button to cancel the error so you can continue printing. Before the ink absorber becomes completely full, contact a Canon service representative. (You will need to replace a particular part of the printer.) Important Canon recommends that you call for service as soon as this error occurs. -
Page 172: Other Error Messages
Use a digital camera or digital video camcorder compatible with this printer. Other Error Messages Cause Action If the Canon IJ Status Monitor is displayed, follow the on-screen Canon IJ Status instructions. Monitor is If an error occurs during printing, a displayed. -
Page 174: Windows-Specific Problems
Windows-specific Problems Canon IJ Status Monitor Is Not Displayed Cause Action Bidirectional Make sure that bidirectional support is support is not enabled. enabled. Click Start > Control Panel > Printers and Other Hardware > Printers and Faxes. In non-XP Windows, click Start >... -
Page 175: Cannot Print Properly From A Digital Camera
Cannot Print in Background (Windows Me/Windows 98 Only) Cause Action Insufficient space Check the amount of free space on your on your computer's hard disk. computer's hard Background printing requires a certain disk. amount of disk space. You may need to delete unnecessary files to free disk space, or disable Background Printing. - Page 176 PictBridge compatible cameras. The error messages and operations may vary depending on the camera you are using. If you are using a non-Canon PictBridge compatible camera and not sure how to dismiss the printer error message from the camera, check the status of the ALARM lamp and dismiss the error message.
- Page 177 Easy Setup Instructions to install the Print Head. If the Print Head is already installed, remove the Print Head and then reinstall If the error is still not resolved, the Print Head may be damaged. Contact your Canon Service representative.
- Page 178 Canon service representative as early as possible. (You will need to replace a particular part of the printer.) "No ink"...
- Page 179 Note If multiple ink lamps are flashing, check how fast they are flashing. Fast flashing (at about 1-second intervals) indicates the tank is empty. Slow flashing (at about 3-second intervals) indicates ink is low. For details on different flashing speeds, Getting the Ink Level Information.
- Page 180 * With this operation, releasing the function for detecting the remaining ink level is memorized. Please be advised that Canon shall not be liable for any printer malfunction or damage caused by refilled ink tanks. Replacing an Ink Tank.
-
Page 181: If You Cannot Resolve The Problem
If you cannot resolve the problem with any of the workarounds in this chapter, please contact the seller of the printer or a Canon service representative. Canon support staff are trained to be able to provide technical support to satisfy customers. -
Page 182: Included Items
Appendix Included Items Check that all the following items are in the box. If anything is missing or damaged, contact your Canon Service representative. Printer Setup CD-ROM Easy Setup Instructions (Setup Sheet) Quick Start Guide Print Head Ink tanks (PGI-5BK, CLI-8C, CLI-8M, CLI-8Y) Power cord * A USB cable is necessary to connect the printer with your computer. -
Page 183: Printing Area
Depending on the type of paper, Borderless Printing may reduce the print quality at the top and bottom edges of the paper or cause these parts to become smudged. Recommended printing area Canon recommends that (dark blue): you print within this area. - Page 184 Printable area (light blue): The area where it is possible to print. ( However, printing in this area can affect the print quality or the paper feed precision. A5, A4, B5, 4" x 6", 4" x 8", 5" x 7", 8" x 10", Credit Card, Wide.
-
Page 185: Letter, Legal
5" x 7" / 127.0 x 177.8 4.7 x 6.7 inches / 120.2 x 169.8 8" x 10" / 203.2 x 254.0 7.7 x 9.7 inches / 196.4 x 246.0 Credit Card 1.86 x 3.07 inches / 47.2 x 78.0 Wide 3.73 x 6.8 inches / 94.8 x 172.6 Note... - Page 186 Size Printable Area (width x height) Letter 8.0 x 10.7 inches / 203.2 x 271.4 mm Legal 8.0 x 13.7 inches / 203.2 x 347.6 mm Note By selecting Borderless Printing on the printer driver, you can make prints with no margins. Borderless Printing can be specified only when Letter is selected for paper size.
- Page 187 Recommended printing area...
-
Page 188: Uninstalling The On-Screen Manuals
The Printer Driver Guide is uninstalled when the printer driver is uninstalled. Uninstalling the User's Guide and the Photo Application Guide Select Applications on the Go menu. Double-click the Canon Utilities folder, and then the IJ Manual folder. Drag the iP3300 folder into the trash. - Page 189 Drag the iP3300 On-screen Manual icon on your desktop into the trash.
-
Page 190: Transporting The Printer
Transporting the Printer When relocating the printer or storing the printer for a long period of time, pack the printer using the original packing materials. If you do not have the original packing materials, pack the printer carefully using protective material and place it inside a sturdy box. Important Pack the printer with the Print Head and ink tanks left installed in the printer. -
Page 191: Shipping The Printer
Caution Do not transport or store the printer slanted, vertically, or upside-down, as the ink may leak and damage the printer. Shipping the Printer Before shipping the printer by a delivery service: Tape the lid of the box securely with strong tape. Clearly label the box as "FRAGILE"... -
Page 192: Specifications
Specifications General Specifications Printing 4800 (horizontal) x 1200 (vertical) resolution (dpi) Print width 8 inches / 203.2 mm max. (for Borderless Printing: 8.5 inches / 216 Acoustic noise Approx. 37 dB (A) (when printing in the level highest print quality mode on Photo Paper Pro) Operating Temperature: 5 to 35°C (41 to 95°F) - Page 193 Image optimize Default (the setting to follow that of the printer), On, Off, "VIVID"*, "NR" (Noise Reduction)*, "VIVID+NR"* * If using a Canon PictBridge- compatible camera, you can select it. Print date & file Default (Off: No printing), Date, File No.,...
- Page 194 Trimming Default (Off: No trimming), On (follow camera's setting), Off Minimum System Requirements Interface Operating System Processor RAM Hard Disk Space USB 2.0 Windows XP SP1, Pentium 400 MB Speed (Celeron Windows 2000 566 MHz) Professional SP4 Windows XP SP1, Pentium II 300 MHz Windows 2000...
- Page 195 For bundled software installation. CD-ROM drive Display: Windows; 800 x 600 Color 16 bit, Macintosh; 800 x 600 Thousands Colors Macintosh File System: Mac OS Extended (Journaled), Mac OS X Extended. Additional System Requirements for On-Screen Manuals Browser: Windows HTML Browser: Help Viewer Help Viewer Note: The on-screen manual...
- Page 196 The Print dialog box can usually be opened by selecting Print on the File menu in your application program. Make sure that Canon iP3300 is selected, and then click Preferences (or Properties). The printer properties dialog box opens.
- Page 197 Click Start > Control Panel > Printers and Other Hardware > Printers and Faxes. In non-XP Windows, click Start > Settings > Printers. Click the Canon iP3300 icon. Open the File menu and select Printing Preferences (Properties in Windows Me or Windows 98).
- Page 198 Opening the Page Setup and Print Dialog Box (Macintosh) Open the Page Setup dialog box and the Print dialog box from the application program you are using. Opening the Page Setup Dialog Box Open the Page Setup dialog box to specify page (paper) settings before printing.
- Page 199 Opening the Printer Setup Utility (Print Center) (Macintosh) You can open the Printer Setup Utility either from the Finder or from an application program you are using. Opening from the Finder Select Applications on the Go menu. Double-click the Utilities folder, and then double-click the Printer Setup Utility icon.
- Page 201 Opening the Canon IJ Printer Utility (Macintosh) To open the Canon IJ Printer Utility, follow the procedure below. Select Applications on the Go menu. Double-click the Utilities folder, and then double-click the Printer Setup Utility icon. In Mac OS X v.10.2.8, double-click the Utilities folder and then the Print Center icon.
- Page 202 The Canon IJ Printer Utility starts up. Note For details on how to set each function, refer to the Printer Driver Guide on-screen manual or the online help.
Need help?
Do you have a question about the PIXMA iP 3300 and is the answer not in the manual?
Questions and answers