Table of Contents
Advertisement
Quick Links
Advertisement
Table of Contents

Subscribe to Our Youtube Channel
Related Manuals for ElectrIQ eiqislandled


Summary of Contents for ElectrIQ eiqislandled
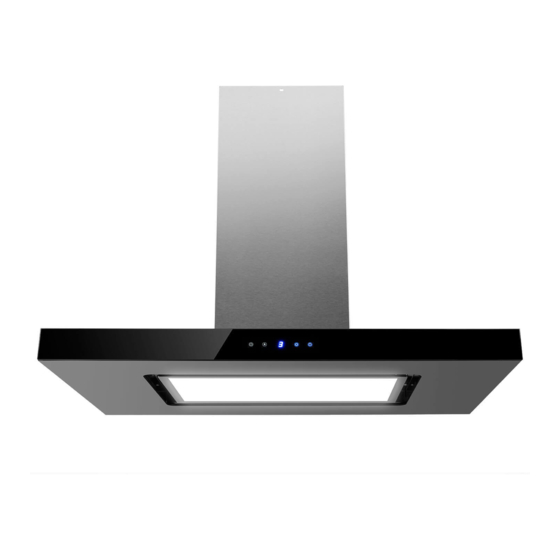
- Page 1 USER MANUAL COOKER HOOD 90CM LED ISLAND COOKER HOOD eiqislandled Thank you for choosing electriQ Please read this user manual before using this product and keep it safe for future reference. Visit our page www.electriQ.co.uk for our entire product range...
-
Page 2: Table Of Contents
CONTENTS SAFETY VENT FLAP INSTALLATION VENTILATION AND INSTALLATION OPERATION TROUBLESHOOTING CLEANING AND MAINTENANCE FILTER INFORMATION BULB INFORMATION SUPPORT PRODUCT FICHE... -
Page 3: Safety
SAFETY PRECAUTIONS Whilst this product is compliant with all safety requirements, incorrect or inappropriate use can lead to both personal injury and potential damage to property. Please read the contents of this instruction booklet thoroughly before fitting or using this appliance. •... - Page 4 • The minimum distance between the surface of the hob and the lowest part of the hood should be at least 65cm. A distance of between 65cm and 75cm gives peak efficiency. • The air must not be discharged into a flue that is used for exhausting fumes from appliances burning gas or other fuels.
-
Page 5: Vent Flap Installation
INSTALLATION (VENT OUTSIDE) MOUNTING OF THE V-FLAP If the cooker hood does not have an assembled V-flap 1, you should mount the half- parts to its body.The images only show an example of how to mount the V-flap,the outlet may be various according to different models and configuration. To mount the V-flap 1 you should: 1. -
Page 6: Ventilation And Installation
OPTIONS FOR VENTILATION This hood can be set up for either external venting or recirculation of the air. The type of setup should be decided before commencing installation. EXTERNAL VENTING If you have an outlet to the outside, your cooker hood can be connected as shown in the diagram using any suitable extraction duct (enamel, aluminium, flexible pipe or inflammable material with an interior diameter of 150mm) can... - Page 7 3. The ceiling must can bear at least 120kgs weight, and the thickness of the ceiling must be ≧ 30MM, drill 1*170mm round hole in the ceiling. 4. According to the hanging board, drill 12 holes in the ceiling, see pic 2, 12pcs of ST6*40mm big flat screws will be used to fix the hanging board on the ceiling, and then 8pcs of M4*10 screws and M4 nut with gasket will be used to connect the angle iron into the hanging board, see pic 1, calculated the length of the angle iron,...
- Page 8 7. Fix the v-flaps and converter onto the outlet. 8. Hold up the hood, 16pcs M4*10 big flat screws will be used to connect the hood body into angle iron. 9. Put the expansion pipe on the converter; after ensure all the things ok, put down the hook, take from the outside chimney, all the installation is finished.
- Page 9 HINTS FOR EXHAUST DUCT INSTALLATION The following rules must be strictly followed to obtain optimal air extraction: • Keep expansion pipe short and straight. • Do not reduce the size or restrict expansion pipe. • When using expansion pipe always install the pipe pulled taut to minimize pressure loss.
-
Page 10: Operation
START USING YOUR COOKER HOOD 1. Press the “Power” button to turn the cooker hood “on” & “off ”. 2. Press the “Speed” button to change between fan speeds. The LED will indicate the current fan speed. 1 being the slowest, and 3 being the fastest. 3. -
Page 11: Troubleshooting
TROUBLESHOOTING Fault Possible Cause Solution Fan switch turned off Select a fan switch position. Light on, but motor Fan switch failed Contact service center. does not work Motor failed Contact service center. House fuses blown Reset/Replace fuses. Light does not work, motor does Power cord loose or Refit cord to power outlet. -
Page 12: Filter Information
CLEANING THE FILTERS • Remove the filters by pulling the latch until the filter cover comes off. • Put into a dishwasher with detergent, set the temperature below 60 degrees. Or wash by hand with warm soapy water, making sure to dry thoroughly. -
Page 13: Bulb Information
BULB REPLACEMENT Before changing the bulb, ensure the hood is turned off and the power is disconnected before attempting to change the bulb. Wait until the flitting has cooled down before commencing replacement. • Open the LED light plate assembly and take away the grease filter.See pic 1. •... -
Page 14: Support
The appliance must not be dismantled by an unqualified person. At the end of its life, the appliance should not be disposed of with general household waste. Check with your Local Authority or retainer for recycling advice. electriQ UK SUPPORT www.electriQ.co.uk/support Call: 0330 390 3061 Office hours: 9AM - 5PM Monday to Friday... -
Page 15: Product Fiche
PRODUCT FICHE...
Need help?
Do you have a question about the eiqislandled and is the answer not in the manual?
Questions and answers