
Related Manuals for Sune Technology ALFAROMEO-IF


Summary of Contents for Sune Technology ALFAROMEO-IF
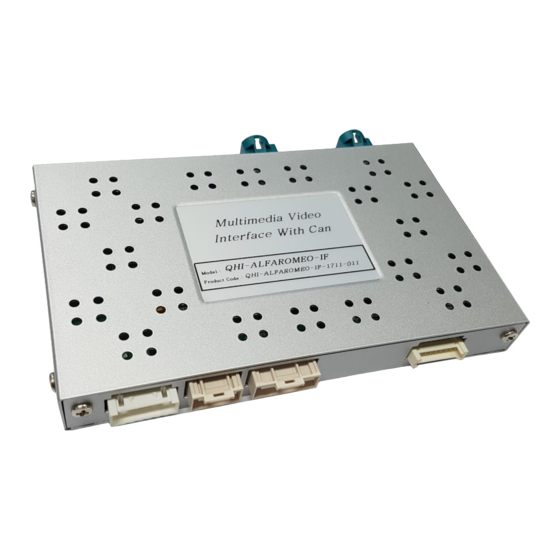
- Page 2 •Specification Compatibility : ALFAROMEO Components : Interface* 1pcs Interface Input/Output specification Input : Analog RGB*1, A/V*2, CVBS(Rear Camera)*1 CVBS(Front Camera)*1 Output : To LCD*1 Power Spec Input Power : 8VDC ~ 18VDC Consumption : 5WATT Switch input mode - External video sources skip function : able to control input videos on and off via DIP switches.
- Page 3 •Product exterior Length-97mm Height-18mm Width-160mm •Components AV * 1ea RGB * 1ea MULTI * 1ea POWER * 1ea (HAVCAB0056) (HRGBCA0013) (HARETC0240) (HPOWER0097) R-CAM * 1ea LCD * 1ea BUTTON * 1ea IR * 1ea Remote * 1ea (HARETC0002) (HLCDCA0049) (HARETC0001) (HIRCAB0002) (REMOTE0001)
- Page 4 •DIP SWITCH ※ ON : DOWN / OFF : UP Mode Dip S/W OFF : Display RGB(Navi) Mode RGB mode ON : Skip RGB(Navi) Mode No use OFF : Display AV1 Mode AV1 mode ON : Skip AV1 Mode OFF : Display A/V2 Mode AV2 mode ON : Skip A/V2 Mode Please refer to below Chart.
- Page 5 •Remote control FUNCTION POWER & PIP NO USE MENU Activate Factory menu Selection, changing image display ▲ ▼ Down Left( Access the factory mode ◀ if the button is pressed for 2 seconds) Right (Activate factory reset ▶ if the button is pressed for 2 seconds)
- Page 6 •Factory Setting Adjust the position and size of image Menu of FACTORY IMAGE H-POSITION H-POSITION : Move the image horizontally PARK V-POSITION V-POSITION : Move the image vertically. UTIL1 UTIL2 INFO MENU to Return SEL to Select/Save Menu of FACTORY Setting for rear camera IMAGE PAS TYPE...
- Page 7 •Factory Setting Select Navigation&Car model Menu of FACTORY NAVI MODEL : Select RGB Navigation model IMAGE NAVI MODEL PARK AVOUT SELECT (QROI) UTIL1 FCAM FUNC AVOUT SELECT : Select background mode sound UTIL2 INFO via Car Aux(AV1, AV2, Default) FACM FUNC : On - Use front camera MENU to Return SEL to Select/Save OFF –...
- Page 8 • OEM button Press “MENU” button placed nearby the gear for a while to switch the mode (OEM → RGB → A/V1 → A/V2)
- Page 9 •Installation Diagram Behind the moniotor Behind the headunit OEM LCD Cable Supplied LCD Cable CAN1-H(IN) CAN1-L(IN) CAN2-H(OUT) CAN2-L(OUT) PWR/CAN MULTI RGB-IN MULTI CABLE A/V CABLE...
- Page 10 • LCD cable connection Find OEM LCD cable OEM LCD cable which is connected between the monitor and the headunit like picture on the left Remove OEM lcd cable from the monitor and connect the supplied lcd cable Supplied LCD cable OEM LCD cable →...
- Page 11 •CAN connection Find the connector behind the headunit as shown above Wire marked with ① shall be connected with CAN1-L(IN) from the supplied power cable Wire marked with ② shall be connected with CAN1-H(IN) from the supplied power cable The color of wires may vary depends on vehicles. Make sure that cables are connected to the right pin position.
-
Page 12: Troubleshooting
•Trouble shooting Q. I cannot change mode A. Check connection of Ground cable and IR Cable. Check LED lamp is on, if not check connection of POWER cable. Q. All I got on the screen is black. A. Check second LED lamp of the interface is on, if not, check A/V sources connected are working well. - Page 13 SUNE TECHNOLOGY CO.,LTD No.9,Lane 606,Anping Rd,Tainan City 70849,TAIWAN TEL:+88662292246 FAX: +88662288104 Http://www.sune-tech.com Shop http://www.carnavi-tech.com SKYPE:sune_tech or hsin_han99 Copyright ⓒ 2019 by SUNE TECHNOLOGY...
Need help?
Do you have a question about the ALFAROMEO-IF and is the answer not in the manual?
Questions and answers