Table of Contents
Advertisement
Quick Links
General Notes
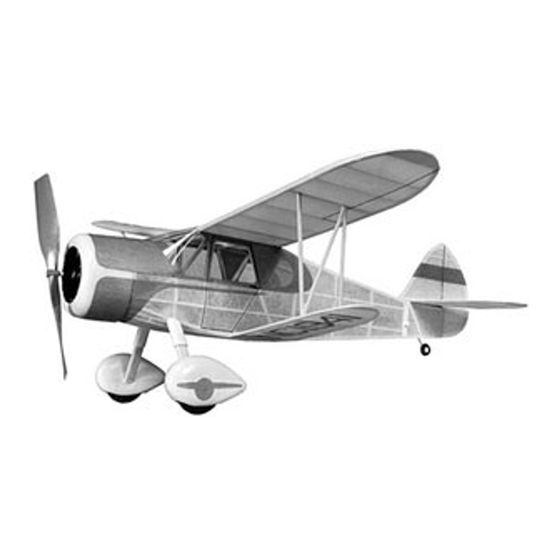
The Customaire is a challenging kit designed for experienced modelers. Basic parts must be accurately built in order to produce
a strong, well aligned model. If you haven't already completed a number of rubber powered kits successfully, we suggest that
you set your Customaire aside until you have gained some experience on several of the simpler Sig kits.
Even if you are an experienced builder, please read the instructions before beginning construction. A few minutes spent reading
may prevent serious mistakes. MANY STEPS MUST BE DONE IN ORDER LISTED IF PARTS ARE TO GO TOGETHER
PROPERLY.
Assembling Plastic Parts
Small scissors are the best tool for cutting out plastic parts. While cutting, hold parts so that the trim line can be seen clearly.
Double check with the instructions to BE SURE YOU ARE CUTTING ON THE RIGHT LINE. The edges of the shells and the
back surface of the completed cowling assembly can be finished flat and accurate to the desired line by rubbing them across a
sandpaper block. Go slowly and carefully.
Cement plastic to plastic or to wood with a thin, even coat of Sigment. Other types of cements or solvent may work, but try on
test scraps first. Some cements soften plastic excessively, others will not adhere at all. Plastic joints dry slowly.Waif overnight
Before-handling.
Most of the paints sold for plastic models are OK on these parts. But before using any kind of paint on your Customaire parts,
test it on scrap plastic.
Advertisement
Table of Contents

Related Manuals for SIG Customaire SIGFF26 Classic Series


Summary of Contents for SIG Customaire SIGFF26 Classic Series
- Page 1 If you haven't already completed a number of rubber powered kits successfully, we suggest that you set your Customaire aside until you have gained some experience on several of the simpler Sig kits. Even if you are an experienced builder, please read the instructions before beginning construction. A few minutes spent reading may prevent serious mistakes.
-
Page 2: Wheel Pants
Wheel Pants Cement L-1 discs to the inside of pants and wheel shells. Allow to dry completely. Pierce or drill the center holes. It's handy to leave holes undersize, enlarging them when parts are complete. This allows holes to be shifted slightly for perfect alignment. -
Page 3: Tail Surfaces
Complete the following subassemblies before starting the fuselage box frame: All former assemblies ("F" parts). Bulkhead F-11 and three cross pieces "R". Assembly of F-6 and the landing gear wire. Cowling and dummy motor assembly. Now invert the fuselage sides and pin them over the bottom view of the fuselage. Cement cross pieces "R" and the upper part of F-11 in place in the cabin area. -
Page 4: Final Assembly
Do not shrink or dope the wing or tail unless they are pinned down on a flat surface while drying. Use Sig Lite-Coat Dope only. WING SURFACES MUST BE FREE OF WARPS OR THEY WILL NOT FIT PROPERLY IN FINAL ASSEMBLY. - Page 5 Bevel the inner ends of the bottom wings slightly so they fit against the fuselage when they are held parallel with the top wings. Support the fuselage upside down so its weight is not resting on the wing tips. Center the top tabs of the N struts in the slots in the top wing and cement very lightly.
-
Page 6: Testing And Adjusting
FLYING YOUR SIG CLASSIC Now you are ready to fly your plane, and FLYING is what the Sig Classic models are designed for. Most models as realistic looking as your Classic make poor flyers. They're often tricky to adjust and clumsy in the air. But Sig's Classic kits give you three important features that assure you of successful flights: 1. -
Page 7: Power-Off Tests
Power-Off Tests A rubber-powered model is adjusted in two steps. First, the tail surfaces are adjusted to produce a good glide. Then the propeller assembly is adjusted to give a smooth, powered flight. Wait for a calm day. Begin by gliding the model from your hand into a patch of tall grass. Grasp the ship by the fuselage near the balance point, and aim the nose at a spot on the ground about twenty feet in front of you. - Page 8 Power-On Flight ALL ADJUSTMENTS TO THE "WOUND UP" PART OF THE FLIGHT ARE MADE BY POINTING THE PROPELLER AND NOSEBLOCK IN THE DIRECTION YOU WANT THE PLANE TO GO. This kind of adjustment affects only the powered flight, and will not upset the glide pattern you have developed. Now - wind the propeller l-50 turns and launch your Classic into the wind with the same motion you used in glide testing.
- Page 9 A plane's weight determines how much power it needs. If your ship is huskier than average, it may not climb, even when fully wound. In that case, add one strand (not a complete loop) of 1/8" Sig rubber to the motor. Tie an eye (like a slip knot) in each end.
- Page 10 SIG MFG. CO., INC. is totally committed to your success in both assembling and flying the Customaire. Should you encounter any problem building this kit or discover any missing or damaged parts, please feel free to contact us by mail or telephone.
Need help?
Do you have a question about the Customaire SIGFF26 Classic Series and is the answer not in the manual?
Questions and answers