Advertisement
Advertisement
Table of Contents

Subscribe to Our Youtube Channel
Related Manuals for SIG SIGRC69 SIG HOG BIPE


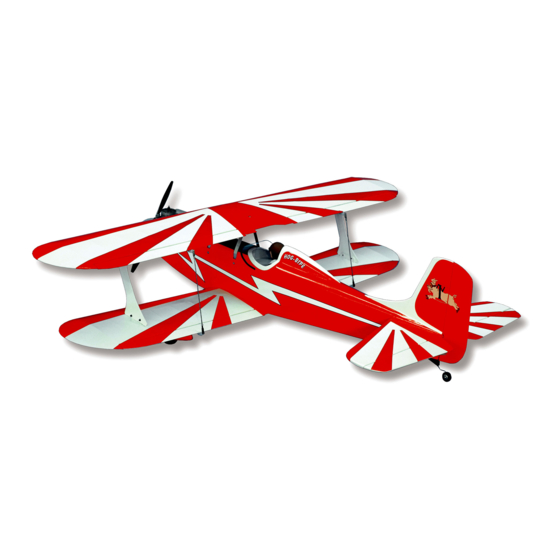
Summary of Contents for SIG SIGRC69 SIG HOG BIPE
- Page 1 Sig Mfg. Co., Inc...401-7 South Front Street..Montezuma, Iowa 50171-0520...
-
Page 2: Customer Service
In order for your HOG-BIPE to fly as well as it was designed to, it must be carefully assembled. A model airplane that is not built properly will not fly properly! Remember to work slowly and follow the instructions exactly. SIG, as the kit manufacturer, can provide you with a proven aerodynamic design, quality materials, and detailed instructions, but ultimately the flyability of your finished model depends on how well YOU put it all together. -
Page 3: Plastic Parts
Sawn Plywood 2 1/32"x1"x2" Birch 3-ply; P-9 Wing Bolt Plates Laser-Cut Parts 1 1/4" 5-ply Birch Firewall 1 1/4" 5-ply Birch Landing Gear 1 1/16" 3-ply Birch P-6 Top 1 1/16" 3-ply Birch P-7 Center Plate Cabane Mount Plate Cabane Mount Plate 1 1/8"... - Page 4 About The Wood In The Kit We strive to supply good quality materials in all SIG kits. However wood is a highly variable material (unlike man-made plastic or metal), so every single wood part in a kit will probably not have flawless appearance. Often things that look like an imperfection are actually quite acceptable when you consider the function the part will serve.
- Page 5 CA to the pre-assembled joints.This makes it very easy to build a straight and true fuselage in a very short time. If the use of CA glues is new to you, please read "TIPS ON USING SIG CA", included in this kit.
-
Page 6: How To Use These Instructions
Building Board - 12" x 50" minimum size This can be any flat surface that will accept and hold pins - such as insulation board, foam board (cardboard laminated to both sides of a foam sheet), cork bulletin board, soft plywood, a reject "door core" from the lumber yard, etc. The most important thing is that the board must be perfectly flat and untwisted! Your wings and tail surfaces will be built on this board, and if the board is twisted or bowed, the parts you build on it will assume the same shape and your model will not fly properly. -
Page 7: Fuselage Subassemblies
FUSELAGE SUBASSEMBLIES Before starting fuselage construction there are a few subassemblies that should be built and set aside until needed. This is done to avoid interruptions during the flow of the fuselage construction. NOTE: You need to have the engine that you will be using on hand when working on the firewall. We don’t recommend using the motor mounts provided in this kit for any two cycle engine larger than .65 or for any four cycle engine larger than .80. -
Page 8: Fuselage Construction
5 c. Using the fuselage side view as a guide locate the position of the cabane mount supports (P-4) on the inside of the fuselage sides and glue them in place on the right and left fuselage sides. Be sure to space the four P-4 parts 1/8”... - Page 9 c. Glue 1/2" triangular stock in the corners between the firewall and the fuselage sides. You may have to notch the triangular stock to clear the blind nuts. d. Now is a good time to install the tank floor. The height of the floor can be adjusted for different engines, just be sure to leave enough room for the tank.
- Page 10 c. After the glue has cured mark the cockpit opening using the template provided on the plan. Trim with a sharp knife and sand the edge with fine sandpaper. Using the 1/4"x1"x15" balsa plank cut appropriate pieces for the cowl filler blocks and glue them in place on the front of the firewall and on top of the fuselage sides.
- Page 11 TOP WING CONSTRUCTION NOTE:The top wing is built in one piece - be sure your building board Builders Tip: For convenience you may want to cut is flat. CROOKED WINGS NEVER FLY RIGHT. the plan into four pieces; top wing, CAUTION: left bottom wing, There are a lot of pieces to be glued before the wing is removed from...
- Page 12 c. When the glue has cured remove the wing from the building board. 21 a. Cut the 1/4" triangular piece into eight 1" pieces. Referring to the photograph and the plans glue them to the sides of the two W-1T wing ribs. Find the two 1/8"x5/8"x6-5/8"...
- Page 13 24 a. Using pieces of 1/16"x1/4" balsa strip, cut and glue capstrips on the bottom of the wing as indicated on the plans. Note that the capstrip at the I-strut mount (P-2) is cut from 1/16"x1/2" balsa strip. Notch one end of the capstrip to fit around P-2 and glue in place.
- Page 14 d. Cut four pieces of 1/16"x4" balsa sheet to fit on the top and bottom of the wingtip. Shape the wingtip sheet so that it fits neatly to the leading edge sheet when the wingtip sheet is wrapped around the wingtip. Glue the top and bottom wingtip sheet in place.
- Page 15 c. Using the dihedral gauge glue rib W-1 to the bottom spar. The top of the rib should slant towards the wingtip. The angle on the dihedral gauge is 3 degrees. d. Pin and glue a 1/4"x1/2"x24" balsa stick in the ribs as the top spar. Check the angle of rib W-1 with the dihedral gauge before gluing rib W-1 to the spar 32 a.
- Page 16 36 a. Using a long flat sanding block sand the trailing edge sheeting flush with the trailing edge of the ribs. b. Cut the 1/4"x3/4"x48" balsa in half, glue and pin or tape the stick to the trailing edge and the ribs. c.
- Page 17 b. Now is the time to check all of the glue joints and to add glue where necessary. Pin the left bottom wing plan section to the building board and cover with waxed paper. Build the left wing panel by repeating steps 31a through 39b. 42 a.
- Page 18 c. Using thin CA start at one side of the servo opening and flow glue into the tape with a side-to-side motion. As the glass tape turns clear move on around the center seam until the complete length of the tape is glued. Remove any exrtra glue with a clean rag.
-
Page 19: Stabilizer And Elevator
b. Drill an 1/8" hole in the leading edge of the wing at each indentation. Check the location of the holes in reference with the cross marks. If necessary shift the holes to align with the cross marks by drilling a slightly larger hole, hold pressure on the drill to "walk"... - Page 20 - do it now as it’s nearly impossible to sand the sheets when they are over an open framework. b. Using Slow CA or SIG Bond glue the top and bottom sheets to the stabilizer frame.
-
Page 21: Fin And Rudder
FIN AND RUDDER 57 a. Pin the fin and rudder plan to the building board and cover with waxed paper. Pin in place and glue the laser cut parts F-1, F-2, and F-3. Cut and glue the 1/4"x1/2" balsa fin post on the back of the assembled fin parts. Remove the glued parts from the plan, reglue all the joints and then sand the assembled fin flat and smooth. -
Page 22: Final Assembly
Glue the two balsa filler blocks in place. Control Surface Hinging SIG EASY HINGES are probably the easiest-to-use hinges ever developed. 1. Begin by carefully cutting a very shallow slit at the hinge location using a fresh, sharp #11 blade in your modeling knife. -
Page 23: Tank Installation
6. Place three or four drops of Thin CA glue directly onto the Easy Hinge in the gap. You will notice that the glue is quickly wicked into the slot as it penetrates both the wood and the hinge. Turn the part over and glue the other side of the Easy Hinge. - Page 24 66. a Assemble the tank per the manufacturers instructions, add carburetor and pressure lines and slide the tank into the fuel compartment. Blow in the carburetor line and check for free flow of air. It’s much easier to fix any problems before anything else gets in the way.
-
Page 25: Wing Assembly
c. Assemble a pushrod connector to the engine throttle arm, reassemble the engine to the firewall, thread the 1/16” steel cable from the radio compartment to the engine pushrod connector and connect the cable to the engine. Slide a solder clevis onto the servo end of the 1/16”... - Page 26 Rudder; 1-1/4” left and right After quite a few flights the SIG Factory Flyers have settled on these throws as a comfortable starting point. None of these throws will result in a dangerously slow response, nor will you find the controls too wild. After a few flights you may decide you want to change the response of one or more controls or to change the CG.
- Page 27 LIMIT OF LIABILITY: In use of our products, Sig Mfg. Co.'s only obligation shall be to replace such quantity of the product proven to be defective. User shall determine the suitability of the product for his or her intended use and shall assume all risk and liability in connection...
Need help?
Do you have a question about the SIGRC69 SIG HOG BIPE and is the answer not in the manual?
Questions and answers