
Related Manuals for Elba ES60-310 XD


Summary of Contents for Elba ES60-310 XD
- Page 1 BUILT-IN COOKING HOBS Instructions for the use - Installation advices KEEP IN A SAFE PLACE Before operating this appliance, please read these instructions carefully...
- Page 2 English Instructions for the use - Installation advices Page 3 The manufacturer cannot be held responsible for possible inaccuracies due to printing or transcription errors in the present booklet. The manufacturer reserves the right to make all modifications to its products deemed necessary for manufacturer commercial reasons at any moment and without prior notice, without jeopardising the essential functional and safety characteristics of the appliances.
-
Page 3: Declaration Of Ce Conformity
English Instructions for the use - Installation advices Dear Customer, Thank you for having purchased and given your preference to our product. The safety precautions and recommendations within this booklet are for your own safety and that of others. They will also provide a means by which to make full use of the features offered by your appliance. -
Page 4: Important Safety Precautions And Recommendations
IMPORTANT SAFETY PRECAUTIONS AND RECOMMENDATIONS IMPORTANT: This appliance is designed and manufactured solely for the cooking of domestic (household) food and is not suitable for any non domestic application and therefore should not be used in a commercial environment. The appliance guarantee will be void if the appliance is used within a non domestic environment i.e. - Page 5 • Do not attempt to modify the technical characteristics of the appliance as this may become dangerous to use. The manufacturer declines all responsibility for any inconvenience resulting from the inobservance of this condition. • CAUTION: this appIiance must only be installed in a permanently ventilated room in compliance with the applicable regulations.
- Page 6 • WARNING: During use the appliance and its accessible parts become hot; they remain hot for some time after use. Care should be taken to avoid touching heating elements on – the hob. To avoid burns and scalds, young children should be kept –...
- Page 7 ENERGY LABELLING/ECODESIGN • Commission regulation (EU) No 66/2014 (implementing Directive 2009/125/EC of the European Parliament and of the Council). Reference to the measurement and calculation methods used to establish compliance with the above requirements: • Standard EN 60350-2 (hobs: electric cooking zones and/or areas). •...
-
Page 9: Advice For The Installer
Advice for the installer... - Page 10 IMPORTANT : • The appliance is designed and approved for domestic use only and should not be installed in a commercial, semi commercial or communal environment. Your product will not be guaranteed if installed in any of the above environments and could affect any third party or public liability insurances you may have.
-
Page 11: Installation
INSTALLATION TECHNICAL INFORMATION FOR THE INSTALLER In order to install the cooker top into the kitchen fixture, a hole with the dimensions shown in fig. 1.2 has to be made, bearing in mind the following: • within the unit, between the bottom of the cooktop and the upper surface of a shelf there must be a clearance of at least 30 mm. - Page 12 FASTENING THE INSTALLATION BRACKETS (figs. 1.4, 1.5, 1.6) • Each cooker top is provided with an installation kit including brackets and screws for fastening the top to fixture panels from 2 to 4 cm thick. • Turn the cooker top upside down and fasten the brackets “F and R” to the appropriate socket holes, without tightening the screws “B”...
- Page 13 VENTILATION REQUIREMENTS (UNITED KINGDOM ONLY) • The appliance should be installed in a room or space with an air supply in accordance with BS 5440:2 2000. • For rooms with a volume of less than 5 m , permanent ventilation through a free area of at least 100 cm will be required.
- Page 14 VENTILATION REQUIREMENTS (FOR THE OTHER COUNTRIES) The appliance must be installed in compliance with applicable local regulations concerning ventilation and the evacuation of exhaust gases. Intensive and prolonged use may require extra ventilation, e.g. opening a window, or more efficient ventilation increasing the mechanical suction power if this is fitted. CHOOSING SUITABLE SURROUNDINGS The room where the gas appliance is to be installed must have a natural flow of air so that the gas can burn (in compliance with applicable local regulations).
-
Page 15: Gas Section
GAS SECTION GAS INSTALLATION REQUIREMENTS Important ! • Before installation, make sure that the local distribution conditions (gas type and pressure) and the adjustment of this appliance are compatible. The appliance adjustment conditions are given on the plate or the label. •... -
Page 16: Connecting The Cooktop To The Gas Supply
CONNECTING THE COOKTOP TO THE GAS SUPPLY The gas connection fitting (fig. 2.1) is made up of: • the floating nut; • the elbow; • the gaskets; • the conical pipe fitting - to be used for the United Kingdom only or if requested by the applicable local regulations. - Page 17 ADDITIONAL GAS CONNECTION REQUIREMENTS (UNITED KINGDOM ONLY) It is recommended that the gas connection to the appliance is installed with a flexible connecting tube made to BS5386. Flexible hoses can be used where the sited ambient temperature of the hose does not exceed 70°C.
-
Page 18: Lubrication Of The Gas Taps
GAS MAINTENANCE Some models - for the gas category check the data label attached on the appliance TABLE FOR THE CHOICE OF THE INJECTORS G30/G31 Cat: I 3+ 28-30/37 mbar Nominal Reduced Ø injector BURNERS Power [kW] Power [kW] [1/100 mm] Auxiliary (A) 1,00 0,30... - Page 19 REPLACEMENT OF THE INJECTORS Auxiliary, Select the injectors to be replaced semi-rapid and rapid according to the “Table for the choice of the burners injectors”. nozzle diameters, expressed hundredths of a millimetre, are marked on the body of each injector. If the injectors are not supplied they can be obtained from the “Service Centre”.
-
Page 20: Electrical Section
ELECTRICAL SECTION – connect the blue wire to the IMPORTANT: The appliance must be terminal marked with the letter “N” installed by a qualified technician or coloured black; according with the current local – connect the brown wire to the regulations and in compliance with terminal marked with the letter “L”... -
Page 21: Replacing The Power Supply Cable
REPLACING THE POWER SUPPLY CABLE WARNING: If the power supply cable is damaged, it must be replaced only by an authorized service agent in order to avoid a hazard. Use the same type of power supply cable. This cable must be connected to the terminal block following the diagram in fig. 3.1. NOTE: The earth conductor must be left about 3 cm longer than the others. - Page 23 Advice for the users...
-
Page 24: Features And Technical Data
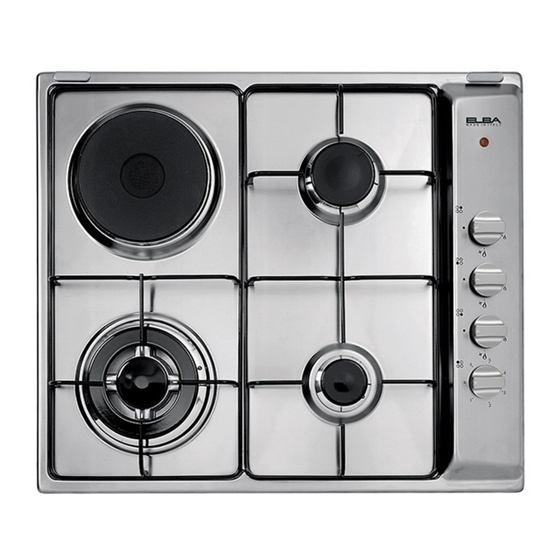
FEATURES AND TECHNICAL DATA Fig. 1.1a Fig. 1.1b Fig. 1.2a Fig. 1.2b Fig. 1.3b Fig. 1.3a Caution! NOTE: Do not cover the hob with aluminium The knobs and symbols may vary. foils. - Page 25 Fig. 1.4b Fig. 1.4a Fig. 1.6 Fig. 1.5 Fig. 1.7 Caution! NOTE: Do not cover the hob with aluminium The knobs and symbols may vary. foils.
-
Page 26: Control Panel Description
The appliance has class 3 COOKING POINTS Auxiliary burner (A) ..........1,00 kW Semirapid burner (SR) ...........1,75 kW Rapid burner (R) ............3,00 kW Triple ring burner (TR) ...........3,50 kW Electric plate - normal Ø 145 mm (1000 W) - rapid (1500 W) CONTROL PANEL DESCRIPTION 10. -
Page 27: How To Use The Cooktop
HOW TO USE THE COOKTOP GAS BURNERS LIGHTING GAS BURNERS FITTED WITH SAFETY VALVE DEVICE Gas flow to the burners is adjusted by turning the knobs (illustrated in fig. 2.1) ignite burner, following which control the valves. instructions are to be followed: Turning the knob so that the indicator Press in the corresponding knob and points to the symbols printed on the panel... -
Page 28: Choice Of The Burner
CHOICE OF THE BURNER On the control panel, near every knob there is a diagram that indicates which burner is controlled by that knob. The suitable burner must be chosen according to the diameter and the capacity used. The burners and pans must be used in accordance with the following instructions: DIAMETERS OF PANS WHICH MAY BE USED ON THE BURNERS BURNERS MINIMUM... - Page 29 SPECIAL WOK GRILLE - OPTIONAL - (models with triple-ring burner only) (figs. 2.5a - 2.5b or 2.6a - 2.6b or 2.7a - 2.7b) This special grille for woks should be placed over the pan-rest for the triple ring burner. Warning: •...
- Page 30 Optional for models in figs. 1.5, 1.7 CORRECT WRONG Fig. 2.7a Fig. 2.7b...
-
Page 31: Electric Hotplate/S
PROPER USE OF THE ELECTRIC ELECTRIC HOTPLATE/S HOTPLATE/S (fig. 2.9) When the pan comes to the boil, turn the NORMAL HOTPLATE heat down to the level desired. Remember that the hotplate will continue To switch on the normal hotplate, turn the to produce heat for about five minutes after knob (fig. - Page 32 ELECTRIC HOTPLATE USAGE TABLE Position TYPE OF COOKING of switch Switched OFF For melting operations (butter, chocolate). To maintain food hot and to heat small quantities of liquid (sauces, eggs). To heat bigger quantities; to whip creams and sauces. (vegetables, fruits, soups). Slow boiling, i.e.: boiled meats, spaghetti, soups, continuations of steam,...
-
Page 33: Cleaning And Maintenance
CLEANING AND MAINTENANCE GENERAL ADVICE COOKING HOBS WITH • Before you begin cleaning you must GLASS LID (optional) ensure that the hob is switched off. • It is advisable to clean when the appliance is cold and especially when cleaning the enamelled parts. •... -
Page 34: Control Knobs
CLEANING ELECTRIC HOTPLATES (models with electric hotplate) Foods burned on the hot plates must Note: Continuous use may cause a always be cleaned dry. change in the glaze around the burners Do not use water to avoid the forming of and grids, corresponding to the areas rust. - Page 35 Fig. 3.1 Fig. 3.2 Fig. 3.3 Fig. 3.5 Fig. 3.4...
-
Page 37: Declaration De Conformite Ce
Français Mode d’emploi - Conseils Français pour l’installation Cher Client Vous venez d’acquérir une de nos cuisinières et nous vous remercions de votre choix. Celle-ci a été soigneusement conçue, fabriquée et testée pour votre plus grande satisfaction. Pour être à même de l’utiliser dans les meilleures conditions et pour obtenir ce que vous êtes en droit d’en attendre, nous vous conseillons de lire très attentivement cette NOTICE D’UTILISATION. - Page 38 PRECAUTIONS DE SECURITE ET CONSEILS IMPORTANTS IMPORTANT: Cet appareil a été conçu et fabriqué uniquement pour la cuisson domestique des aliments et ne convient pas à l’usage non ménager. Cet appareil ne devrait donc pas être utilisé dans un environnement commercial. La garantie de l’appareil sera annulée s’il est utilisé...
- Page 39 • ATTENTION: cet appareil doit être installé dans un local bien aéré en conformité avec la réglementation en vigueur. • N’utilisez pas votre appareil au moyen d’une minuterie extérieure ou par un système de commande à distance séparé. • Avant toute opération d’entretien ou de nettoyage, débrancher l’appareil du réseau électrique.
- Page 40 • Le constructeur décline toute responsabilité en cas de dommages occasionnés par une utilisation incorrecte, erronée ou irrationnelle. • AVERTISSEMENT: L’appareil et ses parties accessibles chauffent en cours d’utilisation; ils restent chauds pendant un certain temps après utilisation. Faire attention à ne pas toucher les éléments chauffants sur –...
- Page 41 ETIQUETAGE ENERGETIQUE/ECOCONCEPTION • Règlement (UE) N° 66/2014 de la commission (portant application de la directive 2009/125/CE du Parlement Européen et du Conseil). Référence aux méthodes de calcul et de mesure utilisées pour s’assurer de la conformité aux exigences précitées: • Norme EN 60350-2 (plaques de cuisson: zones et/ou aires de cuisson électriques).
-
Page 43: Conseils Pour L'installation
Conseils pour l’installation... - Page 44 IMPORTANT • L’installation, le réglage et la transformation de la table de cuisson pour l’utilisation d’autres gaz, doivent être effectués par un installateur qualifié. La non observation de cette règle annule la garantie. • L’installation gaz et électrique doit être effectuée correctement, en conformité aux prescriptions locales en vigueur et aux instructions du fabricant.
- Page 45 INSTALLATION INFORMATION TECHNIQUES POUR L’INSTALLATEUR Pour encastrer la table de cuisson dans le meuble, il faut pratiquer une découpe aux dimensions indiquées sur la fig. 1.2, sans oublier que: • à l’intérieur du meuble, entre le fond de la table de cuisson et le haut d’une étagère, il faut laisser une distance minimale de 30 mm;...
-
Page 46: Fixation De La Table De Cuisson
MONTAGE DES PATTES DE FIXATION (figs. 1.4, 1.5, 1.6) • Chaque table de cuisson est fournie avec une série de pattes et de vis, pour la fixation à des meubles d’une épaisseur de 2 à 4 cm. • Retourner la table de cuisson et monter les pattes “F et R” dans les logements prévus, en se rrant les vis “B”... - Page 47 CONDITIONS A L’EGARD DE LA VENTILATION Cet appareil n’est pas relié à un dispositif pour l’évacuation des produits de combustion. L’installateur doit se rapporter aux normes locales en vigueur en ce qui concerne la ventilation et l’évacuation des produits de combustion. Une utilisation intensive et prolongée peut nécessiter une aération supplémentaire, par exemple l’ouverture d’une fenêtre ou une aération plus efficace en augmentant la puissance d’une aspiration mécanique éventuellement existante.
- Page 48 PARTIE GAZ CONDITIONS A L’EGARD DE L’INSTALLATION AU GAZ Important ! Avant l’installation, s’assurer que le réseau de distribution local (type de • gaz et pression) et les caractéristiques de l’appareil sont compatibles. Les caractéristiques sont indiquées sur la plaque ou étiquette. Cet appareil doit être installé...
-
Page 49: Raccordement Au Gaz
RACCORDEMENT AU GAZ Le groupe raccordement (fig. 2.1) se compose de: • écrou; • raccord coudé; • rondelles d’entancheité; Le raccordement au gaz doit être effectué par un technicien spécialisé conformément aux normes locales en vigueur. • Faire attention que, dans le cas où l’on utilise des tuyaux flexibles, ceux-ci ne sont pas au contact de parties mobiles ou écrasés. - Page 50 CONDITIONES SUPPLEMENTAIRES POUR LE RACCORDEMENT AU GAZ Lors de la connexion au gaz avec des tuyaux rigides ou flexible assurez-vous que: • Vous utilisez des tuyaux rigides ou flexibles conformément aux normes locales en vigueur. Le tuyau flexible doit être conforme au type de gaz pour lequelle l’appareil doit être utilisé...
- Page 51 TABLEAU DES INJECTEURS Certains modèles - pour la catégorie du gaz voir l’étiquette appliquée sur l’appareil G30/G31 Cat: I 3+ 28-30/37 mbar Débit Débit Ø injecteur BRULEURS nominal réduit [1/100 mm] [Hs - kW] [Hs - kW] Auxiliaire (A) 1,00 0,30 Semi-rapide (SR) 1,75...
- Page 52 REMPLACEMENT DES INJECTEURS Brûleurs DES BRULEURS auxiliaire, semi-rapide, Au cas où ils ne seraient pas fournis, et rapide on peut les trouver auprès des Services Après-Vente. Consulter le “Tableau des injecteurs” pour ce qui concerne le diamètre des injecteurs à utiliser. Le diamètre des injecteurs, exprimé...
-
Page 53: Partie Electrique
PARTIE ELECTRIQUE IMPORTANT: L’installation doit être effectuée suivant les instructions du constructeur. Une installation erronée peut causer des dommages aux personnes, animaux ou choses, le constructeur ne peut en être tenu pour responsable. Le branchement à la terre de l’appareil est obligatoire. Le constructeur décline toute responsabilité... - Page 54 RACCORDEMENT DU CABLE D’ALIMENTATION ATTENTION: Si le câble d’alimentation est endommagé, il doit être remplacé par le Service Après-Vente afin d’éviter tout danger. • Le câble d’alimentation doit être remplacé par un câble du même type que celui monté sur l’appareil. •...
- Page 57 Conseil pour les utilisateurs...
- Page 58 CARACTERISTIQUES Fig. 1.1a Fig. 1.1b Fig. 1.2a Fig. 1.2b Fig. 1.3b Fig. 1.3a recouvrir feuilles NOTE: Les manettes et les symboles peuvent varier. d’aluminium la table de cuisson.
- Page 59 Fig. 1.4b Fig. 1.4a Fig. 1.6 Fig. 1.5 Fig. 1.7 recouvrir feuilles NOTE: Les manettes et les symboles d’aluminium la table de cuisson. peuvent varier.
-
Page 60: Description Des Commandes
Cet appareil est de classe 3 DESCRIPTION DES FEUX Brûleur auxiliaire (A) ..........1,00 kW Brûleur semi-rapide (SR) ........1,75 kW Brûleur rapide (R) ............3,00 kW Brûleur triple couronne (TR) ........3,50 kW Plaque électrique Ø 145 mm normale (1000 W) - rapid (1500 W) DESCRIPTION DES COMMANDES 10. -
Page 61: Utilisation De La Table De Cuisson
UTILISATION DE LA TABLE DE CUISSON ALLUMAGE DES BRULEURS AVEC BRULEURS A GAZ SYSTEME DE SECURITE L’arrivée du gaz dans les brûleurs est Pour allumer le brûleur, il faut suivre les commandée par le bouton illustré sur les instructions ci-dessous: fig. - Page 62 CHOIX DU BRULEUR La position des brûleurs est marquée sur le tableau de bord. Le symbole de couleur ou graphisme différent indique le brûleur que la manette, située au-dessus, commande. Le brûleur à utiliser doit être choisi en fonction du diamètre et de la capacité des casseroles employées.
- Page 63 GRILLE SPECIALE POUR MARMITES “WOK” (en option) Cette grille spéciale pour marmites “WOK” se pose sur la grille du brûleur à triple couronne. (figs. 2.5a - 2.5b ou 2.6a - 2.6b ou 2.7a - 2.7b). ATTENTION: • L’utilisation de marmites “WOK” sans cette grille spéciale peut causer de graves anomalies au brûleur.
- Page 64 Option pour les modèles in figs. figs. 1.5, 1.7 CORRECT WRONG EXACT INEXACT Fig. 2.7a Fig. 2.7b...
- Page 65 EMPLOI CORRECT DES PLAQUE PLAQUES ELECTRIQUES ELECTRIQUES (fig. 2.9) Pour bien entretenir les plaques: Lorsqu’on utilise la plaque électrique, il PLAQUE NORMALE faut: La mise en marche de la plaque normale • éviter à tout prix de la faire fonctionner se fait en tournant la manette (fig.
- Page 66 TABLEAU POUR L’UTILISATION DES PLAQUES ELECTRIQUES Position TYPE DE CUISSON manette Eteint Pour fondre (beurre, chocolat). Pour maintenir les aliments au chaud ou chauffer des liquides en petite quantité. Pour chauffer des liquides en quantités plus importantes; réduction sauces crèmes. Ebullition des aliments;...
-
Page 67: Nettoyage Et Entretien
NETTOYAGE ET ENTRETIEN CONSEILS GENERAUX Modèles avec couvercle en verre • Important: Avant toute opération d’entretien ou de maintenance, déconnectez l’appareil en le débranchant ou bien en agissant sur l’interrupteur de la ligne électrique. • IMPORTANT: L’utilisation de vêtements et de gants de protection est recommandée lors de la manutention et l’installation de cet appareil. -
Page 68: Acier Inoxydable
PLAQUES ELECTRIQUES (modèles avec plaque électrique) • Les aliments brûlés sur le foyer doivent être nettoyés à sec. • Ne pas utiliser d’eau pour éviter la formation de rouille. • Après usage, verser sur la plaque légèrement chaude un peu d’huile et passer avec un chiffon. - Page 69 Fig. 3.1 Fig. 3.2 Fig. 3.3 Fig. 3.4 Fig. 3.5...
- Page 72 Cod. 1106014- ß1...
Need help?
Do you have a question about the ES60-310 XD and is the answer not in the manual?
Questions and answers