Table of Contents
Advertisement
Quick Links
Advertisement
Table of Contents

Related Manuals for Aputure Nova P600c


Summary of Contents for Aputure Nova P600c
- Page 1 Nova P600c Product Manual English...
-
Page 2: Important Safety Instructions
Thank You! Thank you for purchasing Aputure® Nova series products. Nova P600c is a high-power RGBWW light . The high-power output easily meets the illumination requirements of the studio. The high CRI can perfectly restore the skin color of the characters. The high -quality structure does not fear the heavy work of the studio. -
Page 3: Fcc Compliance Statement
Any malfunctions caused by unauthorized disassembly are not covered by the warranty. The user may pay for maintenance. We recommend only using the original Aputure cable accessories. Please note that any malfunctions caused by using unauthorized accessories are not covered by the warranty. -
Page 4: Components List
Strap (1 pc) DMX IN DMX OUT Control Box (1 pc) Nova P600c Lamp Head (1 pc) Nova P600c Custom Hard Shell Lighting Clamp (1 pc) (1 pc) (Available in Kit/Sold Separately) Cable Tie Cable Tie Neutrik® power CON 5-Pin Male-to-Female Product Card (1pc)... -
Page 5: Product Details
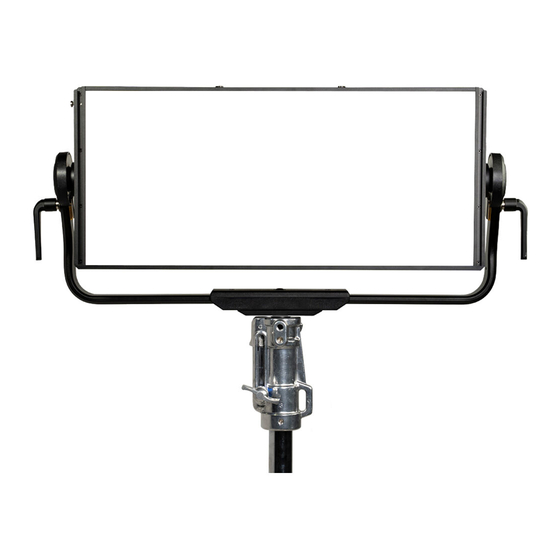
Product Details 1. Lamp Head Carrying Handle Accessory Fixed Diffusion Pogo Pin Quick-Release Slot Panel Lamp support column Yoke T-Handle Control Box Input Storage Hole Neutrik® power CON (5-pin Male XLR) Disk Brake AC Power Input Handle Battery Input (3-Pin Male XLR) 2. -
Page 6: Installations
Installations 1. Setting Up the Lamp Head Put the support column of the lamp head into the hole of the lamp stand, and use the fastening knob of the lamp holder to lock it. The angle of the lamp head can be adjusted by rotating the handle on the side of the lamp head. - Page 7 Lightning Clamp Specifications Weight 670g / 1.48lbs Sizes(L*W*H) 10.35x8.74x12.5cm / 4.07x3.44x4.92in * The Lightning Clamp can clamp onto square or round pipe with a diameter between 2-5cm or 0.79-1.97in. 3. Connect the Lamp Head to the Control Box 3.1 Connect the lamp head and control through the contacts There is a quick-release plate (with Electrical contacts) on the back of the control box, which can be quickly installed on the lamp head or the Lighting Clamp on the lamp stand;...
- Page 8 4. Power Solution 4.1 Powering by AC Neutrik® power CON Male Connector AC 100V-240V Neutrik® power CON Female Locking Connector * To disconnect the Neutrik® power Con cable, pull back on the release tab on the cable connector, and rotate the connector counter clockwise. Do not pull directly. 4.2 Powering by DC Connect 48V 15A DC power supply equipment to supply power through the XLR interface to maintain the operation of the lamp.
- Page 9 Operations 1. Turn the Light On When the lamp body is connected to the power source, connect it to the contact of the control box through the connecting cable or the Pogo pin of the lamp head, and short press the power button on the side of the control box to turn on/off the lamp body.
- Page 10 Rotate the Green-Magenta / Saturation (G/M / SAT) Control Knob to adjust the Green-Magenta Shift or Saturation output of the light fixture. * The speed at which you rotate the knob will result in different rates of change. G/M / SAT 2.2 Press the Light Mode button to enter the Menu interface.
- Page 11 2.2.2 Press the INT wheel to select HSI mode to adjust the change of the HUE from 1°~360°. 2.2.3 Short press the INT wheel to select FX mode, then rotate the INT wheel to toggle between Club Lights, Paparazzi, Lightning, TV, Candle, Fire, Strobe, Explosion, Fault Bulb, Pulsing, Welding, Cop Car, Color Chase, Party Lights, Fireworks, Color Fade, Color cycle, Color Gradient, One Color Chase.
- Page 12 5. Candle 6. Fire 7. Strobe 8. Explosion 9. Fault Bulb 10. Pulsing 11. Welding 12. Cop Car 13. Color Chase 14. Party Lights - 11 -...
- Page 13 15. Fireworks 16. Color Fade 17. Color cycle 18. Color Gradient 19. One Color Chase 2.24 Short press the INT wheel to enter or exit the light effect cycle, the icon is ) in the cycle state, and the icon is ( ) when the light effect is stopped;...
- Page 14 2.2.6 Short press the INT wheel to select X, Y color coordinate mode, press or rotate the HUE wheel to change the figure of X and press the SAT wheel to change the figure of Y. 2.2.7 Short press the INT wheel to select SOURCE mode, then rotate the INT wheel to select appropriate source.
- Page 15 Constant Output Mode and Max Output Mode. Constant out put mode can maintain the brightness output during the process of changing the color temperature. Max Output Mode can make Nova P600c perform the current maximum power output. 2.3.2 DMX Mode Press the MENU Button to enter the menu interface, rotate the INT wheel and short press to enter the DMX mode, rotate the INT wheel to select DMX Address/DMX Profiles...
- Page 16 2.3.3 Fan Mode Press the MENU button to enter the menu interface, rotate the INT wheel and press to enter the Fan Mode. Turn the INT wheel to choose from smart/ high/ medium/ silent mode, and then press the INT wheel to confirm the selection. 2.3.4 Dimming Curves Press the MENU button to enter the menu interface, rotate the INT wheel to select Dimming Curve, and press the INT wheel to enter the Dimming Curve selection...
- Page 17 2.3.5 Studio Mode Press the MENU button to enter the menu interface, rotate the INT wheel to select and press to enter Studio Mode interface. Then, rotate the INT wheel to turn the Studio Mode on or off. When the studio mode is turned on (ON), the lamp can be turned on directly, when the studio mode is turned off...
- Page 18 2.3.8 Bluetooth Press the MENU button to enter the menu interface, rotate the INT wheel to select and press to enter Bluetooth mode, short press the INT wheel to enter the Bluetooth mode interface, and turn the INT wheel to select BT status/BT reset/ Fixture Serial No./exit.
- Page 19 2.3.9 Update Firmware Press the MENU button to enter the menu interface, rotate the INT wheel to select and press to enter Update Firmware interface, rotate the INT wheel to select "YES" or "NO". If a USB flash drive containing a firmware update is mounted in the USB port, the screen will display an update progress;...
- Page 20 2.3.12 Factory Reset Press the MENU button to enter the menu interface, rotate the INT wheel to select and press to enter the Factory Reset interface. The factory settings are: fan is in smart mode, light effect brightness value is 50%, light effect mode color temperature value is 5600K, normal mode brightness is 50%, normal light mode color temperature is 5600K, Bluetooth mode is turned on, studio mode is turned off, dimming curve-linear, DMX channel number 001, English,...
- Page 21 3. Connecting to DMX 3.1 Connect a standard DMX controller Connecting DMX to only one Nova P600c OUTPUT Daisy chaining multiple lights using DMX...
- Page 22 The DMX controller is connected to the control box, as shown in the figure below: OUTPUT The Nova P600c offers a variety of DMX modes.Please find a detailed overview of all DMX modes in the document,NOVA P600c DMX Chart is available for free download on the Aputure official website https://www.aputure.com...
- Page 23 You can download the Sidus Link app from the iOS App Store or Google Play Store for enhancing the functionality of the light. Please visit Sidus.link/app/ help for more details regarding how to use the app to control your Aputure Sidus.link/app/help lights. Get Sidus Link Specifications Operating Temperature -20~45℃...
- Page 24 Photometrics Nova P600c 1m / 3.3ft 3m / 9.8ft 5m / 16.4ft 14,586 Lux 1,850 Lux 725 Lux 2700K 1,356 fc 172 fc 67 fc 15,240 Lux 1,936 Lux 746 Lux 3200K 1,416 fc 180 fc 69 fc 15,533 Lux...
Need help?
Do you have a question about the Nova P600c and is the answer not in the manual?
Questions and answers