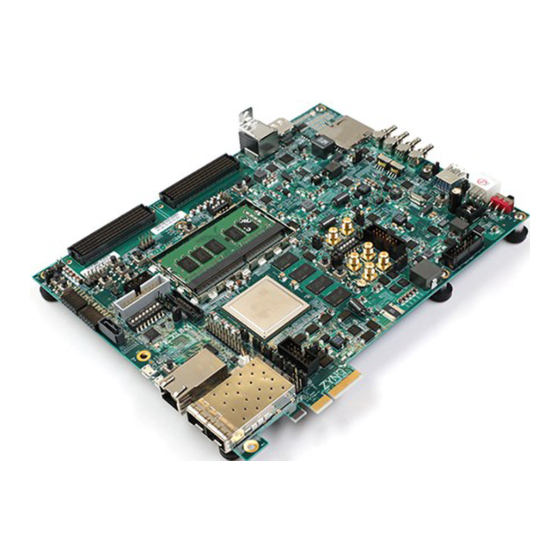
Xilinx ZCU106 Manual
Board interface test
Hide thumbs
Also See for ZCU106:
- User manual (152 pages) ,
- Quick start manuals (4 pages) ,
- User manual (86 pages)
Advertisement
Quick Links
Advertisement

Related Manuals for Xilinx ZCU106


Summary of Contents for Xilinx ZCU106
- Page 1 ZCU106 Board Interface Test December 2018 XTP491...
-
Page 2: Revision History
NOTICE OF DISCLAIMER: The information disclosed to you hereunder (the “Information”) is provided “AS-IS” with no warranty of any kind, express or implied. Xilinx does not assume any liability arising from your use of the Information. You are responsible for obtaining any rights you may require for your use of this Information. - Page 3 ZCU106 Board Interface Test Overview ZCU106 Software Install and Board Setup ˃ ZCU106 Board Interface Test Setup ˃ Running the Board Interface Test ˃ Appendix ˃ References ˃ Note: This presentation applies to the ZCU106...
- Page 4 ZCU106 Software Install and Board Setup Refer to XTP497 – ZCU106 Software Install and Board Setup for details on: ˃ Software Requirements ZCU106 Board Setup UART Driver Install Optional Hardware Setup Note: Presentation applies to the ZCU106...
- Page 5 ZCU106 Board Interface Test Setup Open the RDF0446 – ZCU106 Board Interface Test Files (2018.3 C) ZIP file ˃ Extract these files to your C:\ drive Note: Presentation applies to the ZCU106...
- Page 6 Running the Board Interface Test From C:\zcu106_bit, double click on BoardUI.exe ˃ Note: Presentation applies to the ZCU106...
- Page 7 Running the Board Interface Test Enter the Board Serial Number and Mac Address and click OK ˃ Note: Presentation applies to the ZCU106...
- Page 8 Running the Board Interface Test Click the Run All button ˃ Note: Presentation applies to the ZCU106...
- Page 9 Running the Board Interface Test All selected tests passed ˃ Note: Presentation applies to the ZCU106...
-
Page 10: Test Details
Ensure that you have followed all instructions in XTP497, ZCU106 Software ˃ Install and Board Setup Ensure that no other Terminal program is connected to the ZCU106’s COM ˃ ports while the Board Interface Test is running See XTP497, for details on COM Ports Only one board can be connected to your PC during the test ˃... - Page 11 Appendix...
- Page 12 Running the Production Board Interface Test Select ZCU106_PROD ˃ Enter the Board Serial Number and Mac Address and click OK ˃ Note: Presentation applies to the ZCU106...
- Page 13 Running the Production Board Interface Test Click the Run All button ˃...
- Page 14 Running the Production Board Interface Test All selected tests passed ˃...
- Page 15 Review the following pages to make sure the board is set up for the ˃ Production Board Interface Test Ensure that no other Terminal program is connected to the ZCU106’s COM ˃ ports while the Board Interface Test is running...
- Page 16 Optional Test Equipment This test requires optional equipment ˃ Whizz FMC XM107 boards ‒ Attach to HPC0 (J5) and HPC1 (J4) Whizz PCIe Loopback Connect to USB Power source ‒ Attached to PCIe fingers (P3) ‒ Linux tests optional equipment ˃...
- Page 17 Connect pins 6 to 8, 10 to 12, 14 to 16, 18 to 20, and 22 to 24 ‒ Jumpers for System Controller Programming Follow instructions in BIT GUI ‒ Mictor Loopback adapter, see setup on following pages Note: Presentation applies to the ZCU106...
- Page 18 Setup details are available later in this Appendix If this is not available, the following tests will require manual power cycling: ‒ SYS_CTLR_RESTORE XM107 CARD TEST ZCU106 RTC Test Level Shifters ZCU106 SETUP Program QSPI Flash ...
- Page 19 Optional Test Equipment This test requires optional equipment ˃ SFP Loopback Adapters ‒ www.molex.com SFP Loopback Adapter, ‒ 5.0 dB Attenuation Part # 74765-0904 ‒ The ZCU106 uses 2 adapters Note: Presentation applies to the ZCU106...
- Page 20 SMA Cable Setup Four SMA Cables ˃ www.rosenbergerna.com Part number: 72D-32S1-32S1-00610A Optional: SMA Quick connects ˃ RADIALL Part number: R125791501 Available here here Note: Presentation applies to the ZCU106...
- Page 21 Hook up the SMA cables as shown ˃ IBERT Test: ˃ J72 to J74 (Red) J73 to J42 (Yellow) IPI Clocking Test ˃ Connect J79 and J80 (Blue) to a 148.5 MHz clock source Note: Presentation applies to the ZCU106...
- Page 22 Part # ZX104LN Mictor Jumper odd side as follows: ˃ 7 to 11 9 to 13 15 to 19 17 to 21 23 to 27 25 to 29 31 to 35 33 to 37 Note: Presentation applies to the ZCU106...
- Page 23 6 to 8 10 to 16 (use a wire) 16 to 20 22 to 24 26 to 28 36 to 38 (use a wire) Insert into Mictor slot P6 ˃ Make sure they are firmly inserted Note: Presentation applies to the ZCU106...
- Page 24 EZ-11B Setup How to setup an EZ-11B (or EZ-22B) for use in ˃ Production tests Connect EZ-11B to Power Connect Ethernet cable (192.168.0.2) Install EZ-11B Utility (one time install) C:\zcu106_bit\tests\ZCU106_PROD\bat\utility.exe...
- Page 25 EZ-11B Setup Run Utility from the Start menu and it will detect an unconfigured EZ-11B ˃ attached to the host Note: Presentation applies to the ZCU106...
- Page 26 EZ-11B Setup Click Network settings and set to 192.168.0.12 ˃ Note: Presentation applies to the ZCU106...
- Page 27 EZ-11B Setup Setup is done: ˃ Note: Presentation applies to the ZCU106...
- Page 28 To test, connect Board power supply to outlet on EZ11B and run “cycle_power.bat” in test folder. Power should go off for a few seconds then turn on again BIT will call this during the test to cycle power Note: Presentation applies to the ZCU106...
- Page 29 EZ-22B Setup If using the new EZ-22B (replacement for the EZ-11B) ˃ Click Launch Web User Interface Note: Presentation applies to the ZCU106...
- Page 30 EZ-22B Setup Under Settings, clear the Username, Password, and Confirm Password ˃ fields, click Confirm; will now work same as EZ-11B...
- Page 31 References...
- Page 32 References Vivado Release Notes ˃ Vivado Design Suite User Guide - Release Notes – UG973 ‒ https://www.xilinx.com/support/documentation/sw_manuals/xilinx2018_3/ ug973-vivado-release-notes-install-license.pdf Vivado Design Suite 2018 - Vivado Known Issues https://www.xilinx.com/support/answers/70860.html ‒ Vivado Programming and Debugging ˃ Vivado Design Suite Programming and Debugging User Guide – UG908 https://www.xilinx.com/support/documentation/sw_manuals/xilinx2018_3/...
- Page 33 Documentation...
- Page 34 ˃ Zynq UltraScale+ MPSoC ‒ http://www.xilinx.com/products/silicon-devices/soc/zynq-ultrascale-mpsoc.html ZCU106 Documentation ˃ Xilinx Zynq UltraScale+ MPSoC ZCU106 Evaluation Kit https://www.xilinx.com/products/boards-and-kits/zcu106.html ‒ ZCU106 Board User Guide – UG1244 https://www.xilinx.com/support/documentation/boards_and_kits/zcu106/ ‒ ug1244-zcu106-eval-bd.pdf ZCU106 Evaluation Kit Quick Start Guide User Guide – XTP472 https://www.xilinx.com/support/documentation/boards_and_kits/zcu106/ ‒ xtp472-zcu106-quickstart.pdf...
Need help?
Do you have a question about the ZCU106 and is the answer not in the manual?
Questions and answers