
Related Manuals for BeefEater DISCOVERY BMG1231BBE


Summary of Contents for BeefEater DISCOVERY BMG1231BBE
- Page 1 DISCOVERY SERIES Assembly and Operating Instructions 1000 MOBILE NATURAL GAS (METHANE) BMG1231BBE BMG1231SBE BMG1241BBE BMG1241SBE BMG1251BBE BMG1251SBE FOR OUTDOOR USE ONLY EUROPE BMAN_Discovery1000_EU_NG_Sep20...
-
Page 2: Table Of Contents
Products must be used, installed and operated in accordance with this manual. You may not be able to claim on the BeefEater manufacturer’s warranty in the event that your product fault is due to failure to adhere this manual. -
Page 3: Important Safety Instructions
TIPS & INFORMATION IMPORTANT BeefEater Barbecues are approved for OUTDOOR USE ONLY WARNING WARNING and must not be used in a building, garage or any other This appliance must be serviced only by a qualified enclosed area. - Page 4 BeefEater dealer. The appliance is designed for use by adults, keep • Please only use BeefEater supplied hose(s) to connect children away from the barbecue at all times. this appliance. Natural Gas conversion kits are available from your nearest BeefEater dealer.
- Page 5 IMPORTANT SAFETY INSTRUCTIONS • Move the appliance during use. IMPORTANT TIPS & INFORMATION • Obstruct any ventilation of barbecue or the cylinder. Should the appliance go out for any reason, turn off all • Allow the flexible gas supply hose or any electrical cord control knobs and the cylinder gas valve. Wait 5 minutes to come in contact with hot surface of the appliance. before attempting to relight the appliance.
-
Page 6: Gas Cylinder Safety Information
Make connection as described in figures 1 and 2. Leak-test the connection with a soapy water solution. (See Gas Leak Testing Procedure). Hose and regulator replacement must be a genuine part specified for this appliance and is obtainable from your nearest BeefEater stockist. GAS CYLINDER SAFETY INFORMATION... - Page 7 LPG SAFETY INFORMATION LPG safety information • Use only gas cylinders, which meet national and regional codes. The minimum cylinder size for this barbecue is 6kg. Ensure that the cylinder can provide enough fuel to operate the appliance. If in doubt, check with your local gas supplier.
-
Page 8: Product Description
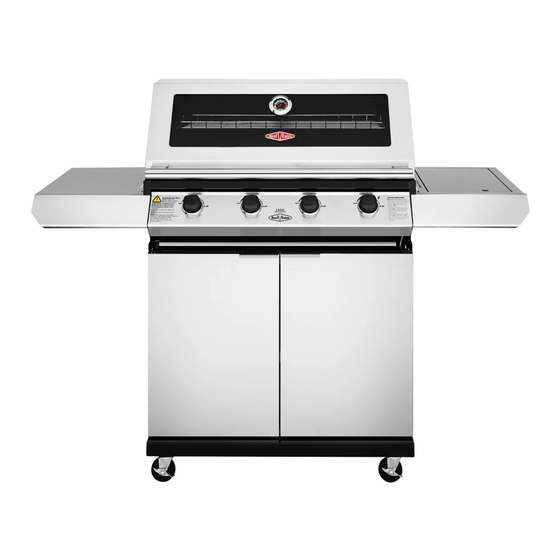
PRODUCT DESCRIPTION 4 burner mobile barbecue Rack Door catches Brace Grill plate Door striker plate Grommet Vaporiser x2 Door catch RH side panel Burner x2 Hotplate Gas bottle holder LH side table Burner box and hood Base panel Spill tray RH side burner assy Caster x2 LH side panel Side burner hose... -
Page 9: Product Dimensions
PRODUCT DIMENSIONS 4 burner mobile barbecue shown Hood closed 3 burner 1377mm 4 burner 1527mm 5 burner 1697mm 3 burner 687mm 4 burner 837mm 550mm 5 burner 1007mm 1217mm 887mm Hood open 27mm 1360mm 930mm 602mm PRODUCT DIMENSIONS... -
Page 10: Trolley Assembly
ASSEMBLING THE BARBECUE Tools required: Fasteners supplied: 45 x large head 4 x M6x20mm 2 x M3x10mm 12 x fibre washers 4 x M4x8mm M6x12mm This hole indicates the rear side of trolley IMPORTANT TIPS & INFORMATION Ensure the locking type castors are fitted to the front of the trolley, with locks facing outward... - Page 11 ASSEMBLING THE BARBECUE Fit screws but do not tighten Large head M6x12mm to position subsequent screws more easily Fit screws but do not tighten Large head M6x12mm to position subsequent screws more easily ASSEMBLING THE BARBECUE...
- Page 12 ASSEMBLING THE BARBECUE Screw holes indicate the top Fit screws but do not tighten Large head M6x12mm to position subsequent screws more easily Tighten all screws to Large head M6x12mm secure front, rear and side panels ASSEMBLING THE BARBECUE...
- Page 13 ASSEMBLING THE BARBECUE Clip magnets in place Fit Grommet to Right Side Panel Ensure the flange (protruding rim) of the separation panel engages both the left and right hand side panels, before screwing in. Large head M6x12mm ASSEMBLING THE BARBECUE...
- Page 14 ASSEMBLING THE BARBECUE First fit lower door pin into the hole on the base assembly. Then depress the upper door pin with your finger, line up with the hole above on the separator panel, and release to allow the pin into the hole. Attach handles to doors with screws...
- Page 15 ASSEMBLING THE BARBECUE Ensure Gas Regulator Transport Retaining Tie is removed, so Regulator can be fed through notch as shown M6x20 2x LHS 2x RHS ASSEMBLING THE BARBECUE...
- Page 16 M0223787 001 nutsert (M6 NUTSERT.11) ASSEMBLING THE BARBECUE M0223787 001 nutsert (M6 NUTSERT.12) M0225232 001 bolt (M6 X 12 SCREW.1) M0225232 001 bolt (M6 X 12 SCREW.2) M0225232 001 bolt (M6 X 12 SCREW.3) M0225232 001 bolt (M6 X 12 SCREW.4) M0225232 001 bolt (M6 X 12 SCREW.5) M0225232 001 bolt (M6 X 12 SCREW.6) M0225232 001 bolt (M6 X 12 SCREW.7)
- Page 17 ASSEMBLING THE BARBECUE IMPORTANT TIPS & INFORMATION Remove plastic film if fitted ASSEMBLING THE BARBECUE...
- Page 18 ASSEMBLING THE BARBECUE ASSEMBLING THE BARBECUE...
- Page 19 CONNECTING THE SIDE BURNER When connecting to side burner, remove the regulator assy hose (A) as pictured below left: Gas connection 3/8” SAE Flare with 5/8-18 UNF thread Then connect it to the side burner like this (the 90 degree elbow must be on outside as pictured on left): Connect the gas hose and regulator assembly (A) to the side burner...
- Page 20 CONNECTING THE SIDE BURNER Connect the other side of gas hose (B) to the BBQ connection using 2 spanners. WARNING WARNING To ensure gas tight connections, complete the gas leak test procedure before and after gas hose connection and after every reconnection of the gas cylinder.
-
Page 21: Using Your Barbecue
Inspect the hose and regulator regularly for cracks or any sign of damage. If there is excessive abrasion or wear, Manual Lighting replace only with a genuine BeefEater regulator. Press and turn the right hand control knob anti-clockwise Grease Tray to the ‘High’... - Page 22 USING YOUR BARBECUE After Use Operating the side Side Burner It is a good idea to leave the barbecue on for about 10 Do not use oversized cookware or place cookware off-centre minutes after you have finished cooking. This helps to burn over the burner as this can cause high temperatures in away any excess food residues and oil, and makes cleaning control knob and surrounding panels.
-
Page 23: Technical Information
TECHNICAL INFORMATION TECHNICAL INFORMATION DISCOVERY 1000E 3 BURNER BBQ WITH SIDEBURNER AT, CH, CZ, DK, DE, LU, EE, ES, FI, FR, GB, GR, IE, IT, LT, LV, NO, PT, RO, COUNTRY SI, SK GAS CATEGORY GAS TYPE METHANE GAS INLET PRESSURE [mbar] INJECTOR 1.40 Ø [mm] 16kW TOTAL HEAT INPUT... - Page 24 TECHNICAL INFORMATION DISCOVERY 1000E 4 BURNER BBQ WITH SIDEBURNER AT, CH, CZ, DK, DE, LU, EE, ES, FI, FR, GB, GR, IE, IT, LT, LV, NO, PT, COUNTRY RO, SE, SI, SK GAS CATEGORY GAS TYPE METHANE GAS INLET PRESSURE [mbar] INJECTOR 1.40 Ø [mm] 20kW TOTAL HEAT INPUT G20:2.112m3/h...
- Page 25 DISCOVERY 1000E 5 BURNER BBQ WITH SIDEBURNER AT, CH, CZ, DK, DE, LU, EE, ES, FI, FR, GB, GR, IE, IT, LT, LV, NO, PT, RO, SE, COUNTRY SI, SK GAS CATEGORY GAS TYPE METHANE GAS INLET PRESSURE [mbar] INJECTOR 1.40 Ø [mm] 24kW TOTAL HEAT INPUT G20:2.112m3/h WARNING...
-
Page 26: Locating Your Barbecue
LOCATING YOUR BARBECUE Most importantly, this is an outdoor appliance. Ensure your NOTE: Do not modify this appliance. Any deviation from the barbecue is positioned safely away from anything that can factory settings could result in a safety hazard. catch fire. • If moving the barbecue from one place to another, never drag the cylinder behind. Disconnect the cylinder first, Outdoors Use Only move, and re-connect once reached the new location. -
Page 27: Installation Options
INSTALLATION OPTIONS WARNING WARNING Partial Enclosures This appliance shall only be used in an above ground, open air situation with natural ventilation, without stagnant areas, where gas leakage and products of combustion are rapidly dispersed by wind and natural convection. Failure to adhere to these installation instructions may cause injury or property damage and affect your ability to make a claim under the manufacturer’s warranty. Any enclosure in which the appliance is used shall comply with one of the following: Any enclosure with walls on all sides, but at least one permanent opening at ground level, and no overhead cover. -
Page 28: Cleaning And Storing Your Barbecue
Brushes specifically designed for this purpose can Gas cylinders must be stored outdoors, out of reach of be purchased from your BeefEater retailer. Wipe off children and must not be stored in a building, garage or any remaining residue with a paper towel. -
Page 29: Maintenance
This appliance should be checked and serviced by an authorised service person every 2 years to ensure the appliance remains in a safe operating condition. (These services are not covered by warranty).Replacement parts are available from your authorised BeefEater Dealer. Service and Maintenance Schedules Each Use 6 Monthly... -
Page 30: Troubleshooting
TROUBLESHOOTING Condition Possible Cause Solution Empty gas cylinder Replace cylinder Air mixed in hoses Re-ignite and allow operating for a Flame goes out while in use short while, till clears out Blockage Seek professional assistance Gas cylinder valve close Turn off knob button, then open the cylinder valve Air mixed in the hoses Re-ignite and allow operating for a... -
Page 31: Warranty
Conditions of Warranty materials within the specified period from the date of purchase, 1. The appliance is delivered to the BeefEater distributor’s service department BeefEater or its distributor will repair or, (at distributors option), or authorised service agent and freight charges both ways are paid by the replace the defective part free of charge. - Page 32 EU: +44 (0) 1934 743362 email: sales@beefeaterbarbecues.co.uk web: www.beefeaterbbq.com BeefEater. We are part of the Electrolux Family. To add a touch of professional inspiration to your home, visit electrolux.co.uk © 2020 Electrolux Home Products Pty Ltd. ABN 51 004 762 341 BMAN_Discovery1000_EU_NG_Sep20...
Need help?
Do you have a question about the DISCOVERY BMG1231BBE and is the answer not in the manual?
Questions and answers