
Subscribe to Our Youtube Channel
Related Manuals for BeefEater BSH158SAEU


Summary of Contents for BeefEater BSH158SAEU
- Page 1 INTEGRATED Assembly and Operating Instructions SERIES BSH158SAEU, BSL158SAEU 2531 PIN CODE: 2531CS-0054 EUROPE...
-
Page 2: Table Of Contents
CONGRATULATIONS CONTENTS Dear customer, Important safety instructions ��������������������������������������������������������3 Product description �����������������������������������������������������������������������4 Congratulations and thank you for choosing our barbecue� Parts �����������������������������������������������������������������������������������������������5 We are sure you will find it a pleasure to use� Before you use the barbecue, we recommend that you read through the Gas specifications ��������������������������������������������������������������������������6 relevant sections of this manual, which provide a description Leak test procedure ����������������������������������������������������������������������7... -
Page 3: Important Safety Instructions
Do not test for leaks with a naked flame. manufacturer’s warranty. • Do not modify this appliance. Please contact your local Beefeater Distributor for additional information or assistance for an approved • Do not obstruct any ventilation of the barbecue. -
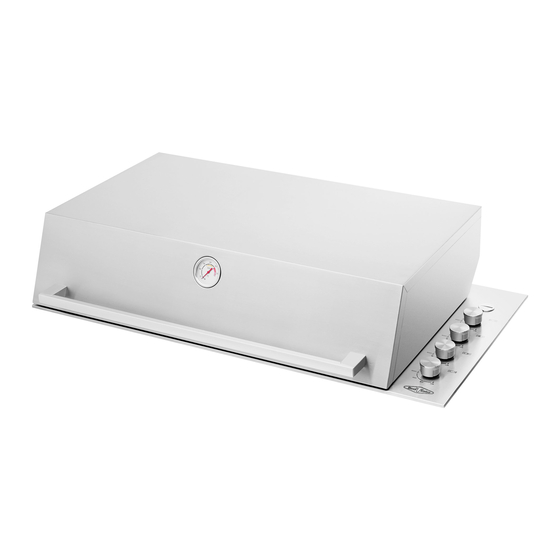
Page 4: Product Description
Cast Iron Hotplate Removable oil reservoir located at front of cooking surface (not illustrated) Flame tamers x 2 located under grills (not illustrated) Integrated barbecue with roasting hood BSH158SAEU Roasting hood Warming racks Battery cover Gas connection point Burner controls... -
Page 5: Parts
PARTS DESCRIPTION DESCRIPTION Rear heat 1 Plastic bag, containing this instruction book, shield labels, 1 fibre washer, brass adaptor, nut and tail fitting, gas injectors for conversion to alternate gas EITHER Roasting hood Flame and base tamers assembly Oil reservoirs Slimline lid and base assembly... -
Page 6: Gas Specifications
GAS SPECIFICATIONS COUNTRY BE, FR, IT, LU, IE, LU, NL, DK, FI, AT, DE, SK, CH, FR, IT, DK, IE, DE, LU, PL, NL GB, GR, PT, ES, SE, CY, CZ, EE, GB, GR, ES, PT, CY,CZ, LT, SK, CH, LT, MT, SK, SI, AT, FI, SE, CZ, SI, LV... -
Page 7: Leak Test Procedure
For details of the kit and fitting detergent or soap� instructions appropriate for your market, please contact your local BeefEater distributor�� • After connection of the hose, turn on the gas supply at the gas bottle or mains as appropriate�... -
Page 8: Gas Conversion Instructions
For details of the kit and fitting instructions appropriate for your market, please contact your local • Replace the injector with appropriate size injector BeefEater distributor� (refer to Gas Specification Table on page 6)� All injectors are marked with the orifice size� Procedure 1. -
Page 9: Lpg Safety Information
LPG SAFETY INFORMATION LPG safety information • Use only gas cylinders, which meet national and regional codes� The minimum cylinder size for this barbecue is 6kg� Ensure that the cylinder can provide enough fuel to operate the appliance� If in doubt, check with your local gas supplier�... -
Page 10: Installation Warnings
INSTALLATION WARNINGS WARNING WARNING • This appliance shall only be used in an above ground, open air situation with natural ventilation without stagnant areas, where gas leakage and products of combustion are rapidly dispersed by wind or natural convection. This appliance is designed to be used outdoors and well ventilated indoor areas. - Page 11 INSTALLATION INSTRUCTIONS Installation warnings Choosing a location The mounting enclosure When planning the location and preparing the installation • The barbecue requires a non-combustible barrier under structure for this appliance note the following: the barbecue to prevent excessive temperatures being accessed�...
-
Page 12: Dimensions
DIMENSIONS Benchtop must be non- This side wall can be combustible material combustible material 250 min 250 min Non-combustible barrier – at least 30mm between barrier and This side wall can be base of the appliance combustible material 71mm minimum from cutout This front wall can Benchtop... - Page 13 DIMENSIONS WARNING! This appliance requires venting. An open area as indicated must be allowed for. A suitable grille can be fitted if desired. This vent area is to allow air into the enclosure for the correct combustion of gases and for the correct exhausting of the products of combustion.
-
Page 14: Gas Requirements
GAS REQUIREMENTS ASSEMBLING THE BARBECUE 1� Remove all components from box� WARNING! 2� Attach heat shield to rear of unit by inserting the three top tabs into the rear holes and sliding the • If an LPG bottle is to be stored in the enclosure shield down�... -
Page 15: Hotplate Configuration
HOTPLATE CONFIGURATION Install hotplates and grills as shown, ensuring that the flame tamers are located under the grills. NOTE: ensure that grill assemblies are orientated correctly so that the surface of the grill is sloping forward to allow oil to drain into oil reservoirs�... -
Page 16: Operating Instructions
OPERATING INSTRUCTIONS Control functions Preheating Before lighting the barbecue: For best cooking results it is recommended to preheat the barbecue prior to cooking� • Check that all hoses and gas fittings are tight� • This barbecue is fitted with high power burners� In •... -
Page 17: Lid Safety Lid - Slimline Lid Only
LID SAFETY – SLIMLINE ONLY CLEANING AND CARE To ensure that the user remembers to turn off the gas before The Electrolux Integrated barbecue has been constructed closing the lid, a pivoting safety leg has been fitted� from select grade stainless steel which, if not cared for, may discolour over time�... - Page 18 CLEANING AND CARE Other stainless steel surfaces Ensure all oil and food particles are removed� After cleaning complete, re-assemble ensuring the burner is correctly located over the injector� CAUTION! Cleaning the oil reservoirs Do not use abrasive or caustic cleaners, scourers or metal The Integrated barbecue has a unique oil management scrapers on these stainless steel surfaces as they may system which uses channels to drain all oil to the front...
-
Page 19: Maintenance
This appliance should be checked and serviced by an authorised service person every 2 years to ensure the appliance remains in a safe operating condition� (These services are not covered by warranty)� Replacement parts are available from your authorised BeefEater dealer� SERVICE AND MAINYENANCE SCEDULES EACH 6 MOM Check gas supply hose(s) for cracks and leaks ü... -
Page 20: Troubleshooting
TROUBLESHOOTING ACCESSORIES To order any of the following accessories and spare parts, or PROBLEM POSSIBLE REMEDY for more information on any other suitable accessories for this CAUSE product, please contact the Electrolux Customer Service Centre� Barbecue No gas Check isolation valve is ON� won’t light Gas bottle empty - ACCESSORIES... -
Page 21: Notes
NOTES NOTES... - Page 22 NOTES NOTES NOTES...
-
Page 23: Warranty
Conditions of Warranty materials within the specified period from the date of purchase, 1. The appliance is delivered to the BeefEater distributor’s service department BeefEater or its distributor will repair or, (at distributors option), or authorised service agent and freight charges both ways are paid by the replace the defective part free of charge. - Page 24 For more information on all Beefeater products, or for dimension and installation information, call into your retailer, phone or email our customer care team or visit our website: EUROPE BeefEater Europe PO Box 1238 Cheddar BS27 9AH United Kingdom phone UK:...
Need help?
Do you have a question about the BSH158SAEU and is the answer not in the manual?
Questions and answers