Advertisement
Quick Links
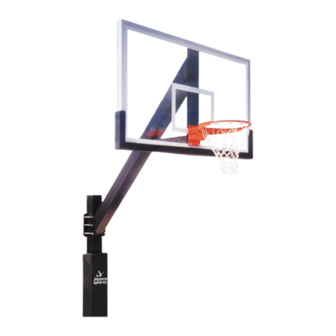
-- LS-200 --
(THE PLAYGROUND)
Installation Instructions
!
WARNING
!
D O N O T A T T E M P T T O
A S S E M B L E T H I S S Y S T E M
W I T H O U T C A R E F U L L Y
READING AND FOLLOWING ALL
I N S T R U C T I O N S . B E G I N B Y
I D E N T I F Y I N G A N D T A K I N G
I N V E N T O R Y O F A L L P A R T S
U
S
I
N
G
Call Jaypro Sports Equipment at 1-800-243-0533
during regular business hours for technical support.
www.jaypro.com
Rev-B
Page 1 of 12
Advertisement

Subscribe to Our Youtube Channel
Summary of Contents for Jaypro Sports LS-200
- Page 1 I D E N T I F Y I N G A N D T A K I N G I N V E N T O R Y O F A L L P A R T S Call Jaypro Sports Equipment at 1-800-243-0533 during regular business hours for technical support.
- Page 2 JAYPRO SPORTS LS-200RS THE PLAYGROUND ITEM IMAGE DESCRIPTION 6” x 6” x 157-1/8” LONG SQUARE UPRIGHT POST 8-1/4” x 11” x 7/16” THICK BACK POST PLATE 5” x 5” x 78-3/8” LONG UPPER EXTENSION ARM WITH 8-1/4” x 11” PLATE & 6” x 10-1/2” PLATE 2-3/4”...
- Page 3 ITEM IMAGE DESCRIPTION 42” x 72” GLASS BACKBOARD UNIVERSAL BREAKAWAY GOAL W/ NETTING & RUBBER GASKET GLASS BACKBOARD SUPPORT FRAME PAIR OF BACKBOARD EDGE PADDING ITEM IMAGE DESCRIPTION Rev-B Page 3 of 12...
- Page 4 ITEM IMAGE DESCRIPTION PVC RIM SPACER FOR BACKBOARD M16 x 220 mm HEX BOLT M16 WASHER M16 LOCK WASHER M16 HEX NUT M10 x 70 mm HEX BOLT M10 WASHER M10 LOCK WASHER M10 HEX NUT ITEM IMAGE DESCRIPTION Rev-B Page 4 of 12...
- Page 5 2) USE OF THIS EQUIPMENT OTHER THAN INTENDED, MAY BE HAZARDOUS. 3) ALTERATION OR MODIFICATION OF THIS EQUIPMENT MAY BE HAZARDOUS AND RESULT IN INJURY. FOR REPAIR OR REPLACEMENT, CONTACT YOUR DEALER OR JAYPRO SPORTS. Rev-B Page 5 of 12...
-
Page 6: Before You Start
SUGGESTED TOOLS AND MATERIALS FOR ASSEMBLY (Not Included) 1. 2 Adjustable Wrenches 10. Concrete-1/2 yard or 14-16 2. Socket Set Bags, (80 lb. bags) 3. 9/16" Wrench 11. Phillips Head Screwdriver 4. 3/4" Wrench 12. Electric Drill 5. 15/16" Wrench 13. - Page 7 Footing: NOTE: Before digging, call to locate any buried utility lines. a. Dig a hole 54" deep x 36" across. The edge of the hole should be flush with the edge of the playing surface. If you live in an area where heavy frost can occur, it may pose a problem, consult your local building inspector to determine the appropriate hole depth.
- Page 8 Extension assembly: a. Attach the back post plate to the upper extension arm and position it just beneath the white stripe. b. Attach the lower extension arm to the upper extension arm, assembly as shown. c. Carefully adjust the height of the extension arm assembly so that the height of the top slot of the lower extension arm is 119”...
- Page 9 Rev-B Page 9 of 12...
- Page 10 Backboard & Goal Rim Assembly: a. Insert six (6) M6 x 30 mm hex bolt into extension arm / support upright and secure with M6 washer, lock washer and hex nut. b. Slide the glass backboard into the support channel and secure with M8 x 35 mm hex bolt with washer, lock washer and hex nut.
- Page 11 Rev-B Page 11 of 12...
- Page 12 Rev-B Page 12 of 12...


Need help?
Do you have a question about the LS-200 and is the answer not in the manual?
Questions and answers