
Subscribe to Our Youtube Channel
Related Manuals for Jaypro Sports FSG-2


Summary of Contents for Jaypro Sports FSG-2
- Page 1 -- FSG-2 -- Installation Instructions Call Jaypro Sports Equipment at 1-800-243-0533 during regular business hours for technical support. www.jaypro.com Page 1 of 6...
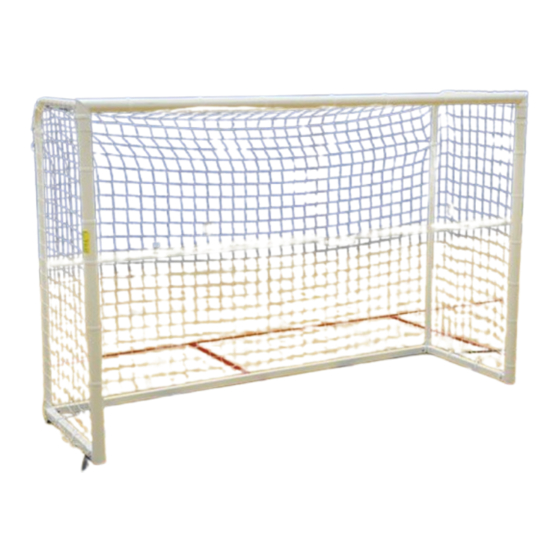
- Page 2 FSG-2 PARTS LIST (QTY: SINGLE UNIT) ITEM IMAGE DESCRIPTION BOTTOM BACKSTAY LEFT FSG67910-3 BOTTOM BACKSTAY RIGHT FSG67910-4 SQUARE CROSSBAR FSG67910-6 FUTSAL GOAL UPRIGHT FSG67910-2 TOP CROSSBAR FSG67910-5 BACKSTAY 1.90 DIA FSG-BS1 FUTSAL GOAL REPLACEMENT NET FSG67910N (COMES IN COLOR WHITE) Classic Cast Corner –...
- Page 3 3) USE OF THIS EQUIPMENT OTHER THAN INTENDED, MAY BE HAZARDOUS. 4) ALTERATION OR MODIFICATION OF THIS EQUIPMENT MAY BE HAZARDOUS AND RESULT IN INJURY. FOR REPAIR OR REPLACEMENT, CONTACT YOUR DEALER OR JAYPRO SPORTS. Tools Require: Rubber Mallet 9/16" Socket Wrench or Box Wrench 7/32"...
- Page 4 ASSEMBLY (REQUIRES 2 PEOPLE): 1) Unpack all parts and check against parts list to ensure that all parts have been included. 2) inspect for damage. Report all damages to trucking company. 3) Lay parts out on clean dry floor as shown in figure 1. 4) Assemble corner (item 8) with upright (item 4) do not add hardware at this time.
- Page 5 10) Slide top crossbar (item 5) into corner and install hardware shown in detail e, do not tighten bolts completely. 11) Assemble opposite upright to crossbar with hardware shown in detail e and again do not tighten bolts completely. 12) With the help of a second person assemble the square bottom crossbar (item 3) to the bottom backstays using hardware shown.
- Page 6 15) Square the frame and tighten all hardware. Start by aligning the corner piece with the upright extrusion and closing any gap between the corner and the upright. Now tighten the two screws furthest from the corner hub. Once they are secure you can tighten the bolt closest to the corner hub.
Need help?
Do you have a question about the FSG-2 and is the answer not in the manual?
Questions and answers