Table of Contents
Advertisement
Quick Links
Advertisement
Table of Contents

Summary of Contents for Ronix 4318
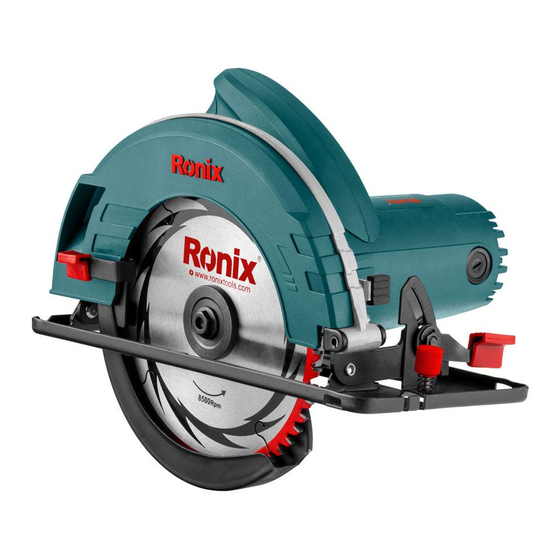
- Page 1 CIRCULAR SAW 4318...
-
Page 2: Specification
SPECIFICATION Model 4318 Power 1350W No-load RPM 6000 RPM Voltage 220V Frequency 50Hz Saw Blade Diameter 180mm Max Cutting Depth at 90° 60mm Max Cutting Depth at 45° 45mm Weight 3.7kg Guide rail, 2 pieces adjustable blade Accessories rings, Spring, 6mm hex wrench, 180×2.4×30mm, 56T circular saw blade... -
Page 3: Work Area
GENERAL SAFETY RULES (FOR ALL TOOLS) WARNING! Read and understand all instructions. Failure to follow all instructions listed below, may result in electric shock, fire and / or serious personal injury. SAVE THESE INSTRUCTIONS WORK AREA 1. keep your work area clean and well it. Cluttered benches and dark areas invite accidents. -
Page 4: Personal Safety
8.When operating a power tool outside, use an outdoor extension cord marked “W-A” or “W”. These cords are rated for outdoor use and reduce the risk of electric shock. PERSONAL SAFETY 9. Stay alert, watch what you are doing and use common sense when operating a power tool. - Page 5 be controlled With the switch is dangerous and must be repaired. 18.Disconnect the plug from the power source before making any adjustments, changing accessories, or storing the tool. Such preventive safety measures reduce the risk of starting the tool accidentally. 19.
- Page 6 second hand on auxiliary handle, or motor housing. If both hands are holding the saw, cannot be cut by the blade. Keep your body positioned to either side of the saw blade, but not in line with the saw blade. KICKBACK could cause the saw to jump backwards.
- Page 7 7. Hold tool by insulated gripping surfaces when performing an operation where the cutting tool may contact hidden wiring or its own cord. Contact with a “live” wire will also make exposed metal parts of the tool“live” and shock the operator. 8.
- Page 8 KICKBACK from the workpiece as the saw is restarted. Support large panels to minimize the risk of blade pinching and KICKBACK. Large panels tend to sag under their own weight. Supports must be placed under the panel on both sides, near the line of cut and near the edge of the panel .To minimize the risk of blade pinching and kickback.
- Page 9 operation. The tool is provided with a front grip and rear handle for two hand operation. Operate with proper hand support, proper workpiece support, and supply cord routing away from the work area. WARNING! It is important to support the workpiece properly and to hold the saw firmly to prevent loss of control which could cause personal injury.
- Page 10 • Be sure the blade is installed with teeth pointing up at the front of the tool. • Use only the Ronix wrench to install or remove the blade. 1. To remove the blade, Press the Lock shaft so that it cannot revolve, then use the Hex wrench to loosen the hex bolt counterclockwise.
-
Page 11: Adjusting Depth Of Cut
Notice: When changing blade, make sure to also clean upper and lower blade guards of accumulated sawdust. Such efforts do not, however, replace the need to check lower guard operation before each use. Adjusting Bevel cutting Loosen the clamping screw on the bevel scale plate on the front of the base. - Page 12 SAW SIGHTING(FIG4) For straight cuts, align the Right groove on the front of the base plate with your cutting line, For 45°bevel cuts, align the Left groove with it. Fig 4 SWITCH CAUTION: Before plugging in the tool, always double check the shaft lock in the “off”...
-
Page 13: Replacing Carbon Brushes
Fig 6 EFFECTIVE AND SAFE FOR SAWING OPERATION Always hold the tool firmly with one hand on housing and the other on the side handle, turn the tool on and them apply the blade to the workpiece. 1. Put the tool’s Base plate on the workpiece, Let the blade don’t touch the workpiece,you don’t saw equably the workpiece until the machine get to the maximum speed from staring. - Page 14 If the tool is not working well , ask your local Ronix service center for repair. To maintain product SAFETY and RELIABILITY, repairs, any other maintenance or adjustment should be performed by Ronix Authorized or Factory service centers, always using Ronix replacement parts. USER MANUAL...


Need help?
Do you have a question about the 4318 and is the answer not in the manual?
Questions and answers