
Subscribe to Our Youtube Channel
Related Manuals for Setra Systems setralite


Summary of Contents for Setra Systems setralite
- Page 1 Installation & Operating Guide Setra Systems, Inc. 159 Swanson Road, Boxborough, MA 01719 800.257.3872 • www.setra.com...
- Page 2 The material in this document is for information purposes only and is subject to change without notice. Setra Systems assumes no responsibility for any errors or for consequential damages that may result from the use or misrepresentation of any of the material in this...
-
Page 3: Table Of Contents
Table of Contents 1.0 Introduction ........................4 1.1 Intended use ......................4 1.2 Display and LED light ring ..................4 2.0 In the Box ........................5 3.0 Rough-in installation (Wall Mount) ................5 3.1 Installer Provided Materials ..................5 3.2 Prepare wall for mounting - Permanent installations ..........6 3.3 Plumbing ........................ -
Page 4: Introduction
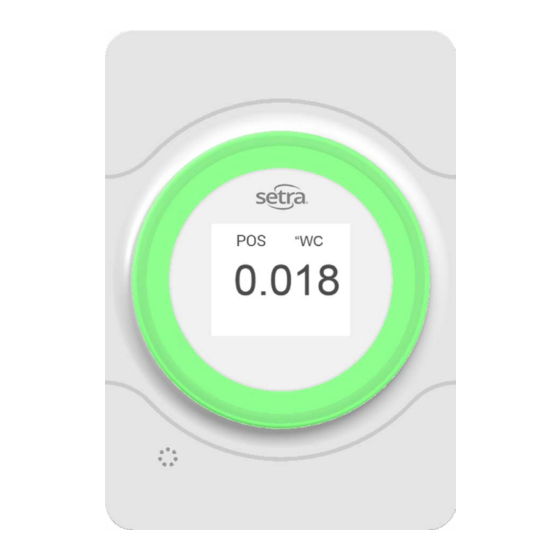
1.0 Introduction The Setra Lite provides a simple, cost-effective, and accurate way to measure and display room differential pressure in areas that previously require manual verification. For local staff managing area, Setra Lite visual and audible alarms. The light ring displays green or red, showing a clear indication of room conditions. -
Page 5: In The Box
2.0 In the Box Setra Lite Base Unit - As specified by customer • Pressure Pickup Port (Setra RPS) Standard Monitor • Mounting Hardware • Elbow Connectors • 250ohm resistor (If wiring inputs for 4-20mA current loops) Setra Lite Base Unit - As specified by customer •... -
Page 6: Prepare Wall For Mounting - Permanent Installations
3.2 Prepare wall for mounting - Permanent installations 1. Cut a 2" hole in the wall for the Setra Lite base unit or install 1-gang electrical box Note: Be sure to install electrical box in correct orientation based on purchased configuration (Portrait or Horizontal) 2. -
Page 7: Installing Lite Base Unit (Permanent Installations)
4.0 Installing Lite base unit (Permanent installations) 1. Connect pressure tubing from the Pressure Pickup Port to the port on the back of Setra Lite. 2. Connect wiring for power and analog output (if required) per section 7.0 Dual Alert: This variant will have an additional wire lead connected to the back of the unit. - Page 8 6. Prior to installing the faceplate, be sure the rubber seal is properly installed on the back of the faceplate. 7. Install the faceplate by firmly pressing it into place over the base unit housing. Note: Press the plate in at a slight angle, leading with the bottom edge.
-
Page 9: Pressure Port Installation
5.0 Pressure Port Installation 5.1 Standard Monitor and Quick Mount Pressure Pick Up Port Install 1. Install the supplied silicone tube (with integrated external spring) and attached barbed tube adapter on the rear face of the RPS unit onto the end of the 0.25” field tubing. This short length of tubing is used as a safety to prevent any kinking inside tight spaces. - Page 10 3. Prior to installing the faceplate, be sure the rubber seal is properly installed on the back of the faceplate. 4. Thread the tubing and wire lead through the front cover and snap the front cover into place. Note: Press the plate in at a slight angle, leading with the bottom edge 5.
-
Page 11: Installing Lite Base Unit (Permanent Installations)
6.0 Quick Mount Installation 1. Prepare the wall for the pressure pick up port as defined in section 3.2 Note: Pressure pick up port can also be left loose and placed on a surface in the room being monitored, it does not need to be installed in the wall 2. - Page 12 9. If mounting to wall install a screw in the wall via drywall anchor or screwing into a supportive structure leaving the screw protruding approximately 1/8” (3mm). Place quickmount onto screw, then tighten screw until firmly tightened. Note: Unit can also be placed on a flat surface.
-
Page 13: Wire Setra Lite (All Variants)
7.0 Wire Setra Lite (All Variants) 7.1 Wiring Setra Lite The back of Setra Lite has a 3-pin terminal block used to connect power and analog pressure output (if needed). 7.2 Power – The power connection for Setra Lite uses the 2 pins on the right when looking at the rear of the unit. -
Page 14: Configuration And Operation
8.0 Configuration and Operation Once Setra Lite is installed and powered-up, configuration and operation can begin. Setra Lite can be easily configured via 3 buttons located below the LCD display after removing the front lens. 8.1 Navigation and configuration basics With the unit powered on, grab the lens by the left and right edge, then pull away from the unit. -
Page 15: Configuration Menus
8.2 Configuration menus This section will describe the function of each of the configuration menus. 8.2.1 Zero adjust Press and hold the RIGHT button (“”) to zero the onboard pressure sensor. The unit contains an onboard valve to automatically equalize the pressure differential across the sensor. - Page 16 8.2.4 Door delay Press and hold the RIGHT button (“”) to adjust the alarm door delay (i.e. number of seconds before the LED ring will turn red when pressure alarm limits are exceeded); the screen text will flash 3 times to indicate that the setting is ready to be adjusted. Use the LEFT ("") and MIDDLE ("") buttons to adjust between 000 and 999 seconds.
- Page 17 8.2.7 Digits Press and hold the RIGHT button (“”) to adjust the number of decimal places displayed on the LCD screen; the screen text will flash 3 times to indicate that the setting is ready to be adjusted. Use the LEFT ("") and MIDDLE ("") buttons to adjust between 0 ("0.000"), tenths ("0.000"), hundredths ("0.000"), or thousandths ("0.000").
-
Page 18: Room Operation
8.2.10 Units Press and hold the RIGHT button (“”) to adjust the measuring units used for the digital display and alarm thresholds; the screen text will flash 3 times to indicate that the setting is ready to be adjusted. Use the LEFT ("") and MIDDLE ("") buttons to adjust between pascals ("Pa") and inches of water ("WC"). - Page 19 To silence audible alarm, press the light ring below the display. Audible alarm will stop but red status light will maintain until pressure is within set limits one time Alarm limits can be configured via the ALARM LIMITS menu. LED light ring behavior can be configured via the RING menu. 8.3.2 View pressure reading If the DISPLAY is set to "OFF", the LCD display will display Setra logo under normal operation.
-
Page 20: Removal Of Permanent Installations
9.0 Removal of Permanent installations 9.1 Removal In the event Setra Lite needs to be removed for service, first remove the front lens. To remove the front lends, grab the front lens from the left and right side edges, and pull the lens away from the wall. -
Page 21: Returning Products For Repair
No representative or person is authorized to give any warranty other than as set out above or to assume for SETRA any other liability in connection with the sale of its products. For all CE technical questions, contact Setra Systems, USA. EU customers may contact our EU representative Hengstler GmbH, Uhlandstr 49, 78554 Aldingen, Germany (Tel: +49-7424-890; Fax: +49-7424-89500). - Page 22 Setra Systems, Inc. 159 Swanson Road, Boxborough, MA 01719 800.257.3872 • www.setra.com...
Need help?
Do you have a question about the setralite and is the answer not in the manual?
Questions and answers