Advertisement
23001 Industrial Blvd, Rogers, MN 55374 / 1-866-527-7637
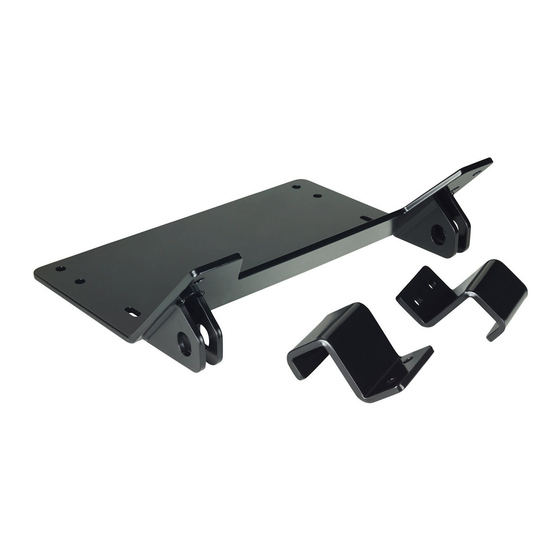
Thank you for purchasing a DENALI plow mount. You now own a premium, custom
plow mount to allow you to use your plow with your UTV/SxS. Please note the following
instructions and heed all warnings.
Your UTV/SxS and/or plow system can cause death or injury. Please use caution
and common sense when operating your unit.
Read your Plow Operator Manual, your Winch Operator Manual, and all warning
labels before operating your UTV/SxS.
Operate your UTV/SxS at a walking speed with the blade installed. Do not
exceed 5 mph (8 km/h) even with the blade up.
Do not operate the UTV/SxS on slopes greater than 10 degrees with the plow
installed.
Always lower the plow to the down position before leaving your UTV/SxS
unattended.
SEVERE INJURY OR DEATH MAY RESULT IF YOU ARE NEGLIGENT.
866.527.7637
www.motoalliance.com
DENALI Plow Mount
MA11748
Can-Am Defender
1
motoinfo@motoalliance.com
Advertisement
Table of Contents

Related Manuals for Motoalliance DENALI MA11748


Summary of Contents for Motoalliance DENALI MA11748
- Page 1 23001 Industrial Blvd, Rogers, MN 55374 / 1-866-527-7637 www.motoalliance.com DENALI Plow Mount MA11748 Can-Am Defender Thank you for purchasing a DENALI plow mount. You now own a premium, custom plow mount to allow you to use your plow with your UTV/SxS. Please note the following instructions and heed all warnings.
- Page 2 Please verify that all hardware and parts are included in your package. Kit Contents: Part # Description MA11748 Plow Mount Z-Bracket 3/8 x 1” Serrated Flange Bolt 3/8” Serrated Flange Nut 5/16 x 1” Serrated Flange Bolt 5/16” Serrated Flange Nut 3/8” Nylock Nut MA11748 Plow Assembly View 866.527.7637 motoinfo@motoalliance.com...
- Page 3 Bracket (part #2) as shown in Figure 1 (circled in red). Insert two (2) of the 5/16 x 1” Serrated Flange Bolts (part #5) from the holes in the A-Arm mount as shown in Figure 1 (circled in green). Figure 1 866.527.7637 motoinfo@motoalliance.com...
- Page 4 Verify the location matches the four bolts (circled yellow) in Figure 2. Always check to make sure there won’t be any interference before drilling, because bumpers can change from year to year and model to model. Figure 2 866.527.7637 motoinfo@motoalliance.com...
- Page 5 7. Attach the plow using the quick release pins included with DENALI Plow Kits. After First Time Use After the first use of your plow, check and retighten all hardware at least once, in case your frame has flexed and the Plow Mount has loosened. 866.527.7637 motoinfo@motoalliance.com...
Need help?
Do you have a question about the DENALI MA11748 and is the answer not in the manual?
Questions and answers