
Related Manuals for Steris Hausted 493RPCST


Summary of Contents for Steris Hausted 493RPCST
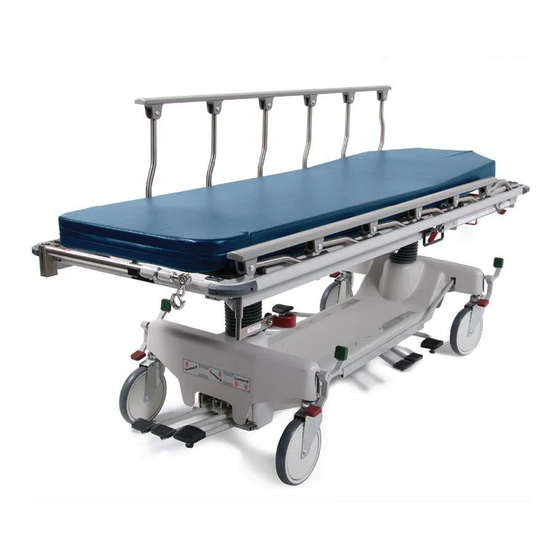
- Page 1 OPERATING MANUAL ® Hausted Fluoro-Track Fluoroscopy Capable Stretcher Model: 493RPCST (08/30/06) 150830-331...
- Page 2 If missing, contact STERIS for replacement copies, giving the serial number and model numbers of the unit. STERIS carries a complete line of accessories for use with this stretcher. A STERIS representative will gladly review these with you.
- Page 3 EC Authorized Representative STERIS Limited STERIS House Jays Close Viables Basingstoke Hampshire RG22 4AX UNITED KINGDOM Manufactured by: STERIS Corporation 2720 Gunter Park East Montgomery, AL 36109 • USA www.steris.com TEL: 334 277 6660 FAX: 334 271 5450 Equipment not suitable for use...
-
Page 4: Table Of Contents
TABLE OF CONTENTS Section Title Page 1 LISTING OF WARNINGS AND CAUTIONS ........1-1 2 UNPACKING INSTRUCTIONS ............2-1 3 OPERATING INSTRUCTIONS ............3-1 3.1 Braking and Steering Operation ................. 3-1 3.1.1 Applying The Brakes ................... 3-1 3.1.2 Releasing The Brakes ..................3-1 3.1.3 Applying The Steering Lock/Fifth Wheel ............. -
Page 5: Listing Of Warnings And Cautions
LISTING OF WARNINGS AND CAUTIONS The following Safety Precautions must be observed when operating or servicing this Hausted ® Fluoro-Track Fluoroscopy Capable Stretcher Model: 493RPCST . WARNING indicates the potential for personal injury and CAUTION indicates the potential for damage to equipment. For emphasis, certain Safety Precautions are repeated throughout the manual. It is important to review ALL Safety Precautions before operating or servicing the unit. -
Page 6: Unpacking Instructions
5. If any of the features of the bands are cut and tension stretcher do not work properly, call STERIS for service. released. Step 5 – Clean the stretcher using a mild detergent to remove any dirt accumulated during shipment. -
Page 7: Operating Instructions
OPERATING INSTRUCTIONS 3.1 Braking and Steering Operation 3.1.1 Applying The Brakes The four wheel central braking system is activated by depressing the red pedal at any of the four corners of the unit (Figure 3-1). To fully engage the brakes, the pedal should be pressed to approximately 45º. -
Page 8: Litter Top Height Adjustment
3.2 Litter Top Height Adjustment 3.2.1 Height Adjustment Press the pump pedal either at base side (Figure 3-4A) or foot end (Figure 3-4B) to the floor, then release. Repeat this process until desired height is obtained. Use smooth strokes on either pump pedal to ensure patient comfort. Figure 3-4B Figure 3-4A 3.2.2 Lowering Litter Top... -
Page 9: Reverse Trendelenburg Adjustment
3.2.4 Reverse Place the unit at maximum height, see “height adjustment.” Press down on the Trendelenburg Adjustment release pedal at base side nearest the foot end (Figure 3-7A) or left hand pedal at foot end (Figure 3-7B) until desired position is obtained then remove pressure. -
Page 10: Fowler Backrest Operation
3.4 Fowler Backrest Operation 3.4.1 Raising the Grasp the fowler backrest tube and the gas spring activating handle (Figure 3- Backrest 10), squeeze the handle and the tube together and lift. Once the desired incline is achieved, release the handle. (Amount of manual lifting required will vary depending on patient size;... -
Page 11: Recommended Preventive Maintenance
Lubricate pivot points after washing Accessories Wipe with a damp cloth to remove After each use disinfectants, soap and any foreign materials or pressure water wash For more details information, please contact: STERIS Corporation at: 1-800-333-8828 Recommended Preventive Maintenance Operator Manual 150830-331... -
Page 12: Optional Accessories
OPTIONAL ACCESSORIES 00001200 Patient safety strap with buckle (Qty. 1) 00001400 Patient safety strap with Velcro (Qty. 1) 00001800 IV Pole - telescoping, removable, stainless steel, 27" x 54" (69 cm x 137 cm) 00005400 Lateral x-ray cassette holder, holds cassettes up to 14"-17" (36 cm- 43 cm) 00006B00 Head/Footboard, stationary 00007B00... -
Page 13: Recommended Replacement Parts
RECOMMENDED REPLACEMENT PARTS Recommended Replacement Parts Operator Manual 150830-331... - Page 14 Figure 6-1. Retracto Rail Assemblies 150830-331 Operator Manual Recommended Replacement Parts...
- Page 15 FIG. & UNITS PER PART ITEM DESCRIPTION ASSEMBLY NUMBER 6-1- RETRACTO RAIL ASSEMBLIES ..........075057 ASSEMBLY, Top Cap -Right ............075056 ASSEMBLY, Top Cap -Left ............068886 RIVET, Cherry - Female End ............068886 RIVET, Cherry - Male End ............068882 LEG, Offset ..................
- Page 16 Figure 6-2. Model RPC – Fluoro Track Assembly 150830-331 Operator Manual Recommended Replacement Parts...
- Page 17 FIG. & UNITS PER PART ITEM DESCRIPTION ASSEMBLY NUMBER 6-2- MODEL RPC – FLUORO TRACK ASSEMBLY ......069353 WELDMENT, Horizon Fluoro Top ..........061195 BHCS, 1/4-20 x 5/8" Long ............031055 NUT, Lock 1/4-20 ................. 067316 GUARD, Release Handle ............067316 ASSEMBLY, Release Handle ............
- Page 18 FIG. & UNITS PER PART ITEM DESCRIPTION ASSEMBLY NUMBER 6-2- MODEL RPC – FLUORO TRACK ASSEMBLY (CONTINUED) . 068469 CROSSTUBE ................069363 ASSEMBLY, Roller Head, Left ............. 069364 ASSEMBLY, Roller Head, Right Pointer ........069365 ASSEMBLY, Roller Foot, Left ............069366 ASSEMBLY, Roller Foot, Right ............
- Page 19 NOTE: 1. Unless otherwise specified: For all moving and sliding locations - apply petroleum jelly lubricant. Apply oil to Items 24, 27, 41 & 47. Apply Never-Seize to Item 42. 2. For all threaded areas (which do not have a built in thread locking mechanism), apply removable thread locker to male threads.
- Page 20 FIG. & UNITS PER PART ITEM DESCRIPTION ASSEMBLY NUMBER HORIZON FLUORO BASE ASSEMBLY ........068553 ASSEMBLY, Base Frame ............062672 CASTER, Tente, Brake ..............062671 CASTER, Tente, Swivel Lock ............062659 PLATE, Caster Dolt Lock ............. 062685 SCREW, Hex Head Cap, M8 x 1.25 X 12.00" Lg......065041 BOLT Eye, 5/16-18 ..............
- Page 21 FIG. & UNITS PER PART ITEM DESCRIPTION ASSEMBLY NUMBER HORIZON FLUORO BASE ASSEMBLY (CONTINUED) .... 031017 SCREW, Hex Head Cap, 1/4-20 x 1.0" Lg........068554 ASSEMBLY, Pump Pedal ............068559 ASSEMBLY, Release Pedal ............068564 ROD, Head End Release ............. 068563 ROD, Foot End Release ..............
- Page 22 NOTE: (unless otherwise specified) 1. For all moving and sliding locations - apply petroleum jelly lubricant. 2. Apply permanent thread locker to male threads of Item 19. Figure 6-4. Fluoro Base Assembly 6-12 150830-331 Operator Manual Recommended Replacement Parts...
- Page 23 FIG. & UNITS PER PART ITEM DESCRIPTION ASSEMBLY NUMBER 6-4- FLUORO BASE ASSEMBLY (SEE FIGURE 6-3) ....... 065114 FOAM, 1/2 x 5.00 x 6.00 Lg.” ............065611 NUT, Push, 3/16 & PA 188007” ........... 069282 ROD, Bottom Cover” ..............068343 PAD, Pump Pedal”...
- Page 24 Figure 6-5. Label Location 6-14 150830-331 Operator Manual Recommended Replacement Parts...
- Page 25 FIG. & UNITS PER PART ITEM DESCRIPTION ASSEMBLY NUMBER 6-5- LABEL LOCATIONS ..............075832 LABEL, Fluoro-Track, Right ............075831 LABEL, Base End ................ 075833 LABEL, Fluoro-Track, Left ............031457 LABEL, Universal Serial Number ..........063022 LABEL, Service ................150828 999 LABEL, Bar Code .................
Need help?
Do you have a question about the Hausted 493RPCST and is the answer not in the manual?
Questions and answers