
Related Manuals for Steris VividImage MON-STE42HD


Summary of Contents for Steris VividImage MON-STE42HD
- Page 1 ® VividImage Medical Grade High Definition Wide Screen Monitor OPERATION MANUAL MON-STE42HD MON-STE42HD-SDI MON-STE47HD MON-STE47HD-SDI MON-STE52HD MON-STE52HD-SDI...
-
Page 2: Notice For Users
Declaration of Conformity VividImage High Definition Wide Screen Monitor- MON-STE42HD / MON-STE42HD-SDI / MON-STE47HD / MON-STE47HD-SDI / MON-STE52HD / MON-STE52HD-SDI: This device complies with Part 15 of the FCC Rules. Operation is subject to the following two conditions: (1) this device may not cause harmful interference, and (2) this device must accept any interference received, including interference that may cause undesired operation. -
Page 3: Table Of Contents
Table of Contents Notice for Users ............................2 FCC Statement ............................2 Declaration of Conformity........................... 2 TIPS AND SAFETY PRECAUTIONS ......................4 Monitor and Accessory Checklist ....................... 4 Mounting ..............................4 Location..............................4 Power Cord ..............................4 Manual Scope ............................4 CONNECTING THE MONITOR AND POWERING ON/OFF................ -
Page 4: Tips And Safety Precautions
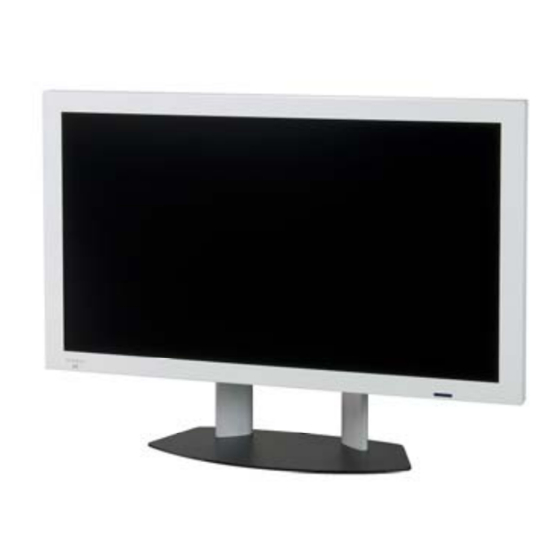
Mounting - Always follow mounting instructions to avoid for all models. For product appearance, physical injury and/or damage to the monitor. illustrations of model MON-STE42HD are used in this manual.) 4 of 19 Document # Revision Date... -
Page 5: Connecting The Monitor And Powering On/Off
Connecting the monitor and powering on/off Step 1: Unpacking the carton Included in the carton are the following items: 1 VividImage HD Wide Screen Monitor 1 S-VIDEO Mini Din 4 pin cable 1 Power Cord 1 Component Mini Din 8 pin cable 1 Remote Control 1 RS232C D-sub 9 pin cable (Optional) 1 RCA Cable... -
Page 6: Step 3: Connecting The Video Inputs
Step 3: Connecting the Video Inputs The video input cable(s) should be attached to the appropriately labeled ports on the back of the monitor as shown below. The following inputs are available: • Video (RCA) • S-Video • Component YPb/Pr •... -
Page 7: Step 4: Connecting The Power Cord
RGB Input You can select RGB input from 2 connections listed below: RGB signals Connection type RGB Analog VGA 15 pin RGB Digital DVI-D DVI-D 24 pin Signal delivery Connection type RS-232C 9 pin Dual SDI (optional) Step 4: Connecting the power cord Plug the appropriate end of the power cord into the 3-pronged interface on the back of the monitor. -
Page 8: User Interface
User Interface The User Interfaces The user interface on the side panel consists of seven push buttons, which are located on the side of the monitor. The interface is shown in Figure 2 below. Button Description Power ON / OFF Activate Selection (when in menu) / Input ENTER Source Selection (when not in menu) -
Page 9: Osd (On Screen Display)
OSD (On Screen Display) OSD Lock / Unlock Control To Lock / Unlock the OSD using the Side Controls of Monitor: Lock: Press ( /+) and (▽) at the same time and OSD will be locked. Unlock: Press ( /+) and (▽) at the same time again and OSD will be unlocked. To Lock / Unlock the OSD using the Remote Control: Lock: Press Enter, Enter, Exit, Exit, Enter and Exit on the remote control in that sequence and OSD will be locked. -
Page 10: Osd Menu Function
OSD Menu Function Main Menu Sub-Menu Description Setting Brightness Adjust the brightness of the screen 0, 100 Contrast Adjust the contrast of the screen 0, 100 Adjust the picture hue of the screen -45, +45 Display Saturation Adjust the picture saturation of the screen 0, 100 Flesh-Tone Adjust the picture tone of the screen... -
Page 11: Table 1: Osd Menu Function
Vertical Adjust the OSD menu V-position 0, 255 Horizontal Adjust the OSD menu H-position 0, 255 Blend Adjust the OSD menu blend 0, 15 Time out Adjust the OSD menu display time 0, 60 OSD Zoom Magnify the OSD menu On, Off Brightness Level Adjust the OSD menu brightness... -
Page 12: Structure Of Osd Menus
Structure of OSD Menus Main Menu Using Side Controls of monitor: Press “MENU” to enter Main Menu Press “ /+” or “ /-” to select Main Menu (ex. picture setting, language, original default setting) Using Remote Control: Press “MENU” to enter Main Menu Press “... -
Page 13: Language Setting (English Only)
Language Setting (English Only) Using Side Controls of monitor: Press “MENU” to enter Main Menu. Press “ /+” 3 times and press the “Enter” to enter item Press “▽” to select sub-item (English only) Press “Enter” when finished adjusting Press “MENU” to exit the item Using Remote Control: Press “MENU”... -
Page 14: Default Settings
Default Settings Item Default Power Switch Brightness Contrast Color Temperature User Green Blue Language English Auto Adjust Table 2: Default Settings 14 of 19 Document # Revision Date 82070-248, Revision A 1/19/2009... -
Page 15: Monitor Care / Troubleshooting
Monitor Care / Troubleshooting Monitor Care Troubleshooting Always remove the plug from the AC outlet when Please follow these troubleshooting tips prior to cleaning the monitor. contacting customer support. LCD Panel The image is not displayed on the screen - Is the power cord connected properly? Use a mild soap &... -
Page 16: Specifications
Specifications 42 HD 47 HD 52 HD MON-STE42HD MON-STE47HD MON-STE52HD VividImage Model # MON-STE42HD-SDI MON-STE47HD-SDI MON-STE52HD-SDI INPUTS: Composite ● ● ● S-Video ● ● ● YPbPr ● ● ● ●* ●* ●* RGBHV (computer) WUXGA WUXGA WUXGA ● ● ●... -
Page 17: Glossary
Glossary Black Level: This adjustment allows the display to be set to discriminate between small differences in dark or near black areas of the image. The adjustment should make a black area of the image (such as a deep shadow where all detail is lost in the image) appear black. The black level is decreased (less black) until a change toward light or grey is perceived in this area, then the adjustment should be increased slightly to restore the dark area to black. -
Page 18: Index
Index Accessory Checklist, 4 Main Menu, 12 Audio Setting, 10 Monitor Care, 15 Mounting, 5 Black Level, 17 Brightness, 17 On Screen Display, 9 OSD, 9, 10, 11, 12, 15 OSD Lock, 9 Cable Input, 6 Care, 15 Clock, 17 Phase, 17 Color, 10 Picture Setting, 12... -
Page 19: Contact Customer Support
Contact Customer Support 40 Melville Park Road Melville, NY 11747 (877) 887-1788 is a registered trademark of STERIS Corporation. ® VividImage is a registered trademark of VTS Medical Systems, LLC Printed in USA 19 of 19 Document # Revision Date...
Need help?
Do you have a question about the VividImage MON-STE42HD and is the answer not in the manual?
Questions and answers