
Related Manuals for Steris SurgiGraphic 6000


Summary of Contents for Steris SurgiGraphic 6000
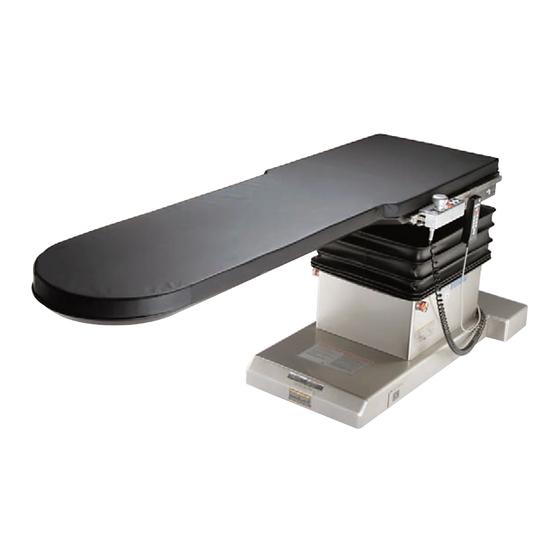
- Page 1 MAINTENANCE MANUAL SurgiGraphic™ 6000 Image Guided Surgical Table (02/01/04) P764330-472...
-
Page 2: A Word From Steris Corporation
A Word From STERIS Corporation IMPORTANT: A listing of the Safety Precau- STERIS carries a complete line of accessories for use tions to be observed when operating and servic- with this table. STERIS representatives will gladly ing this equipment can be found in Section 1 of review these with you. - Page 3 Manufactured by: STERIS Corporation 2720 Gunter Park East Montgomery, AL 36109 • USA TEL: 334 277 6660 Class 1 Equipment Type B Equipment Equipment not suitable for use in the presence of a flammable anesthetic mixture with air or oxygen or nitrous oxide.
-
Page 4: Table Of Contents
Table of Contents SECTION TITLE PAGE A Word From S TERIS Corporation ..................i Section 1: Safety Precautions and Labels................1-1 Section 2: General Information ..................2-1 General Description ........................2-1 Technical Specifications ......................2-1 2.2.1 Overall Size ........................2-1 2.2.2 Ranges of Motion ......................2-1 2.2.3 Weight ........................ - Page 5 Table of Contents (Cont'd) SECTION TITLE PAGE Section 5: Principles of Operation (Continued) 5.5.1 Original and 6000CE Tables ..................5-3 5.5.2 6000FB Table ......................... 5-3 Left/Right Tilt function ........................ 5-4 5.6.1 Original and 6000CE Tables ..................5-4 5.6.2 6000FB Table ......................... 5-4 Trendelenburg/Reverse Trendelenburg function ................
- Page 6 Table of Contents (Cont'd) SECTION TITLE PAGE Section 7: Service Procedures (Continued) Setting the Extreme Limit Windows for Reverse Trendelenburg and Trendelenburg ....7-7 7.6.1 Reverse Trendelenburg ....................7-7 7.6.1.1 Original Table ....................7-7 7.6.1.2 6000CE Table ....................7-8 7.6.1.3 6000FB Table ....................
- Page 7 Table of Contents (Cont'd) SECTION TITLE PAGE Section 8: Service Component Repair and Replacement ..........8-1 Bellows Procedures ........................8-1 8.1.1 Removal (Original Table) ....................8-1 8.1.2 Replacement (Original Table)..................8-1 8.1.3 Removal (6000CE and FB Tables) ................8-1 8.1.4 Replacement (6000CE and FB Tables) ................. 8-1 Head End Base Cover Procedures ..................
- Page 8 TITLE PAGE Section 5: Principles of Operation SurgiGraphic 6000 Surgical Table Movement Function Control Devices ......... 5-2 SurgiGraphic 6000 Image Guided Surgical Table Technical Drawings ........5-6 Section 6: Inspection and Maintenance Preventive Maintenance Schedule for SurgiGraphic 6000 Surgical Table ....... 6-2 Troubleshooting Guide, Original Tables ..................
- Page 9 Section 5: Principles of Operation Phone-Type Jack ........................5-3 Section 9: Illustrated Parts Breakdown SurgiGraphic 6000 (Original Table) Base Assembly ..............9-2 SurgiGraphic 6000 (Original Table) Assembly ................9-4 SurgiGraphic 6000 (Original Table) Assembly (Cont'd) ............. 9-6 SurgiGraphic 6000 (Original Table) Assembly (Cont'd) ............. 9-8 SurgiGraphic 6000CE Base Assembly (1 of 3) ...............
- Page 10 List of Illustrations (Cont'd) FIGURE TITLE PAGE Section 9: Illustrated Parts Breakdown (Cont'd) 9-15 SurgiGraphic 6000FB Computer Box Assembly ..............9-42 SurgiGraphic 6000FB Computer Box Assembly (Cont'd) ............9-46 SurgiGraphic 6000FB Computer Box Assembly (Cont'd) ............9-47 9-16 Power Inlet Panel Assembly ....................9-48 9-17 Remote Panel Assembly ......................
-
Page 11: Section 1: Safety Precautions And Labels
Section 1: Safety Precautions and Labels The following Safety Precautions must be observed when operating or servicing the SurgiGraphic™ 6000 Image Guided Surgical Table. WARNING indicates the potential for personal injury, and CAUTION indicates the potential for damage to equipment. These Safety Precautions are repeated, where applicable, throughout the manual. - Page 12 WARNING – INSTABILITY HAZARD: Possible patient or user injury, as well as table or accessory failure, may result from using STERIS table accessories for other than their stated purpose - or from using accessories manufactured and sold by other companies on STERIS tables.
- Page 13 WARNING – PERSONAL INJURY AND/OR EQUIPMENT DAMAGE HAZARD (Cont'd): Regularly scheduled preventive maintenance is required for safe and reliable operation of this equipment. Contact STERIS to schedule preventive maintenance. Do not immerse any part of Foot Control, Hand Control, or Palm Control in liquids; this could cause unanticipated table movement, leading to patient injury.
- Page 14 1.1 Safety Labels on the Original SurgiGraphic Table Following is a key to safety labels on the Original SurgiGraphic 6000 Surgical Table. Label Definition Oxygen/flammable anesthetic caution. Lo- cated at rear of table. Use of the table in an explosive or oxygen-enriched environment could result in death, serious personal in- jury, or table damage.
- Page 15 Label Definition Located on the front upper portion of each side of the column covers. This label warns the operator that, to maximize the effec- tiveness of chest compressions, the top of the table must be fully retracted to the proximal end of the table before perform- ing CPR on a patient.
- Page 16 1.2 Safety Labels on the SurgiGraphic 6000CE Table Following is a key to safety labels on the SurgiGraphic 6000CE Surgical Table. Label Definition Oxygen/flammable anesthetic caution. Lo- cated at rear of table. Use of the table in an explosive or oxygen-enriched environment could result in death, serious personal in- jury, or table damage.
- Page 17 Label Definition Located on the front lower portion of each side of the column covers. This label warns the operator that, to maximize the effec- tiveness of chest compressions, the top of the table must be fully retracted to the proximal end of the table before perform- ing CPR on a patient.
- Page 18 1.3 Safety Labels on the SurgiGraphic 6000FB Table Following is a key to safety labels on the SurgiGraphic 6000FB Surgical Table. Label Definition Oxygen/flammable anesthetic caution. Lo- cated at rear of table. Use of the table in an explosive or oxygen-enriched environment could result in death, serious personal in- jury, or table damage.
- Page 19 Label Definition Located on the front lower portion of each side of the column covers. This label warns the operator that, to maximize the effec- tiveness of chest compressions, the top of the table must be fully retracted to the proximal end of the table before perform- ing CPR on a patient.
-
Page 20: Section 2: General Information
Memory buttons). Refer to Figure 4-5 of electrical configuration needs to be changed in the field, consult this document for control feature locations. STERIS for the needed procedure and required materials. 2. A surgeon's Palm Handle Control (which includes Four-Way Manual Float control with LOCKOUT 2.2.5 Anatomical Imaging Area... -
Page 21: Pinch Point
Figure 2-1. Pinch Point Figure 2-2. Pinch Point Figure 2-4. Pinch Point Figure 2-3. Pinch Point Figure 2-5. Pinch Point Figure 2-6. Pinch Point Figure 2-7. Pinch Point Figure 2-8. Pinch Point 764330-472... -
Page 22: Patient Positioning And Weight Limitation
2.4 PATIENT POSITIONING AND 2.5 PATIENT SAFETY STRAPS WEIGHT LIMITATION WARNING – PERSONAL INJURY HAZARD: Failure to keep the patient properly secured with the WARNING – TIPPING HAZARD: patient safety straps at all times could result in death • Do not place patient on the Original or or serious injury to the patient and the operating 6000CE table unless floor locks are engaged. -
Page 23: Emergency Backup Buttons
2.6.1 Emergency Backup Buttons 2.6.1.2 SurgiGraphic 6000FB Table Two Emergency Backup Buttons are located behind the 2.6.1.1 SurgiGraphic Original or 6000CE Table cover plate on the rear left corner of the table base of the Four Emergency Backup Buttons are located behind the SurgiGraphic™... -
Page 24: Emergency Stop Buttons
Two Emergency Stop Buttons (6000CE and 6000FB only) are located on either side of the stainless steel front column cover of the SurgiGraphic 6000 Image Guided Surgical Table. Either Emergency Stop Button may be used to immediately halt any unanticipated table movement. -
Page 25: Section 3: Installation Instructions
Any alteration of this equipment not authorized or power cord to the receptacle in a position so that it performed by STERIS which could affect the table opera- will not be tripped over by personnel in the area. tion will void the warranty, could adversely affect proper table functioning, and could violate national, state, and WARNING –... -
Page 26: Section 4: Operating Instructions
Section 4: Operating Instructions WARNING – PERSONAL INJURY HAZARD: If the power cord is plugged into the front of the table, the power switch (located at the rear of the table base) should be • Section 4.1, Steps 1 - 7 in Operating the Table, in the Down (FRONT) position for power activation (CEN- must be executed before patient transfer to the TER position for power deactivation). -
Page 27: Weight Capacity
7. Before placing the patient on the table, reference PALM HAND PALM CONTROL 4.2, W , in this manual. Assum- ECTION EIGHT APACITY CONTROL / FOOT CONTROL CONTROL ing the weight of the patient does not exceed the indicated weight capacity for the table, with the pa- tient properly restrained (reference S 2.5, P ECTION... -
Page 28: Hand (Pendant) Control
WARNING – TIPPING HAZARD: Do not use TILT R: When depressed, the tabletop will roll to the right the Carbon Fiber Extension Accessory with pa- (viewing the table from the distal or head end). tients exceeding the 400-lb (181-kg) limit. NOTE: The table must first be centered (reference the de- The table is rated for 500-lb (227-kg) patients. -
Page 29: Hand Control Leds Description
pressed momentarily (do not hold), the floor locks will depressing the ON button. This will also reset EStop retract up into the table and table will become "un- function for the 6000CE and 6000FB tables. locked." Do not attempt to move the table until the LOCK (green LED): For the Original and 6000CE tables, UNLOCK LED is illuminated. -
Page 30: Palm Handle Control
earth plane). To float the tabletop in all four directions, safety. Do not use the LEVEL or HOME function if any possible dangers appear to the LEVEL or HOME LED must be illuminated. exist. FLOAT ENABLED (yellow LED): indicates the table- top is in a float capable position. -
Page 31: Optional Foot Control
STERIS table accessories for other than their stated pur- 4.5 OPTIONAL FOOT CONTROL pose - or from using, on STERIS tables, accessories manufactured and sold by other companies. WARNING – PERSONAL INJURY HAZARD: The table's permanently attached 3/8" wide x 1-1/8" tall •... -
Page 32: Section 5: Principles Of Operation
15 Amp circuit Controlled by a 16-bit PLC (Programmable Logic Con- breaker located on the rear power inlet panel. From the troller), the SurgiGraphic 6000 Image Guided Surgical circuit breaker the power goes to the isolation trans- Table features lateral tilt, trendelenburg/reverse former. -
Page 33: 6000Fb Table
Table 5-1. SurgiGraphic 6000 Surgical Table Movement Function Control Devices Original and 6000CE Tables: Function PLC Output Relays Actuator(s) Notes Lock Y20, Y22, Y23 Y20R, Y22R, Y23R 1M, 2M Front Locks Lower First Unlock Y21, Y22, Y23 Y21R, Y22R, Y23R... -
Page 34: Floor Lock/Unlock Function
The PLC directs 24VDC to the proper actuators when After shutting off Y22, the PLC turns on output Y23 movement is requested. Table 5-1 indicates which com- energizing relay Y23R. +24VDC is supplied to the end ponents are involved with a particular function. connection of the phone jack for the 2M (rear floor lock) actuator through the N.O. -
Page 35: Left/Right Tilt Function
lower actuator Y27R is energized to split the current and Y30R respectively. Relay Y20R is energized so the carried between R1 and R2. The current sensed through N.O. (normally open) contacts close supplying -24VDC the resistors are used to determine patient weight (see to the N.O. -
Page 36: Actuator Limits And Home (Level) Descriptions
middle connections of the phone jacks for 2M and 3M 5.9.2 6000CE Table (Trendelenburg) actuators. The end connections of the When the palm control float switch is activated, the PLC phone jacks are tied to +24VDC through the other set of determines the level state of the tabletop and activates the N.O. -
Page 37: Technical Drawings
These drawings are supplied as an aid in understanding unit operation and troubleshooting. Refer to Table 5-2 for listing and order of drawings. Table 5-2. SurgiGraphic 6000 Image Guided Surgical Table Technical Drawings Title Sheet Drawing Reference Number... -
Page 45: Section 6: Inspection And Maintenance
The agreement includes maintenance adjust- ments and replacement of worn parts by a qualified techni- CAUTION – POSSIBLE EQUIPMENT DAMAGE: cian on a scheduled basis. Contact STERIS for details. • When cleaning/disinfecting table, do not IMPORTANT: If SurgiGraphic™ 6000 Image Guided... -
Page 46: Preventive Maintenance Schedule For Surgigraphic 6000 Surgical Table
Table 6-1. Preventive Maintenance Schedule for SurgiGraphic 6000 Surgical Table MINIMUM SERVICE REQUIRED FREQUENCY PREPARATION FOR PREVENTIVE MAINTENANCE Discuss equipment operation with departmental personnel. Each Check overall unit appearance, for leaks and visual damage. Each Follow appropriate Safety Procedures and use Personal Protective Equipment (PPE). -
Page 47: Troubleshooting
It is recommended to clean only 6.4 TROUBLESHOOTING one pad at a time. This section describes the types of SurgiGraphic 6000 NOTE: Follow manufacturer's label recommenda- Image Guided Surgical Table situations that might tions when using cleaning fluids/disinfectants. -
Page 48: Troubleshooting Guide, Original Tables
Table 6-2. Troubleshooting Guide, Original Tables NOTE: Floor locks must be locked to perform any table articulation. SITUATION ACTION 6.1 Table does not beep when plugged into 1. Power selector switch is in the wrong position – electrical outlet. correct. 2. - Page 49 9. Faulty actuator 6M – replace. 10. Faulty Hand Control – replace. 11. Faulty tilt sensor – replace. 12. Table out of adjustment – contact STERIS. 6.5 Table will not tilt left using Hand Control. 1. Hand Control not on – press ON button.
- Page 50 9. Faulty actuator 4M or 5M – replace. 10. Faulty Hand Control – replace. 11. Faulty tilt sensor – replace. 12. Table out of adjustment – contact STERIS. 6.8 Table will not raise using Hand Control. 1. Hand Control not on – press ON button.
- Page 51 5. Faulty bridge rectifier 2BR – replace. 6. Faulty relay Y11R – replace. 7. Faulty float brake – replace. 8. Table out of adjustment – contact STERIS. 6.12 Tabletop will not float longitudinally (front to 1. Floor locks not down – lower floor locks.
- Page 52 8. Faulty actuator 6M – replace. 9. Faulty Palm Control – replace. 10. Faulty tilt sensor – replace. 11. Table out of adjustment – contact STERIS. 6.15 Table will not trendelenburg using Palm 1. Floor locks not down – lower floor locks.
- Page 53 6. Faulty relay Y21R or Y27R – replace. 7. Faulty actuator 3M – replace. 8. Faulty Palm Control – replace. 9. Table out of adjustment – contact STERIS. 6.18 Table will not lower using Palm Control. 1. Floor locks not down – lower floor locks.
-
Page 54: Troubleshooting Guide 6000Ce Tables
Table 6-3. Troubleshooting Guide, 6000CE Table NOTE: 6000CE Table floor locks must be locked to perform any table articulation. SITUATION ACTION 6.1 Table does not beep when plugged into 1. Power selector switch is in the wrong position – electrical outlet. correct. - Page 55 9. Faulty actuator 6M – replace. 10. Faulty Hand Control – replace. 11. Faulty tilt sensor – replace. 12. Table out of adjustment – contact STERIS. 6.5 Table will not tilt left using Hand Control. 1. Hand Control not on – press ON button.
- Page 56 9. Faulty actuator 4M or 5M – replace. 10. Faulty Hand Control – replace. 11. Faulty tilt sensor – replace. 12. Table out of adjustment – contact STERIS. 6.8 Table will not raise using Hand Control. 1. Hand Control not on – press ON button.
- Page 57 6. Faulty bridge rectifier 3BR – replace. 7. Faulty relay Y11R – replace. 8. Faulty float brake – replace. 9. Table out of adjustment – contact STERIS. 6.12 Tabletop will not float longitudinally (front to 1. Floor locks not down – lower floor locks.
- Page 58 8. Faulty actuator 6M – replace. 9. Faulty Palm Control – replace. 10. Faulty tilt sensor – replace. 11. Table out of adjustment – contact STERIS. 6.15 Table will not trendelenburg using Palm 1. Floor locks not down – lower floor locks.
- Page 59 6. Faulty relay Y21R or Y27R – replace. 7. Faulty actuator 3M – replace. 8. Faulty Palm Control – replace. 9. Table out of adjustment – contact STERIS. 6.18 Table will not lower using Palm Control. 1. Floor locks not down – lower floor locks.
- Page 60 2. Faulty table height potentiometer – replace. 3. Faulty PC board – replace. 4. Faulty actuator 3M – replace. 5. Table out of adjustment – contact STERIS. 6.25 FOUR BEEPS. Table trendelenburg moving 1. Loose table trendelenburg potentiometer – repair.
-
Page 61: Troubleshooting Guide 6000Fb Tables
6. Faulty bridge rectifier 1BR – replace. 7. Faulty relay Y21R or Y30R – replace. 8. Faulty actuator 4M – replace. 9. Faulty Hand Control – replace. 10. Faulty tilt sensor – replace. 11. Table out of adjustment – contact STERIS. 6-17 764330-472... - Page 62 8. Faulty actuator 4M – replace. 9. Faulty Hand Control – replace. 10. Faulty tilt sensor – replace. 11. Table out of adjustment – contact STERIS. 6.5 Table will not trendelenburg using Hand 1. Hand Control not on – press ON button.
- Page 63 6. Faulty relay Y20R or Y27R – replace. 7. Faulty actuator 1M – replace. 8. Faulty Hand Control – replace. 9. Table out of adjustment – contact STERIS. 6.8 Table will not lower using Hand Control. 1. Hand Control not on – press ON button.
- Page 64 5. Faulty bridge rectifier 1BR – replace. 6. Faulty relay Y11R – replace. 7. Faulty float brake – replace. 8. Table out of adjustment – contact STERIS. 6.11 Tabletop will not float longitudinally (front to 1. Tabletop not level – LEVEL table.
- Page 65 7. Faulty actuator 4M – replace. 8. Faulty Palm Control – replace. 9. Faulty tilt sensor – replace. 10. Table out of adjustment – contact STERIS. 6.14 Table will not trendelenburg using Palm 1. Phone jacks are loose – correct.
- Page 66 5. Faulty relay Y21R or Y27R – replace. 6. Faulty actuator 1M – replace. 7. Faulty Palm Control – replace. 8. Table out of adjustment – contact STERIS. 6.18 Tabletop does not float freely. 1. Bearing guide rails need lubricated – lubricate rails.
- Page 67 2. Faulty table height potentiometer – replace. 3. Faulty PC board – replace 4. Faulty actuator 1M – replace. 5. Table out of adjustment – contact STERIS. 6.24 FOUR BEEPS. Table trendelenburg moving 1. Loose table trendelenburg potentiometer – repair.
-
Page 68: Recommended Cleaning Products
Coverage Plus ® Concentrated One-step germicide disinfectant cleaner Disinfectant Cleaner ® Coverage Spray Ready-to-Use General cleaner/disinfectant formulated Disinfectant Cleaner with quarternary ammonium compounds and nonionic detergents Germicidal Cloth Impregnated Surface disinfectant Non-Woven Disposable * Contact STERIS for ordering information. 6-24 764330-472... -
Page 69: Section 7: Service Procedures
7.3 through 7.9, special software is required and ECTIONS 15. Software is now in Monitoring Mode, proceed with should be performed by a STERIS trained service technician. required service function(s). WARNING – PERSONAL INJURY AND / OR EQUIPMENT DAMAGE HAZARD: 7.2 SETTING FLOOR LOCKS... -
Page 70: Setting Floor Lock Pressure
7. Bring bottom nut up to downrigger bar and top nut d. To download new K value, click on CONVERT in down to bar securing footpads finger tight. Tool Bar and select CONVERT. Click YES on the window that appears. A window will now appear 8. -
Page 71: 6000Ce Table
ENTER SYMBOL window appears. The first K value “Run Write Processing Has Completed,” click OK. (default value is 3) represents table lower limit. Set New value is now saved inPLC memory. this first K value (reading from left to right) to “0.” 4. -
Page 72: Original Table
5. Double click within blue outline and Enter Symbol “Run Write Processing Has Completed,” click OK. window appears. Set first K value to calculated New value is now saved in PLC memory. value from Step 4. 7. Lower table. Raise table until it stops. Entered value 6. -
Page 73: 6000Fb Table
7.4.2.3 6000FB Table sents extreme limit for tilt right. Set first K value (default value is 3), reading from left to right, to a 1. Click FIND/REPLACE on tool bar. Select FIND low enough value to achieve lateral tilt actuator end DEVICE. -
Page 74: 6000Fb Table
4. Double click within the blue outline and the ENTER 7.5.2 Tilt Left SYMBOL window appears. Set first K value to 7.5.2.1 Original Table calculated value from Step 3. 5. Click OK. Whole rung has a gray background be- 1. Double click M425 within 1085 rung so ENTER cause new value has not been downloaded into SYMBOL window appears for entry. -
Page 75: 6000Fb Table
2. Click OK. Whole rung has a gray background be- 5. Click OK. Whole rung has a gray background. This cause new value has not been downloaded into means new value has not been downloaded into PLC. To download new value, click CONVERT from PLC. -
Page 76: 6000Ce Table
6. Level tabletop. Push and hold the REVERSE 2. Click OK. Whole rung has a gray background be- TREND button on hand control. Trendelenburg cause new value has not been downloaded into actuators stop on their own and digital level indi- PLC. -
Page 77: 6000Ce Table
4. Double click within blue outline and ENTER SYM- 7.6.2.3 6000FB Table BOL window appears. Set second K value to calcu- 1. Double click M420 within 1320 rung so ENTER lated value from Step 3. SYMBOL window appears for entry. Second K value 5. -
Page 78: 6000Ce Table
3. Click ONLINE on Tool Bar. From Monitor, click 2. Place a digital level on tabletop. Articulate table ENTRY DATA MONITOR. (A window may appear using TILT L and R buttons until tabletop is level. saying that same device has already been regis- 3. -
Page 79: 6000Fb Table
7.7.1.3 6000FB Table window. Values should be within a value of two from each other. If this does not occur, readjust K 1. Click FIND/REPLACE on Tool Bar. Select FIND value on rung 366 until it satisfies this tolerance. DEVICE. Enter D43 in Device box. Click FIND NEXT pushbutton. -
Page 80: 6000Fb Table
MONITOR window with K value on rung 393 in appears in window. Click START MONITOR and a main window. Values should be within a value of value appears next to D1 and a Small Monitor two from each other. If this does not occur, readjust Status window appears. -
Page 81: 6000Fb Table
3. Click ONLINE on Tool Bar. From monitor, click 2. Place a digital level on the tabletop. Articulate the ENTRY DATA MONITOR. (A window may appear table using the trendelenburg buttons until the saying that same device has already been regis- tabletop is level. -
Page 82: Setting Values For Home Level From A Reverse Trendelenburg Position
on rung 914 in main window. Values should be 4. To verify HOME level from reverse trendelenburg, within a value of two from each other. If this does hold REVERSE TREND button for three seconds. not occur, readjust K value on rung 879 until it Press and hold the LEVEL (HOME) button until satisfies this tolerance. -
Page 83: 6000Ce Table
lateral brake engages and stops lateral float capabil- ity. Measure this angle with a digital level. Angle ity. Measure this angle with a digital level. Angle should be 1 degree from HOME position. If float should be 1 degree from HOME position. If float needs adjusting, double click D52 within rung 604 needs adjusting, double click D52 within rung 583 and enter symbol appears. -
Page 84: 6000Fb Table
lateral brake engages and stops lateral float capa- button until trendelenburg brake engages and stops bility. Measure this angle with a digital level. Angle trendelenburg float capability. Measure this angle should be 1 degree from the HOME position. If float with a digital level. -
Page 85: Reverse Trendelenburg
button until trendelenburg brake engages and stops 7.9.4.2 6000CE Table trendelenburg float capability. Measure this angle 1. Home table by pushing down on palm control to with a digital level. Angle should be 1 degree from achieve four-way float. Press REVERSE TREND HOME position. -
Page 86: Section 8: Service Component Repair And Replacement
EQUIPMENT DAMAGE HAZARD: Repairs and adjustments to this equipment must be made only NOTE: Two people required for Step 3. by STERIS or STERIS-trained service personnel. 3. Insert plastic bearing supports into each float bearing Nonroutine maintenance performed by inexperi-... -
Page 87: Replacement
3. Remove two button head cap screws from foot end. 5. Plug in phone jack for right trendelenburg actuator (marked T.R.). Unplug the jack for left trendelen- 4. Ensure hand control, palm control, and power cord burg actuator (marked T.L.). (Original and 6000CE tables, only) are not plugged in. -
Page 88: Replacement
8.7 15 AMP CIRCUIT BREAKER 8.5.2 Replacement PROCEDURES 1. Route new actuator plug cord along same path as original and secure with tie wraps. NOTE: This Section covers the Original Tables only. 2. Connect lower actuator clevis to lower support 8.7.1 Removal bracket using shaft and spacer previously removed. -
Page 89: Replacement
8.9.3 Small Crack or Nick Repair 8.8.2 Replacement To repair a small crack or nick, order Carbon Fiber 1. Screw on lower jam nut to approximately same Tabletop Repair Kit (P764330-638). Kit includes a two- place as old foot pad. part black epoxy, sand paper, instructions, and other 2. - Page 90 Surgigraphic 6000 Surgical Table. This procedure is meant to replace section 7 of the Maintenance Manual P764330-472. ACTION: When working with the PLC program in the Surgigraphic 6000 Table use the procedure below. It will be necessary to have the GX Developer Program part...
- Page 91 3. A sensor has been replaced; this may require calibration of the positioning for the direction affected by the sensor that was replaced. Note: PLC Battery Part Number is P764333028 THIS DOCUMENT IS INTENDED FOR THE EXCLUSIVE USE OF STERIS SERVICE TECHNICIANS AND CONTRACT CUSTOMERS. REPRODUCTION IN WHOLE OR IN PART IS PROHIBITED.
- Page 92 7.1.2 Installation of GX Developer Software part # 764332-279 Note: MELSOFT ENV must be installed prior to installing the GX Developer Software THIS DOCUMENT IS INTENDED FOR THE EXCLUSIVE USE OF STERIS SERVICE TECHNICIANS AND CONTRACT CUSTOMERS. REPRODUCTION IN WHOLE OR IN PART IS PROHIBITED.
- Page 93 THIS DOCUMENT IS INTENDED FOR THE EXCLUSIVE USE OF STERIS SERVICE TECHNICIANS AND CONTRACT CUSTOMERS. REPRODUCTION IN WHOLE OR IN PART IS PROHIBITED.
- Page 94 THIS DOCUMENT IS INTENDED FOR THE EXCLUSIVE USE OF STERIS SERVICE TECHNICIANS AND CONTRACT CUSTOMERS. REPRODUCTION IN WHOLE OR IN PART IS PROHIBITED.
- Page 95 THIS DOCUMENT IS INTENDED FOR THE EXCLUSIVE USE OF STERIS SERVICE TECHNICIANS AND CONTRACT CUSTOMERS. REPRODUCTION IN WHOLE OR IN PART IS PROHIBITED.
- Page 96 THIS DOCUMENT IS INTENDED FOR THE EXCLUSIVE USE OF STERIS SERVICE TECHNICIANS AND CONTRACT CUSTOMERS. REPRODUCTION IN WHOLE OR IN PART IS PROHIBITED.
- Page 97 2. Start GPP for Windows (GX Developer) application by clicking on the icon. 3. From Online menu, click on Read From PLC. THIS DOCUMENT IS INTENDED FOR THE EXCLUSIVE USE OF STERIS SERVICE TECHNICIANS AND CONTRACT CUSTOMERS. REPRODUCTION IN WHOLE OR IN PART IS PROHIBITED.
- Page 98 If there is a need to reload the PLC Project you will have the original file backed up. THIS DOCUMENT IS INTENDED FOR THE EXCLUSIVE USE OF STERIS SERVICE TECHNICIANS AND CONTRACT CUSTOMERS. REPRODUCTION IN WHOLE OR IN PART IS PROHIBITED.
- Page 99 You may need to reload it at a later date. THIS DOCUMENT IS INTENDED FOR THE EXCLUSIVE USE OF STERIS SERVICE TECHNICIANS AND CONTRACT CUSTOMERS. REPRODUCTION IN WHOLE OR IN PART IS PROHIBITED.
- Page 100 15. Click Yes to create a new project. The following prompt will not appear if you are using a file name that was previously used, such as the table serial number. THIS DOCUMENT IS INTENDED FOR THE EXCLUSIVE USE OF STERIS SERVICE TECHNICIANS AND CONTRACT CUSTOMERS. REPRODUCTION IN WHOLE OR IN PART IS PROHIBITED.
- Page 101 Note: Program variables are case sensitive. 21. Proceed to the appropriate section needed to complete the service. THIS DOCUMENT IS INTENDED FOR THE EXCLUSIVE USE OF STERIS SERVICE TECHNICIANS AND CONTRACT CUSTOMERS. REPRODUCTION IN WHOLE OR IN PART IS PROHIBITED.
- Page 102 1. Open saved Project from the Project menu. 2. Select location where the backed-up file is stored. Click Open. THIS DOCUMENT IS INTENDED FOR THE EXCLUSIVE USE OF STERIS SERVICE TECHNICIANS AND CONTRACT CUSTOMERS. REPRODUCTION IN WHOLE OR IN PART IS PROHIBITED.
- Page 103 PLC on the surgical table yet. To complete this step go to the Online menu, select Write to PLC. 4. Check the boxes Main and PLC Parameters. Click Execute. THIS DOCUMENT IS INTENDED FOR THE EXCLUSIVE USE OF STERIS SERVICE TECHNICIANS AND CONTRACT CUSTOMERS. REPRODUCTION IN WHOLE OR IN PART IS PROHIBITED.
- Page 104 7. A progress bar will be displayed for both the Main and PLC programs. 8. Click Yes for safety box question. THIS DOCUMENT IS INTENDED FOR THE EXCLUSIVE USE OF STERIS SERVICE TECHNICIANS AND CONTRACT CUSTOMERS. REPRODUCTION IN WHOLE OR IN PART IS PROHIBITED.
- Page 105 PLC memory of the table. 12. Please return to Section 7.1.3 and complete steps 16 through 21 to continue calibration.. THIS DOCUMENT IS INTENDED FOR THE EXCLUSIVE USE OF STERIS SERVICE TECHNICIANS AND CONTRACT CUSTOMERS. REPRODUCTION IN WHOLE OR IN PART IS PROHIBITED.
- Page 106 7.2 SETTING FLOOR LOCKS Set the Surgigraphic 6000 Image Guided Surgical Table (Original, 6000CE and Fixed Base versions) floor locks as follows: NOTE: Refer to S 5.4 of the Maintenance Manual for floor lock/unlock principles of operation. ECTION Also refer to Figures 9-1 and 9-2.
- Page 107 Do not use backspace button when all characters are highlighted in blue THIS DOCUMENT IS INTENDED FOR THE EXCLUSIVE USE OF STERIS SERVICE TECHNICIANS AND CONTRACT CUSTOMERS. REPRODUCTION IN WHOLE OR IN PART IS PROHIBITED.
- Page 108 Click YES on the window that appears. A window will now appear stating "Run Write Processing Has Completed. f. Click OK. New K value is now saved in PLC memory. THIS DOCUMENT IS INTENDED FOR THE EXCLUSIVE USE OF STERIS SERVICE TECHNICIANS AND CONTRACT CUSTOMERS. REPRODUCTION IN WHOLE OR IN PART IS PROHIBITED.
- Page 109 Step 4 (D2 + 10). Set second K value to calculated value from Step 5 (D2-10). THIS DOCUMENT IS INTENDED FOR THE EXCLUSIVE USE OF STERIS SERVICE TECHNICIANS AND CONTRACT CUSTOMERS. REPRODUCTION IN WHOLE OR IN PART IS PROHIBITED.
-
Page 110: Hand Control
PLC. To download new value, click CONVERT from the Tool Bar and select CONVERT. When window appears, click YES. When a window appears stating THIS DOCUMENT IS INTENDED FOR THE EXCLUSIVE USE OF STERIS SERVICE TECHNICIANS AND CONTRACT CUSTOMERS. REPRODUCTION IN WHOLE OR IN PART IS PROHIBITED. - Page 111 7. Level tabletop. Push and hold the REVERSE TREND button on hand control. Trendelenburg actuators stop on their own and digital level indicates 17 degrees. If table THIS DOCUMENT IS INTENDED FOR THE EXCLUSIVE USE OF STERIS SERVICE TECHNICIANS AND CONTRACT CUSTOMERS. REPRODUCTION IN WHOLE OR IN PART IS PROHIBITED.
- Page 112 2. Place a digital level on tabletop. Articulate table using TILT L and TILT R buttons until tabletop is level. THIS DOCUMENT IS INTENDED FOR THE EXCLUSIVE USE OF STERIS SERVICE TECHNICIANS AND CONTRACT CUSTOMERS. REPRODUCTION IN WHOLE OR IN PART IS PROHIBITED.
- Page 113 Click OK and jump to step # 6) 4. Now click box that says REGISTER DEVICES. Click on Register Devices Button THIS DOCUMENT IS INTENDED FOR THE EXCLUSIVE USE OF STERIS SERVICE TECHNICIANS AND CONTRACT CUSTOMERS. REPRODUCTION IN WHOLE OR IN PART IS PROHIBITED.
- Page 114 MONITOR, a value appears next to D0 and a small MONITOR STATUS window appears. Close small MONITOR STATUS window. THIS DOCUMENT IS INTENDED FOR THE EXCLUSIVE USE OF STERIS SERVICE TECHNICIANS AND CONTRACT CUSTOMERS. REPRODUCTION IN WHOLE OR IN PART IS PROHIBITED.
- Page 115 10. Double click D43 on rung (400_CE) (53 _Original) (366 _FB). ENTER SYMBOL window appears. Add 10 to D0 value. THIS DOCUMENT IS INTENDED FOR THE EXCLUSIVE USE OF STERIS SERVICE TECHNICIANS AND CONTRACT CUSTOMERS. REPRODUCTION IN WHOLE OR IN PART IS PROHIBITED.
- Page 116 K value on rung (406_CE) (59 _Original) (372_FB) until it satisfies this tolerance. THIS DOCUMENT IS INTENDED FOR THE EXCLUSIVE USE OF STERIS SERVICE TECHNICIANS AND CONTRACT CUSTOMERS. REPRODUCTION IN WHOLE OR IN PART IS PROHIBITED.
- Page 117 2 from each other. If this does not occur, readjust K value on rung (1218_CE) (848 _ Original) (879 _FB) until it satisfies this tolerance. THIS DOCUMENT IS INTENDED FOR THE EXCLUSIVE USE OF STERIS SERVICE TECHNICIANS AND CONTRACT CUSTOMERS. REPRODUCTION IN WHOLE OR IN PART IS PROHIBITED.
- Page 118 “Run Write Processing Has Completed,” click OK. New value is now saved in PLC memory. 4. Test new value by repeating the previous Left Tilt instructions. THIS DOCUMENT IS INTENDED FOR THE EXCLUSIVE USE OF STERIS SERVICE TECHNICIANS AND CONTRACT CUSTOMERS. REPRODUCTION IN WHOLE OR IN PART IS PROHIBITED.
- Page 119 Press REVERSE TREND button until Trendelenburg brake engages and stops Trendelenburg float capability. Measure this angle with a digital level. Angle should be 1 THIS DOCUMENT IS INTENDED FOR THE EXCLUSIVE USE OF STERIS SERVICE TECHNICIANS AND CONTRACT CUSTOMERS. REPRODUCTION IN WHOLE OR IN PART IS PROHIBITED.
- Page 120 Height Up Right Tilt Trend First K Value Actuator Mechanical Limit Mechanical Limits and Sensor Feedback Values Relationships THIS DOCUMENT IS INTENDED FOR THE EXCLUSIVE USE OF STERIS SERVICE TECHNICIANS AND CONTRACT CUSTOMERS. REPRODUCTION IN WHOLE OR IN PART IS PROHIBITED.
- Page 121 9. Verify the program was retained after the battery change by checking table functions per the Maintenance Manual, P/N 764330-472. If successful, reinstall computer box assembly cover THIS DOCUMENT IS INTENDED FOR THE EXCLUSIVE USE OF STERIS SERVICE TECHNICIANS AND CONTRACT CUSTOMERS. REPRODUCTION IN WHOLE OR IN PART IS PROHIBITED.
- Page 122 FIND DEVICE, and then enter the device number in the Device box. All device numbers are shown in bold face font style in the beginning of this document. THIS DOCUMENT IS INTENDED FOR THE EXCLUSIVE USE OF STERIS SERVICE TECHNICIANS AND CONTRACT CUSTOMERS. REPRODUCTION IN WHOLE OR IN PART IS PROHIBITED.
- Page 123 9. Disconnect the Cable from the PLC and replace shrouds © 2011 STERIS Corporation All Rights Reserved THIS DOCUMENT IS INTENDED FOR THE EXCLUSIVE USE OF STERIS SERVICE TECHNICIANS AND CONTRACT CUSTOMERS. REPRODUCTION IN WHOLE OR IN PART IS PROHIBITED.
- Page 124 Maintenance Manual Updates Revision History Date Added Maintenance Manual Update Maintenance Manual Update Subject to Manual Number and Date 8/22/2011 11010-MMU 8/22/2011 Updated Calibration Procedure...
- Page 126 1 8 1 9 2 0 Figure 9-1. SurgiGraphic 6000 (Original Table) Base Assembly 764330-472...
-
Page 127: Surgigraphic 6000 (Original Table) Base Assembly
FIG. & PART UNITS PER ITEM DESCRIPTION NUMBER ASSEMBLY SURGIGRAPHIC 6000 (ORIGINAL TABLE) BASE ASSEMBLY ..ASSEMBLY, ATM6000 Base ............... P 200050 357 COVER, Front Base ................P 200050 358 COVER, Rear Base ................P 200050 286 SCREW, Button Head Cap, #10-32 x 1/4" .......... 24 P 200050 359 BRACKET, Base Mounting Cover ............ -
Page 128: Surgigraphic 6000 (Original Table) Assembly
2 0 4 3 5 4 5 5 2 0 3 9 3 7 8 6 8 7 109 130 2 6 123 124 125 127 132 Figure 9-2. SurgiGraphic 6000 (Original Table) Assembly 764330-472... -
Page 129: Surgigraphic 6000 (Original Table) Assembly (Cont'd)
7 1 7 2 5 9 137 6 7 6 8 6 9 132 133 134 Figure 9-2. SurgiGraphic 6000 (Original Table) Assembly (Cont'd) 764330-472... -
Page 130: Surgigraphic 6000 (Original Table) Assembly
FIG. & PART UNITS PER ITEM DESCRIPTION NUMBER ASSEMBLY SURGIGRAPHIC 6000 (ORIGINAL TABLE) ASSEMBLY ....P 200050 016 WELDMENT, Base ................P 200050 017 CASTER ....................P 200050 018 SCREW, Socket Head Cap, 3/8-16 x 3/4" ........... 20 P 200050 019 LOCKWASHER, 3/8"... -
Page 131: Surgigraphic 6000 (Original Table) Assembly (Cont'd)
PART UNITS PER ITEM DESCRIPTION NUMBER ASSEMBLY SURGIGRAPHIC 6000 (ORIGINAL TABLE) ASSEMBLY (Cont'd) ... P 200050 080 ARM, Pivot ................... P 200050 081 WELDMENT, Lateral Tilt Plate ............P 200050 082 SCREW, Socket Head Cap, 3/8-16 x 7/8" ........... 12 P 200050 076 WELDMENT, Lateral Tilt Braket ............ -
Page 132: Surgigraphic 6000 (Original Table) Assembly (Cont'd)
9 2 128 8 9 103 128 143 9 5 101 102 9 9 100 128 135 136 104 3 6 Figure 9-2. SurgiGraphic 6000 (Original Table) Assembly (Cont'd) 764330-472... - Page 133 PART UNITS PER ITEM DESCRIPTION NUMBER ASSEMBLY SURGIGRAPHIC 6000 (ORIGINAL TABLE) ASSEMBLY (Cont'd) ... P 200050 021 CHAIN, Static 5 Link ................P 200050 022 SCREW, Socket Head Cap, 1/4-20 x 3/4" ........... P 200050 088 STUD, Boot Snap ................12 P 200050 258 RACK, Side/Side Brake ...............
-
Page 134: Surgigraphic 6000Ce Base Assembly (1 Of 3)
1 7 4 7 Figure 9-3. SurgiGraphic 6000CE Base Assembly (1 of 3) 9-10 764330-472... -
Page 135: Surgigraphic 6000Ce Base Assembly (1 Of 3)
FIG. & PART UNITS PER ITEM DESCRIPTION NUMBER ASSEMBLY SURGIGRAPHIC 6000CE BASE ASSEMBLY (1 OF 3) ....SURGIGRAPHIC 6000CE BASE ASSEMBLY (1 OF 3; EXPORT) ... P 200050 016 WELDMENT, Base ................P 200050 017 CASTER ....................P 200050 018 SCREW, Socket Head Cap, 3/8-16 x 3/4"... - Page 136 1 0 1 1 Figure 9-4. SurgiGraphic 6000CE Table Assembly (2 of 3) 9-12 764330-472...
-
Page 137: Surgigraphic 6000Ce Base Assembly (2 Of 3)
FIG. & PART UNITS PER ITEM DESCRIPTION NUMBER ASSEMBLY SURGIGRAPHIC 6000CE BASE ASSEMBLY (2 OF 3) ....SURGIGRAPHIC 6000CE BASE ASSEMBLY (2 OF 3; EXPORT) ... P 200050 064 BREARING, Trendelenburg ..............P 200050 065 ACTUATOR, Trendelenburg ............... P 200050 072 BUSHING ..................... -
Page 138: Surgigraphic 6000Ce Base Assembly (3 Of 3)
Figure 9-5. SurgiGraphic 6000CE Base Assembly (3 of 3) 9-14 764330-472... -
Page 139: Surgigraphic 6000Ce Base Assembly (3 Of 3)
FIG. & PART UNITS PER ITEM DESCRIPTION NUMBER ASSEMBLY SURGIGRAPHIC 6000CE BASE ASSEMBLY (3 OF 3) ....SURGIGRAPHIC 6000CE BASE ASSEMBLY (3 OF 3; EXPORT) ... P 200050 906 HARNESS, Lower Brake ..............P 129360 483 LABEL, Ground ..................P 200050 127 BLOCK, Photo Eye Terminal ............... - Page 140 Figure 9-6. SurgiGraphic 6000CE Top Assembly 9-16 764330-472...
-
Page 141: Surgigraphic 6000Ce Top Assembly
FIG. & PART UNITS PER ITEM DESCRIPTION NUMBER ASSEMBLY SURGIGRAPHIC 6000CE TOP ASSEMBLY ........SURGIGRAPHIC 6000CE TOP ASSEMBLY (EXPORT) ....P 200050 102 PLATE, In/Out Bearing ................. P 200050 863 BRAKE, Float ..................P 200050 090 SCREW, Socket Head Cap, 1/4-20 x 1-1/4" ........25 25 P 200050 092 LOCKWASHER, 1/4"... - Page 142 Figure 9-7. SurgiGraphic 6000CE Exterior Assembly 9-18 764330-472...
-
Page 143: Surgigraphic 6000Ce Exterior Assembly
FIG. & PART UNITS PER ITEM DESCRIPTION NUMBER ASSEMBLY SURGIGRAPHIC 6000CE EXTERIOR ASSEMBLY ......SURGIGRAPHIC 6000CE EXTERIOR ASSEMBLY (EXPORT) ..P 200050 358 COVER, Rear Base ................P 200050 773 COVER, Front ..................P 200050 357 COVER, Front Base ................P 200050 286 SCREW, Button Head Cap, #10-32 x 1/4"... - Page 144 FIG. & PART UNITS PER ITEM DESCRIPTION NUMBER ASSEMBLY SURGIGRAPHIC 6000CE ASSEMBLY (Cont'd) ....... SURGIGRAPHIC 6000CE ASSEMBLY (EXPORT; Cont'd) ....NOT USED P 200050 867 PACKAGE, Literature (Not Shown) ............. – P 200050 920 PACKAGE, Literature (Not Shown) ............. – P 200050 869 CONTROL, Palm (Not Shown) ............
- Page 145 Figure 9-8. SurgiGraphic 6000FB Base Assembly (1 of 3) 9-22 764330-472...
-
Page 146: Surgigraphic 6000Fb Base Assembly (1 Of 3)
FIG. & PART UNITS PER ITEM DESCRIPTION NUMBER ASSEMBLY SURGIGRAPHIC 6000FB BASE ASSEMBLY (1 OF 3) ..... SURGIGRAPHIC 6000FB BASE ASSEMBLY (1 OF 3; EXPORT) ..P 200050 721 WELDMENT, SurgiGraphic 6000FB Base .......... P 200050 024 RAIL, Up/Down Bearing ..............P 200050 025 SCREW, Socket Head Cap, M14 x 50 mm ......... - Page 147 Figure 9-9. SurgiGraphic 6000FB Base Assembly (2 of 3) 9-24 764330-472...
-
Page 148: Surgigraphic 6000Fb Base Assembly (2 Of 3)
FIG. & PART UNITS PER ITEM DESCRIPTION NUMBER ASSEMBLY SURGIGRAPHIC 6000FB BASE ASSEMBLY (2 OF 3) ..... SURGIGRAPHIC 6000FB BASE ASSEMBLY (2 OF 3; EXPORT) ..P 200050 043 PLATE, Front Carriage ................ P 200050 045 SCREW, Socket Head Cap, 3/8-16 x 1" ..........28 28 P 200050 044 PLATE, Rear Carriage ................. - Page 149 Figure 9-10. SurgiGraphic 6000FB Base Assembly (3 of 3) 9-26 764330-472...
-
Page 150: Surgigraphic 6000Fb Base Assembly (3 Of 3)
FIG. & PART UNITS PER ITEM DESCRIPTION NUMBER ASSEMBLY 9-10 SURGIGRAPHIC 6000FB BASE ASSEMBLY (3 OF 3) ..... SURGIGRAPHIC 6000FB BASE ASSEMBLY (3 OF 3; EXPORT) ..P 200050 234 BRACKET, Trendelenburg Sensor Tilt Limit ........P 200050 778 ASSEMBLY, Memory Linear Sensor ........... P 200050 120 SCREW, Round Head Socket Machine, #8-32 x 1-1/4"... - Page 151 1 7 1 8 Figure 9-11. SurgiGraphic 6000FB Top Assembly 9-28 764330-472...
-
Page 152: Surgigraphic 6000Fb Top Assembly
FIG. & PART UNITS PER ITEM DESCRIPTION NUMBER ASSEMBLY 9-11 SURGIGRAPHIC 6000FB TOP ASSEMBLY ........SURGIGRAPHIC 6000FB TOP ASSEMBLY (EXPORT) ....P 200050 100 RAIL, Side/Side Bearing ..............P 200050 102 PLATE, In/Out Bearing Mounting ............P 200050 101 SCREW, Socket Head Cap, M6 x 22 mm ..........14 14 P 200050 103 ASSEMBLY, Stop Block ............... - Page 153 Figure 9-12. SurgiGraphic 6000FB Exterior Assembly 9-30 764330-472...
-
Page 154: Surgigraphic 6000Fb Exterior Assembly
WASHER, #10 Countersunk ............... 34 34 P 200050 368 FLOAT, Front Cover ................P 200050 369 FLOAT, Rear Cover ................P 150830 336 LABEL, STERIS Logo ................P 150830 424 LABEL, STERIS I.D................P 200050 385 LABEL, CPR ..................–... - Page 155 Figure 9-13. SurgiGraphic 6000 (Original Table) Computer Box Assembly 9-32 764330-472...
-
Page 156: Surgigraphic 6000 Computer Box Assembly
FIG. & PART UNITS PER ITEM DESCRIPTION NUMBER ASSEMBLY 9-13 SURGIGRAPHIC 6000 COMPUTER BOX ASSEMBLY ....P 200050 261 BOX, Computer ..................P 200050 287 SWITCH, Emergency ................P 200050 262 ASSEMBLY, PC Board Bracket (Interface Board) ....... P 200050 286 SCREW, Button Head Cap, #10-32 x 1/4"... - Page 157 2TB 27 3TB 27 20 BL 5TB 5 MCE V+1 12.0 14 BL 2TB 25 3TB 25 20 BL 51B 6 MCD V+2 16 RD PSJ1 5 3TB 1 Figure 9-13. SurgiGraphic 6000 (Original Table) Computer Box Assembly (Cont'd) 9-34 764330-472...
- Page 158 For Relays Y25, Y24, For Relay Y26 Y21, and Y20 (as viewed from top) (as viewed from top) Microcontroller Interface PCB (as viewed from top) (as viewed from top) Figure 9-13. SurgiGraphic 6000 (Original Table) Computer Box Assembly (Cont'd) 9-35 764330-472...
- Page 159 Figure 9-14. SurgiGraphic 6000(CE) Computer Box Assembly 9-36 764330-472...
-
Page 160: Surgigraphic 6000Ce Computer Box Assembly
PART UNITS PER ITEM DESCRIPTION NUMBER ASSEMBLY 9-14 SURGIGRAPHIC 6000(CE) COMPUTER BOX ASSEMBLY ..... P 200050 763 BOX, Computer ..................P 200050 287 SWITCH, Emergency Button ............... P 200050 262 ASSEMBLY, PC Board Bracket (Interface Board) ....... P 200050 286 SCREW, Button Head Cap, #10-32 x 1/4"... - Page 161 DB1 11 1B J1 11 16 BL Y20 NOA 3TB 42 20 BL DB1 12 1B J1 13 16 BL Y20 NOB 2TB 10 20 BL DB1 13 1B J1 16 Figure 9-14. SurgiGraphic 6000(CE) Computer Box Assembly (Cont'd) 9-38 764330-472...
-
Page 162: Surgigraphic 6000Ce Computer Box Assembly (Cont'd)
20 BK MCP1 NEUT 3TB 23 20 GN MCP1 GND 2TB GND 149 Schottky 45V 8A Striped 2TB 5 2TB 23 150 Schottky 45V 8A Striped 2TB 8 2TB 23 Figure 9-14. SurgiGraphic 6000(CE) Computer Box Assembly (Cont'd) 9-39 764330-472... -
Page 163: Surgigraphic 6000Ce Computer Box Assembly (Cont'd)
Y21, and Y20 (as viewed from top) (as viewed from top) For Relays Y30, Y27, Y23, Y22, Y12, Y11, Y10 and Y100 As Used on 2TB (as viewed from top) Terminal Block Figure 9-14. SurgiGraphic 6000(CE) Computer Box Assembly (Cont'd) 9-41 764330-472... - Page 164 Figure 9-15. SurgiGraphic 6000(FB) Computer Box Assembly 9-42 764330-472...
- Page 165 PART UNITS PER ITEM DESCRIPTION NUMBER ASSEMBLY 9-15 SURGIGRAPHIC 6000(FB) COMPUTER BOX ASSEMBLY ..... P 200050 802 MOD., Computer Box ................P 200050 806 ASSEMBLY, Safety Relay Bracket ............P 200050 189 SCREW, Button Head Cap, #10-32 x 1/2" ..........
-
Page 166: Surgigraphic 6000Fb Computer Box Assembly
FIG. & PART UNITS PER ITEM DESCRIPTION NUMBER ASSEMBLY 9-15 SURGIGRAPHIC 6000(FB) COMPUTER BOX ASSEMBLY (Cont'd) ................. P 200050 157 RECTIFIER, Bridge ................P 200050 146 CAPACITOR ..................P 200050 147 CLAMP, Capacitor ................P 200050 292 RELAY, 1PDT, 30 Amp ................ - Page 167 6TB-41 Upper Brake 16 YEL Y23-9 6TB-42 16 BLK 2TB-23 Right Term. 16 YEL Y23-5 6TB-43 Lower Brake 18 BL ESR1-A1 SCR-14 16 BL ESR1-6 ESR2-A2 18 BL ESR2-A1 SCR-24 Figure 9-15. SurgiGraphic 6000(FB) Computer Box Assembly (Cont'd) 9-46 764330-472...
- Page 168 PB Indicates switch Item 15 18 BL Y26-TOPR J3P3-12 ( ) Indicates to be attached at final assembly 18 BL Y27-TOPR J3P3-13 Wire mark all wires 1" from both ends 18 BL Y30-TOPR J3P3-14 Figure 9-15. SurgiGraphic 6000(FB) Computer Box Assembly (Cont'd) 9-47 764330-472...
-
Page 169: Power Inlet Panel Assembly
Figure 9-16. Power Inlet Panel Assembly 9-48 764330-472... - Page 170 FIG. & PART UNITS PER ITEM DESCRIPTION NUMBER ASSEMBLY 9-16 POWER INLET PANEL ASSEMBLY ..........P 200050 193 PANEL, Power Inlet ................P 200050 194 INLET, Power ..................P 200050 464 CORD, Power (Not Shown) ..............42 P 200050 465 WIRE, 14 AWG, Red (Not Shown) ............
-
Page 171: Remote Panel Assembly
Figure 9-17. Remote Panel Assembly 9-50 764330-472... - Page 172 FIG. & PART UNITS PER ITEM DESCRIPTION NUMBER ASSEMBLY 9-17 REMOTE PANEL ASSEMBLY ............P 200050 206 PLATE, Remote Panel ................. P 200050 633 CONNECTOR, Palm Control, Female ..........P 200050 632 CONNECTOR, Foot Control, Female ..........P 200050 634 CONNECTOR, Hand Control, Female ..........
-
Page 173: Rear Enclosure Assembly
1 2 1 7 1 0 1 1 Figure 9-18. Rear Enclosure Assembly 9-52 764330-472... - Page 174 FIG. & PART UNITS PER ITEM DESCRIPTION NUMBER ASSEMBLY 9-18 REAR ENCLOSURE ASSEMBLY (ORIGINAL TABLE) ....REAR ENCLOSURE ASSEMBLY (6000CE TABLE) ......P 200050 145 ENCLOSURE, Modified Rear .............. P 200050 755 ENCLOSURE, Modified Rear .............. P 200050 146 CAPACITOR ..................P 200050 147 CLAMP, Capacitor ................
-
Page 175: Battery Box Assembly
SurgiGraphic 6000FB Figure 9-19. Battery Box Assembly 9-54 764330-472... - Page 176 FIG. & PART UNITS PER ITEM DESCRIPTION NUMBER ASSEMBLY 9-19 BATTERY BOX ASSEMBLY .............. BATTERY BOX ASSEMBLY (EXPORT) ..........BATTERY BOX ASSEMBLY (SURGIGRAPHIC 6000FB) ....P 200050 745 WELDMENT, Battery Box ..............P 200050 746 STRAP, Battery ..................P 093908 637 BATTERY .....................
-
Page 177: Relay Bracket Assembly
Figure 9-20. Relay Bracket Assembly 9-56 764330-472... - Page 178 FIG. & PART UNITS PER ITEM DESCRIPTION NUMBER ASSEMBLY 9-20 RELAY BRACKET ASSEMBLY ............P 200050 748 BRACKET, Relay Mounting ..............P 200050 767 RELAY, Emergency Stop ..............P 200050 747 BRACKET, Safety Relay Mounting ............. P 200050 885 RAIL, Din, 2.5" ..................P 200050 769 SOCKET, Battery Timer ...............
- Page 179 P: Stamp "08/05/2010 LIVE DOCUMENT" C: Document Manufacturing Front Cover changes/manual errors and clarifications A: Stamped to show Live Document Date Cover) 9-1/ Surgigraphic 6000 P: item #29 Part number P200050-559, is no longer available (Original Table) Base C: Manufacturing Change Assembly A: Order part number P200050-869 for replacement palm control.
Need help?
Do you have a question about the SurgiGraphic 6000 and is the answer not in the manual?
Questions and answers