Table of Contents
Advertisement
Quick Links
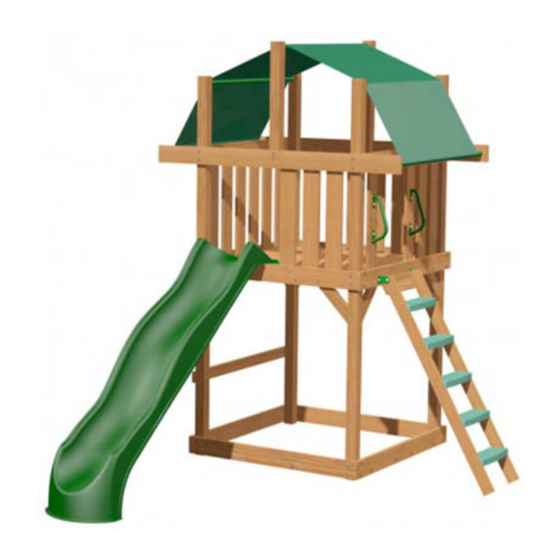
WILLIAMSBURG
TENT
MODEL #SH 3200-000
with
ROOF
ASSEMBLY MANUAL
Carefully read the owner's manual and all instructions
All hardware on this set is
before assembling your play set. It provides additional
specially coated for corrosion
information on the care and use of your play set.
resistance.
Creative Playthings takes great care to design its products
If non-Creative Playthings
with your child's safety in mind. However, only with careful
supervision and proper safety instructions, can you be
hardware is used, it must be
assured of safe play time on any product designed for
galvanized or stainless steel.
children.
This product is intended for single family home/residential use only
and not intended for use in any public setting. Placement in any public
setting constitutes a misuse of this product.
Creative Playthings
33 Loring Drive, Framingham, MA 01702
www.creativeplaythings.com
Advertisement
Table of Contents

Subscribe to Our Youtube Channel
Related Manuals for Creative Playthings WILLIAMSBURG SH 3200-000


Summary of Contents for Creative Playthings WILLIAMSBURG SH 3200-000
- Page 1 Creative Playthings takes great care to design its products If non-Creative Playthings with your child’s safety in mind. However, only with careful supervision and proper safety instructions, can you be...
-
Page 2: Assembly Safety
• Avoid assembling your play set in poor weather conditions. • Wear proper clothing and safety equipment (safety glasses, boots, and gloves) while assembling your play set. WILLIAMSBURG WITH TENT ROOF Page 2 © Copyright 2005, Creative Playthings 19687-100 Rev U (09-20) - Page 3 Safe play area using recommended ground cover. Landscape Timbers 6' from WHICHEVER play structure. IS GREATER A FALL ONTO A HARD SURFACE COULD RESULT IN SERIOUS INJURY. WILLIAMSBURG WITH TENT ROOF Page 3 © Copyright 2005, Creative Playthings 19687-100 Rev U (09-20)
-
Page 4: Hardware Bag Contents
Screw - #10 x 2” 17020-113 Screw - #10 x 2-1/2” 17036-1202 Lag Screw - 5/16 x 3” We have packaged more hardware than is required for assembly. WILLIAMSBURG WITH TENT ROOF Page 4 © Copyright 2005, Creative Playthings 19687-100 Rev U (09-20) -
Page 5: Pre Assembly Information
Assembly PRE ASSEMBLY INFORMATION All hardware on this set is specially coated for corrosion resistance. If non- Creative Playthings hardware is used, it MUST be galvanized or stainless steel. CREATIVE PLAYTHINGS PLAY SETS USE A FEW STANDARD CONNECTIONS. BECOMING FAMILIAR WITH THESE CONNECTIONS WILL SIMPLIFY ASSEMBLY AND INSURE A SAFER PLAY PRODUCT FOR YOUR CHILDREN. - Page 6 PLAY SET VIEW WILLIAMSBURG WITH TENT ROOF Page 6 © Copyright 2005, Creative Playthings 19687-100 Rev U (09-20)
-
Page 7: Component Parts
Mounts have not been included, contact customer service. included, contact customer service. 31820-102 Swing Mount - 4 x 4 x 39" 3 ea 32404-102 Wall Slat - 5/4 x 6 x 31-1/2" WILLIAMSBURG WITH TENT ROOF Page 7 © Copyright 2005, Creative Playthings 19687-100 Rev U (09-20) -
Page 8: Maintenance Instructions
MAINTENANCE INSTRUCTIONS YOUR CREATIVE PLAYTHINGS PLAY SET IS STAINED AT OUR FACTORY. STAINING IS NOT NEEDED AT THE TIME OF INITIAL ASSEMBLY. Re-staining Information: • Pigmented, exterior, water repellent stains are recommended and will provide an excellent barrier against moisture without hiding the natural wood grain or leaving a film that may later crack or peel. - Page 9 * Note: A Hex Bolt Assembly consists of one Hex Bolt, one Lock Washer, one Flat Washer and one Repeat with the other posts, sandbox end and Weld Nut. platform end. WILLIAMSBURG WITH TENT ROOF Page 9 © Copyright 2005, Creative Playthings 19687-100 Rev U (09-20)
- Page 10 You may need to loosen or remove one of the bolts holding the platform side. Repeat with the other 56-1/2" Tent Pipe (AA) and the right corner posts. Restore and tighten the bolts holding the platform sides. WILLIAMSBURG WITH TENT ROOF Page 10 © Copyright 2005, Creative Playthings 19687-100 Rev U (09-20)
- Page 11 Attach each inside stringer using two 5/16 x 4" lag screws and flat washers as shown. Make sure the outside stringers and inside stringers align across the top edge. WILLIAMSBURG WITH TENT ROOF Page 11 © Copyright 2005, Creative Playthings 19687-100 Rev U (09-20)
- Page 12 Place two Narrow Platform Boards (I) tightly against the platform ends on top of the stringers. Fasten the narrow platform boards to the stringers with six #10 x 2" screws on each board. WILLIAMSBURG WITH TENT ROOF Page 12 © Copyright 2005, Creative Playthings 19687-100 Rev U (09-20)
- Page 13 Arrange the parts so the holes at the center align near the top edge. Note: you will need to loosen these fasteners when installing the tent in a later step. WILLIAMSBURG WITH TENT ROOF Page 13 © Copyright 2005, Creative Playthings 19687-100 Rev U (09-20)
- Page 14 Secure the tent pipe to the end tent support using one #10 x 2-1/2" screw. Repeat with the other three ends of the tent pipes. WILLIAMSBURG WITH TENT ROOF Page 14 © Copyright 2005, Creative Playthings 19687-100 Rev U (09-20)
-
Page 15: Step 20 - Safety Rail
Fasten the safety rail to the corner posts on the same side of the tower as the swings using two 5/16 x 3" lag screws with 5/16" flat washers as shown. Use the pre-drilled holes provided. WILLIAMSBURG WITH TENT ROOF Page 15 © Copyright 2005, Creative Playthings 19687-100 Rev U (09-20) - Page 16 Use four #10 x 1-5/8" screws in each wall slat. Leave approximately 3-1/8" between each wall slat. Parts have been omitted from the illustration for clarity. #10 x 1-5/8" Screws 1/2" gap WILLIAMSBURG WITH TENT ROOF Page 16 © Copyright 2005, Creative Playthings 19687-100 Rev U (09-20)
-
Page 17: Step 25 - Hand Grips
Drive the screws until the heads are flush with the top of the slide mount. Do not over-tighten; over-tightening may cause the points of the screws to protrude through the bottom of the platform boards. WILLIAMSBURG WITH TENT ROOF Page 17 © Copyright 2005, Creative Playthings 19687-100 Rev U (09-20) - Page 18 Please fill out the warranty card on the back of your owners manual. Your completed warranty card will allow us to quickly process warranty claims. Thank you. WILLIAMSBURG WITH TENT ROOF Page 18 © Copyright 2005, Creative Playthings 19687-100 Rev U (09-20)
Need help?
Do you have a question about the WILLIAMSBURG SH 3200-000 and is the answer not in the manual?
Questions and answers