Table of Contents
Advertisement
Quick Links
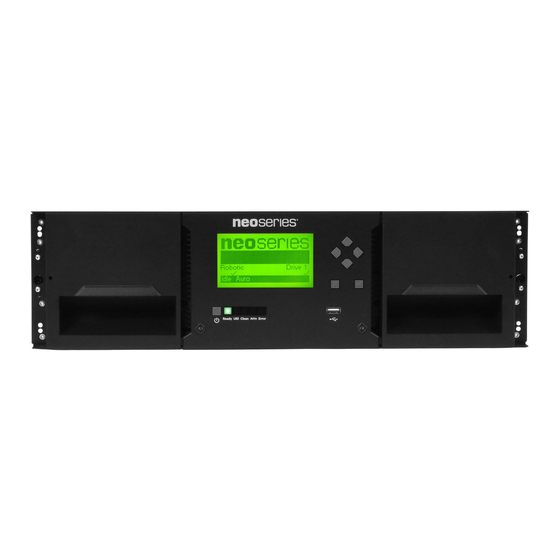
Quick Start Guide
NEOxl 40
3U Tape Library Base Unit
and Expansion Modules
Step 1
It is essential that the product be registered because technical and warranty support
is not available until then.
For an existing customer:
1. Go to
http://support.overlandstorage.com/
support
page.
2. Enter your e-mail address and password, and
>
then press Enter or click the right arrow (
).
3. At the Support Home page, click Register New.
4. Enter the requested information and click Submit.
Your warranty certificate will be emailed to you. Follow the instructions in the
email to complete the process.
For a new customer, go to the
New User Registration
instructions.
The serial number is located on the bottom left cover at the rear.
NOTE: You will receive a confirmation e-mail from Overland with instructions on how to
complete the registration process.
– 1 –
Step 2
WARNING:
people be used to lift the module out of the box to prevent injury.
WARNUNG:
*10400846-001*
10400846-001
des Moduls, dass mindestens zwei Personen das Modul aus der Verpackung heben.
AVERTISSEMENT:
personnes au moins pour soulever l'module hors de la boîte pour éviter les blessures.
NOTE: If the temperature in the room where the module will be installed varies by 15º C
(30º F) from the room where the boxed module was stored, allow the module to acclimate to
the surrounding environment for at least 12 hours before unpacking it.
1. Using two people, remove the module from its box and set it on a secure surface.
2. Remove any packaging materials and tape from the module.
3. For the base module, remove the robotics insertion foam:
a. Using two small screwdrivers, unlock and remove the top cover plate.
b. Lift the front edge about 5 in. (12cm) and pull forward to disengage the cover;
set the cover aside.
c. Remove the foam from the center.
d. If you are only installing the base module, replace the cover.
Step 3
A NEOxl 3U tape library module comes with a rack kit for easy installation and
securing of the module into a 19-inch (EIA-310) rack.
IMPORTANT: Two-post telco-style or other racks less than 29 inches in depth will NOT
support these modules.
Enter
Enter
Install the Rack Rails
1. Determine the location in your rack for your module to be installed and, using a
pencil, mark the location on each vertical rail in your rack.
It is recommended to start at the lowest position of the rack for stability. The
bottom mark should be at the lowest narrow gap.
page and follow the
NOTE: The modules require 3U (5.25 in.) of rack space each.
Reserve 3U (5.25 in.)
For Each Module
2. On the front of the rack, mount the left and right adapter blocks with the lower
fixed nut in the middle hole of the bottom 1U space reserved for the module.
3. Secure the adapters with a screw through the front into one of the middle holes.
4. Mount the rear adapters making sure they are level with the front ones.
5. Mount the LH Rackmount rail to the left adapter blocks with the tray flange
parallel to the floor and facing inward.
Due to the weight of the module, it is recommended that at least two
Um Verletzungen zu vermeiden, empfehlen wir aufgrund des Gewichts
En raison du poids du module, il est recommande d'utiliser deux
Each EIA unit (1U)
&
starts at a narrow
gap and has three
holes and two wide
Adapter
gaps above it
Block
Wide Gaps within
the EIA unit
Narrow Gaps
between EIA units
– 2 –
6. Mount the RH Rackmount rail to the right adapter blocks.
LH Rail
RH Rail
Insert the Module in the Rack
WARNING:
To avoid injury, it is recommended that a mechanical lifter (or at least two
people) be used for rack installation or removal. Use care during rack installation or
removal to avoid accidentally tilting or tipping the rack, causing damage or personal
injury.
WARNUNG:
Um Verletzungen zu vermeiden, empfehlen wir zur Rack-Installation oder
-Deinstallation die Nutzung einer mechanischen Hebehilfe (oder mindestens zwei
Personen). Seien Sie vorsichtig bei der Rack-Installation oder -Entnahme, um ein
versehentliches Kippen des Racks zu vermeiden und das Rack nicht zu beschädigen
bzw. sich selbst zu verletzen.
AVERTISSEMENT:
Afin d'éviter des blessures pendant l'installation, il est
recommande d'utiliser un monte-charge (ou au moins deux personnes) pour élever ou
aligner l'module. Faites attention lorsque vous insérez ou retirez l'module d'un
support, pour empêcher le déversement accidentel de la crémaillère causant des
dommages et des blessures.
1. Using the mechanical lifter, position the module in front of the rack, aligned with
the rails.
2. Slide the module onto the rail flanges and into the rack until it stops.
3. Secure it to the rack with the recessed Phillips screws in the middle of the
front flanges of the module to the adapter's top fixed nut.
Recessed Screws
– 3 –
Advertisement
Table of Contents

Summary of Contents for Overland Storage NEOxl 40
- Page 1 Due to the weight of the module, it is recommended that at least two people be used to lift the module out of the box to prevent injury. NEOxl 40 WARNUNG: Um Verletzungen zu vermeiden, empfehlen wir aufgrund des Gewichts...
- Page 2 You can get additional technical support on the Internet at the Overland-Tandberg Contact Support page, or by contacting Overland Storage using the information found on the Contact Us page on •...


Need help?
Do you have a question about the NEOxl 40 and is the answer not in the manual?
Questions and answers