
Related Manuals for StarTech.com FPWTLTPORT


Summary of Contents for StarTech.com FPWTLTPORT
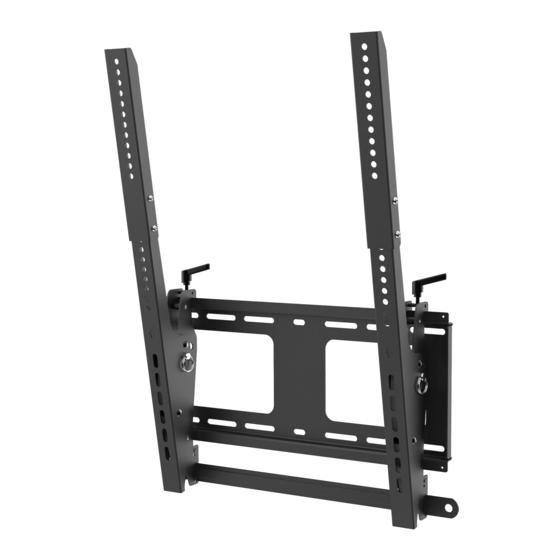
- Page 1 Wall-Mounted Tilting Display Mount - Portrait Actual product may vary from photos User Manual SKU#: FPWTLTPORT For the latest information and specifications visit www.startech.com/FPWTLTPORT Manual Revision: 11/12/2020...
- Page 2 This manual may make reference to trademarks, registered trademarks, and other protected names and/or symbols of third-party companies not related in any way to StarTech.com. Where they occur these references are for illustrative purposes only and do not represent an endorsement of a product or service by StarTech.com, or an endorsement of the product(s) to which this manual...
-
Page 3: Safety Statements
Säkerhetsåtgärder • Installation och/eller montering får endast göras av behöriga yrkespersoner och enligt gällande lokala förordningar för säkerhet och byggnormer. To view manuals, videos, drivers, downloads, technical drawings, and more visit www.startech.com/support... -
Page 4: Warning Statements
• Certifique-se de que o peso do monitor não excede a capacidade de peso deste produto. Se exceder a capacidade de peso, pode sofrer ferimentos pessoais ou danos no equipamento. Este produto pode suportar o seguinte peso: 50 kg. To view manuals, videos, drivers, downloads, technical drawings, and more visit www.startech.com/support... - Page 5 • Asegúrese de que el peso del monitor no exceda la capacidad de carga de este producto. Si se excede dicha capacidad se podrían producirse lesiones personales o daños al equipo. Este producto tiene la siguiente capacidad de carga: 50 kilogramos. To view manuals, videos, drivers, downloads, technical drawings, and more visit www.startech.com/support...
- Page 6 • niet overschrijdt. Als u de gewichtscapaciteit overschrijdt, kan persoonlijk letsel of schade aan de apparatuur ontstaan. Dit product ondersteunt het volgende gewicht: 50 kg. To view manuals, videos, drivers, downloads, technical drawings, and more visit www.startech.com/support...
- Page 7 い。 確認を怠った場合、 傷害を負う恐れや物的損害が発生する恐れがあり ます。 壁の構造が、 取り付けるモニター重量の最低4倍まで支持できるだけ の強度を持っていなければなりません。 • 本製品に同梱されている取付け金具は、 ご使用になる壁の構造に対して十 分ではない場合があります。 本製品を壁面に取り付ける時、 十分な専門知 識が不足していると判断された場合、 専門業者に連絡を取って、 本製品の取 り付けを行ってもらうか、 お客様の壁の構造に適した取り付け方法を教えて もらってから取り付けを行って下さい。 • 取り付けるモニターの重量が、 本製品で定められた最大積載重量を超えな いようにして下さい。 最大積載重量をオーバーした場合、 傷害を負う恐れや モニターや本製品に損害が発生する恐れがあります。 本製品は、 最大50kg までのモニター重量に対応しています。 To view manuals, videos, drivers, downloads, technical drawings, and more visit www.startech.com/support...
- Page 8 In caso di superamento della capacità di supporto potrebbero verificarsi danni a persone o apparecchiature. Il prodotto è in grado di supportare i seguenti pesi: 50 kg. To view manuals, videos, drivers, downloads, technical drawings, and more visit www.startech.com/support...
-
Page 9: Table Of Contents
Table of Contents Compliance Statements ................i Safety Statements ..................ii Warning Statements ................iii Product Diagram ..................1 Front View ..............................1 Side View ..............................2 Rear View ..............................3 Product Dimensions ................4 Product Information ................5 Package Contents ............................. 5 Requirements ..................7 Technical Specifications .......................... 8 Installation ....................10 Fasten the Tilting Display Mount to a Wall .................. -
Page 10: Product Diagram
• the pivot point for the TV Tilt Mount the Display Mounting • Brackets Wall Plate Evenly distributes the weight of the • TV across the Mounting Surface To view manuals, videos, drivers, downloads, technical drawings, and more visit www.startech.com/support... -
Page 11: Side View
Insert to set the Tilt • Three configurations for tilting • Tilt Pins the Display Mount - 0°, 5°, or 10° Display Mounting Brackets that hold the Display • Brackets To view manuals, videos, drivers, downloads, technical drawings, and more visit www.startech.com/support... -
Page 12: Rear View
Secure the TV to the Display Mount • to deter theft Security Bar Requires a Padlock (sold separately) • Secure the Display Mounting • Brackets and Extension Brackets Bracket Screws to the Display Mount To view manuals, videos, drivers, downloads, technical drawings, and more visit www.startech.com/support... -
Page 13: Product Dimensions
Product Dimensions To view manuals, videos, drivers, downloads, technical drawings, and more visit www.startech.com/support... -
Page 14: Product Information
M8 x 30 mm M6 x 30 mm M5 x 14 mm M6 x 14 mm Screws Screws Screws Screws Qty: 4 Qty: 4 Qty: 4 Qty: 4 To view manuals, videos, drivers, downloads, technical drawings, and more visit www.startech.com/support... - Page 15 Rectangular M8 x 50 mm Short Spacers Long Spacers Washers Screws Qty: 8 Qty: 8 Qty: 4 Qty: 4 Concrete Round Washers - Mounting Screws Anchors Large Qty: 6 Qty: 6 Qty: 6...
-
Page 16: Requirements
For the latest requirements, please visit www.startech.com/FPWTLTPORT Phillips Head Screwdriver • Spirit/Bubble Level • Mounting Surface • (Optional) Two People for the Installation • (Optional - for locking) Padlock • To view manuals, videos, drivers, downloads, technical drawings, and more visit www.startech.com/support... -
Page 17: Technical Specifications
Weight Capacity Up to 110 lb. (50 kg) VESA Compatible 200 x 200 200 x 300 200 x 400 300 x 300 400 x 400 400 x 600 To view manuals, videos, drivers, downloads, technical drawings, and more visit www.startech.com/support... - Page 18 Minimum Profile to Wall 3.1” (78 mm) Rotation +3° to -3° Tilt Range 0° -5° -10° To view manuals, videos, drivers, downloads, technical drawings, and more visit www.startech.com/support...
-
Page 19: Installation
Insert 4 Extension Bracket Screws - M6 x 6 mm through the Extension Bracket and into the Display Mounting Bracket. Use the Phillips Head Screwdriver to tighten the 4 Extension Bracket Screws - M6 x 6 mm. To view manuals, videos, drivers, downloads, technical drawings, and more visit www.startech.com/support... -
Page 20: Adjust The Tilt Angle
Lower 5° Tilt Pin Holes. With the Display Mounting Brackets • 10° tilted all the way forward, align the Upper Tilt Pin Holes. To view manuals, videos, drivers, downloads, technical drawings, and more visit www.startech.com/support... -
Page 21: Attach The Display Mounting Brackets To A Tv
(Optional) Place a Round Washer and the necessary number of Short and/or Long Spacers over each VESA Mounting Hole. Use the Spacer Combination Table to determine the number of Spacers for the application. (Figure 3) To view manuals, videos, drivers, downloads, technical drawings, and more visit www.startech.com/support... - Page 22 Mounting Holes. The arrows on the Display Mounting Brackets should be pointing towards the side of the TV that is intended to be the top when the TV is in the portrait position. To view manuals, videos, drivers, downloads, technical drawings, and more visit www.startech.com/support...
- Page 23 Figure 4 Thread the appropriately sized M-Type Screws (ex. M5 x 14 mm Screws) through the Rectangular Washers, Display Mounting Bracket Assemblies, (Optional) Spacers, and into your TV. To view manuals, videos, drivers, downloads, technical drawings, and more visit www.startech.com/support...
-
Page 24: Hang The Tv On The Wall Plate
Hang the TV on the Wall Plate Loosen the 2 Screws, located at the bottom of the Display Mounting Bracket Assemblies, with the Phillips Head Screwdriver. (Figure 5) Screw Phillips Head Screwdriver Figure 5 To view manuals, videos, drivers, downloads, technical drawings, and more visit www.startech.com/support... -
Page 25: (Optional) Security Bar Installation
Slide the Security Bar through the slots at the base of the Display Mounting Bracket Assemblies. (Figure 6) Slot Figure 6 Install a Padlock through the hole in the Security Bar. (Figure 7) To view manuals, videos, drivers, downloads, technical drawings, and more visit www.startech.com/support... -
Page 26: Operation
Assemblies Clockwise to raise the height of the TV and Counterclockwise to lower the TV. The Levers have to be rotated evenly so that the height setting is the same on both sides. (Figure 8) To view manuals, videos, drivers, downloads, technical drawings, and more visit www.startech.com/support... - Page 27 Figure 8 To view manuals, videos, drivers, downloads, technical drawings, and more visit www.startech.com/support...
-
Page 28: Warranty Information
Limitation of Liability In no event shall the liability of StarTech.com Ltd. and StarTech.com USA LLP (or their officers, directors, employees or agents) for any damages (whether direct or indirect, special, punitive, incidental, consequential, or otherwise), loss of profits, loss of business, or any pecuniary loss, arising out of or related to the use of the product exceed the actual price paid for the product. - Page 29 StarTech.com is an ISO 9001 Registered manufacturer of connectivity and technology parts. StarTech.com was founded in 1985 and has operations in the United States, Canada, the United Kingdom and Taiwan servicing a worldwide market.
Need help?
Do you have a question about the FPWTLTPORT and is the answer not in the manual?
Questions and answers