Advertisement
Quick Links
IMPORTANT NOTICE ABOUT LICENSING YOUR KIT TRAILER
YOUR MANUFACTURER CERTIFICATE OF ORIGIN (MSO) IS REQUIRED TO LICENSE THIS
TRAILER.
YOUR MSO WITH VIN TAG IS PROVIDED TO YOU BY YOUR DEALER (THE RESELLER
FROM WHOM YOU BOUGHT THIS TRAILER).
CONTACT YOUR DEALER FOR THE STATUS OF RECEIVING YOUR MSO WITH VIN TAG
STATE LAWS ALLOW YOU 30 DAYS TO REGISTER YOUR TRAILER WITH THE DMV.
SIMPLY SAVE YOUR SALES INVOICE IN YOUR GLOVE BOX WHEN OPERATING WITHIN
YOUR GRACE PERIOD.
To license this trailer at the DMV or transfer ownership of your trailer before licensing it,
you MUST have your Manufacturer Certificate of Origin (MSO). This statement is the trailer's
"birth certificate". Motor vehicle law in most states require trailer registration; the DMV gives you
a license plate upon registration.
Contact your local DMV for any additional requirements in your jurisdiction.
Your trailer VIN tag is also included with your MSO, and must be affixed to the driver
side of your trailer's drawbar as part of your assembly procedures and in event of DMV
inspection. If you do not register your trailer, SAVE YOUR MSO for the future need, and apply
your VIN tag as instructed
Copyright© 2021, Lets Go Aero, Inc., All rights reserved.
Trailer Manual-010122Rev
LittleGiant & SpecOPS Trailers
ASSEMBLY & OPERATING INSTRUCTIONS
BE SURE TO READ THIS NOTICE!
Page 1 of 15
Table of Contents:
Trailer Licensing Notice
and Cleaning
Procedures
Pg. 1
Pg. 2
Pg. 11
Pg. 11
Pg. 12
Pg. 15
Revision Date: 010122
Advertisement

Related Manuals for Let's Go Aero LittleGiant


Summary of Contents for Let's Go Aero LittleGiant
-
Page 1: Table Of Contents
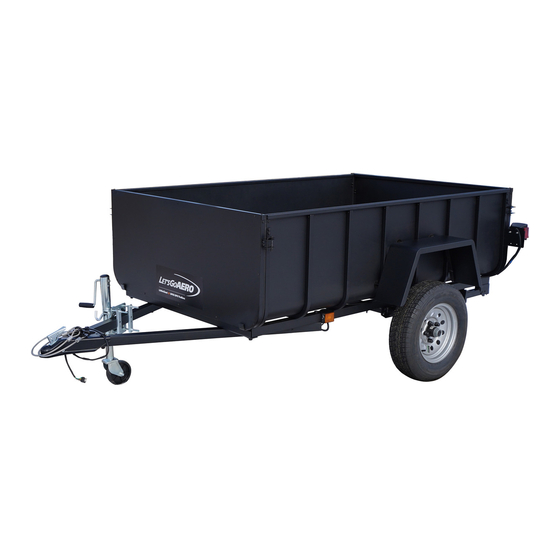
LittleGiant & SpecOPS Trailers ASSEMBLY & OPERATING INSTRUCTIONS IMPORTANT NOTICE ABOUT LICENSING YOUR KIT TRAILER BE SURE TO READ THIS NOTICE! YOUR MANUFACTURER CERTIFICATE OF ORIGIN (MSO) IS REQUIRED TO LICENSE THIS TRAILER. YOUR MSO WITH VIN TAG IS PROVIDED TO YOU BY YOUR DEALER (THE RESELLER FROM WHOM YOU BOUGHT THIS TRAILER). - Page 2 LITTLEGIANT & SPECOPS TRAILERS ASSEMBLY TOOLS QTY. TOOLS REQUIRED 3/4” WRENCH 1/2” WRENCH 1/2” SOCKET WRENCH FLAT HEAD SCREWDRIVER POWER DRILL W/ PHILLIPS BIT 7/16” WRENCH, CRIMPING TOOL PARTS QTY. DESCRIPTION AXLE WIRE HARNESS COUPLER SAFETY CABLE WHEEL A-FRAME TUBE...
- Page 3 2 QTY. 1/4-20 x 3.5” Bolt 4 QTY. End Gate Body Latch 2 QTY. 1/4-20 x 2” Bolt 2 QTY. 1/4-20 Nylock Nut 4 QTY. Spacers (Silver) 8 QTY. Flat Washer * LittleGiant Trailer Hardware ** Spec Ops Trailer Hardware Page 3 of 15...
-
Page 4: Assembly
ASSEMBLY PREPARATION: Place axle [A] on two jack stands (Optional & Recommended, user supplied, not included). Unless otherwise noted, for the following steps “assembly fit” all nuts and bolts, meaning snug but with a bit of play for alignment of parts from one step to the next. STEP 1: STEP 4: TOOLS: TWO 3/4”... - Page 5 STEP 6a: STEP 9 (continued): TOOLS: TWO 9/16” WRENCHES Attach trailer Jack [N] to the passenger side (curb Position all U-Tubes one the frame, U1 will be in the side) A-Frame tube [F]. [Fg 9] front and U3 will be rear with the 6 A2’s in the middle. Tighten nuts and bolts securely.
- Page 6 STEP 8: TOOLS: 1/2” ALLEN WRENCH AND FLAT HEAD SCREW DRIVER Attach [ I & J1] with eight bolts, pin nuts and washers. Note how the button end of each pin nut must engage the side of the tube. Remove the eight 4” bolts used as pins. Attach [ I & J2]. Assembly fit all 16 bolts first. Then tighten all bolts / pin nuts securely.
- Page 7 STEP 16: STEP 12: TOOLS: TWO 1/2” WRENCHES TOOLS: TWO 1/2” WRENCHES Attach one tail At each [Fg. 26] light bracket corner of the on each side trailer, attach of the rear one end gate trailer. [Fg. 26] body latch. [Fg.
- Page 8 Install fenders as shown [M]. [Fg. 30] Depending on the model purchased, use 2” length Carriage Bolts for LittleGiant Trailer (model T02035) and 3” length Carriage Bolts for SpecOps Trailer (model T00366). Unused size bolts may be discarded. [Fg. 30-31] [Fg.
-
Page 9: Safe Use & Operation
Be sure to follow these guidelines to prevent possible hazards from misuse: Do NOT exceed the trailer maximum load weight capacity and Gross Vehicle Weight Rating (G.V.W.R.) as follows: LittleGiant Trailer Empty Weight = 480 lbs Maximum payload is 1,500 lbs... -
Page 10: Inspection, Maintenance
Steps for Determining Correct Load Limit (1) Locate the statement “The weight of cargo should never exceed XXX kg or XXX lbs” on your vehicle’s placard. (2) This figure equals the available amount of cargo and luggage load capacity. (3) Determine the combined weight of luggage and cargo being loaded on the vehicle. That weight may not safely exceed the available cargo and luggage load capacity. - Page 11 • The LittleGiant Trailer has a four flat-connector wire style plug. This is a common pin hole configuration for the wir- ing of to wables. Check to verify your vehicle’s wiring plug style. Should it differ, consult your local hitch installer for a wire plug adaptor.
- Page 12 Bearing Lubrication Below is a listing of approved lubrication. ubrication pecificationS Grease Dropping Point 230°C (446°F) Minimum Viscosity Index 80 Mini- The grease used should meet the requirements as shown in the chart above. The following amounts of grease should be used: •...
- Page 13 Rubber Torsion Axle Suspension Except for periodic inspection of the fasteners used to attach the rubber torsion axle to the trailer frame and a visual inspection of the welds, no other suspension maintenance is required. However, all maintenance regarding hubs, drums, rotors, bearing, wheels, and tires, should be adhered to.
- Page 14 The proper procedure for the attachment of your wheels is listed at right. 1. Start all bolts or nuts by hand to prevent cross threading. 2. The tightening of the fasteners should be done in stages. Following the recommended sequence (illustration, right), tighten fasteners per the wheel torque chart below.
-
Page 15: Warranty / Repair
Maintenance Schedule Below is a maintenance schedule for routine maintenance of your trailer. 3 Months 6 Months 12 Months Function 500 Mile Item Required Intervals 1000 Miles 3000 Miles 6000 Miles • Inspect for Hub/Drum/Rotor abnormal wear • Bearings (Sure Lube- Replenish grease Bearing Lube) in the system...
Need help?
Do you have a question about the LittleGiant and is the answer not in the manual?
Questions and answers