Advertisement
Quick Links
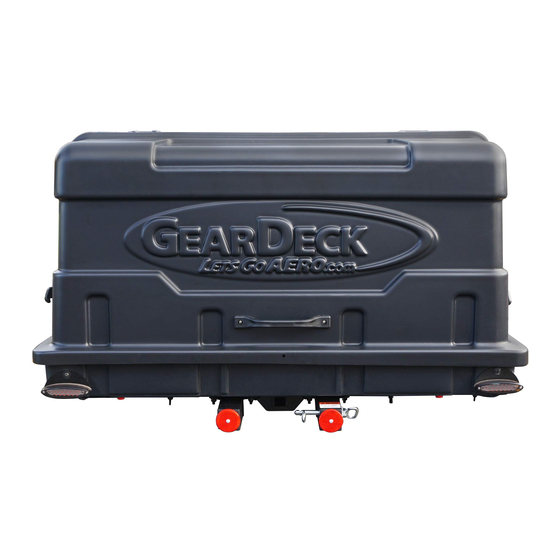
For 2in Receivers Hitches and Class II Minimum Tow Rating.
Weighs 80 lbs empty. Rated for up to 300 lbs of cargo payload.
For product updates and to register your product, visit the LetsGoAero.com/registration
For More Information & Accessories, Visit our Website - www.LetsGoAero.com
For Technical Support & Product Questions Contact Us at 877-464-2376 or 719- 630-3800
NOTICE: All Manual information is subject to change without notice. Revised editions
will be available for free download at LetsGoAero.com. Manual information is considered
factual until made obsolete by a revised version.
Follow this QR-Code or visit
LetsGoAero.com/manuals to check for an updated version:
Copyright© 2019, Lets Go Aero, Inc., All rights reserved.
GDH00604-121219Rev
PRODUCT MANUAL
Installation & Safe Use Operation Highlights
Email: Support@LetsGoAero.com
Page 1 of 11
17 cu ft. Enclosed Slide-out Cargo Carrier
Patent Numbers 6,409,203; 6,609,725; D717718 Patents Pending
GearDeck®
Part No. H00604
Revision Date: 12/12/19
Advertisement

Related Manuals for Let's Go Aero GearDeck H00604


Summary of Contents for Let's Go Aero GearDeck H00604
- Page 1 GearDeck® 17 cu ft. Enclosed Slide-out Cargo Carrier Part No. H00604 PRODUCT MANUAL Installation & Safe Use Operation Highlights For 2in Receivers Hitches and Class II Minimum Tow Rating. Weighs 80 lbs empty. Rated for up to 300 lbs of cargo payload. For product updates and to register your product, visit the LetsGoAero.com/registration For More Information &...
-
Page 2: Parts List
PARTS LIST PARTS PARTS QTY. DESCRIPTION QTY. DESCRIPTION TWINTUBE SPINE DRAIN PLUGS RETAINER CLIP FIXED LID 5/8” SILENT HITCH PIN ® PIVOT LID (W/ LOGO) 5/8” SILENT HITCH PIN WITH HANDLE HANDLE 5/8” LOCK WASHER 1/4-20 X1” BUTTON-HEAD CAP BOLTS 5/8”... - Page 3 WARNING: Silent Hitch Pin must be secured in hitch with wrench before transit. STEP 3 Rub the Wax Block [K] all over [Fg. 6] [Fg. 7] along the all four sides of the TwinTube [A] Spine’s dual tubes. [Fg. 6 & 8] Install two Rubber Bumpers [L], with one onto each fixed tube of the TwinTube [A].
- Page 4 STEP 6 REQUIRED TOOL: 1/2” WRENCH On the side of the base that is closest to the [Fg. 11] vehicle, in the same manner as STEP 5, attach the remaining Wing [N] to the Slide Tube [M] using two (2) Hat Brackets [P] along with two (2) 5/16in Carriage Bolts [Q], two (2) 5/16in Carriage Washers [T], and two (2) 5/16in Nylock Nuts [U] on each side, adding the “looped end”...
- Page 5 STEP 9 Attach the carabiner to the Safety Cable [R] (if not [Fg.14] already pre-installed). From underneath the carrier, connect the carabiner end of the Safety Cable [R] to the “1st Position” hole in the frame of the TwinTube [A]. [Fg.14] 1ST POSITION NOTE: The Safety Cable [R] can be secured in two positions.
- Page 6 STEP 11 REQUIRED TOOL: 1/2” WRENCH With the Hat Brackets [P] from STEP 5 & 6 still loosely secured, slide the carrier back and forth along the Slide Tubes [M] to adjust for required vehicle clearances (user discretion). Once the final clearance adjustments have made, confirm the aligned Slide Tubes are slid all the way back against the Rubber Bummers [L] and then fully secure all Hat Brackets [P] and hardware from Steps 5 &...
- Page 7 STEP 13 OPTIONAL REQUIRED TOOL: TWO (2) 7/16 WRENCH OR SOCKET This step is for the OPTIONAL installation of a (user [Fg.22] supplied) license plate. If you did not install the License Plate Brackets [UU] onto your LED Light kit during Step 12, you may skip this step and continue onto Step 14.
- Page 8 STEP 16 REQUIRED TOOL: 7/16” SOCKET & 5/32” ALLEN WRENCH Place the Fixed Lid [BB] on the [Fg. 27] [Fg. 26] side of the Tray [V] nearest the vehicle. Align the four (4) holes (two holes on the back of the tray, one hole on each side) of the Lid with the holes in the Tray.
- Page 9 STEP 18 Pull the weather-stripping away from the [Fg. 31] [Fg. 32] WEATHER vertical edges of the Fixed Lid [BB]. STRIPPING Position and align the Angles [QQ] on the inside of the Fixed Lid [BB] as shown. [Fg. 31] Working from the top of the Angle [QQ], WEATHER reinstall the weather-stripping over the edge of STRIPPING...
- Page 10 STEP 21 REQUIRED TOOL: 3/8” WRENCH & PHILLIPS SCREW DRIVER Install Handle [DD] onto the Pivot Lid [CC] (with the GearDeck Logo) where holes have been pre-drilled using 10x24- 1 Phillips Pan Screws [KK] secured on the inside with 3/16” x 1” Fender Washers [MM], and 10-24 Nylock Nuts [NN].
- Page 11 Vehicle and Hitch Receiver Compliance This GearDeck Cargo Carrier fits 2" size hitch receivers and is rated for a Class II tow capability or higher. Before using this product, consult your vehicle and hitch receiver owner manual(s) for details on your tow and tongue weight parame- ters.
Need help?
Do you have a question about the GearDeck H00604 and is the answer not in the manual?
Questions and answers