
Related Manuals for Techni Mobili RTA-4985


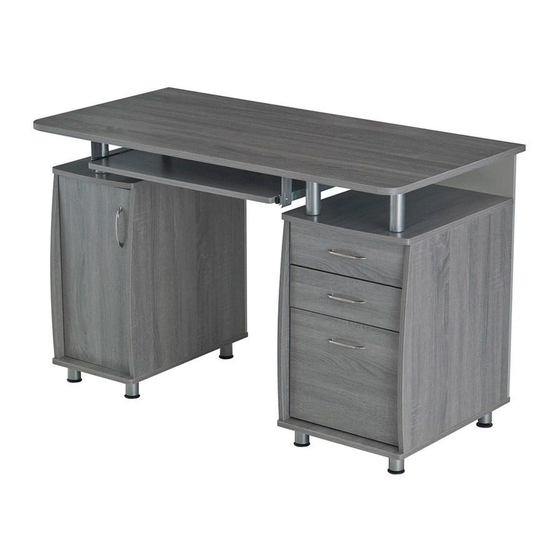
Summary of Contents for Techni Mobili RTA-4985
- Page 5 LIST OF SCREWS AND TOOLS PART QTY. ITEM PART QTY. ITEM 0)mmmmmmim 6X35 MM 4X16 MM � 4X35 MM 6X12 MM @JOllllllllt> 3X15 MM 4X4 MM @JID � 4X20 MM @)mmnIB <D40 MM ® 6X40 MM 6X25 MM 0)-)-)))) � 4X14 MM �...
- Page 6 u This unit uses cam bolts and locks. The following explains how to use them. This is not an assembly step; it is a guide for when you are actually doing the assembly using this kind of hardware. Cam Lock CamBolt �...
- Page 7 BEFORE YOU START THE ASSEMBLY, PLEASE READ THE FOLLOWING TIPS AND WARNINGS. • Do a quick inventory to To avoid misalignments, make sure the package always leave the screws contains all the parts and loose and tighten them until hardware listed in the all pieces are positioned assembly instructions.
- Page 8 ASSEMBLY STEPS STEP 1 First screw the bolts K into the back face of the small drawer front panel 27, then ------- assemble the drawer side panels 25 and 26 as shown and as explained in page 5. Screws: 6x25mm Cam lock direction �...
- Page 9 Assemble the handle 24 to the small drawer STEPS ------- front panel 27 using screws Das shown. Screws: 4x20mm � REPEAT STEPS 1 THRU 5 TO ASSEMBLE THE SECOND SMALL DRAWER First screw the bolts K into the back face of the file drawer front panel 32, then assemble STEP6 ------- the file drawer side panels 30 and 31 as shown and as explained in page 5.
- Page 10 STEP10 Grab the last SET of drawer sliders 14, and sort them by their shape: ------- - The "L" shaped will be used in this step. Screws: - The flat ones will be used until step 25, so please set them aside. With the drawer upside-down and its front facing away from you, assemble the "L"...
- Page 11 P.10 STEP15 First screw the smaller bolts K to the back end of the panel 4, then screw the longer ------- bolts Eon the sides as shown. Screws: Attention: The Innermost 6x25mm holes are for the wooden � pins of panels 1 and 2 in next step.
- Page 12 P.11 STEP19 Assemble the base tubes 7 to Attach the studs 3 to the base STEP 20 ------- the bottom face of the file tubes 7 as shown. Screws: cabinet bottom panel 11 using screws F as shown. 4x14mm � (This panel is wider than panel 4) STEP 21 With the cabinet side panels 12 and 13 oriented as shown, assemble 2 sets of the flat...
- Page 13 P.12 STEP 23 First screw the smaller bolts K to the back end of the panel 11, then screw the longer bolts E ------- on the sides as shown. Finally, assemble the panels 12, 13 and 15 as shown and as Screws: explained in page 5.
- Page 14 P.13 STEP 25 Assemble the last set of flat sliders 14 to the bottom sets of holes on the side panels ------- 12 and 13 using screws C as shown. Note that the wheel is facing towards the front of Screws: the panels and down with 2 empty holes ( on the slider) above it.
- Page 15 P.14 STEP 28 Use screws H to assemble the slider bases 21 to the back face of the main panel 18, with the bases oriented towards the outside as shown. Screws: 6x12 mm Bases are oriented towards the outside ; ..:�...
- Page 16 P.15 STEP 30 First screw bolts K to the main panel 18 as shown. Then with the help of another person, ------- place the main panel over the frame, making sure the bolts enter into the holes of the back Screws: panels 5 and 15, BUT DO NOT LOCK THE CAM LOCKS YET.
- Page 17 P.16 STEP 32 STEP 33 Use screws G to assemble Use screws D to assemble the ------- ------- handle 24 to the CPU door 23. the hinges 8 to the CPU Screws: Screws: door 23. 4x16mm 4x20mm $)llIDID � ..··...
-
Page 18: Troubleshoot
P.17 STEP 35 Insert the drawers into the cabinet, starting with the bottom drawer. For the top drawer, you might have to insert it at a downward tilted angle. The wheel on the drawer will run in the middle of the sliders on the cabinet. Troubleshoot: Problem: There is a gap at the bottom of the file drawer and/or the top drawer doesn't fit. - Page 19 ALL DONE! Give yourself a nice pat on the back. You did a great job!
- Page 20 P.19 AFTER THE ASSEMBLY IS DONE, PLEASE READ CAREFULLY THE FOLLOWING CARE AND MAINTENANCE WARNINGS: MAXIMUM WEIGHT CAPACITIES (DO NOT EXCEED THESE LIMITS) 22 Lbs------- 22 Lbs e-+++-- L--::� • Do not exceed the indicated weight limits. • Do not expose the surfaces to direct sunlight or to extreme environmental conditions. •...
- Page 21 DESKS/LAPTOP CARTS/FILE CABINETS: LIMITED 5-YEAR WARRANTY TV Stand/Entertainment Center : 2 YEAR WARRANTY We warrants to the Original Purchaser who acquired a new product or its authorized resellers that this product will be free from defects in its workmanship and materials, under normal use and service conditions, as described herein.
Need help?
Do you have a question about the RTA-4985 and is the answer not in the manual?
Questions and answers