Table of Contents
Advertisement
Quick Links
Advertisement
Table of Contents

Related Manuals for Advantech EKI-1200-CE Series


Summary of Contents for Advantech EKI-1200-CE Series
- Page 1 User Manual EKI-1200-CE Series 1/2/4-port Modbus Gateway...
- Page 2 No part of this manual may be reproduced, copied, translated or transmitted in any form or by any means without the prior written permission of Advantech Co., Ltd. Information provided in this manual is intended to be accurate and reliable. How- ever, Advantech Co., Ltd.
- Page 3 Technical Support and Assistance Visit the Advantech web site at www.advantech.com/support where you can find the latest information about the product. Contact your distributor, sales representative, or Advantech's customer service center for technical support if you need additional assistance.
- Page 4 Before setting up the system, check that the items listed below are included and in good condition. If any item does not accord with the table, please contact your dealer immediately. 1 x Industrial Modbus Device 1 x DIN-Rail Mounting Bracket and Screws 1 x Wall-mounting Bracket EKI-1200-CE Series User Manual...
- Page 5 The sound pressure level at the operator's position according to IEC 704-1:1982 is no more than 70 dB (A). DISCLAIMER: This set of instructions is given according to IEC 704-1. Advan- tech disclaims all responsibility for the accuracy of any statements contained herein. EKI-1200-CE Series User Manual...
- Page 6 Always disconnect the power from the device before servicing it. Before plugging a cable into any port, discharge the voltage stored on the cable by touching the electrical contacts to the ground surface. EKI-1200-CE Series User Manual...
-
Page 7: Table Of Contents
Accessing the Web Page via Configuration Utility ...... 42 4.2.2 Accessing the Web Page via Web Browser........ 43 System ....................43 Ethernet Configuration ................44 Port Configuration ................... 45 4.5.1 Basic ................... 45 4.5.2 Operation ..................46 EKI-1200-CE Series User Manual... - Page 8 4.7.5 Modbus Slave Response Time........... 53 Tools ....................... 54 4.8.1 Ping..................... 54 4.8.2 Reboot ..................55 Management ................... 55 4.9.1 Change Password ..............55 4.9.2 Export Device Settings ............... 56 4.9.3 Import Device Settings..............56 EKI-1200-CE Series User Manual viii...
- Page 9 Figure 2.18 Wall Mount Installation ....................18 Figure 2.19 DB9 Pin Assignment....................19 Figure 2.20 Power Wiring for EKI-1200-CE Series................. 20 Figure 3.1 InstallShield Wizard 1 of 4 ................... 23 Figure 3.2 InstallShield Wizard 2 of 4 ................... 23 Figure 3.3 InstallShield Wizard 3 of 4 ...................
- Page 10 Syslogd > Modbus Slave Response Time..............53 Figure 4.17 Tools > Ping ........................ 54 Figure 4.18 Tools > Reboot ......................55 Figure 4.19 Management > Change Password ................55 Figure 4.20 Management > Import ....................56 EKI-1200-CE Series User Manual...
-
Page 11: Chapter 1 Introduction
Chapter Introduction... -
Page 12: Overview
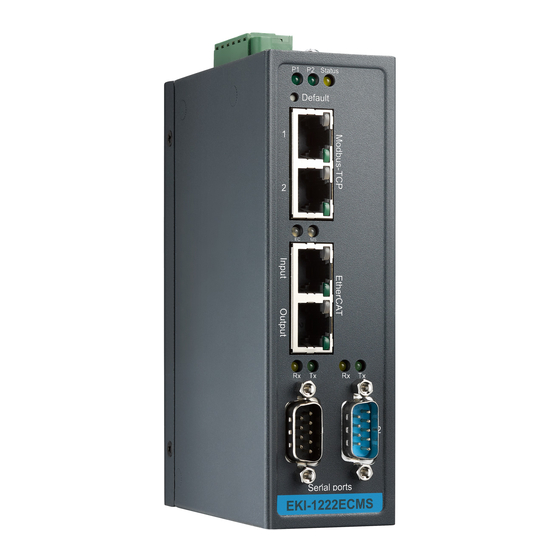
Overview Advantech’s EKI-1200-CE Series of Modbus Gateways (the following manual will use EKI-1200-CE Series instead of complete model name) are a robust, feature-rich, and cost effective way to integrate Ethernet and Serial Modbus devices. The EKI-1200- CE Series provides one, two or four serial ports, two Ethernet ports, a wide range of... -
Page 13: Chapter 2 Getting Started
Chapter Getting Started... -
Page 14: Understanding Modbus Gateways
PC or control panel. Advantech’s revolutionary network-enabling technology is now allowing control devices with serial ports to connect to the Ethernet and share networks quickly and cost-effectively. The EKI-1200-CE Series are net- work-based, Modbus gateways for integrating new and existing Mo bus/RTU and Modbus/ASCII serial devices to newer TCP/IP networked-based devices. -
Page 15: Modbus Rtu
1 bit for even/odd parity; no bit for parity parity 1 stop bit if parity is used; 1 stop bit if parity is used; 2 bits if no parity 2 bits if no parity Error Check EKI-1200-CE Series User Manual... -
Page 16: Modbus Ascii
‘CI’ & ‘I’ models: -40°C ~ 70°C (-40°F ~ 158°F) Storage -20°C ~ 80°C (-4°F ~ 176°F) Temperature Ambient Relative 5 ~ 95% RH Humidity Ethernet Compatibility IEEE 802.3, IEEE 802.3u Communications Speed 10/100 Mbps Port Connector 8-pin RJ45 Protection Built-in 1.5 KV magnetic isolation EKI-1200-CE Series User Manual... - Page 17 , redundant dual inputs Software OS Support 32-bit/64-bit Windows XP/Vista/7/8/8.1, Windows Server 2003/2008/2008 R2/2012/2012 R2 Utility Advantech EKI Device Configuation Utility Operation Modes Modbus RTU Master/Slave mode Modbus ASCII Master/Slave mode Configuration Windows utility, Web Browser Protocols Modbus RTU, Modbus TCP, Modbus ASCII...
-
Page 18: Hardware
System LED panel See “LED Indicators” on page 13 for further details. Default button Press for at least 10 secs. to rest device to default settings. ETH port RJ45 ports x 2 Serial port DB9 pinout, supports 232/422/485 EKI-1200-CE Series User Manual... -
Page 19: Figure 2.4 Front View
See “LED Indicators” on page 13 for further details. Default button Press for at least 10 secs. to rest device to default settings. ETH port RJ45 ports x 2 Serial port DB9 (pinout) ports x 2, supports 232/422/485 EKI-1200-CE Series User Manual... -
Page 20: Figure 2.5 Front View
See “LED Indicators” on page 13 for further details. Default button Press for at least 10 secs. to rest device to default settings. ETH port RJ45 ports x 2 Serial port DB9 (pinout) ports x 4, supports 232/422/485 EKI-1200-CE Series User Manual... -
Page 21: Rear View
2.3.2 Rear View The following view shows the EKI-1221 and EKI-1222. Figure 2.6 Rear View No. Item Description DIN-Rail mounting Mounting plate used for the installation to a standard DIN rail plate EKI-1200-CE Series User Manual... -
Page 22: Top View
Description Terminal block Connect cabling for power and alarm wiring Ground terminal Screw terminal used to ground chassis Wall mounting holes Screw holes (top x4, bottom x4) used in the installation of a wall mounting plate EKI-1200-CE Series User Manual... -
Page 23: Led Indicators
EKI-1221-CE 95 [3.740] 95 [3.740] 30 [1.181] 104 [4.094] Figure 2.10 EKI-1221 Dimensions The following view shows the EKI-1222. 14.70 [0.579] 95 [3.740] EKI-1222-CE 95 [3.740] 95 [3.740] 30 [1.181] 104 [4.094] Figure 2.11 EKI-1222 Dimensions EKI-1200-CE Series User Manual... -
Page 24: Figure 2.12 Eki-1224 Dimensions
The following view shows the EKI-1224. 104 [4.094] 95 [3.740] 30.50 [1.299] [1.378] 42 [1.654] [1.201] [1.575] 42 [1.654] [0.591] EKI-1224-CE 95 [3.740] Figure 2.12 EKI-1224 Dimensions EKI-1200-CE Series User Manual... -
Page 25: Connecting Hardware
DIN rail clip. If seated correctly, the bottom of the DIN rail should be fully inserted in the release tab. DIN rail clip DIN rail DIN rail clip release tab Figure 2.13 Installing the DIN-Rail Mounting Kit EKI-1200-CE Series User Manual... -
Page 26: Figure 2.14 Correctly Installed Din Rail Kit
Push down on the top of the DIN rail clip release tab with your finger. As the clip releases, lift the bottom of the switch, as shown in the following illustration. Figure 2.15 Removing the DIN-Rail EKI-1200-CE Series User Manual... -
Page 27: Wall-Mounting
Use the wall mount plates as a guide to mark the locations of the screw holes. Drill four holes over the four marked locations on the wall, keeping in mind that the holes must accommodate wall sinks in addition to the screws. Insert the wall sinks into the walls. EKI-1200-CE Series User Manual... -
Page 28: Figure 2.17 Securing Wall Mounting Screws
Install the wall mount plate on the screws and slide it forward to lock in place, see the following figure. Figure 2.18 Wall Mount Installation Once the device is installed on the wall, tighten the screws to secure the device. EKI-1200-CE Series User Manual... -
Page 29: Serial Connection
2.4.3 Serial Connection EKI-1200-CE Series provides up to four ports DB9 (male) connectors. RS-232/422/ 485 pin assignments as below: Figure 2.19 DB9 Pin Assignment RS-232 RS-422 RS-485 DATA- DATA+ GND EKI-1200-CE Series User Manual... -
Page 30: Power Connection
Caution! Disconnect the power cord before installation or cable wiring. The EKI-1200-CE Series supports dual 12 to 48 VDC power inputs and power-fail relay output. The following figure illustrates a P-Fail alarm application example. The P-Fail alarm contacts are visible on the front view of the terminal block. -
Page 31: Chapter 3 Configuration
Chapter Configuration... -
Page 32: Configuration Utility Overview
Advantech EKI Device Configuration Utility is an excellent device server manage- ment tool. You can connect and configure the local and remote Advantech serial device servers easily. The utility provides access to the following functions: ... -
Page 33: Figure 3.1 Installshield Wizard 1 Of 4
Once the InstallShield Wizard screen displays, click Next to proceed with the installation. Figure 3.1 InstallShield Wizard 1 of 4 The Software License Agreement displays, press I Agree to continue or Cancel to stop the installation. Figure 3.2 InstallShield Wizard 2 of 4 EKI-1200-CE Series User Manual... -
Page 34: Figure 3.3 Installshield Wizard 3 Of 4
Figure 3.3 InstallShield Wizard 3 of 4 Once the installation of the package is finished a Configuration Utility Setup screen displays. Click Finish to conclude the process and exit the InstallShield Wizard. Figure 3.4 InstallShield Wizard 4 of 4 EKI-1200-CE Series User Manual... -
Page 35: Menu Bar
Click on the devices or move cursor to the devices, the related information is shown in this area. Status Bar Displays the current time. Configuration Area Click on the item on the Device Server List Area, the configura- tion page displays. EKI-1200-CE Series User Manual... -
Page 36: Quick Tool Bar
Quick Tool Bar The Advantech EKI Device Configuration Utility makes use of a Quick Tool Bar menu to allow quick access to the management functions. See the following figure for fur- ther information. Figure 3.6 Quick Tool Bar Overview Icon... -
Page 37: Utility Settings
NOTE: A restart is required for the settings to take effect. Click OK to save and exit the Utility Settings menu. Cancel Click Cancel to discard the changes. Apply Click Apply to save the main form settings. EKI-1200-CE Series User Manual... -
Page 38: Discovering Your Device Server
Auto Searching Advantech Serial Device Server Configuration Utility will automatically search all the EKI-1200-CE Series device servers on the network and show them on the Serial Device Server List Area of the utility. The utility provides an auto-search function to... -
Page 39: Figure 3.9 Open View Of Serial Device Configuration Utility
“Basic Information” included device type, version, and name, “Ethernet Information”, and “Serial Port Information”. In the serial port information frame, it dis- plays the operation mode, status and connected host IP. Figure 3.10 Selecting a Group EKI-1200-CE Series User Manual... -
Page 40: Figure 3.11 Selecting A Device
Click on the “+” before the device name, and the utility will expand the interfaces on this device server. Figure 3.11 Selecting a Device Click on each item to enter the configuration page to change the setting. The configu- ration will be introduced on following sections. Figure 3.12 Viewing Basic Settings EKI-1200-CE Series User Manual... -
Page 41: Network Settings
3.4.3 Network Settings This section explains how to configure the EKI-1200-CE Series network settings using the configuration utility to allow it to a serial device over a network connection. Click on the “+” before the model name (e.g. EKI-1222) to expand the device’s sub- menu listing. -
Page 42: Figure 3.14 Network Settings Overview
180 seconds. Note! When you have finished the configuration of these settings for each cat- egory, please press the “Apply” button in order to make these settings effective on the Serial Device Server. EKI-1200-CE Series User Manual... -
Page 43: Figure 3.15 Reset Device
Click Reboot to reboot the serial device server. Any configuration changes you have made since the last time you saved will be lost. To reset the device: Right-click a desired device to display the settings menu. Select Reset Device. Figure 3.15 Reset Device EKI-1200-CE Series User Manual... -
Page 44: Administrator Settings
From the device list frame, locate the desired device and right-click on it to dis- play the settings menu. Select Locate from the menu. Figure 3.16 Locate the Serial Device Server The unit’s Status LED solid amber and the buzzer beep until you click Stop Locate. EKI-1200-CE Series User Manual... -
Page 45: Securing The Serial Device Server
Right-click a desired device to display the settings menu. Select Lock Device. Figure 3.17 Lock the Serial Device Server Enter a password. Retype the password entry to confirm the profile password. Figure 3.18 Enter a Password EKI-1200-CE Series User Manual... -
Page 46: Figure 3.19 Reset Device
Enter the password as entered in the Lock Device procedure. If you forgot the password, you must restore the setting of the serial device server to the factory defaults, which will be introduced in the next section. EKI-1200-CE Series User Manual... -
Page 47: Restore To Factory Default Settings
Power off the serial device server within ten seconds. After reconnecting the power, all settings will be reset to the factory default. If the power supply remains connected for more than ten seconds, the serial device server will not be changed. EKI-1200-CE Series User Manual... -
Page 48: Resetting The Device
Right-click a desired device to display the settings menu. Select Reset Device. Figure 3.22 Reset Device The device resets. Once the process is complete, the serial device server displays under the Serial Device Server listing once again. EKI-1200-CE Series User Manual... -
Page 49: Add To Favorite
The Add to Favorite function allows to easily map available devices to Favorites. By bookmarking specific devices, you can create quickly accessible shortcuts for exist- ing critical devices from the vast pool of locally or remotely networked EKI devices. Figure 3.23 Add to Favorite EKI-1200-CE Series User Manual... -
Page 50: Update Firmware
Note! Be sure that the host PC Ethernet network domain is as same as the EKI-1200-CE Series serial device server or the host PC can establish the TCP connection with the serial device server while doing the updat- ing firmware process. -
Page 51: Chapter 4 Web Interface
Chapter Web Interface... -
Page 52: Overview
Accessing the Web Page 4.2.1 Accessing the Web Page via Configuration Utility To access the web page via configuration utility: Select Ethernet under the desired device. Click Launch Browser. Figure 4.1 Accessing the Web Page via Configuration Utility EKI-1200-CE Series User Manual... -
Page 53: Accessing The Web Page Via Web Browser
Displays the revision number of the device. Device Name Enter the device name: up to 31 alphanumeric characters. Device Description Enter the device description. Local Time Click Modify to set local date and time of the system. EKI-1200-CE Series User Manual... -
Page 54: Ethernet Configuration
192.168.1.1. Subnet Mask Enter a value to specify the IP subnet mask for the interface. The default is 255.255.255.0. Default Gateway Enter a value to specify the default gateway for the interface. The default is 192.168.1.254. EKI-1200-CE Series User Manual... -
Page 55: Port Configuration
Click the drop-down menu to select the parity: None, Odd, Even, Mark or Space. Data Bits Click the drop-down menu to select the data bits: 5, 6, 7, or 8. Stop Bits Click the drop-down menu to select the stop bits: 1, 1.5 or 2. EKI-1200-CE Series User Manual... -
Page 56: Operation
To translate RTU/ASCII to TCP, use Master Mode. P1 P2 EKI-122X Status De fau Figure 4.5 Master Mode To translate TCP to RTU/ASCII, use Slave Mode. P1 P2 Status De fau EKI-122X Figure 4.6 Slave Mode EKI-1200-CE Series User Manual... -
Page 57: Figure 4.7 Port Configuration > Operation > Modbus Slave Mode
Series to wait for a response after it has issued a command while using Modbus/RTU or Modbus ASCII. After the timeout is expired and no response is received, the EKI-1200-CE Series will regard the command as failed. Note that the timeout for the host PC must be greater than the timeout setting here specified, otherwise an error will occur. -
Page 58: Figure 4.8 Port Configuration > Operation > Modbus Master Mode
Series to wait for a response after it has issued a command while using Modbus/RTU or Modbus ASCII. After the timeout is expired and no response is received, the EKI-1200-CE Series will regard the command as failed. Note that the timeout for the host PC must be greater than the timeout setting here specified, otherwise an error will occur. -
Page 59: Monitor
Display the current parity of the selected port. RTS/CTS Display the current RTS/CTS status of the selected port. XON/XOFF Display the current XON/OFF status of the selected port. DTR/DSR Display the current DTR/DSR status of the selected port. EKI-1200-CE Series User Manual... -
Page 60: Statistic
Display the current CTS status of the selected port. Display the current DTR status of the selected port. Display the current DSR status of the selected port. Display the current DCD status of the selected port. EKI-1200-CE Series User Manual... -
Page 61: Connected Ip
Figure 4.11 Monitor > Connected IP The following table describes the items in the previous figure. Item Description Connected IP Displays the IP designation for the device. IP Address Displays the current connected IP address of the selected port. EKI-1200-CE Series User Manual... -
Page 62: Syslogd
Click Save to save the values and update the screen. 4.7.2 Syslogd Message After enabling the syslogd function, users can check the history in the syslogd mes- sage page. To access this page, click Syslogd > Syslogd Message. Figure 4.13 Syslogd > Syslogd Message EKI-1200-CE Series User Manual... -
Page 63: Modbus Ip Mapping
This page shows the longest response time of each individual unit ID. This should be helpful for optimizing the performance. To access this page, click Syslogd > Modbus Slave Response Time. Click Clear All to clear all response information. Figure 4.16 Syslogd > Modbus Slave Response Time EKI-1200-CE Series User Manual... -
Page 64: Tools
Enter the number of echo requests to send. The default value is 4. The value ranges from 1 to 5. The count entered is not retained across a power cycle. Run ping Display the ping reply format. Save Click Save to save the values and update the screen. EKI-1200-CE Series User Manual... -
Page 65: Reboot
If you want to disable the password protection, change the password to the default option None (leave the new password column blank). Be sure to press the Save but- ton and reboot the serial device server to make the change effective. EKI-1200-CE Series User Manual... -
Page 66: Export Device Settings
To access this page, click Management > Import. Figure 4.20 Management > Import The following table describes the items in the previous figure. Item Description Choose File Click Choose File to select the configuration file. Submit Click Submit to backup the settings. EKI-1200-CE Series User Manual... - Page 67 No part of this publication may be reproduced in any form or by any means, electronic, photocopying, recording or otherwise, without prior written permis- sion of the publisher. All brand and product names are trademarks or registered trademarks of their respective companies. © Advantech Co., Ltd. 2018...
Need help?
Do you have a question about the EKI-1200-CE Series and is the answer not in the manual?
Questions and answers