Sign In
Upload
Download
Table of Contents
Contents
Add to my manuals
Delete from my manuals
Share
URL of this page:
HTML Link:
Bookmark this page
Add
Manual will be automatically added to "My Manuals"
Print this page
×
Bookmark added
×
Added to my manuals
Manuals
Brands
Advantech Manuals
Gateway
EKI-1200 Series
User manual
Advantech EKI-1200 Series User Manual
1/2/4-port modbus gateways
Hide thumbs
Also See for EKI-1200 Series
:
User manual
(64 pages)
,
User manual
(114 pages)
1
2
3
4
5
6
Table Of Contents
7
8
9
10
11
12
13
14
15
16
17
18
19
20
21
22
23
24
25
26
27
28
29
30
31
32
33
34
35
36
37
38
39
40
41
42
43
44
45
46
47
48
49
50
51
52
53
54
55
56
57
58
59
60
61
62
63
64
65
66
67
68
69
70
71
72
73
74
75
76
77
78
79
80
page
of
80
Go
/
80
Contents
Table of Contents
Bookmarks
Table of Contents
Table of Contents
Chapter 1 Introduction
Overview
Device Features
Chapter 2 Getting Started
Understanding Modbus Gateways
Protocol Overview
Modbus RTU
Modbus ASCII
Figure 2.1 Modbus System Architecture 1
Figure 2.2 Modbus System Architecture 2
Modbus ASCII
Specifications
Hardware
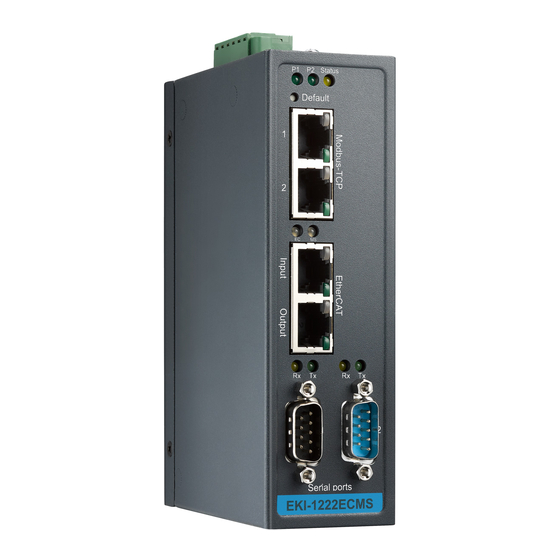
Front View
Figure 2.3 EKI-1211 Front View
Figure 2.4 EKI-1221 Front View
Figure 2.5 EKI-1221I-MT Front View
Figure 2.6 EKI-1222 Front View
Figure 2.7 EKI-1222I-SC Front View
Figure 2.8 EKI-1224 Front View
Rear View
Figure 2.9 EKI-1211 Rear View
Figure 2.10 EKI-1221 and EKI-1222 Rear View
Figure 2.11 EKI-1224 Rear View
Left View
Top View
Figure 2.12 EKI-1211 Left View
Figure 2.13 EKI-1211 Top View
Bottom View
Figure 2.14 EKI-122X Top View
Figure 2.15 EKI-1221I and EKI-1222I Top View
Figure 2.16 EKI-1211 Bottom View
LED Indicators
Figure 2.17 EKI-1221I and EKI-1222I Bottom View
Figure 2.18 EKI-1211 System LED Panel
Figure 2.19 EKI-122X System LED Panel
Dimensions
Figure 2.20 EKI-1211 Dimensions
Figure 2.21 EKI-1221 Dimensions
Figure 2.22 EKI-1221I-MT Dimensions
Figure 2.23 EKI-1222I-SC Dimensions
Figure 2.24 EKI-1222 Dimensions
Figure 2.25 EKI-1224 Dimensions
Connecting Hardware
DIN Rail Mounting
Figure 2.26 Installing the DIN Bracket (EKI-1211 Series)
Figure 2.27 Installing the DIN-Rail Mounting Kit (EKI-1211 Series)
Figure 2.28 Correctly Installed DIN Rail Kit
Figure 2.29 Installing the DIN-Rail Mounting Kit (EKI-122X Series)
Figure 2.30 Correctly Installed DIN Rail Kit (EKI-122X Series)
Figure 2.31 Removing the DIN-Rail (EKI-1211 Series)
Figure 2.32 Removing the DIN-Rail (EKI-122X Series)
Wall-Mounting
Figure 2.33 Installing Wall Mount Plates (EKI-1211 Series)
Figure 2.34 Securing Wall Mounting Screws
Figure 2.35 Wall Mount Installation (EKI-1211 Series)
Figure 2.36 Installing Wall Mount Plates (EKI-122X Series)
Figure 2.37 Securing Wall Mounting Screws
Figure 2.38 Wall Mount Installation (EKI-1211 Series)
Serial Connection
Power Connections
Figure 2.39 Wall Mount Installation (EKI-122X Series)
Figure 2.40 DB9 Pin Assignment
Figure 2.41 Power Adapter Electrode Label Indication
Figure 2.42 Power Wiring for EKI-1211
Figure 2.43 Power Wiring for EKI-1200-CE Series
Chapter 3 Configuration
Configuration Utility Overview
Installing the Configuration Utility
Figure 3.1 Installshield Wizard 1 of 4
Figure 3.2 Installshield Wizard 2 of 4
Figure 3.3 Installshield Wizard 3 of 4
Figure 3.4 Installshield Wizard 4 of 4
Menu Bar
Figure 3.5 Configuration Utility Overview
Quick Tool Bar
Utility Settings
Figure 3.7 View > Settings > Main Form Setting
Discovering Your Device Server
Figure 3.8 View > Settings > Device Manager
Figure 3.9 Open View of Serial Device Configuration Utility
Figure 3.10 Selecting a Group
Figure 3.11 Selecting a Device
Figure 3.12 Viewing Basic Settings
Network Settings
Figure 3.13 Utility Overview
Figure 3.14 Network Settings Overview
Figure 3.15 Reset Device
Administrator Settings
Locate the Serial Device Server
Figure 3.16 Locate the Serial Device Server
Securing the Serial Device Server
Figure 3.17 Lock the Serial Device Server
Figure 3.18 Enter a Password
Figure 3.19 Reset Device
Figure 3.20 Unlock the Serial Device Server
Restore to Factory Default Settings
Figure 3.21 Restore to Factory Default Settings
Resetting the Device
Figure 3.22 Reset Device
Add to Favorite
Figure 3.23 Add to Favorite
Update Firmware
Figure 3.24 Update Firmware
Chapter 4 Web Interface
Overview
Accessing the Web Page
Accessing the Web Page Via Configuration Utility
Accessing the Web Page Via Web Browser
Figure 4.1 Accessing the Web Page Via Configuration Utility
System
Figure 4.2 System
Ethernet Configuration
Figure 4.3 Ethernet Configuration
Port Configuration
Basic
Operation
Figure 4.4 Port Configuration > Basic
Figure 4.5 Master Mode
Figure 4.6 Slave Mode
Figure 4.7 Port Configuration > Operation > Modbus Slave Mode
Figure 4.8 Port Configuration > Operation > Modbus Master Mode
Monitor
Setting
Figure 4.9 Monitor > Setting
Statistic
Connected IP
Syslogd
Syslogd Setting
Syslogd Message
Figure 4.12 Syslogd > Syslogd Setting
Figure 4.13 Syslogd > Syslogd Message
Modbus IP Mapping
Modbus Port Mapping
Modbus Slave Response Time
Figure 4.14 Syslogd > Modbus IP Mapping
Figure 4.15 Syslogd > Modbus Port Mapping
Figure 4.16 Syslogd > Modbus Slave Response Time
Tools
Ping
Figure 4.17 Tools > Ping
Reboot
Management
Change Password
Figure 4.18 Tools > Reboot
Figure 4.19 Management > Change Password
Export Device Settings
Import Device Settings
Figure 4.20 Management > Import
Advertisement
Quick Links
1
Modbus Rtu
Download this manual
User Manual
EKI-1200 Series
1/2/4-port Modbus Gateways
Table of
Contents
Previous
Page
Next
Page
1
2
3
4
5
Advertisement
Table of Contents
Need help?
Do you have a question about the EKI-1200 Series and is the answer not in the manual?
Ask a question
Questions and answers
Related Manuals for Advantech EKI-1200 Series
Gateway Advantech EKI-1200 Series User Manual
1/2/4-port modbus gateways (114 pages)
Gateway Advantech EKI-1200 Series User Manual
1/2/4-port modbus gateways (64 pages)
Gateway Advantech EKI-1222 User Manual
Eki-122x series 1/2/4-port modbus gateway (67 pages)
Gateway Advantech EKI-1221D User Manual
1/2/4-port modbus gateway (62 pages)
Gateway Advantech ADAM-4572 User Manual
1/2/4-port modbus gateway (62 pages)
Gateway Advantech ADAM-4572 User Manual
1/2/4-port modbus gateway (56 pages)
Gateway Advantech EKI-1221 User Manual
1/2/4-port modbus data gateway (48 pages)
Gateway Advantech EKI-1224 User Manual
4-port modbus data gateway (3 pages)
Gateway Advantech EKI-1331 User Manual
Cellular gateway (74 pages)
Gateway Advantech EKI-1221IEIMB User Manual
Modbus tcp to profinet ethernet/ip protocol gateway (42 pages)
Gateway Advantech EKI-1242ECMS User Manual
Eki-1242 series modbus rtu/tcp to ethercat | ethernet/ip | profinet fieldbus gateway (56 pages)
Gateway Advantech EKI-1242IEIMS User Manual
Eki-1242 series modbus rtu/tcp to ethercat | ethernet/ip | profinet fieldbus gateway (56 pages)
Gateway Advantech EKI-1228-DR Series User Manual
8-port modbus gateway (64 pages)
Gateway Advantech EKI-1200-CE Series User Manual
1/2/4-port modbus gateway (67 pages)
Gateway Advantech EKI-1242 Series User Manual
Modbus rtu/tcp to bacnet ip/mstp | ethercat | ethernet/ip | profinet fieldbus gateway (64 pages)
Gateway Advantech EKI-1211 User Manual
1/2/4-port modbus gateways (80 pages)
This manual is also suitable for:
Eki-1221
Eki-1222
Eki-1224
Eki-1211
Eki-1221i
Eki-1222i
Table of Contents
Print
Rename the bookmark
Delete bookmark?
Delete from my manuals?
Login
Sign In
OR
Sign in with Facebook
Sign in with Google
Upload manual
Upload from disk
Upload from URL


Need help?
Do you have a question about the EKI-1200 Series and is the answer not in the manual?
Questions and answers