Sign In
Upload
Download
Table of Contents
Contents
Add to my manuals
Delete from my manuals
Share
URL of this page:
HTML Link:
Bookmark this page
Add
Manual will be automatically added to "My Manuals"
Print this page
×
Bookmark added
×
Added to my manuals
Manuals
Brands
Advantech Manuals
Gateway
EKI-1242ECMS
User manual
Advantech EKI-1242ECMS User Manual
Eki-1242 series modbus rtu/tcp to ethercat | ethernet/ip | profinet fieldbus gateway
Hide thumbs
Also See for EKI-1242ECMS
:
User manual
(68 pages)
1
2
3
4
5
6
Table Of Contents
7
8
9
10
11
12
13
14
15
16
17
18
19
20
21
22
23
24
25
26
27
28
29
30
31
32
33
34
35
36
37
38
39
40
41
42
43
44
45
46
47
48
49
50
51
52
53
54
55
56
page
of
56
Go
/
56
Contents
Table of Contents
Bookmarks
Table of Contents
Declaration of Conformity
Packing List
Safety Instructions
Table of Contents
Product Overview
Chapter 1 Product Overview
Specifications
Hardware Views
Front View
Figure 1.1 Front View (EKI-1242ECMS/EKI-1242IECMS)
Figure 1.2 Front View (EKI-1242EIMS/EKI-1242IEIMS)
Figure 1.3 Front View (EKI-1242PNMS/EKI-1242IPNMS)
Rear View
Top View
Figure 1.4 Rear View
Figure 1.5 Top View
Bottom View
LED Indicators
Figure 1.6 Bottom View
Dimensions
Chapter 2 Fieldbus Gateway Installation
Installation Guidelines
Connecting Hardware
Verifying Fieldbus Gateway Operation
Installing the Fieldbus Gateway
DIN Rail Mounting
Figure 2.1 Installing the DIN-Rail Mounting Kit
Figure 2.2 Correctly Installed DIN Rail Kit
Figure 2.3 Removing the DIN-Rail
Wall-Mounting
Figure 2.4 Installing Wall Mount Plates
Figure 2.5 Securing Wall Mounting Screws
Figure 2.6 Wall Mount Installation
Connecting the Fieldbus Gateway to Ethernet Ports
RJ45 Ethernet Cable Wiring
Serial Connection
Figure 2.7 Ethernet Plug & Connector Pin Position
Figure 2.8 DB 9 Pin Position
Microsd Card Installation
Installing a Microsd Card
Figure 2.9 Opening the Component Cover
Figure 2.10 Installing the Microsd Card
Figure 2.11 Closing the Component Cover
Utilizing a Microsd Card
Power Supply Installation
Overview
Figure 2.12 Power Wiring for EKI-1242 Series
Considerations
Grounding the Device
Wiring a Relay Contact
Figure 2.13 Grounding Connection
Figure 2.14 Terminal Receptor: Relay Contact
Wiring the Power Inputs
Figure 2.15 Terminal Receptor: Power Input Contacts
Figure 2.16 Removing a Terminal Block
Reset Button
Figure 2.17 Installing DC Wires in a Terminal Block
Figure 2.18 Securing a Terminal Block to a Receptor
Chapter 3 Managing Fieldbus Gateway
Log in
Changing Default Password
Figure 3.1 Login Screen
Figure 3.2 Changing a Default Password
Overview
Device Information
Figure 3.3 Overview > Device Information > System
Figure 3.4 Overview > Device Information > Modbus/Tcp
Figure 3.5 Overview > Device Information > Ethernet/Ip
Figure 3.6 Overview > Device Information > PROFINET
Diagnose
Data View
Figure 3.7 Overview > Data View (EKI-1242ECMS/EKI-1242IECMS)
Figure 3.8 Overview > Data View (EKI-1242EIMS/EKI-1242IEIMS)
Figure 3.9 Overview > Data View (EKI-1242PNMS/EKI-1242IPNMS)
Network Setting
IP Setting
Figure 3.10 Network Setting > IP Setting
Figure 3.11 Network Setting > IP Setting
Figure 3.12 Network Setting > IP Setting
Serial Settings
Port
Figure 3.13 Serial Settings > Port 1/Port 2
Figure 3.14 Protocol Setting > Ethercat Setting
Figure 3.15 Protocol Setting > Ethernet/Ip Setting
Protocol Setting
Ethercat Setting
Ethernet/Ip Setting
Figure 3.16 Protocol Setting > PROFINET Setting
PROFINET Setting
Figure 3.17 Protocol Setting > Modbus Setting
Modbus Setting
Figure 3.18 Protocol Setting > Modbus Setting > Add
Mapping Overview
System Management
Change Password
Figure 3.19 System Management > Change Password
Backup Manager
Figure 3.20 System Management > Backup Manager > Backup Manager
Figure 3.21 System Management > Backup Manager > SD Card Backup
Figure 3.22 System Management > Upgrade Manager
Figure 3.23 System Management > Reset System
Figure 3.24 System Management > Reboot Device
Figure 3.25 System Management > Apply Configuration
Figure 3.26 Tools > Modbus Traffic Catcher
Advertisement
Quick Links
Download this manual
User Manual
EKI-1242 Series
Modbus RTU/TCP to EtherCAT |
EtherNet/IP | PROFINET Fieldbus
Gateway
Table of
Contents
Previous
Page
Next
Page
1
2
3
4
5
Advertisement
Table of Contents
Need help?
Do you have a question about the EKI-1242ECMS and is the answer not in the manual?
Ask a question
Questions and answers
Related Manuals for Advantech EKI-1242ECMS
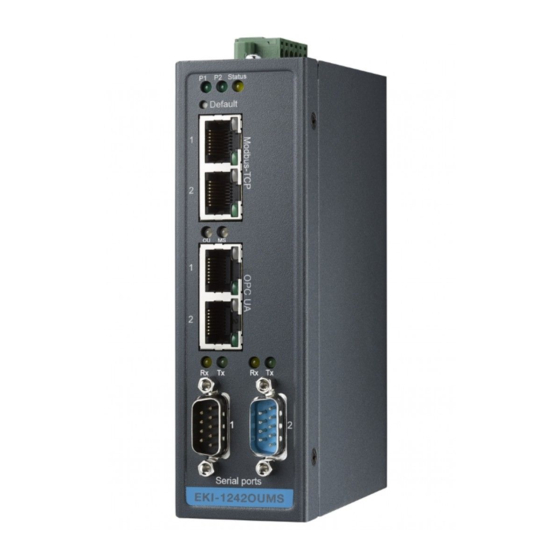
Gateway Advantech EKI-1242OUMS User Manual
Modbus rtu/tcp to bacnet ip/mstp, ethercat, ethernet/ip, profinet, opc ua fieldbus gateway (68 pages)
Gateway Advantech EKI-1242PNMS Quick Manual
Protocol gateway (17 pages)
Gateway Advantech EKI-1221 User Manual
1/2/4-port modbus data gateway (48 pages)
Gateway Advantech ADAM-4572 User Manual
1/2/4-port modbus gateway (62 pages)
Gateway Advantech ADAM-4572 User Manual
1/2/4-port modbus gateway (56 pages)
Gateway Advantech EKI-1222 User Manual
Eki-122x series 1/2/4-port modbus gateway (67 pages)
Gateway Advantech EKI-1200 Series User Manual
1/2/4-port modbus gateways (80 pages)
Gateway Advantech EKI-1224 User Manual
4-port modbus data gateway (3 pages)
Gateway Advantech EKI-1221IEIMB User Manual
Modbus tcp to profinet ethernet/ip protocol gateway (42 pages)
Gateway Advantech EKI-1242IPNMS User Manual
Eki-1242 series modbus rtu/tcp to ethercat | ethernet/ip | profinet fieldbus gateway (56 pages)
Gateway Advantech EKI-1242IEIMS User Manual
Eki-1242 series modbus rtu/tcp to ethercat | ethernet/ip | profinet fieldbus gateway (56 pages)
Gateway Advantech EKI-1228-DR Series User Manual
8-port modbus gateway (64 pages)
Gateway Advantech EKI-1200-CE Series User Manual
1/2/4-port modbus gateway (67 pages)
Gateway Advantech EKI-1242 Series User Manual
Modbus rtu/tcp to bacnet ip/mstp | ethercat | ethernet/ip | profinet fieldbus gateway (64 pages)
Gateway Advantech EKI-1211 User Manual
1/2/4-port modbus gateways (80 pages)
Gateway Advantech EKI-1221I User Manual
1/2/4-port modbus gateways (80 pages)
This manual is also suitable for:
Eki-1242iecms
Eki-1242ipnms
Eki-1242eims
Eki-1242ieims
Eki-1242pnms
Table of Contents
Print
Rename the bookmark
Delete bookmark?
Delete from my manuals?
Login
Sign In
OR
Sign in with Facebook
Sign in with Google
Upload manual
Upload from disk
Upload from URL


Need help?
Do you have a question about the EKI-1242ECMS and is the answer not in the manual?
Questions and answers