Barco MDSC-8255 LED User Manual
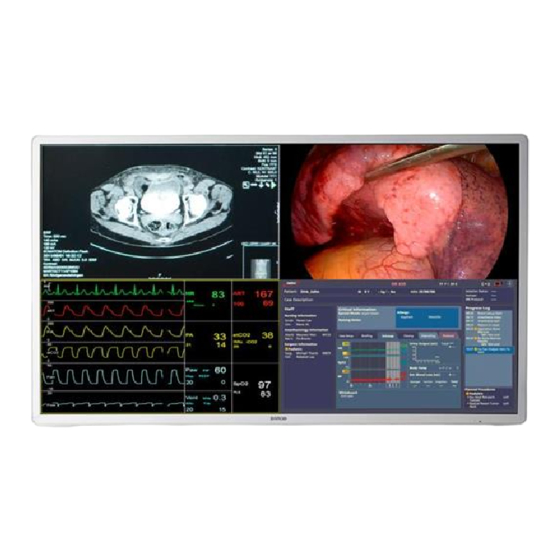
55” uhd 4k surgical display
Hide thumbs
Also See for MDSC-8255 LED:
- User manual (49 pages) ,
- User manual (58 pages) ,
- User manual (62 pages)

Related Manuals for Barco MDSC-8255 LED


Summary of Contents for Barco MDSC-8255 LED
- Page 1 MDSC-8255 55” UHD 4K surgical display User Guide MDSC-8255 LED MDSC-8255 MNA MDSC-8255 12G ENABLING BRIGHT OUTCOMES...
- Page 2 Barco NV Beneluxpark 21, 8500 Kortrijk, Belgium www.barco.com/en/support www.barco.com Registered office: Barco NV President Kennedypark 35, 8500 Kortrijk, Belgium www.barco.com/en/support www.barco.com...
-
Page 3: Table Of Contents
What's in the box ....................................8 About this user guide ..................................8 2 Parts, controls and connectors..............................11 Front view......................................12 Rear view......................................12 Connector view ....................................13 2.3.1 MDSC-8255 LED ................................13 2.3.2 MDSC-8255 MNA...............................13 2.3.3 MDSC-8255 12G.................................14 Connector pin assignments ..............................14 2.4.1 DVI connector (DVI-D) .............................14 2.4.2... - Page 4 5.3.8 Picture and Picture input (MDSC-8255 LED & MNA)................42 5.3.9 Picture and Picture input (MDSC-8255 12G) ....................43 5.3.10 Picture in Picture input (MDSC-8255 LED & MNA) .................43 5.3.11 Picture in Picture input (MDSC-8255 12G) ....................44 5.3.12 Picture in Picture mode............................44 5.3.13...
- Page 5 Cleaning instructions..................................55 Regulatory compliance information ............................56 EMC notice ......................................57 Explanation of symbols................................60 Legal disclaimer....................................63 Technical specifications................................64 6.10 Troubleshooting ....................................69 R5913964 /00 MDSC-8255...
- Page 6 R5913964 /00 MDSC-8255...
-
Page 7: Welcome
Welcome! R5913964 /00 MDSC-8255... -
Page 8: About The Product
1x MDSC-8255 display • 1x DisplayPort cable (MDSC-8255 MNA and 12G) • 2x DisplayPort cable (MDSC-8255 LED) • 1x HDMI cable (only for MDSC-8255 LED and 12G) • 1x SDI cable (only for MDSC-8255 12G) • 1x printed User Guide (English) •... - Page 9 Welcome! Warnings, cautions, notes and tips There are four levels of precautionary or advisory statements that may be used in this user guide. In descending order of importance, they are: WARNING: Describes hazards or dangers that might result in personal injury or death. CAUTION: Describes hazards that could damage the product.
- Page 10 Welcome! R5913964 /00 MDSC-8255...
-
Page 11: Parts, Controls And Connectors
Parts, controls and connectors R5913964 /00 MDSC-8255... -
Page 12: Front View
Parts, controls and connectors 2.1 Front view Overview Image 2–1 A 7-key keypad is located on the right side of the display. 1. Input selection key 2. Down key 3. Up key 4. OSD menu key / Enter key 5. Brightness decrease / Left key 6. -
Page 13: Connector View
Parts, controls and connectors 2.3 Connector view 2.3.1 MDSC-8255 LED Overview Image 2–3 1. SDI in 2. SDI out 3. HDMI2 2.0 in 4. HDMI1 2.0 in 5. +5 VDC – 2A power out (connector type: mating connector HIROSE RP34L-5PA- 2SC) 6. -
Page 14: Mdsc-8255 12G
Parts, controls and connectors 16. Potential Equalization pin (POAG) 17. 2 (Left) DisplayPort in 18. 100-240 VAC (50-60 Hz) power in Input and Output 1 to 9 are directly connected to the embedded Nexxis decoder. The BNC SDI connectors match the characteristic impedance of 75 ohm cables. 2.3.3 MDSC-8255 12G Overview Image 2–5... -
Page 15: Usb Type A Connector
Parts, controls and connectors 4. Not connected 5. Not connected 6. SCL (for DDC) 7. SDA (for DDC) 8. Not connected 9. D1_Rx- (T.M.D.S.) 10. D1_Rx+ (T.M.D.S.) 11. GND (data 1 shield) 12. Not connected 13. Not connected 14. +5V output (*) 15. -
Page 16: Displayport Connector
Parts, controls and connectors 3. Data + 4. GND 5. Not connected 2.4.5 DisplayPort connector Overview (sink side pin-out) 19 17 15 13 11 9 20 18 16 14 12 10 8 Image 2–10 1. ML_Lane 3 (n) 2. GND 3. -
Page 17: Dc Out Connector
Parts, controls and connectors 16. DDC_SDA 17. DDC/CEC GND 18. +5VDC POWER 19. HDP 2.4.7 DC out connector Overview Image 2–12 1. +5 VDC 2. GND Connector type: mating connector HIROSE RP34L-5PA- 2SC. R5913964 /00 MDSC-8255... - Page 18 Parts, controls and connectors R5913964 /00 MDSC-8255...
-
Page 19: Installation
Installation R5913964 /00 MDSC-8255... -
Page 20: Interface Connection
Nexxis OR Connecting your MDSC-8255 to Barco's Nexxis OR system allows you to distribute video, graphics, audio and computer data over the IP network, in raw uncompressed format, inside the operating room and even between surgical suites. -
Page 21: Mdsc-8255 Mna
Installation Image 3–1 DisplayPort VESA DP 1.2 certified cables for 5.4 Gbps HBR2 with a length of up to 3 m are recommended. Premium certified HDMI 2.0 cables with a length of up to 3 m are recommended. 3G-SDI Belden 1694A cables with a length of up to 50 m and 12G-SDI Belden 4855R cables with a length of up to 30 m are recommended. -
Page 22: Mdsc-8255 12G
Installation Main Image 3–2 DisplayPort VESA DP 1.2 certified cables for 5.4 Gbps HBR2 with a length of up to 2 m are recommended. Premium certified HDMI 2.0 cables with a length of up to 3 m are recommended. 3G-SDI Belden 1694A cables with a length of up to 50 m and 12G-SDI Belden 4855R cables with a length of up to 30 m are recommended. -
Page 23: Power Connection
Installation +5VDC Image 3–3 DisplayPort VESA DP 1.2 certified cables for 5.4 Gbps HBR2 with a length of up to 2 m are recommended. Premium certified HDMI 2.0 cables with a length of up to 3 m are recommended. 3G-SDI Belden 1694A cables with a length of up to 50 m and 12G-SDI Belden 4855R cables with a length of up to 30 m are recommended. -
Page 24: Vesa Mount Installation
Installation Potential equalization When potential equalization between the display and other devices is required then connect the potential equalization pin (POAG) to the potential equalization terminal of the equipment. Image 3–5 Additional protective earth For additional grounding, earth the display by connecting the protective earth pin to a grounded outlet by means of a wire with at minimum AWG18 size (according to national Regulation requirements regarding maximum admitted cable length). - Page 25 Installation Image 3–8 CAUTION: Tighten the screws with a torque of 3 Nm when fixing the VESA mounting plate. CAUTION: Use an arm that is in compliance with VESA requirements. CAUTION: The monitor VESA interface has been designed for a safety factor 6 (to support 6 times the monitor weight).
- Page 26 Installation R5913964 /00 MDSC-8255...
-
Page 27: Daily Operation
Daily operation R5913964 /00 MDSC-8255... -
Page 28: On/Off Switching
Daily operation 4.1 On/Off switching To switch on/off your display: 1. Power on/off your display using the mains switch located on the back of the display. While your display is on, press and hold the stand-by key for approximately 1 second to put the display in the stand-by mode. -
Page 29: Shortkey Functions
Daily operation Picture Picture 1024x768@100 Hz Profile Factory Picture Brightness advanced Contrast Input select Saturation Configuration Color temperature 6500K Color space ITU709 System Gamma Native Sharpness Image 4–1 1. Menu pages 2. Sub-menus (menu items) 3. Status bar 4. Selector/Slider 5. -
Page 30: Main Source Selection
Daily operation Overview of shortkeys Image 4–3 1. Main source selection 2. Brightness decrease 3. Brightness increase 4.5.1 Main source selection To quickly select the main source Press the key to scroll through all the possible input signals and quickly select the main source. Available main source options may differ depending on display model. - Page 31 Daily operation Each time a key is pressed an asterisk is shown in the square boxes. After pressing the fourth key, if the sequence is correct, the OSD main menu is activated. After exit, the OSD menu will automatically lock again. R5913964 /00 MDSC-8255...
- Page 32 Daily operation R5913964 /00 MDSC-8255...
-
Page 33: Advanced Operation
Advanced operation Not all features described in the chapter “Advanced operation” are available. The features not available in specific software versions are grayed out in the OSD menu. R5913964 /00 MDSC-8255... -
Page 34: Picture Menu
Advanced operation 5.1 Picture menu 5.1.1 Profile About profiles To select a profile means to load a set of predefined video parameters like Brightness, Contrast, Saturation, Input selection (Primary & Secondary), Multi-image layout selection, etc. The user can modify the default video parameters associated to each profile and save the new parameters setting under the User 1, User 2 or User 3 profile. -
Page 35: Saturation
Advanced operation 5.1.4 Saturation To adjust the saturation level 1. Bring up the OSD main menu. 2. Navigate to the Picture menu. 3. Enter the Saturation submenu. The command bar Saturation is highlighted. 4. Set the saturation level as desired and confirm. 5.1.5 Color temperature About color temperature presets The available color temperature presets for your display are:... -
Page 36: Gamma
Advanced operation 3. Enter the Color Space submenu. 4. Select one of the available color space presets and confirm. 5.1.7 Gamma About gamma presets The available gamma presets for your display are: • • • • Video (transfer function adapted for video cameras with dark levels enhancement) •... -
Page 37: Latency
Advanced operation 5.2.2 Latency About latency The video latency is defined as the delay between the time of a monitor input video transition to the corresponding light output transition on screen. The available latency modes for your display are: • Diagnostic: Best picture quality (with enhanced noise reduction filter) •... -
Page 38: Yuv Color Matrix
Advanced operation 4. Select one of the available input color formats and confirm. 5.2.5 YUV color matrix About YUV color matrix When YCbCr input format is selected/detected, a programmable color matrix for YUV to RGB conversion is available. A manual selection is available to match the color encoding used at the transmitter side (“AUTO” setting will follow the input metadata information). -
Page 39: Input Select Menu
• SDI 4K (MDSC-8255 12G only) • • DisplayPort • HDMI–1 (MDSC-8255 LED/12G only) • HDMI–2 (MDSC-8255 LED/12G only) • Nexxis (MDSC-8255 MNA only) Available main source options may differ depending on display model. The main source can also be quickly selected through the Input selection key ( ), without the need to navigate through the OSD menu. -
Page 40: Sdi Config (Only For Mdsc-8255 12G)
3. Enter the Auto search submenu. 4. Enable/Disable auto search as desired and confirm. 5.3.6 Failover input (MDSC-8255 LED & MNA) About failover input This function allows the display to automatically switch to a failover (backup) source in case the main source (DisplayPort, HDMI, Nexxis) is missing. -
Page 41: Failover Input (Mdsc-8255 12G)
Advanced operation The failover input can only be selected when both 1. the Auto search function is disabled (see “Auto search”, page 40), and 2. the PiP/PaP Modes function is disabled (see "Picture and Picture input” and “Picture in Picture input”). -
Page 42: Picture And Picture Input (Mdsc-8255 Led & Mna)
3. Enter the Failover Input submenu. 4. Select one of the available failover inputs and confirm. 5.3.8 Picture and Picture input (MDSC-8255 LED & MNA) About Picture and Picture input This function allows the display to show a second input source on the left side of the display. The Primary input (main source) is still displayed on the right half of the screen. -
Page 43: Picture And Picture Input (Mdsc-8255 12G)
3. Enter the PaP Input submenu. 4. Select one of the available PaP sources (or NONE) and confirm. 5.3.10 Picture in Picture input (MDSC-8255 LED & MNA) About Picture in Picture input This function allows the display to show a second input source as an inset window inside the main source. -
Page 44: Picture In Picture Input (Mdsc-8255 12G)
Advanced operation Gamma and Color temperature for the PiP Source are always set to Native and 6500 K independently from the Transfer Function applied to the Primary input Source. To select Picture in Picture input 1. Bring up the OSD main menu. 2. -
Page 45: Picture In Picture Position
Advanced operation 5.3.13 Picture in Picture position About Picture in Picture position The available Picture in Picture positions for your display are: • Bottom right • Top right To select Picture in Picture position 1. Bring up the OSD main menu. 2. -
Page 46: Osd Time-Out
Advanced operation To select the language 1. Bring up the OSD main menu. 2. Navigate to the Configuration menu. 3. Enter the Language submenu. 4. Select one of the available languages and confirm. 5.4.3 OSD Time-out About OSD time-out The OSD menu can automatically close after a certain time of inactivity after the last selection was made. The available OSD time-out values for your display are: •... -
Page 47: System Menu
Advanced operation To save a profile 1. Bring up the OSD main menu. 2. Navigate to the Configuration menu. 3. Enter the Save Profile submenu. 4. Select one of the available profiles to save and confirm. 5.5 System menu 5.5.1 Power on DVI About power on DVI This setting allows you to select the pin of the DVI connector on which the +5V DC supply is applied. -
Page 48: Power Saving
Advanced operation 5.5.4 Power saving About power saving When the selected input(s) is (are) missing (main, 2nd and failover), this setting allows the display to switch off the backlight and enter a low power mode. As soon as the selected input(s) is (are) present again, the display will exit the power save mode and display the image. -
Page 49: Important Information
Important information R5913964 /00 MDSC-8255... -
Page 50: Safety Information
Important information 6.1 Safety information General recommendations Read the safety and operating instructions before operating the device. Retain safety and operating instructions for future reference. Adhere to all warnings on the device and in the operating instructions manual. Follow all instructions for operation and use. Electrical Shock or Fire Hazard To prevent electric shock or fire hazard, do not remove cover. - Page 51 Important information Mission critical applications We strongly recommend there is a replacement monitor immediately available in mission critical applications. Use of Electrical Surgical Knives Provide as much distance as possible between the electrosurgical generator and other electronic equipment (such as monitors). An activated electrosurgical generator may cause interference with them. The interference can activate the OSD menu of the display and as such disrupt the functionality of the display.
- Page 52 Sufficient expertise is required for installing this equipment, especially to determine the strength of the wall for withstanding the display's weight. Be sure to entrust the attachment of this equipment to the wall to licensed contractors of Barco and pay adequate attention to safety during the installation and usage. •...
-
Page 53: Environmental Information
Electronic Products ” (Also called RoHS of Chinese Mainland), the table below lists the names and contents of toxic and/or hazardous substances that Barco’s product may contain. The RoHS of Chinese Mainland is included in the MCV standard of the Ministry of Information Industry of China, in the section “Limit Requirements of toxic substances in Electronic Information Products”. - Page 54 Mainland, marked with the Environmental Friendly Use Period (EFUP) logo. The number inside the EFUP logo that Barco uses (please refer to the photo) is based on the “General guidelines of environment-friendly use period of electronic information products” of Chinese Mainland.
-
Page 55: Biological Hazard And Returns
Important information 6.3 Biological hazard and returns Overview The structure and the specifications of this device as well as the materials used for manufacturing makes it easy to wipe and clean and therefore suitable to be used for various applications in hospitals and other medical environments, where procedures for frequent cleaning are specified. -
Page 56: Regulatory Compliance Information
The manufacturing country of the product is indicated on the product label (“Made in …”). Importers contact information To find your local importer, contact one of Barco’s regional offices via the contact information provided on our website (www.barco.com). R5913964 /00... -
Page 57: Emc Notice
Changes or modifications not expressly approved by the party responsible for compliance could void the user's authority to operate the equipment. FCC responsible: Barco Inc., 3059 Premiere Parkway Suite 400, 30097 Duluth GA, United States, Tel: +1 678 475 8000... - Page 58 Important information Interference can be determined by turning the equipment off and on. If this equipment does cause harmful interference to, or suffer from harmful interference of, surrounding equipment, the user is encouraged to try to correct the interference by one or more of the following measures: •...
- Page 59 Important information IEC 60601-1-2 4 edition Electromagnetic (2014) Immunity test Compliance level environment – guidance Test levels Power frequency (50/60 30 A/m 30 A/m Power frequency Hz) magnetic field magnetic fields should be at levels characteristic of a IEC 61000-4-8 typical location in a typical commercial or hospital environment.
-
Page 60: Explanation Of Symbols
Important information These guidelines may not apply in all situations. Electromagnetic propagation is affected by absorption and reflection from structures, objects and people. Recommended separation distance The MDSC-8255 is intended for use in an electromagnetic environment in which radiated RF disturbances are controlled. - Page 61 Important information Indicates the device is approved according to the UL Demko regulations. Indicates the device is approved according to the CCC regulations. Indicates the device is approved according to the VCCI regulations. Indicates the device is approved according to the KC regulations. Indicates the device is approved according to the BSMI regulations.
- Page 62 Important information Indicates the temperature limitations for the device to safely operate within specs. Indicates this is a Medical Device. Indicates the device serial number. Indicates the device part number or catalogue number. Indicates the Unique Device Identifier. Warning: dangerous voltage Caution Consult the Instructions For Use.
-
Page 63: Legal Disclaimer
Barco software products are the property of Barco. They are distributed under copyright by Barco NV or Barco Inc., for use only under the specific terms of a software license agreement between Barco NV or Barco Inc. and the licensee. No other use, duplication, or disclosure of a Barco software product, in any form, is authorized. -
Page 64: Technical Specifications
This document is copyrighted. All rights are reserved. Neither this document, nor any part of it, may be reproduced or copied in any form or by any means - graphical, electronic, or mechanical including photocopying, taping or information storage and retrieval systems - without written permission of Barco. © 2020 Barco NV all rights reserved. - Page 65 Dimensions display (W x H x D) 1259 x 733 x 87 mm (49.5 x 28.8 x 3.4 in) Net weight display MDSC-8255 LED: 33.2 kg (73.1 lbs) MDSC-8255 MNA: 34.2 kg (75.3 lbs) MDSC-8255 12G: 33.5 kg (73.8 lbs) Net weight packaged MDSC-8255 LED: 39.7 kg (87.5 lbs)
- Page 66 0 ÷ 35 °C (for performance); 0 ÷ 40 °C (for safety) Storage temperature -20 ÷ +60°C Operating humidity 10 ÷ 90% (non-condensing) Storage humidity 5 ÷ 90% (non-condensing) Timings full-HD & 4MP (MDSC-8255 LED & MNA) Format HDMI DP 1.1 720x487i@59.94Hz (NTSC) 720x480p@59.94Hz 720x480p@60.00Hz 720x576i@50.00Hz (PAL I)
- Page 67 Important information 1280x1024p@75.025Hz 1280x1024p@85.00Hz 1400x1050p@60.00Hz 1600x1200p@60.00Hz 1680x1050p@59.95Hz 1920X1080i@50Hz 1920X1080i@59.94Hz 1920X1080i@60Hz 1920x1080p@25Hz 1920x1080p@29.97Hz 1920x1080p@30.00Hz 1920x1080p@50.00Hz 1920x1080p@59.94Hz 1920x1080p@60.00Hz 1920x1200p@60.00Hz 2048x1536p@60.00Hz 2560x1440p@60.00Hz 2560x1600p@60.00Hz Timings full-HD & 4MP (MDSC-8255 12G) Format HDMI DP 1.1 720x480p@59.94Hz 720x480p@60.00Hz 720x576p@50.00Hz 800x600p@56.25Hz 800x600p@60.317Hz 800x600p@72.19Hz 800x600p@75.00Hz 1024x768p@60.004Hz 1024x768p@70.069Hz 1024x768p@75.029Hz 1024x768p@85.00Hz 1152x864p@75.00Hz 1280x720p@29.97Hz...
- Page 68 Timings UHD / 4K Format HDMI DP 1.1 DP 1.1 DP 1.2 Quad-link 6G–SDI / Dual 12G-SDI 3840x2160@25.00Hz 3840x2160@30.00Hz 3840x2160@50.00Hz 3840x2160@60.00Hz MDSC-8255 LED and 12G versions only MDSC-8255 12G version only / Accepted formats: Square-division & 2-sample interleave R5913964 /00 MDSC-8255...
-
Page 69: Troubleshooting
Important information 6.10 Troubleshooting Overview Description Problem Possible solution Serial connection not available After reboot, the serial connection Reboot the display. on the USB type B port is not present (COM port not visible). OSD disappears during input OSD disappears during input No action required. - Page 70 Important information R5913964 /00 MDSC-8255...
- Page 72 Barco NV President Kennedypark 35 8500 Kortrijk Belgium R5913964 /00 | 2020-12-09 Barco NV | Beneluxpark 21, 8500 Kortrijk, Belgium Registered office: Barco NV | President Kennedypark 35, 8500 Kortrijk, Belgium www.barco.com...
Need help?
Do you have a question about the MDSC-8255 LED and is the answer not in the manual?
Questions and answers